
Best Way to Level Concrete Slab: Complete Guide
To level your concrete slab effectively, first identify if the issue is surface dips or structural settling.
For minor surface irregularities, use self-leveling compounds or polymer overlays after thorough cleaning and priming.
If the slab has settled due to voids, opt for lifting methods like polyurethane foam injection or mudjacking.
Consider hole size, cure time, and material weight. Proper preparation and controlled application guarantee lasting repairs.
Exploring these steps will help you master precise, durable slab leveling techniques.
Key Takeaways
- Diagnose slab issues first to determine if resurfacing or lifting is needed based on surface dip, settlement, or structural failure.
- Use self-leveling compounds for minor surface dips, ensuring the slab is clean, dry, and free of loose materials before application.
- For settled slabs due to voids or soil movement, lift using mudjacking or polyurethane foam injection depending on hole size and cure time.
- Prepare the surface by removing dust, oil, and debris, and use profiling or priming to improve bonding and adhesion of leveling materials.
- Apply leveling materials carefully with proper mixing, use spiked rollers to release air, and verify flatness before curing and sealing repaired areas.
Diagnosing Concrete Slab Problems

Before you begin any repair, thoroughly diagnosing the concrete slab’s condition is essential. Start by identifying whether you’re dealing with a surface dip, settled slab, or structural failure.
Check for water intrusion, voids, or soil movement beneath the slab, as these factors influence your approach. Use a straightedge, level, or laser tool to measure high and low spots accurately.
Make certain the slab is clean, dry, and free of loose material before any leveling attempts. Your diagnosis should determine if the slab requires lifting from below or resurfacing on top.
Skipping this step can lead to ineffective repairs or further damage. Precise evaluation sets the foundation for choosing the correct repair method and guarantees long-term performance of your concrete slab.
Understanding the impact of soil conditions such as unstable clay or high water tables can be crucial in deciding the best leveling approach.
Resurfacing vs Lifting Concrete Slab Leveling: When to Choose Each
When deciding how to level a concrete slab, you must evaluate whether resurfacing or lifting best addresses the defect.
Resurfacing suits minor surface irregularities, such as shallow dips or slight unevenness. It uses self-leveling overlays or patching compounds. It requires clean, dry slabs and proper surface profiling to guarantee bond strength.
Lifting becomes necessary when the slab has settled due to voids or soil movement beneath. In these cases, raising the slab with mudjacking or polyurethane foam restores structural support.
You should never resurface a slab with underlying support issues, as the unevenness will reoccur. Always measure elevations carefully and inspect for water intrusion or soil problems to determine the appropriate method.
Choosing the right approach depends on the defect’s depth, cause, and slab stability. Proper surface preparation and maintenance are essential to ensure long-lasting results and prevent recurring issues related to moisture and wear, similar to how choosing the right floor protection extends hardwood floor durability.
Comparing Mudjacking and Polyurethane Foam Injection for Slab Lifting
Although both mudjacking and polyurethane foam injection aim to lift settled concrete slabs, they differ markedly in materials, application techniques, and impact on the surrounding area.
Mudjacking pumps a cement-based slurry beneath the slab, requiring larger drill holes and more cleanup. Polyurethane foam injection uses expanding foam with smaller holes, offering faster curing and less mess.
Consider these factors when choosing between them:
- Drill hole size: Mudjacking needs 1.5–2.5 inch holes; foam uses 5/8–1 inch.
- Material weight: Mud slurry is heavier, potentially stressing soil; foam is lightweight.
- Cure time: Foam sets in hours; mudjacking may take longer.
- Environmental impact: Foam resists water better, reducing voids.
Choose based on slab condition, accessibility, and desired turnaround time. Proper excavation and repair techniques are essential if any underlying piping or sprinkler systems beneath the slab are damaged during the leveling process.
Preparing Your Concrete Surface for Lasting Repairs
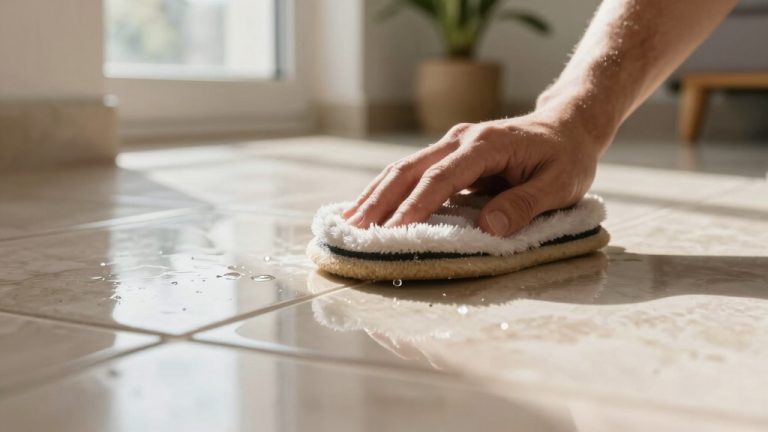
To kick things off, you’ll want to give your concrete surface a good clean. This means getting rid of any dust, oil, or debris. Trust me, a clean surface is key for ensuring everything sticks properly.
Once that’s done, let’s talk about bond strength. You can really boost it by profiling the slab—this can be done through grinding or shot blasting. And don’t forget to apply a primer when it’s necessary; it can make a big difference!
Lastly, it’s all about setting up edge containment. Use barriers or foam expansion joints to keep everything in place. This helps control the flow of materials and ensures your repairs look neat and last long. Also, applying a penetrating sealer after repairs can enhance durability by preventing water damage and surface wear.
Surface Cleaning Essentials
Before applying any leveling material, you need to thoroughly clean the concrete surface to guarantee proper adhesion and a durable repair.
Any dust, oil, paint, or debris will weaken the bond and cause failure. Start by evaluating the slab’s condition and removing loose material with a stiff broom or vacuum.
Then, degrease oily spots with a concrete cleaner and rinse thoroughly. Allow the slab to dry completely before proceeding.
Focus on these four cleaning essentials:
- Remove dust, dirt, and loose particles using mechanical means.
- Eliminate oils and grease with appropriate concrete degreasers.
- Strip paint or sealers that could interfere with adhesion.
- Make certain the surface is dry and free of standing water before applying leveling compounds.
This guarantees your repair material bonds firmly and lasts. Proper surface preparation is as important as insulation integrity when ensuring long-term performance.
Bond Strength Techniques
Once your concrete surface is thoroughly cleaned and dried, focus on techniques that enhance bond strength between the slab and the leveling material.
Remove dust, oil, and loose debris to guarantee adhesion. Profile the surface by grinding or shot blasting when a stronger mechanical bond is needed.
Apply a primer if the leveling compound requires it, improving chemical adhesion and preventing moisture issues. Keep the work area dry before mixing and pouring.
| Technique | Purpose |
|---|---|
| Surface Profiling | Creates rough texture for grip |
| Priming | Enhances chemical adhesion |
| Debris Removal | Prevents bond failure |
These steps guarantee your repair material adheres firmly, providing lasting results without delamination or cracking. Proper preparation and technique before joining set up clean cuts and strong connections in any repair or installation project.
Edge Containment Methods
When working with concrete leveling materials, controlling the edges is critical to prevent overflow and guarantee a clean, uniform finish.
You need effective edge containment to maintain the shape and thickness of the leveling compound, especially near doorways, expansion joints, or slab perimeters.
To secure edges, consider these methods:
- Use foam expansion joints or backer rods as temporary barriers to hold material in place.
- Build wood or metal dams that resist pressure and define the repair boundary.
- Apply masking tape along edges to protect adjacent surfaces and create a neat line.
- Clean and prime edges to promote adhesion and prevent underflow beneath barriers.
Additionally, ensuring proper soil grading around the slab can reduce water pooling and pressure that might compromise the repair’s integrity through soil grading and yard contours.
Top Materials for Resurfacing Concrete and How to Apply Them
When it comes to fixing uneven concrete slabs, you’ll often turn to self-leveling compounds, patching materials, or even methods like mudjacking and polyurethane foam.
Each of these options has its own unique application steps, which can include things like mixing ratios, surface prep, and spreading techniques.
It’s really important to get these details right because they ensure that you end up with a durable, level finish that’s just right for the condition of your slab.
Properly preparing the surface by cleaning and priming before application is essential for optimal adhesion and performance.
Popular Resurfacing Materials
Several popular resurfacing materials provide effective solutions for leveling and restoring concrete surfaces, each suited to specific repair needs. You’ll want to choose based on the slab’s condition and the severity of unevenness.
- Self-leveling compound: Ideal for minor surface dips. It mixes with water and flows into low spots.
- Polymer-modified overlays: Offers enhanced bonding and durability for moderate wear.
- Patching compounds: Best for small isolated depressions. They’re applied manually with trowels.
- Epoxy-based resurfacing: Provides a strong, chemical-resistant surface for high-traffic areas.
Each material requires a clean, dry substrate for maximum adhesion. Prepare the slab thoroughly before application. Proper surface preparation and moisture control are essential to ensure long-lasting adhesion and prevent future damage.
Selecting the right product guarantees a long-lasting, level surface without unnecessary repairs.
Application Techniques Explained
Mastering application techniques for top resurfacing materials guarantees a durable and level concrete finish. Start by thoroughly cleaning and priming the slab for ideal adhesion.
Mix self-leveling compounds precisely, typically 2.5 to 3 quarts of water per 50 lb bag. Use a drill paddle for 2-3 minutes until lump-free. Pour the mixture over low spots, spreading with a long-handled squeegee.
Use a spiked roller to release trapped air. For lifting slabs, inject polyurethane foam or mudjack carefully through drilled holes, sealing afterward. Gradually apply material to avoid over-lifting.
Proper moisture control and drying time can significantly affect the longevity and performance of concrete resurfacing projects, so monitoring humidity levels is essential.
| Material | Application Tip |
|---|---|
| Self-leveling compound | Mix thoroughly, pour evenly |
| Mudjacking | Pump slurry gradually |
| Polyurethane foam | Inject systematically |
| Grinding | Profile surface first |
| Patching compound | Target isolated dips |
Checking and Finishing Your Concrete Leveling Job for Durability
Once the leveling material has set, it’s essential to verify the flatness using a straightedge or level to make sure the surface meets your specifications.
Check carefully for any remaining low spots or uneven areas. If needed, apply a thin second coat to correct these imperfections. Allow the material to cure fully as recommended by the manufacturer to assure durability.
To assure long-lasting results, follow these steps:
- Inspect the entire slab surface for flatness and consistency.
- Address minor low points with additional leveling compound.
- Confirm full cure time before subjecting the slab to foot or equipment traffic.
- Seal drilled holes or patched areas to prevent moisture intrusion.
These finishing steps maximize adhesion, strength, and lifespan of your concrete leveling job.
Frequently Asked Questions
How Long Does Concrete Leveling Typically Take From Start to Finish?
Concrete leveling usually takes a few hours to complete, depending on the method and slab size.
Mudjacking or polyurethane foam injection can be done within 2 to 4 hours, including drilling and pumping.
Self-leveling overlays require preparation, pouring, and smoothing, taking about 3 to 6 hours total.
Curing times vary; some materials set in a few hours but fully cure within 24 hours.
You should plan accordingly for drying before use.
Can I Level a Concrete Slab Myself or Should I Hire a Professional?
You can level a concrete slab yourself if the unevenness is minor and surface-level, using self-leveling compounds and proper prep.
However, if the slab has settled considerably, requires lifting, or shows structural issues, it’s best to hire a professional.
They have specialized equipment for mudjacking or foam injection and can assess underlying soil problems.
This ensures a durable, safe repair without risking further damage or improper leveling.
What Are the Cost Differences Between Mudjacking and Foam Injection?
You’ll find mudjacking often comes with a friendlier price tag, generally ranging from $3 to $7 per square foot, making it a budget-conscious choice.
Foam injection, while a bit more upscale at $7 to $12 per square foot, offers a cleaner, quicker lift with less disruption.
Both methods provide reliable results, but foam’s precision and minimal mess might justify the extra investment if you want efficiency and longevity.
How Soon Can I Use the Leveled Concrete Surface After Repairs?
You can typically use the leveled concrete surface within a few hours to 24 hours after repairs, depending on the material.
Self-leveling compounds often set in 2 to 4 hours and cure fully within about 24 hours.
Mudjacking and polyurethane foam injection usually allow traffic after 24 hours, but check specific product instructions.
Avoid heavy loads until full curing occurs to prevent damage or uneven settling.
Are There Any Environmental Concerns With Polyurethane Foam Injection?
Yes, polyurethane foam injection involves environmental concerns you should consider.
The foam contains chemicals that can off-gas volatile organic compounds (VOCs) during application, impacting air quality.
Improper disposal of leftover material risks soil and water contamination.
You should guarantee proper ventilation during installation and follow manufacturer guidelines for handling and disposal.
Using certified eco-friendly products and hiring trained professionals can minimize environmental impact and health hazards associated with this method.
Prepare Properly for a Smooth, Durable Concrete Surface
When weighing ways to work with your worn concrete, wisely weigh whether resurfacing or raising reigns right. Resurfacing repairs roughness, while lifting levels low spots with lasting results.
Master mudjacking or modern polyurethane foam for meticulous, manageable raising. Preparing properly prevents pitfalls, and picking premium products promotes persistence.
Finally, finishing firmly fosters fruitful, fault-free floors. With careful consideration and committed craftsmanship, you’ll conquer concrete challenges and create consistently solid surfaces.