
Best Way to Clean Grout in Tile Floor Without Damage
To clean grout in your tile floor effectively, start by sweeping or vacuuming to remove loose dirt.
Pre-clean grout lines using a nylon brush to loosen grime, then apply a commercial grout cleaner or a DIY baking soda paste.
Scrub with a stiff brush, rinse thoroughly with fresh water, and dry promptly to prevent residue buildup.
Avoid acidic or waxy cleaners to protect grout and tile.
For stubborn stains or deep grime, steam cleaning helps break buildup without harsh chemicals.
Explore further to master every step and maintenance tip.
Key Takeaways
- Thoroughly sweep or vacuum grout lines before cleaning to remove loose dirt and improve cleaner penetration.
- Apply commercial grout cleaner, let sit 5–15 minutes, then scrub grout lines with a stiff nylon brush for effective dirt removal.
- Rinse grout and tiles frequently with clean water and dry promptly using a microfiber cloth to prevent residue buildup.
- For tough stains, use a baking soda and hydrogen peroxide paste, apply on dry grout, let sit, then scrub and rinse well.
- Avoid acidic or harsh cleaners that can damage grout and tile; test all products on hidden areas before full application.
How to Prep Tile Floors for Grout Cleaning?

Before you apply any cleaner, start by thoroughly sweeping or vacuuming your tile floors to remove loose dirt and dust from the grout lines.
This dry debris removal is vital because it prevents the cleaning solution from sitting on a layer of grime, which would reduce its effectiveness.
Begin cleaning in the corner farthest from the exit so you don’t step over freshly cleaned areas.
Focus on removing as much surface grime as possible before applying any liquid cleaner.
This pre-cleaning step shortens scrubbing time and guarantees the cleaning solution penetrates the grout directly.
Skipping this step risks spreading dirt around and diminishes the final rinse quality.
Preparing your floor meticulously sets the foundation for effective grout cleaning and a more polished finish.
For best results, use a nylon brush to target grout lines during cleaning, as it effectively removes buildup without damaging the surface.
The Best Way to Clean Grout Lines
Apply a commercial grout and tile cleaner directly into the grout lines, ensuring even coverage for peak effectiveness.
Apply grout and tile cleaner directly into grout lines for thorough, even cleaning and optimal results.
Let the cleaner sit for 5 to 15 minutes, following the product’s instructions to loosen dirt and stains deeply embedded in the grout.
Next, use a stiff nylon grout brush or a toothbrush to scrub along the grout line, not across it, to maximize agitation and dislodge grime efficiently.
After scrubbing, rinse thoroughly with clean water, changing rinse water frequently to avoid re-depositing residue.
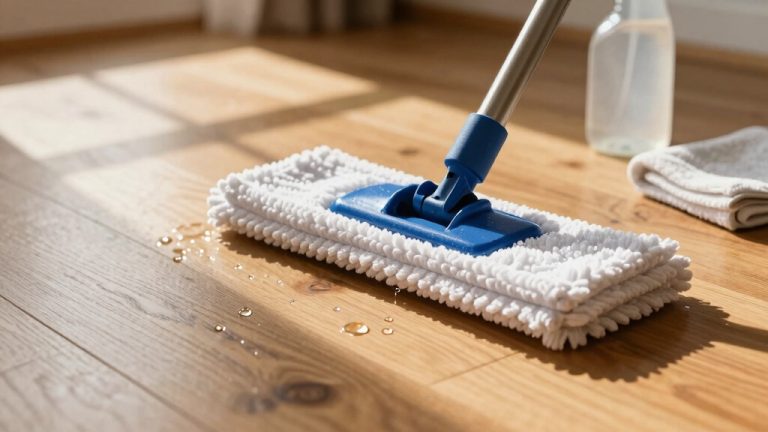
Finally, dry the grout and tiles with a microfiber cloth or mop to prevent residue buildup and faster re-soiling.
This method combines targeted cleaning with proper rinsing and drying, giving you the best results for bright, clean grout lines.
For optimal grout maintenance, it is important to maintain indoor humidity between 40–60% to reduce moisture-related grout damage and preserve tile appearance.
Easy DIY Grout Cleaning Mixtures That Work
Want to tackle that dirty grout? It’s easier than you think!
Just mix up some baking soda and hydrogen peroxide to create a thick paste. This combo really works wonders for breaking down dirt and stains.
Once you’ve got your paste ready, go ahead and apply it directly onto the grout lines. Let it sit for about 10 to 15 minutes—this gives it time to work its magic.
After that, grab a stiff brush and scrub along the grout. You’ll be able to lift all that grime without worrying about damaging your tile edges. Easy peasy!
For best results, always test stain removal methods on small areas first to avoid any damage.
Baking Soda Paste
A baking soda paste offers an effective, affordable way to tackle moderate grout buildup using simple household ingredients.
To make the paste, combine baking soda with a small amount of water until you achieve a thick, spreadable consistency.
After sweeping or vacuuming your floor to remove loose debris, apply the paste directly onto grout lines.
Let it sit for 10 to 15 minutes to loosen dirt and stains.
Use a stiff nylon brush or an old toothbrush to scrub along the grout lines, focusing on agitation without damaging the grout.
Once scrubbed, rinse thoroughly with clean water to remove all residue.
This method works best on moderately dirty grout and avoids harsh chemicals, making it safe for regular maintenance and tile surfaces.
For best results, ensure to remove loose debris beforehand by vacuuming the floor to improve cleaning effectiveness.
Hydrogen Peroxide Mix
While baking soda paste effectively handles moderate grout buildup, combining baking soda with hydrogen peroxide creates a more potent cleaning mixture for tougher stains.
You can mix 3/4 cup baking soda with 1/4 cup hydrogen peroxide and add a tablespoon of mild dish soap to boost cleaning power.
This paste leverages hydrogen peroxide’s oxidizing action to break down deep grime and discoloration that baking soda alone may miss.
The mixture clings well to grout lines, allowing the ingredients to penetrate and lift embedded dirt.
Use it on pre-cleaned grout for best results; avoid excess water beforehand to make certain the paste adheres properly.
This DIY blend offers a safe, effective alternative to harsh chemicals, making it ideal for durable grout surfaces needing a stronger treatment.
Maintaining sealed grout by regularly applying a high-quality sealer helps minimize porosity and enhances the effectiveness of cleaning treatments.
Application And Scrubbing
Typically, applying DIY grout cleaning mixtures begins with spreading the paste directly onto dry, pre-cleaned grout lines to guarantee maximum adherence and penetration.
Use a stiff nylon grout brush or an old toothbrush to scrub the paste firmly along the grout lines, moving parallel rather than across to agitate dirt effectively without damaging the grout.
Let the mixture sit for 10 to 15 minutes before scrubbing to break down moderate grime.
Work systematically, starting from the farthest corner to avoid stepping on cleaned areas.
After scrubbing, rinse thoroughly with clean water to remove all residue, changing rinse water frequently to prevent redepositing dirt.
Finally, dry grout and tiles promptly with a microfiber cloth to avoid attracting new dirt, ensuring a pristine finish and longer-lasting cleanliness.
For best results, ensure all cleaning tools are rinsed and air-dried before use to prevent transferring dirt or debris during cleaning, which helps avoid residue buildup.
Steam Cleaning for Deep Grout Cleaning
Steam cleaning often provides a powerful way to loosen deep-set grime embedded within grout lines. By directing a steam cleaner’s thin nozzle precisely along grout lines, you can soften stubborn dirt and stains that traditional methods may miss.
Repeated passes enhance this effect, breaking down buildup without harsh chemicals. For best results, pre-clean the surface to remove loose debris, allowing steam to penetrate grout more effectively.
If available, use a steam cleaner with an extraction feature or pair it with a wet-dry vacuum to remove loosened grime and moisture. This prevents residue from settling back.
Make certain grout and tiles dry thoroughly afterward to inhibit mold or mildew growth. Steam cleaning complements manual scrubbing, delivering a deeper, more thorough grout cleaning for long-lasting results.
However, it is important to avoid using steam cleaners on vinyl floors due to the risk of adhesive failure and surface damage.
What Grout Cleaners and Methods to Avoid?
After using steam cleaning or any intensive grout-cleaning method, you need to be cautious about the products and techniques you choose next.
Avoid acidic cleaners like vinegar, which can corrode grout and damage tile finishes.
Steer clear of waxy or oil-based cleaners that leave residue attracting dirt.
Always test cleaners on a hidden spot to prevent discoloration or damage.
Follow dilution and contact time instructions strictly to protect grout sealants.
For stubborn stains, using gentle, non-abrasive cleaning agents such as isopropyl cleaning solution can be effective without harming tile surfaces.
| Cleaner Type | Why to Avoid | Impact on Grout/Tile |
|---|---|---|
| Vinegar/Acids | Corrosive; stains grout | Weakens grout, dulls tiles |
| Waxy/Oil-based | Leaves residue | Attracts dirt, hinders cleaning |
| Harsh Chemicals | Overly abrasive or strong | Damages sealants, surface wear |
| Untested Products | Unknown effects | Risk of discoloration, damage |
How to Rinse and Dry Grout Properly?
When you finish scrubbing the grout, you need to rinse thoroughly with clean water to remove all cleaning residue that can attract dirt and dull the surface.
Follow these steps to rinse and dry grout properly:
- Use fresh water and a clean microfiber cloth or mop to rinse the grout lines repeatedly. Change the rinse water often to avoid redistributing dirt.
- After rinsing, dry the grout and tiles promptly with a dry microfiber cloth or mop pad. This prevents moisture from lingering, which can cause staining or mold growth.
- Inspect the grout for any remaining residue. If you spot any, repeat rinsing and drying until the surface feels clean and smooth.
These precise steps guarantee your grout stays clean and prevents new dirt buildup. Proper drying is also essential to prevent white mold growth, which thrives in damp, poorly ventilated areas.
How to Maintain Clean Grout Longer?
Consistently maintaining clean grout requires regular attention and specific habits that prevent dirt buildup and staining.
Start by sweeping or vacuuming your tile floors frequently to remove loose debris from grout lines.
Promptly wipe up spills and spots to stop stains before they set.
After cleaning, always rinse grout thoroughly and dry it with a microfiber cloth or mop to avoid residue that attracts dirt.
Periodically, reseal grout to reinforce its resistance to moisture and grime.
Avoid waxy or oil-based cleaners that leave films, and never skip testing new products on hidden areas.
Quick response to moisture and odor issues is vital to prevent mold growth and structural damage.
When to Call a Professional for Grout Cleaning?
Maintaining clean grout through regular care can markedly reduce the need for intensive cleaning. However, some situations call for professional expertise. You should consider calling a professional when:
- Deep Stains and Discoloration: If stubborn stains persist despite thorough DIY cleaning, professionals use advanced techniques. They employ industrial-grade cleaners to restore grout color effectively without damage.
- Extensive Grout Damage: Cracked, crumbling, or missing grout requires expert repair or regrouting. This prevents water damage and tile loosening, ensuring floor integrity.
- Large Areas or Time Constraints: When dealing with expansive tile floors or limited time, professionals provide efficient, thorough cleaning. They minimize disruption and ensure optimal outcomes.
Recognizing these scenarios helps you maintain your tile floor’s appearance and longevity by leveraging professional skills when necessary.
Frequently Asked Questions
Can Grout Color Be Changed or Restored Permanently?
You can permanently change or restore grout color using grout stain or colorant products designed for this purpose.
Studies show over 80% of users achieve uniform, lasting results when properly applied.
You’ll need to clean and dry the grout thoroughly, apply the stain evenly, then seal it to protect against wear.
This process not only refreshes grout color but also strengthens its resistance to dirt and moisture, extending its lifespan considerably.
Are Grout Sealants Safe for All Tile Types?
Grout sealants aren’t safe for all tile types. You need to test sealants first, especially on porous or natural stone tiles like marble or limestone, as some sealants can discolor or damage them.
Always check the manufacturer’s recommendations to match the sealant type with your tile. For non-porous ceramic or porcelain tiles, most grout sealants work well.
You should still apply carefully and avoid overuse to maintain tile integrity.
How Often Should Grout Be Resealed for Best Protection?
You should reseal grout every 1 to 3 years for peak protection, depending on foot traffic and moisture exposure.
High-traffic or wet areas like kitchens and bathrooms may require annual resealing, while less-used spaces can wait longer.
Regularly test grout by sprinkling water; if it absorbs quickly, it’s time to reseal.
This maintenance prevents stains, moisture damage, and prolongs grout life, keeping your tile floor looking sharp and clean.
What Tools Are Best for Cleaning Grout in Tight Corners?
When tackling grout in tight corners, think of a fine artist’s brush. Small, precise tools work best.
Grab a stiff nylon grout brush or a thin, stiff-bristle brush to reach narrow spaces. A toothbrush also excels, getting into crevices like a nimble explorer.
These tools let you scrub along the grout lines carefully, ensuring grime doesn’t hide in shadows. Their shape and stiffness give you control and power where bigger brushes can’t reach.
Can Pets or Children Safely Walk on Freshly Cleaned Grout?
You shouldn’t let pets or children walk on freshly cleaned grout until it’s completely dry.
Wet grout cleaning solutions can be slippery and may irritate sensitive paws or skin.
Waiting at least 30 minutes to an hour guarantees the cleaner has been absorbed or rinsed away, minimizing risks of exposure.
Always rinse thoroughly and dry the area well to prevent residue that could attract dirt or cause slipping hazards.
Keep Your Tile Grout Clean With Simple Maintenance
Remember, “a stitch in time saves nine.” By prepping your tile floors properly and choosing the best cleaning methods, you’ll restore grout’s appearance and prevent stubborn buildup.
Avoid harsh cleaners, rinse thoroughly, and dry grout well to maintain lasting cleanliness. When DIY efforts fall short, don’t hesitate to call a professional.
Taking these precise steps guarantees your grout stays fresh and your floors look their best for years to come.