Can You Put Polyurethane Over Polycrylic: Avoid Mistakes
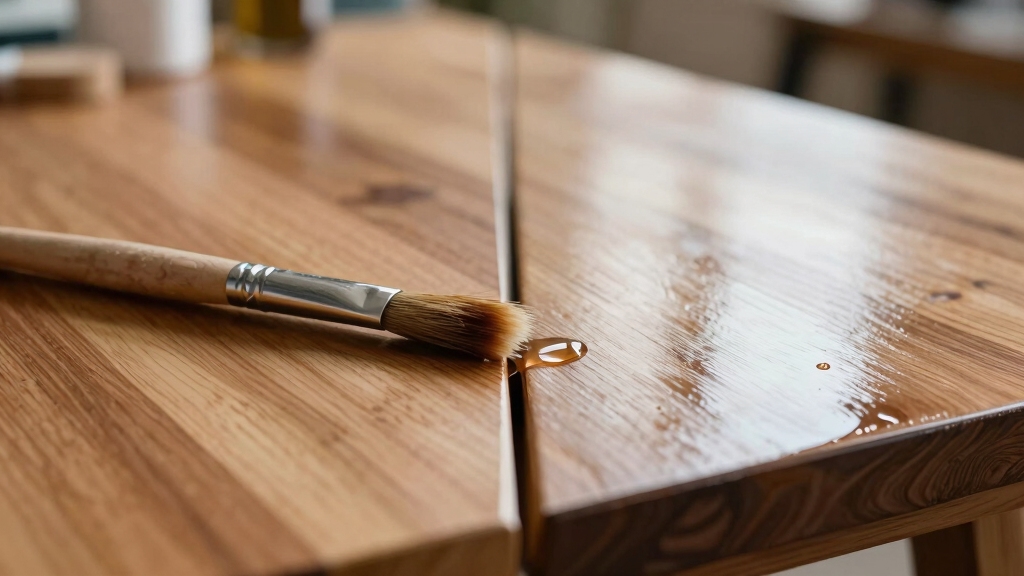
Yes, you can put polyurethane over polycrylic if you take the right steps. Make sure the polycrylic is fully cured, usually 24 hours, and sand it lightly with fine-grit paper for better adhesion.
Apply thin, even coats of polyurethane, allowing each layer to dry 2 to 4 hours. Using this approach helps avoid peeling, yellowing, or bubbling, especially on wood surfaces.
To get the best durable, clear finish, understanding the preparation and application details is key.
Key Takeaways
- Polyurethane can be applied over fully cured polycrylic with proper surface preparation and sanding for adhesion.
- Wait at least 24 hours for polycrylic to fully cure before applying polyurethane to avoid chemical incompatibility.
- Lightly sand the polycrylic surface with fine-grit sandpaper (220+) and remove dust to ensure good bonding.
- Use thin, even coats of polyurethane and allow 2–4 hours drying time between coats for best results.
- Water-based polyurethane is recommended over polycrylic to minimize yellowing and maintain clarity on light wood surfaces.
Is It Safe to Apply Polyurethane Over Polycrylic?

While you can apply polyurethane over polycrylic, it’s important to understand the potential risks and preparation required to guarantee proper adhesion and durability.
Polycrylic is water-based and dries quickly, but polyurethane, especially oil-based, may not adhere well without thorough surface prep. To improve bonding, clean the polycrylic surface and wait at least 24 hours for full curing.
Then lightly sand with fine-grit paper to create a key for the polyurethane. Skipping this step can cause adhesion failures or peeling.
Also, be aware of possible yellowing from oil-based polyurethane over light polycrylic surfaces. Although some woodworkers report success, experts often recommend using one finish type to avoid chemical incompatibilities.
If you proceed, prepare meticulously to minimize risks and assure your project’s longevity. For best results, use lambswool or synthetic pads during application to ensure an even and bubble-free coat.
When to Use Polyurethane Over Polycrylic for Your Project?
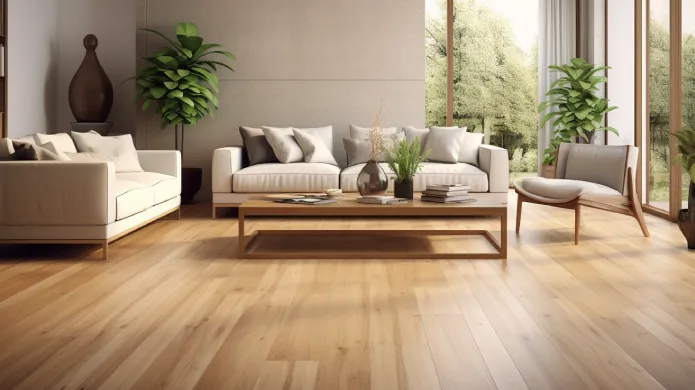
If you’re thinking about enhancing the durability of wood surfaces like furniture or flooring, applying polyurethane over polycrylic might be the way to go. It’s a great choice when you need that extra layer of protection!
But before you dive in, let’s talk about surface prep. You really want to make sure the polycrylic is completely cured, clean, and lightly sanded. This step is super important for ensuring that the polyurethane sticks well.
Ideal Project Scenarios
In projects requiring enhanced durability and moisture resistance, applying polyurethane over polycrylic can offer significant benefits.
You’ll find this combo ideal for wood flooring, furniture, or cabinetry exposed to frequent wear or moisture.
Polycrylic provides a clear, fast-drying base that resists yellowing, while polyurethane adds a tougher, moisture-resistant topcoat.
This layering works best when you want to maintain the wood’s natural beauty but need extra protection against scratches and spills.
Just remember, this approach suits mostly oil-based polyurethane over fully cured polycrylic on wood surfaces.
It’s less advisable for painted or delicate finishes.
When durability and moisture resistance matter most, using polyurethane over polycrylic can extend your project’s life without compromising aesthetics.
Surface Preparation Essentials
Achieving a durable finish when applying polyurethane over polycrylic starts with proper surface preparation. You need to make certain the polycrylic is fully cured, usually 24 hours, before proceeding. Without this, you risk adhesion problems and finish degradation.
Follow these essential steps:
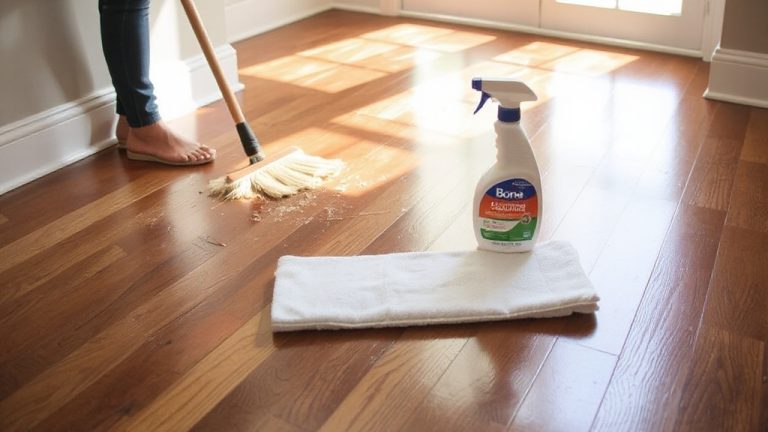
- Clean thoroughly: Remove dust, oils, and residues to promote bonding.
- Lightly sand: Use fine-grit sandpaper (220+) to scuff the polycrylic surface, increasing polyurethane adhesion.
- Remove dust: Vacuum and wipe with a tack cloth to eliminate sanding particles.
Skipping these steps can cause peeling or uneven finishes. Proper prep ensures polyurethane bonds well, enhancing durability and maintaining the wood’s appearance. Maintaining proper surface prep ensures durability and enhances the finish’s appearance.
Key Differences Between Polyurethane and Polycrylic
You might notice that polyurethane and polycrylic have some key differences, especially when it comes to their composition and drying times. For starters, polycrylic is water-based, which means it dries pretty quickly. On the other hand, polyurethane is often oil-based and takes a bit longer to cure.
Now, let’s talk about durability. Polyurethane really shines in that department—it’s tough and can handle a lot of wear and tear. However, one downside is that it tends to amber over time, especially on lighter woods. Polycrylic, on the flip side, stays clear, which is great if you want to maintain that natural look.
Just keep in mind that it scratches more easily than polyurethane. Additionally, choosing the right sealant depends on the compatibility with wood types to avoid unevenness or discoloration.
Composition And Drying
Although both polyurethane and polycrylic serve as protective finishes for wood, their composition and drying characteristics differ markedly. This affects how you use them.
Polycrylic is water-based, dries quickly, and has low odor, making it easy to clean up with soap and water. Polyurethane, often oil-based, takes longer to dry, emits stronger fumes, and requires mineral spirits for cleanup. These differences impact your application and timing.
Here are the key points to know:
- Polycrylic dries in about 30 minutes to an hour, while polyurethane can take 2-4 hours or more between coats.
- Polyurethane’s oil base provides a harder finish but lengthens curing time.
- Polycrylic’s fast drying suits quick projects but needs multiple coats for durability.
Understanding these traits helps you plan your project efficiently. For optimal durability, applying polyurethane typically involves multiple coats with light sanding between applications.
Durability And Yellowing
When choosing between polyurethane and polycrylic, understanding their durability and yellowing tendencies is crucial for your project’s longevity and appearance.
Polyurethane, especially oil-based, provides superior durability and moisture resistance, making it ideal for high-traffic surfaces.
However, it tends to amber or yellow over time, particularly on light-colored woods.
Polycrylic, a water-based finish, dries quickly and resists yellowing, preserving the wood’s natural color.
Yet, it’s less durable and scratches more easily, so it requires multiple coats for adequate protection.
If you want long-lasting toughness, polyurethane is the better option, but expect some yellowing.
For projects where color clarity matters more than heavy wear resistance, polycrylic suits you best.
Balancing these traits helps you choose the right finish based on your project’s needs.
Additionally, using water-based polyurethane can avoid yellowing while still providing durability, combining benefits of both finishes.
How to Prepare Polycrylic Before Applying Polyurethane?
Before applying polyurethane over polycrylic, start by making certain the polycrylic is completely dry and cured.
This typically takes about 24 hours.
Proper preparation is essential to promote adhesion and prevent issues like peeling or bubbling.
Follow these steps to prepare the polycrylic surface:
1. Clean Thoroughly: Remove all dust, dirt, and grease using a damp cloth.
Let it dry fully.
2. Lightly Sand: Use fine-grit sandpaper (220 grit or higher) to scuff the surface gently.
This creates a key for the polyurethane to grip.
3. Remove Dust: Wipe away sanding residue with a tack cloth or vacuum to ensure a clean, dust-free surface.
Additionally, ensure the surface is completely dry before sanding to avoid trapping moisture under the finish, which can lead to paint peeling.
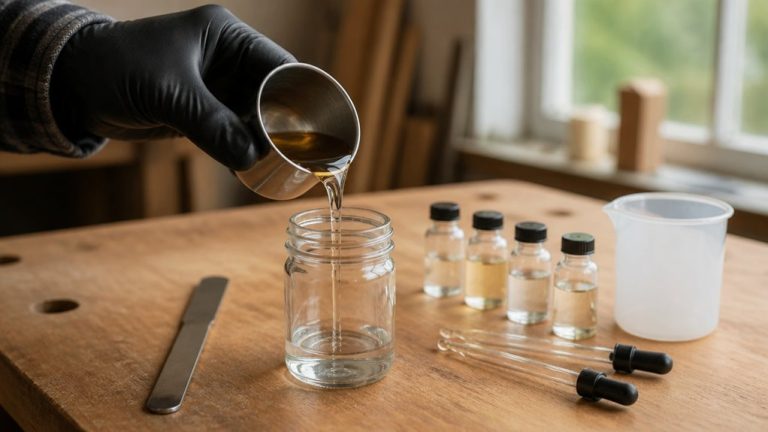
How to Apply Polyurethane Over Polycrylic for Best Results?
Since proper surface preparation is complete, you can apply polyurethane over polycrylic with confidence by following a careful process that guarantees strong adhesion and a smooth finish.
Start by ensuring the polycrylic is fully cured, usually 24 hours. Then sand lightly with fine-grit (220+) sandpaper to scuff the surface.
Ensure polycrylic cures for 24 hours, then lightly sand with fine-grit paper to prepare the surface.
Remove all dust thoroughly before applying. Use a high-quality brush or foam roller to apply thin, even coats of polyurethane.
Allow each coat to dry for 2 to 4 hours, testing dryness before sanding lightly between coats. Apply 2 to 3 coats for maximum protection.
Keep your strokes consistent and avoid over-brushing to prevent bubbles. This method helps you achieve a durable, attractive finish without compromising adhesion or clarity.
Maintaining proper ventilation during drying will optimize curing and enhance the final finish quality.
Common Risks of Layering Polyurethane Over Polycrylic
Applying polyurethane over polycrylic can enhance durability, but it also introduces certain risks you should be aware of.
Since these finishes differ chemically, adhesion problems can arise, leading to peeling or flaking.
You also risk yellowing, especially on light woods, as oil-based polyurethane tends to amber over time.
Finally, incomplete curing of polycrylic before applying polyurethane may cause chemical reactions that degrade the finish.
Here are the key risks:
- Adhesion failure: Poor bonding causes peeling or bubbles.
- Yellowing: Oil-based polyurethane can discolor clear polycrylic layers.
- Chemical incompatibility: Applying too soon risks finish degradation.
To avoid issues, ensure thorough curing and proper surface prep before layering. Using a sanding sealer can improve adhesion and surface uniformity when applying multiple finishes.
Frequently Asked Questions
Can I Use Spray Polyurethane Over Polycrylic for a Smoother Finish?
Yes, you can use spray polyurethane over polycrylic for a smoother finish, but you need to prep properly.
Make sure the polycrylic is fully cured, then lightly sand it with fine-grit sandpaper to promote adhesion.
Clean off all dust before spraying.
Apply thin, even coats with proper drying time between layers.
Testing adhesion on a small area first helps avoid issues.
This method can give you a durable, polished surface if done carefully.
How Long Does Fully Cured Polycrylic Last Before Applying Polyurethane?
Patience pays, as polycrylic typically takes about 24 hours to fully cure before you apply polyurethane.
This waiting window guarantees a solid, stable surface, preventing peeling or poor adhesion.
You’ll want to lightly sand and clean the surface after curing to promote proper polyurethane bonding.
Rushing risks ruining your finish, so respect the recommended cure time for a resilient, radiant result that stands strong and smooth.
Will Polyurethane Yellow Over Dark-Stained Wood With Polycrylic Underneath?
Polyurethane can yellow over dark-stained wood, but the effect is less noticeable than on light woods.
Since dark stains mask yellowing, you won’t see as much ambering. Having polycrylic underneath helps protect the wood, but it doesn’t prevent polyurethane’s natural ambering over time.
If you want to minimize yellow tones, choose a water-based polyurethane or maintain more polycrylic layers.
Always test on a small area first to be sure.
Can I Apply Polyurethane Over Polycrylic on Painted Surfaces?
You can apply polyurethane over polycrylic on painted surfaces, but you must prep carefully.
Make sure the polycrylic is fully cured, usually 24 hours, then lightly sand with fine-grit sandpaper to promote adhesion.
Clean off dust thoroughly before applying thin, even polyurethane coats.
Keep in mind that improper prep can cause adhesion issues and yellowing, especially with oil-based polyurethane.
Testing a small area first helps avoid surprises on your painted surface.
What Tools Work Best for Sanding Between Polycrylic and Polyurethane Coats?
Oh, the joy of sanding between coats!
You’ll want to use fine-grit sandpaper, typically 220 grit or higher, to gently scuff the surface without stripping the finish.
A sanding block helps keep pressure even, preventing accidental gouges.
For those tricky corners, a sanding sponge works wonders.
Always clean off the dust thoroughly afterward; otherwise, you’ll be sealing in grit, not smoothness.
Precision here makes all the difference for a flawless finish.
From Risky to Reliable: Mastering the Perfect Topcoat
So, can you safely put polyurethane over polycrylic? Yes, but only if you prepare the surface properly and understand their differences. Skipping steps could lead to peeling or cloudiness. Do you want all your hard work ruined by a simple mistake?
By sanding and cleaning the polycrylic first, you guarantee a smooth, durable finish. Taking these precautions helps your project look professional and last longer, making the extra effort well worth it.