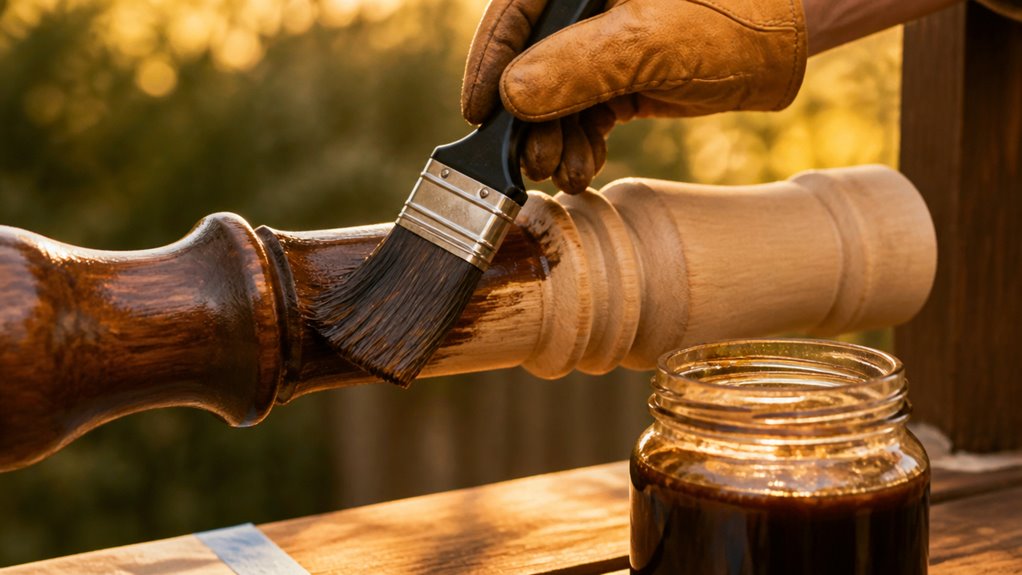
Best Way to Stain Spindles on a Deck: Step-by-Step
To stain deck spindles effectively, start by cleaning, sanding, and guaranteeing the wood’s moisture is under 15% for proper adhesion.
Choose an appropriate penetrating stain: oil-based for deeper grain or water-based for quicker drying. Select natural or synthetic brushes accordingly.
Apply thin, even coats on each spindle in the shade, maintaining a wet edge to prevent drips. Let each coat dry fully before touch-ups.
Following this method guarantees durable, even protection and an attractive finish. Further details can help you perfect every step.
Key Takeaways
- Clean, sand, and ensure spindles are fully dry with moisture under 15% before staining for optimal adhesion and finish durability.
- Protect surrounding plants and surfaces with drop cloths and wear goggles and a mask to ensure safety during staining.
- Apply thin, even coats using a paint or stain mitt, maintaining a wet edge and back-brushing each spindle for deep penetration.
- Avoid staining in direct sunlight or high humidity; choose calm weather with no rain forecasted for at least 24–48 hours.
- Let each coat dry completely (2–4 hours) before reapplying; inspect and touch up missed spots for a uniform finish.
Prepare Your Deck Spindles and Surroundings for Staining

Before you begin staining, protect the plants, siding, and deck surface around your spindles with plastic sheeting, cardboard, or drop cloths to catch drips and overspray.
Next, thoroughly clean the spindles using a deck cleaner, hose nozzle, or pressure washer to remove dirt, mildew, and residue.
Allow the wood to dry completely; damp wood prevents proper stain adhesion.
Test dryness by sprinkling water on the spindle surface. If it soaks in quickly, you’re ready to proceed.
Wear goggles and a mask to protect against stain fumes and eye irritation.
Ensuring a clean, dry, and protected workspace minimizes staining errors and surface contamination.
This sets the stage for an even, durable finish.
To enhance safety during your deck project, consider using non-slip mats around the work area to prevent slips and falls on wet or uneven surfaces.
Check Wood Moisture and Weather Conditions for Best Results
Once your spindles are clean, dry, and protected, it’s important to confirm the wood’s moisture content and assess weather conditions before staining.
Measure moisture with a wood moisture meter; aim for under 15% to guarantee proper stain absorption and adhesion. If moisture exceeds this, allow additional drying time.
Use a wood moisture meter to ensure moisture is below 15% for optimal stain absorption and adhesion.
Avoid staining in direct sunlight, as rapid drying can cause lap marks and uneven penetration.
Check the weather forecast to select a period with low humidity and no rain for at least 24–48 hours to promote thorough drying.
Stain application during high humidity or imminent rain extends drying time and risks finish defects.
Work in manageable sections to maintain a wet edge and consistent coverage.
This preparation step optimizes stain performance and durability on your deck spindles.
For best results, ensure the wood surface is completely dry and free of mill glaze or dirt before applying stain to improve adhesion and longevity of the finish, referring to proper surface preparation.
Choose the Right Stain and Applicator for Deck Spindles
When it comes to staining your deck spindles, the first thing you’ll want to do is choose the right stain. Think about the type of wood your deck is made of and how much exposure it gets. If you’re aiming for deep penetration, an oil-based stain might be your best bet. On the other hand, if you’re in a hurry and want something that dries quickly, go for a water-based option.
Now, let’s talk about applicators. You’ll want to use something like paint mitts or synthetic brushes, especially designed for the type of stain you’ve chosen. This is key for getting that even coverage, particularly on those curved spindles. Remember, matching the right stain with the right tool isn’t just about looks; it’ll really help with adhesion and give you a smooth finish. Happy staining!
For the best long-lasting protection and enhanced grain appearance, consider using oils with deep penetration properties specifically formulated for hardwood surfaces.
Stain Type Selection
Selecting the right stain and applicator plays a crucial role in achieving a durable, even finish on deck spindles.
You’ll want a penetrating stain that soaks into the wood rather than sitting on the surface, ensuring long-lasting protection and natural appearance.
Oil-based stains typically provide deeper penetration but require natural-bristle brushes.
Water-based stains dry faster and work best with synthetic brushes.
Avoid overloading your applicator to prevent runs and sagging.
Consider these stain selection points:
- Choose penetrating stains for better wood absorption and durability.
- Match brush type to stain base: natural bristles for oil-based, synthetic for water-based.
- Apply thin, even coats to avoid buildup and promote uniform drying.
This approach guarantees a consistent, professional finish on your deck spindles. For best results, always test products on a small, inconspicuous area before full application to gauge the final look and compatibility.
Applicator Tool Options
When tackling deck spindles, choosing the right applicator tool can make or break your finish. A paint or stain mitt provides excellent control by wrapping around each spindle, minimizing drips and ensuring even coverage on curved surfaces.
Alternatively, a thick-bristled brush offers precision but demands careful handling to avoid runs. For larger projects, a 4-inch roller speeds application on multiple spindles but requires back-brushing to penetrate wood fibers fully.
Sprayers cover extensive areas quickly but need angled passes for inside edges and careful drip management. Avoid overloading your applicator to prevent sagging and uneven layers.
Match your tool to the stain type: natural bristles for oil-based, synthetic for water-based—to optimize stain adherence and finish quality.
Choose tools that balance speed, control, and stain penetration for the best results. Using a sealer with SCUFF GUARD Technology can help maintain the protective qualities of your stained wood under frequent use.
Oil Vs Water-Based
In choosing between oil-based and water-based stains for deck spindles, understanding their composition and drying properties helps you optimize both application and finish.
Oil-based stains penetrate deeply, enhancing wood grain and providing durable protection. However, they require longer drying times and natural-bristle brushes.
Water-based stains dry quickly, emit fewer fumes, and clean up easily with soap and water. They may raise the wood grain, necessitating light sanding between coats and synthetic brushes.
Consider these factors when selecting your stain:
- Durability vs. Convenience: Oil-based offers longevity; water-based is faster and less odorous.
- Application Tools: Use natural bristles for oil-based, synthetic for water-based stains.
- Environmental Impact: Water-based stains have lower VOCs and are more eco-friendly.
Choose based on your project timeline, desired finish, and environmental considerations. It is also important to ensure the wood surface is completely dry with moisture content below 12% before applying any stain to achieve optimal absorption and finish quality.
Apply Thin, Even Coats to Each Spindle to Avoid Drips
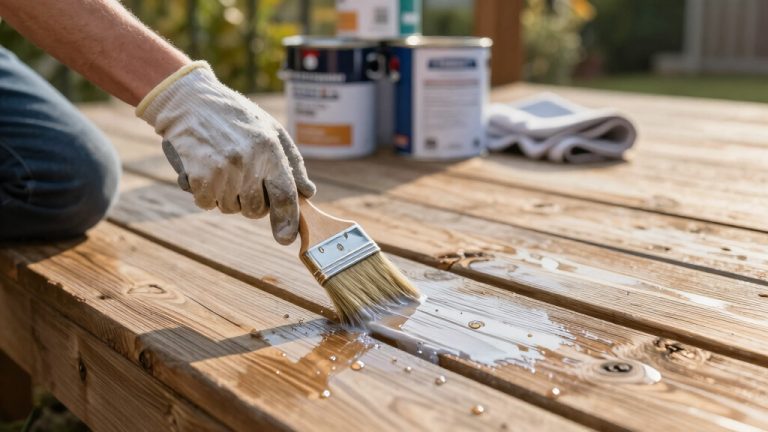
Apply thin, even coats to each spindle to guarantee the stain penetrates properly and prevents drips. Avoid heavy application by loading your applicator sparingly, whether using a paint mitt or brush.
Work one spindle at a time, maintaining a wet edge to ensure uniform coverage and prevent lap marks. Watch closely for drips, especially on undersides and inside edges, and immediately wipe any excess stain to avoid streaking.
Thin coats reduce bubbling, cracking, and uneven buildup, promoting better adhesion and a cleaner finish. Applying stain in manageable sections helps you maintain control and consistency.
Using this method ensures the stain absorbs evenly into the wood fibers, minimizes mess, and produces a professional, durable finish without runs or sagging. For best results, work in small sections and apply even pressure to maintain control over the finish.
Use Proper Techniques to Ensure Even Stain Penetration
Make certain even stain penetration by working the stain thoroughly into the wood fibers using back-brushing or wiping techniques immediately after application. This guarantees the stain soaks uniformly, preventing blotches and enhancing durability.
Apply thin coats on one spindle at a time, maintaining a wet edge to avoid lap marks. Use the correct brush type: natural bristle for oil-based and synthetic for water-based stains to optimize absorption.
Back-brush each spindle promptly to push stain into grain and inside edges. Wipe excess stain gently with a clean cloth to prevent pooling or runs.
Inspect frequently for missed spots or uneven coverage, addressing them immediately.
Employ these methods consistently for a smooth, professional finish with deep, even color saturation. For oil finishes like tung oil, applying multiple thin coats and removing excess oil immediately helps control darkening and ensures an even finish.
Let Stain Dry Completely Before Adding Additional Coats
Although layering stain can deepen color and protection, you must let each coat dry completely before adding the next. Check the manufacturer’s drying time, which often ranges from two to four hours or more, depending on humidity and temperature.
Allow each stain coat to dry fully—usually 2 to 4 hours—before applying the next for best results.
Applying a second coat prematurely traps moisture, leading to poor adhesion, bubbling, or uneven finish. To verify dryness, touch a discreet spindle area; it should feel dry and not tacky.
Avoid staining in direct sunlight or high humidity, as these conditions extend drying times. Patience guarantees proper stain penetration and durability.
Only after confirming full dryness should you proceed with additional coats, applying thin layers for uniform absorption and preventing runs or streaks. This method guarantees a lasting, professional-quality finish on your deck spindles.
Proper ventilation is essential during staining to avoid accumulation of harmful fumes and ensure safe air quality, as highlighted by indoor air quality concerns.
Inspect and Touch Up Missed Spots and Imperfections
Once the main coats have dried fully, you should carefully inspect every spindle from all angles to identify any missed spots, runs, or uneven coverage. Use good lighting and take your time to guarantee thoroughness.
Missed areas can lead to premature wood damage, so precise touch-ups are critical. Use a small brush or stain mitt to apply thin, even layers on these spots. Avoid overloading the applicator to prevent drips or streaks.
Focus on blending the touch-ups seamlessly with the surrounding finish. Target shadowed or hard-to-see areas where coverage is often inconsistent. Check undersides and inside edges for runs or pooling stain.
Reassess after touch-ups dry to confirm evenness and completeness. This meticulous inspection guarantees a durable, uniform finish on your deck spindles.
Regular maintenance and prompt attention to imperfections help preserve the finish and extend the lifespan of your stained wood.
Clean Up Safely and Protect Your Deck Finish
To keep your deck looking great, it’s important to act quickly if you notice any drips. Just grab a rag and wipe them up right away.
If you let them sit too long, they can harden and leave streaks that really mess up your deck’s finish.
Also, don’t forget to protect the areas around your deck while you’re staining. A simple way to do this is by laying down plastic sheets or cardboard under the spindles.
It’s a small step that makes a big difference, helping you achieve a clean job while keeping your deck looking its best.
Immediate Drip Removal
Keep an eye out for drips as you work and wipe them up immediately to prevent stains from hardening into streaks.
Use a clean, lint-free rag or cloth to gently blot excess stain before it penetrates too deeply. Addressing drips quickly preserves the uniform finish and prevents unsightly runs that require sanding or reapplication.
To remove drips safely without damaging the finish or wood surface, blot excess stain gently with a clean rag. Avoid rubbing, which spreads the stain.
For stubborn drips, lightly dampen the rag with mineral spirits for oil-based stains or water for water-based stains and wipe carefully.
Inspect underside and inside edges frequently to catch drips early. Prompt drip removal maintains a professional appearance and protects your deck’s finish integrity.
Surface Protection Methods
Protecting surrounding areas during spindle staining prevents unintended damage and simplifies cleanup. Use plastic sheeting, cardboard, or drop cloths to shield plants, siding, and deck surfaces from drips and overspray.
Secure coverings tightly to avoid shifting. Immediately wipe any drips to prevent staining unwanted areas. Wear protective gear to guard eyes and lungs from fumes.
After staining, remove coverings carefully to avoid spreading residue.
| Protection Material | Best Use | Notes |
|---|---|---|
| Plastic Sheeting | Large surface coverage | Waterproof, reusable |
| Cardboard | Under spindles | Absorbs drips, disposable |
| Drop Cloths | Around plants & siding | Breathable, prevents moisture |
This approach safeguards your deck finish and streamlines cleanup.
Frequently Asked Questions
How Long Does Stained Wood Typically Last Before Needing Reapplication?
Stained wood typically lasts 2 to 5 years before needing reapplication, depending on exposure and stain type.
You’ll want to inspect your wood annually for fading, peeling, or water absorption.
Oil-based penetrating stains often last longer than water-based ones.
Harsh weather or high UV exposure can shorten this lifespan.
Timely cleaning and maintenance help extend durability.
Always follow manufacturer guidelines for peak protection and reapplication intervals.
Can I Stain Spindles That Are Already Painted or Sealed?
You can’t just slap stain on painted or sealed spindles like painting a blank canvas.
You’ll need to strip or sand off the existing finish first because stain needs raw wood to penetrate properly.
If the surface is glossy or sealed, stain won’t adhere well and will peel or flake.
Use a chemical stripper or sandpaper to remove old paint or sealer.
Then make sure the wood is clean and dry before staining for a durable, even finish.
What Safety Precautions Should I Take Besides Goggles and a Mask?
Besides goggles and a mask, you should wear gloves to protect your skin from chemical exposure. Use long sleeves and pants to avoid contact with stain.
Ensure proper ventilation if you’re working indoors or in a confined space. Keep a fire extinguisher nearby, as some stains are flammable.
Also, protect surrounding plants and surfaces with plastic sheeting or drop cloths to prevent contamination. Dispose of rags safely to avoid spontaneous combustion.
How Do I Remove Stain From Skin or Clothing if Spilled?
Stain sticking stubbornly? Swiftly scrub skin with soap and warm water, using a soft brush to break bonds.
For clothing, soak stains in a solvent like rubbing alcohol or a commercial stain remover before laundering with heavy-duty detergent.
Avoid drying stained fabric until fully clean, as heat sets stains. Act promptly to prevent permanent pigmentation.
Always test removers on inconspicuous fabric areas to protect your prized pieces from damage.
Is It Necessary to Sand Spindles Before Staining?
You don’t always have to sand spindles before staining, but it’s highly recommended if the wood surface is rough, weathered, or has old finish remnants.
Sanding opens wood pores, ensuring better stain penetration and a smoother finish. Use fine-grit sandpaper for delicate spindles, then clean off dust thoroughly.
Skipping sanding on new, smooth wood is possible, but prepping the surface improves adhesion and extends the stain’s lifespan.
Best Way to Stain Spindles on a Deck: Final Tips
Staining your deck spindles is like painting strokes on a canvas. Each thin, even coat builds the masterpiece.
By preparing thoroughly and choosing the right tools, you guarantee a flawless finish that stands the test of time.
Just as a skilled artist inspects every detail, you’ll catch and touch up imperfections before the final reveal.
Clean up carefully, and your deck will shine like a well-crafted work of art for seasons to come.