
How to Reduce Humidity in Crawl Space: Guide?
To reduce crawl space humidity, first measure relative humidity using a reliable hygrometer. Target below 50% RH to prevent mold and structural damage.
Install a 6–10 mil polyethylene vapor barrier, sealing seams and extending up walls to block ground moisture. Fix water intrusion by maintaining gutters, grading soil away, and inspecting drainage systems.
Seal vents, rim joists, and HVAC penetrations with foam or caulk. Use a properly sized continuous dehumidifier designed for crawl spaces.
Regular inspections help maintain ideal moisture control. Further details reveal how to optimize these steps effectively.
Key Takeaways
- Use a properly sized dehumidifier designed for crawl spaces to maintain humidity below 50% RH continuously.
- Install and inspect a vapor barrier covering the ground and extending up walls to block moisture intrusion.
- Seal vents, rim joists, and access doors with foam or caulk to prevent humid air entry and air leaks.
- Maintain exterior drainage systems, including gutters, downspouts, and soil grading, to divert water away from the foundation.
- Monitor relative humidity regularly with a hygrometer and adjust ventilation or dehumidification based on readings above 60% RH.
How to Measure Crawl Space Humidity Accurately?

Accurately measuring crawl space humidity typically starts with using a reliable hygrometer designed for relative humidity (RH) readings.
You’ll want to place the device in a central, representative location away from walls or vents to avoid skewed data.
Track RH levels over time to detect seasonal variations and identify persistent moisture issues.
Aim to measure during different weather conditions for a comprehensive profile.
Pay attention to readings above 60%, which often indicate excessive moisture that can promote mold growth.
Complement your measurements by visually inspecting for signs like mold, wood rot, or condensation.
Using data logging hygrometers can help you monitor trends without frequent manual checks.
Consistent, precise humidity data is essential before implementing control strategies to guarantee effective moisture management in your crawl space.
Additionally, maintain consistent ventilation and humidity control throughout the drying phase to mitigate long-term damage and prevent recurring moisture problems with proper humidity control techniques.
Why Keep Crawl Space Humidity Below 50?
Because excessive humidity fosters mold growth and structural decay, keeping crawl space humidity below 50% relative humidity (RH) is essential for maintaining a healthy and durable foundation environment.
Maintaining crawl space humidity below 50% RH prevents mold and structural damage for a healthier foundation.
At levels above 50% RH, moisture accumulates on wood framing, insulation, and ductwork, accelerating fungal growth and promoting wood rot.
High humidity also increases corrosion risk on metal components and may cause musty odors that degrade indoor air quality.
Maintaining humidity below this threshold limits condensation and inhibits microbial activity, preserving structural integrity.
You’ll reduce the likelihood of costly repairs and health hazards by controlling moisture within this range.
Additionally, lower humidity stabilizes insulation performance and prevents deterioration of vapor barriers and sealants.
This contributes to a more energy-efficient and moisture-resilient crawl space over time.
Using dehumidifiers continuously until humidity drops below 50% is a proven method to achieve and maintain optimal moisture levels.
How to Install a Vapor Barrier to Block Ground Moisture?
When installing a vapor barrier to block ground moisture, start by thoroughly preparing the crawl space floor to guarantee proper adhesion and coverage.
Clear debris, smooth uneven soil, and remove sharp objects to prevent punctures. Choose a 6 to 10 mil polyethylene sheet for durability and moisture resistance.
Lay the vapor barrier flat, overlapping seams by at least 12 inches, then seal joints with waterproof tape or adhesive to minimize vapor transmission.
Extend the barrier vertically up foundation walls by 6 to 12 inches, securing it with fasteners or adhesive to create a continuous moisture barrier.
In stronger systems, wrap piers and pillars to further reduce vapor intrusion.
Proper installation ensures a reliable barrier that notably lowers soil moisture evaporation into the crawl space.
For best results, ensure the crawl space is dry before installation to prevent trapped moisture and potential damage to the vapor barrier.
How to Fix Water Intrusion Around Your Crawl Space?
Identify and eliminate sources of water intrusion around your crawl space to prevent moisture buildup that can lead to mold, wood rot, and structural damage.
Eliminate water intrusion around your crawl space to prevent mold, wood rot, and structural damage.
Start by inspecting the perimeter for plumbing leaks, ensuring pipes are intact and free from drips.
Maintain gutters by cleaning debris regularly and confirm downspouts extend 6 to 10 feet away from the foundation to direct water away effectively.
Regrade soil surrounding your home to slope away from the crawl space, preventing surface water pooling.
For persistent water accumulation, install drainage solutions like French drains or sump pumps to actively remove water from vulnerable areas.
Addressing these issues promptly reduces hydrostatic pressure on foundation walls and limits moisture infiltration.
This creates a drier, more stable crawl space environment.
Additionally, installing a vapor barrier in the crawl space can further control moisture and protect structural components.
How to Seal Crawl Space Vents and Air Leaks to Reduce Humidity?
Sealing crawl space vents and air leaks plays a critical role in reducing humidity by minimizing the infiltration of moist outdoor air. You’ll want to focus on these key steps:
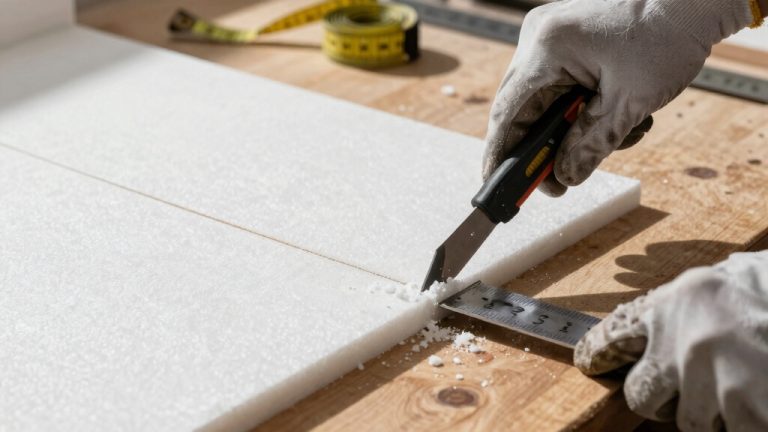
- Seal all crawl space vents using durable materials like rigid foam board or vent covers to block direct airflow.
- Air-seal rim joists, floor penetrations, and foundation gaps with spray foam or caulk to prevent moisture-laden air infiltration.
- Insulate and air-seal the crawl space access door or panel to reduce humidity exchange with the outside environment.
- Seal HVAC ductwork and utility penetrations to stop moist air from leaking into the crawl space, especially where ducts run through unconditioned areas.
These measures work together to create a controlled environment, limiting humidity sources and helping maintain target relative humidity near 50%.
Picking the Best Dehumidifier for Your Crawl Space
Choose a dehumidifier engineered specifically for crawl spaces to reliably manage high humidity levels. Look for models with capacity suited to your crawl space size and humidity load.
Commercial-grade units often outperform residential models in durability and efficiency for persistent moisture. Consider energy consumption and drainage options; continuous drain lines simplify maintenance.
Verify the operating temperature range to guarantee performance in cooler crawl spaces.
Many crawl spaces use rigid core flooring like EVP to minimize moisture impact and improve structural stability.
| Feature | Consideration | Benefit |
|---|---|---|
| Capacity | Matches space size | Effective moisture removal |
| Power Consumption | Energy-efficient models | Lower operating costs |
| Drainage | Continuous drain option | Reduces manual emptying |
| Durability | Commercial grade | Long-term reliability |
| Temperature Range | Operates in cooler temps | Consistent dehumidification |
How to Combine Drainage, Sealing, and Dehumidification Effectively?
When managing crawl space humidity, combining drainage, sealing, and dehumidification creates a thorough moisture control system that addresses multiple sources simultaneously.
You’ll want to:
- Improve drainage by installing sump pumps or French drains. Regrade soil to divert water away from your foundation, preventing standing water accumulation.
- Seal all air leaks and vents to block humid outdoor air infiltration. Focus on rim joists, foundation gaps, and crawl space access points to enhance vapor barrier effectiveness.
- Apply a continuous vapor barrier on the floor and walls. Overlap and seal seams to limit ground moisture evaporation comprehensively.
- Use a properly sized dehumidifier to maintain relative humidity near or below 50%. This is especially important where sealing and drainage alone don’t fully control moisture.
Regular inspection of foundation cracks and drainage components helps identify early signs of water intrusion and maintain effective moisture control through foundation protection.
How to Inspect and Maintain Crawl Space Moisture Control Regularly?
To keep your crawl space in good shape, it’s a smart idea to monitor the relative humidity with a hygrometer. If you notice levels creeping above 60%, that’s a red flag for mold risk.
While you’re at it, take a regular look at your vapor barriers and seals. Any damage or gaps can let moisture sneak in, which you definitely want to avoid.
And don’t forget about your drainage systems! Make sure to clear out gutters and downspouts, and check that the soil is graded properly. You want to prevent any water from pooling near your foundation. Keeping up with these steps will help you maintain a healthy crawl space! Be aware that groundwater intrusion via foundation cracks and failed drainage systems can elevate moisture levels in crawl spaces if not properly managed.
Monitor Humidity Levels
Since maintaining proper humidity levels is critical for preventing mold and structural damage, you should regularly monitor the relative humidity in your crawl space using a reliable hygrometer.
Target around 50% relative humidity (RH) or lower to minimize moisture risks. If levels exceed 60%, you face increased chances of mold growth and wood rot.
Track seasonal variations carefully to identify persistent moisture issues.
Follow these steps to monitor humidity effectively:
- Install a hygrometer in a central crawl space location for accurate readings.
- Record RH values weekly to detect trends or sudden changes.
- Inspect for visible signs like mold, dampness, or musty odors alongside measurements.
- Use data to adjust moisture control actions, such as dehumidification or ventilation, promptly.
Regular monitoring is essential to maintain a dry, healthy crawl space environment. Maintaining crawl space ventilation is also crucial to prevent trapped humidity that exacerbates moisture buildup and wood expansion.
Inspect Barriers And Seals
Inspecting barriers and seals in your crawl space is essential for maintaining effective moisture control and preventing humidity-related damage.
Start by examining the vapor barrier for tears, gaps, or loose seams. Ensure the polyethylene sheet is intact and fully covering the ground and foundation walls.
Check that all overlap joints are properly taped or sealed to prevent vapor intrusion. Inspect air seals around rim joists, floor penetrations, and utility openings for cracks or deterioration that could allow humid air infiltration.
Verify that crawl space vents and access doors are tightly sealed and insulated. Pay particular attention to HVAC ductwork and any penetrations, as leaks can introduce moisture.
Regular inspections, ideally twice a year, help identify defects early and maintain the integrity of your crawl space’s moisture control system. Maintaining indoor humidity between 30–50% is critical to prevent mold growth and moisture-related problems.
Maintain Drainage Systems
Although drainage systems often operate quietly in the background, their proper function is critical to preventing water accumulation and controlling humidity in your crawl space.
To maintain effective moisture control, you need to inspect and service these systems regularly. Follow these steps:
- Check gutters and downspouts for blockages or damage. Make certain downspouts extend 6–10 feet from the foundation.
- Verify soil grading slopes away from your home to prevent water pooling near the crawl space.
- Inspect sump pumps or French drains for operational integrity. Clean debris and test automatic activation.
- Look for standing water or damp spots inside the crawl space. Address leaks or drainage issues promptly.
Consistent maintenance ensures these systems divert moisture away, reducing humidity and protecting structural components. Additionally, applying a waterproof sealant to exterior surfaces can further prevent moisture intrusion and enhance durability.
Common Signs of Crawl Space Moisture Problems to Watch For
It’s a good idea to keep an eye out for visible mold growth and wood rot.
These are pretty clear signs that moisture has been hanging around in your crawl space for too long.
You should also watch for signs of water intrusion, like standing water, damp soil, rust stains, and condensation.
If you spot any of these, don’t wait—addressing them quickly can save you from potential structural damage down the line.
Visible Mold And Rot
When moisture accumulates in a crawl space, visible mold growth and wood rot often develop as early warning signs of persistent humidity problems.
You should inspect crawl space components regularly to catch these issues early. Here are four key indicators to watch for:
- Discolored or fuzzy patches on wood surfaces, signaling mold colonization.
- Softened or crumbling wood areas, indicating structural degradation from rot.
- Musty odors, often linked to microbial growth in damp environments.
- Peeling paint or swelling wood, signs that moisture has penetrated building materials.
Addressing these signs promptly helps prevent further damage and indoor air quality issues. Use a hygrometer to monitor relative humidity, aiming to keep it below 60% to reduce mold risk.
Combining moisture barriers, ventilation control, and dehumidification provides exhaustive humidity management.
Signs Of Water Intrusion
Because water intrusion can quickly worsen crawl space conditions, recognizing its common signs early is essential for effective moisture control. You should regularly check for standing water, damp soil, and rust stains on metal surfaces.
Condensation on pipes or foundation walls also signals moisture issues. Musty odors and visible mold growth often follow persistent dampness, while wood rot indicates structural damage from prolonged water exposure.
| Sign | Description |
|---|---|
| Standing Water | Pools or puddles on crawl space floor |
| Damp Soil | Soil retaining moisture longer than normal |
| Rust Stains | Corrosion marks on metal components |
| Condensation | Water droplets forming on surfaces |
| Musty Odors & Mold | Fungi growth and mildew smell |
Detecting these signs early helps you implement targeted moisture reduction strategies.
Frequently Asked Questions
Can Crawl Space Humidity Affect Indoor Air Quality and Health?
Yes, crawl space humidity can markedly impact indoor air quality and your health.
High moisture promotes mold growth and wood rot, releasing spores and allergens into your home’s air.
This can cause respiratory issues, allergies, and exacerbate asthma symptoms.
Moisture also encourages dust mites and bacteria.
Controlling humidity below 50% RH helps prevent these hazards, ensuring healthier air circulation throughout your living spaces.
This reduces potential health risks associated with damp environments.
What Are the Costs Associated With Crawl Space Moisture Control?
You can expect crawl space moisture control costs to range widely. Installing vapor barriers typically costs $1 to $3 per square foot.
Sealing vents and air leaks may add several hundred dollars, depending on complexity. Mechanical dehumidifiers range from $500 to $2,000, plus installation.
Drainage improvements like sump pumps or French drains can cost $1,000 to $5,000. Combining these measures guarantees durability but increases upfront investment.
Regular inspections add minimal ongoing expense.
How Does Climate Influence Crawl Space Humidity Management Strategies?
When it comes to managing crawl space humidity, climate sets the tone.
In warm, humid climates, you can’t just open the windows; sealing vents and using dehumidifiers become essential to prevent moisture intrusion.
In cooler, drier regions, ventilation might suffice, but you should still monitor for condensation and ground moisture.
Tailoring your approach based on local weather patterns guarantees your crawl space stays dry and mold-free, avoiding a costly uphill battle.
Can Plants or Landscaping Impact Crawl Space Moisture Levels?
Yes, plants and landscaping can impact crawl space moisture levels.
You should avoid planting vegetation too close to the foundation, as roots and excess watering increase soil moisture near the crawl space.
Dense foliage can trap humidity and reduce airflow, worsening moisture issues.
Instead, use well-drained soil and slope landscaping to direct water away from the foundation.
Proper landscaping complements drainage improvements and vapor barriers, helping control crawl space humidity effectively.
Are There Any DIY Alternatives to Professional Crawl Space Encapsulation?
Yes, you can DIY crawl space encapsulation by installing a thick polyethylene vapor barrier (6–10 mil) across the floor.
Seal seams with tape and extend the barrier up the foundation walls.
You’ll also need to seal vents, rim joists, and access points to limit air infiltration.
Combine this with proper drainage, gutter maintenance, and a dehumidifier to effectively control humidity.
While DIY saves money, ensure thorough sealing and moisture management for lasting results.
Protect Your Home From Crawl Space Humidity Damage
To reduce humidity in your crawl space effectively, you need to measure moisture accurately.
Install a reliable vapor barrier and fix any water intrusion.
Seal vents and leaks thoroughly.
Choose the right dehumidifier and combine drainage with sealing and dehumidification.
Inspect regularly for problems.
By following these detailed, coordinated steps, you’ll protect your home’s structural integrity.
Improve air quality and prevent costly damage.
Stay vigilant, stay proactive, and keep humidity under control consistently.