Best Way to Stain Decking: Step-by-Step Guide
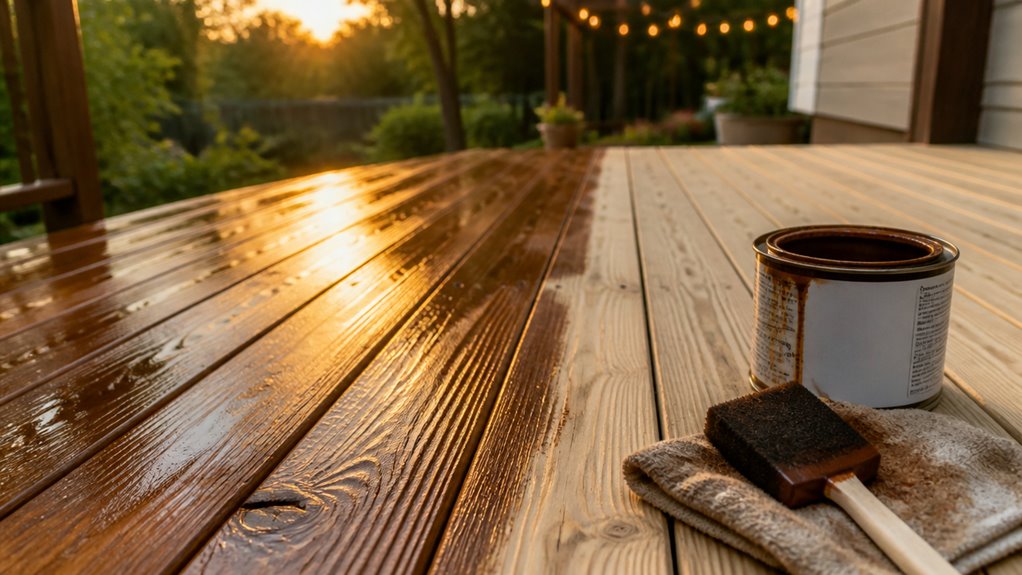
To stain your deck effectively, start by cleaning and sanding the surface, ensuring moisture is below 12%.
Choose a stain with UV inhibitors suited for your wood type.
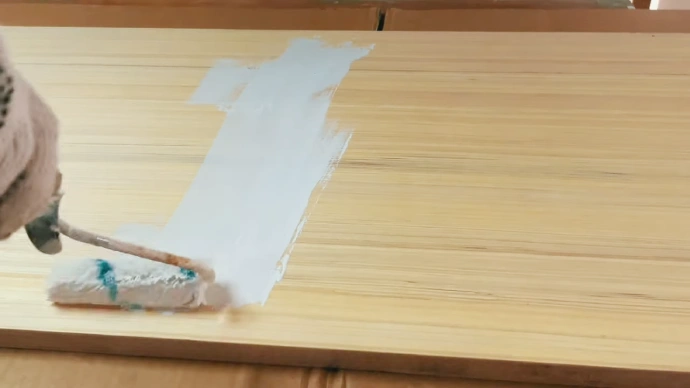
Apply thin, even coats using a brush for edges and a roller for boards.
Always follow the grain and maintain a wet edge to prevent lap marks.
Stain end grains generously for full protection.
Avoid staining under direct sun or rain and allow proper drying and curing time.
Following these steps guarantees lasting results; more detailed guidance can enhance your project’s success.
Key Takeaways
- Thoroughly clean, sand, and repair the deck surface, ensuring moisture content is below 12% before staining.
- Apply stain in thin, even coats using a brush for edges and a roller or sprayer for larger areas, following the wood grain.
- Maintain a wet edge by working in small sections and immediately back-brushing to prevent lap marks and ensure even penetration.
- Avoid staining under direct sunlight or rain, and keep temperatures between 50°F and 90°F for optimal drying and curing conditions.
- Brush end grain generously to fully saturate and seal exposed fibers, then follow a regular maintenance and re-staining schedule every 2–3 years.
How to Prepare Your Deck for Staining?

Begin by completely clearing your deck of furniture, plants, and decorations to guarantee full access to the surface.
Next, thoroughly sweep and vacuum debris from boards, gaps, and house junctions to remove dirt and leaves.
Inspect every board for rot, cracks, loose fasteners, or splintering. Replace or repair damaged areas before proceeding.
Clean the deck using a specialized deck cleaner or pressure washer to eliminate grime that can hinder stain adhesion.
After washing, lightly sand the surface with 60- or 80-grit sandpaper to remove loose fibers and improve stain absorption.
Make certain the wood is dry with moisture content below 12% before staining.
Allow 24 to 72 hours of drying time depending on weather conditions to guarantee peak stain performance and durability.
For best results, avoid staining when the wood feels damp or during extreme weather to prevent peeling and ensure long-lasting protection, focusing on proper surface preparation.
Choosing the Right Deck Stain for Your Project
When choosing a stain for your deck, it’s important to find the right balance between penetration and film formation. This way, you can protect your deck effectively.
Take a moment to think about the color and finish options you have. You want something that enhances the wood grain while also matching your style.
Don’t forget to check the coverage rates and durability, too! These factors will help ensure that your stain not only lasts a long time but also goes on smoothly during application.
Consider selecting finishes with UV inhibitors to maintain color and extend the life of your deck stain.
Stain Types Overview
Selecting the right deck stain markedly impacts both the appearance and longevity of your wood surface. You’ll primarily choose between penetrating, semi-transparent, and solid stains.
Penetrating stains soak into the wood, enhancing natural grain while providing excellent water resistance. Semi-transparent stains add a light color layer, balancing protection with wood visibility.
Solid stains create an opaque coating, offering maximum UV protection but obscuring grain detail. Each type differs in durability, maintenance, and application technique.
Penetrating and semi-transparent stains require thinner coats and frequent reapplication. Solids last longer but need meticulous surface prep to avoid peeling.
Consider wood species, exposure, and maintenance commitment when selecting. Always follow manufacturer guidelines for optimal bonding and curing.
This technical understanding helps you tailor stain choice to your project’s specific demands. Additionally, understanding how different wood types affect stain performance, such as the moisture retention and natural oils found in cedar mulch, can improve your staining results.
Color and Finish Options
How do you choose the right color and finish for your deck stain to balance aesthetics with protection?
Start by considering the wood species and your desired look.
Next, evaluate your environment’s exposure to sun and moisture.
Then, select a finish that complements both factors without compromising durability.
Follow these steps:
- Color choice: Opt for natural tones to highlight grain, or go darker for a modern aesthetic. Test samples on a small area first.
- Finish type: Penetrating or semi-transparent stains enhance texture and provide UV defense without film buildup.
- Sheen level: Matte or satin finishes reduce glare and hide imperfections. Gloss finishes add shine but show wear faster.
- Compatibility: Make certain your stain matches previous coatings or raw wood for adhesion and longevity.
This approach guarantees a visually appealing deck with lasting protection. Consider choosing products with UV resistance and water-repellent properties to extend the life of your wood surfaces.
Coverage and Durability
Although choosing the right deck stain involves aesthetic considerations, coverage and durability are critical factors that directly impact your deck’s longevity and maintenance frequency.
Select a stain that offers sufficient coverage to minimize coats and guarantee uniform protection. Penetrating or semi-transparent stains typically provide better wood grain visibility and longer-lasting protection by soaking into the wood rather than forming a film.
Make certain your wood is dry and clean before application to maximize adhesion and durability. Apply thin, even coats, focusing on end grains which absorb more stain.
Follow manufacturer guidelines for drying and curing times to achieve peak performance. Regular maintenance, including cleaning and timely recoating, preserves the stain’s effectiveness, preventing premature wear and costly repairs.
Prioritize coverage and durability to extend your deck’s service life efficiently. Using the correct roller nap length helps ensure even stain absorption and a professional finish.
When’s the Best Time to Stain Your Deck?
Timing plays a pivotal role in achieving a durable and attractive deck finish. You want to stain your deck when the wood is dry, and weather conditions favor proper adhesion and curing.
Here’s when to stain for best results:
- Apply stain when the wood moisture content is below 12%, guaranteeing peak absorption.
- Choose a day with air and surface temperatures between 50°F and 90°F to promote even drying.
- Avoid staining under direct sunlight to prevent fast drying that can cause peeling.
- Check the forecast and pick a window with no rain for at least 12-24 hours post-application to allow proper curing.
Following these timing guidelines helps reassure your stain bonds well and lasts longer. Proper staining every 2 to 3 years is essential as part of regular maintenance to extend your cedar deck’s lifespan.
Step-by-Step Guide to Applying Deck Stain
Once you’ve identified the ideal conditions for staining your deck, you’re ready to begin the application process.
Start by removing furniture and debris, then sweep and vacuum thoroughly.
Inspect for damaged boards and clean the wood surface with a deck cleaner.
Allow 24-72 hours for complete drying. Use a brush to apply stain to cracks, corners, and railings first.
For larger areas, apply stain with a pad, roller, or sprayer, working in small sections to maintain a wet edge.
Always coat end grain heavily and follow the wood grain direction. Back-brush immediately to ensure even penetration.
Apply thin, even coats to prevent buildup. Allow the first coat to dry fully before applying a second if needed.
Follow manufacturer drying and curing times for peak durability.
For best results on damaged or rotted areas, consider using a stainable wood filler to achieve a seamless finish before staining.
Application Techniques to Avoid Lap Marks and Uneven Coverage When Staining Your Deck
To achieve a smooth, professional finish when staining your deck, you need to apply stain carefully to prevent lap marks and uneven coverage. Follow these steps for consistent results:
- Work in 2- to 4-board sections to maintain a wet edge. Blend each new section seamlessly into the previous one.
- Apply stain in the direction of the grain using a brush for edges and a roller or sprayer for field boards. Immediately back-brush to evenly distribute and push stain into the wood.
- Avoid heavy coats. Apply thin, even layers to prevent puddling and peeling.
- Start from the farthest point from your exit to avoid walking on wet stain and creating marks.
These techniques minimize lap lines and guarantee uniform coverage across your deck surface. Additionally, ensuring the wood surface is completely dry before application helps avoid blotching and promotes even absorption, which is essential for a quality finish with optimal surface preparation.
How to Properly Coat and Protect Deck Board End Grain?
Because end grain absorbs stain more readily than flat surfaces, you need to apply a heavier coat to these areas to guarantee proper protection and durability.
Begin by brushing stain generously onto the board ends, ensuring full saturation without pooling. Use a high-quality brush to push stain deep into the grain, maximizing penetration and sealing exposed fibers.
Avoid thin, skimpy coverage here, as insufficient stain leads to accelerated weathering and water damage. After coating, maintain a wet edge to blend end grain stain smoothly with adjacent deck surfaces, preventing visible seams.
Applying stain in the direction of the grain further improves absorption and uniformity. Properly coated end grain extends deck life by resisting moisture intrusion and minimizing wood splitting, so don’t rush this critical step.
Regularly applying penetrating oil-based sealers with UV resistance every 3–5 years helps maintain this protection and prolongs the wood’s lifespan.
Drying and Curing Times for Deck Stain
When you’re getting ready to stain your deck, it’s super important to pick the right conditions. Aim for temperatures between 50°F and 90°F, and make sure there’s no rain or direct sunlight expected for at least 12 to 24 hours. This will really help the stain set properly.
After you apply the stain, give it a good 24 hours to dry before you start walking on it. It’s also a good idea to check the manufacturer’s guidelines for how long it takes to fully cure. This ensures you get the best durability out of your stain.
Once you’ve stained the deck, try to keep it clear of furniture and any moisture. This little effort goes a long way in making sure the stain adheres well and lasts as long as possible. Happy staining!
For optimal results, maintaining surface temperatures below 85°F during drying and curing helps prevent damage and ensures longevity.
Optimal Drying Conditions
When applying deck stain, ensuring ideal drying conditions is critical for achieving durable, long-lasting results. You want to optimize temperature, humidity, and surface dryness to maximize stain adhesion and performance. Here’s what to focus on:
- Apply stain only when air and wood temperatures range between 50°F and 90°F to prevent improper curing or tackiness.
- Avoid staining under direct sunlight or if rain is forecasted within 12-24 hours to prevent washout and uneven drying.
- Confirm the wood moisture content is below 12%, ensuring the surface is sufficiently dry for stain absorption.
- Allow 24-72 hours after cleaning for the deck to dry fully, depending on weather and humidity levels.
Following these conditions helps you achieve a resilient, uniform finish that resists peeling and fading.
Recommended Curing Duration
After ensuring ideal drying conditions, attention turns to the recommended curing duration to secure maximum stain durability and performance.
Most deck stains require a minimum curing time of 24 to 72 hours before you walk on the surface or replace furniture.
This period allows the stain’s resins and oils to fully penetrate and bond with the wood fibers, enhancing adhesion and resistance to weathering.
Follow the manufacturer’s specified curing times precisely, as they vary by product type, formulation, and environmental factors such as humidity and temperature.
Avoid premature exposure to moisture or heavy traffic during curing to prevent surface damage and peeling.
Proper curing is essential for long-term protection, color retention, and minimizing maintenance frequency on your deck’s stained surface.
Post-Application Precautions
Although the stain may appear dry to the touch within hours, you should allow the full recommended drying and curing times to guarantee peak adhesion and durability.
Proper post-application care assures your deck stain performs at its best.
Follow these key precautions:
- Wait at least 24 hours before walking on the deck or replacing furniture to avoid damage.
- Avoid exposing the freshly stained surface to rain or heavy moisture during curing.
- Maintain ambient temperatures between 50°F and 90°F for consistent drying.
- Consult the stain manufacturer’s instructions for exact curing times before applying second coats or heavy use.
Adhering strictly to these guidelines prevents premature peeling, promotes a uniform finish, and extends your deck’s lifespan effectively.
Maintaining Your Stained Deck Over Time
Regularly inspecting and cleaning your stained deck markedly extends its lifespan and preserves its appearance. Remove debris and dirt frequently. Address any damage like loose boards promptly.
Clean with a mild deck cleaner to prevent buildup that degrades stain performance. Reapply stain per product recommendations to maintain protection. Monitor for signs of wear, such as fading or peeling, and act quickly.
| Maintenance Task | Frequency | Benefit |
|---|---|---|
| Cleaning debris | Weekly | Prevents dirt buildup |
| Inspection | Monthly | Identifies damage early |
| Re-staining | Every 2-3 years | Restores protection and color |
Consistent upkeep ensures your deck remains durable, safe, and visually appealing over time.
Mistakes to Avoid When Staining Your Deck (And How to Fix Them)
Maintaining your deck’s finish demands attention not only to upkeep but also to how you apply the stain initially.
Proper deck maintenance starts with careful stain application, not just regular upkeep.
Avoid these common mistakes to make sure a durable, attractive finish:
- Skipping surface prep: Remove debris and sand after cleaning. Failure leads to poor adhesion. Fix by re-cleaning and sanding before restaining.
- Staining wet or damp wood: Always wait 24-72 hours for wood to dry below 12% moisture content. This prevents peeling.
- Applying stain unevenly: Work in small sections with consistent wet edges. Back-brushing helps avoid lap marks. Fix uneven areas by lightly sanding and recoating.
- Ignoring weather conditions: Apply stain when temperatures are 50°F-90°F. Ensure no rain is forecasted within 24 hours for proper curing. Postpone if conditions aren’t ideal.
Follow these steps to prevent costly repairs and maintain your deck’s longevity.
Frequently Asked Questions
Can I Stain Composite Decking or Only Natural Wood?
You generally can’t stain composite decking like natural wood because its synthetic materials don’t absorb stain well.
Composite decks are designed with factory-applied color and protective coatings, so staining usually won’t adhere or last.
If you want to change the color, specialized composite deck stains or paints exist but require careful surface prep and compatibility checks.
Always test a small area first and follow product instructions to avoid damage or peeling.
How Do I Remove Old Stain Before Applying a New One?
Before staining anew, you’ll want to remove old stain by scrubbing your deck with a deck cleaner or specialized stain stripper.
Start by sweeping debris, then apply the cleaner, following manufacturer instructions closely.
Use a stiff brush or pressure washer to lift residue.
Afterward, rinse thoroughly and allow 24-72 hours for drying.
Lightly sand to prepare the surface for best stain adhesion.
What Safety Gear Is Recommended When Staining a Deck?
You should wear chemical-resistant gloves to protect your skin from stains and cleaners.
Use safety goggles to shield your eyes from splashes. A respirator or mask is essential, especially in poorly ventilated areas, to avoid inhaling fumes.
Long sleeves and pants help prevent skin contact. Non-slip shoes guarantee stable footing on potentially slick surfaces.
Always follow product-specific safety instructions to minimize exposure and risks during staining.
Can I Use Exterior Paint Instead of Deck Stain?
You might think paint is a quick fix, but don’t be fooled. It’s not the best choice for your deck.
Exterior paint forms a thick film that can peel and trap moisture, causing wood damage.
Deck stains penetrate the wood, enhancing durability and appearance while allowing it to breathe.
For lasting protection and a natural look, stick with a quality deck stain designed specifically for outdoor wood surfaces.
How Do Weather Conditions Affect Stain Color Drying?
Weather conditions markedly impact stain color drying. If it’s too cold (below 50°F) or too hot (above 90°F), the stain may not cure properly. This can cause uneven color or peeling.
High humidity slows drying, leading to blotchy or darker patches. Direct sunlight can cause rapid drying, resulting in lap marks and uneven absorption.
Always apply stain during mild, dry weather and avoid rain forecasts within 12-24 hours for consistent, durable results.
Protect Your Deck With the Right Staining Method
Staining your deck properly can extend its life by up to 10 years, making preparation and technique essential.
By choosing the right stain, applying it evenly, and protecting end grain, you guarantee long-lasting durability and beauty.
Avoid common mistakes like uneven coverage or staining in poor weather.
Follow drying times carefully to achieve peak results.
With proper maintenance, your deck will remain vibrant and protected, saving you significant repair costs down the line.