Best Way to Insulate Garage Door: Complete DIY Guide
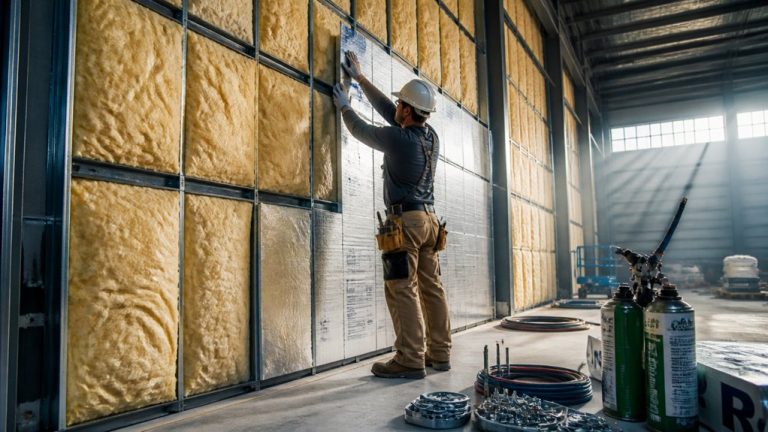
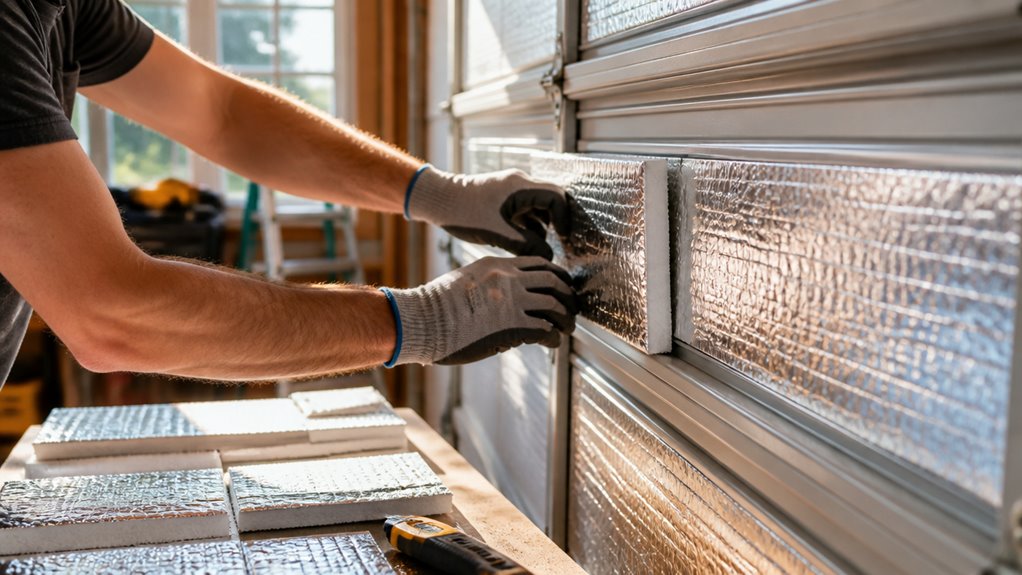
The best way to insulate your garage door is by using rigid foam board panels cut to fit each panel’s recess, with the reflective foil side facing inward for extra efficiency.
Choose an R-value suited to your climate, higher if you have extreme temperatures or an attached garage. Secure panels with retention clips and adhesive.
Then upgrade weatherstripping and bottom seals to eliminate drafts. Afterward, adjust your door springs to maintain balance.
Keep exploring for tips on extending insulation beyond the door itself.
Key Takeaways
- Use foam board insulation with reflective foil facing inward for efficient heat reflection and a tight fit within door panel recesses.
- Choose insulation with an R-value of 12 or higher for garages attached to living spaces or in extreme climates.
- Clean and prepare door surfaces thoroughly before applying insulation and use corrosion-resistant fasteners for secure attachment.
- Replace or install durable rubber or vinyl bottom seals and side weatherstripping to prevent drafts and moisture entry.
- Test door balance after insulation installation and adjust torsion springs carefully to maintain smooth operation and safety.
Why Foam Board Is the Best DIY Garage Door Insulation?

Choosing foam board insulation for your garage door makes the installation process straightforward and effective.
You’ll appreciate how easily foam board cuts to fit inside each door panel recess, ensuring a neat, secure fit. Since panel sizes can vary, measure each one individually.
Cut the foam slightly larger or snug, then trim for minimal gaps. If your foam has a reflective foil side, keep that facing inward toward your garage for added efficiency.
Most garage doors have about 1¾-inch channel depth, so 1½-inch foam boards fit well without crowding. Foam board’s rigidity also lets you press it flat and secure it with retention clips, preventing movement during door operation.
For best results, ensure the garage door surface is clean and dry before installation to promote adhesion and longevity of the insulation.
Choosing the Right Garage Door Insulation R-Value
When you select insulation for your garage door, focusing on the right R-value is essential to match your climate and usage needs.
In mild climates, choose insulation with an R-value between 6 and 8, which offers adequate thermal resistance without overkill.
If you experience hot summers or cold winters, aim for an R-value of 12 or higher to better maintain temperature control.
Consider whether your garage is attached to living spaces, as higher R-values improve comfort and energy efficiency in those cases.
Also, be mindful of your door’s panel depth. Thicker insulation mightn’t fit properly.
Checking the door’s R-value label can provide precise information about the insulation quality and type.
How to Measure and Cut Garage Door Panels?
Selecting the right R-value sets the foundation, but to get effective insulation, you need to measure and cut your garage door panels accurately.
Start by measuring each panel individually since sizes can vary. Use a tape measure to record the height, width, and recess depth, typically around 1¾ inches.
Choose foam board insulation slightly larger or a snug fit to guarantee minimal gaps. Cut the panels using a straightedge and utility knife, trimming as needed for a tight fit inside each recess.
When working with foil-faced foam board, keep the reflective side facing inward toward the garage. Take your time to make precise cuts.
A well-fitted panel improves insulation performance and prevents air leaks, setting you up for a smoother installation in the next step.
Proper preparation, including measuring and ensuring a snug fit, is essential for long-term durability and effectiveness of garage door insulation, similar to the importance of acclimation and expansion in flooring installation.
Installing Retention Clips and Adhesive for Insulation
Before you start attaching those retention clips, it’s a good idea to give the garage door surface a solid cleaning. This step really helps the adhesive stick better.
Once that’s done, go ahead and apply some double-sided tape. Just place it strategically to hold the insulation panels and clips in place while you’re installing everything.
After you’ve pressed the insulation flat, it’s time to secure the clips. You’ll want to cut small openings where the clips pass through. This little trick helps prevent any movement as the door operates, keeping everything nice and steady. Additionally, making sure the insulation is properly sealed can help prevent moisture buildup, similar to how using waterproof sealant protects sprinkler valve boxes.
Preparing Door Surface
Although cleaning the garage door surface might seem like a minor step, it’s essential for guaranteeing the adhesive bonds properly when installing retention clips and insulation.
You’ll want a clean, dry, and smooth surface free from dust, dirt, and grease. Use a mild detergent and water, then wipe the panels with a lint-free cloth.
After drying, you can apply adhesive or double-sided tape confidently.
To prepare effectively:
- Remove old adhesive residues or peeling paint with a scraper or sandpaper.
- Inspect each panel for dents or rust spots and repair before proceeding.
Taking these steps guarantees your retention clips hold firmly and your insulation stays put for long-lasting performance. Additionally, proper surface preparation helps prevent moisture trapping, which can lead to peeling or mold growth under the insulation.
Applying Double-Sided Tape
To get your insulation panels firmly in place, start by applying double-sided tape to the garage door panels where the retention clips will attach.
First, clean the door surface thoroughly to make sure the tape sticks well. Cut tape strips to match each clip’s position, pressing firmly onto the panel.
The tape acts as a temporary adhesive, holding clips or insulation steady before you secure them permanently.
When placing the tape, align it precisely so the clips fit flush without pushing insulation out of place. This method prevents shifting during installation and door operation.
Remember to work panel by panel since sizes may vary, and keep the tape clean and free of dust for maximum adhesion.
This step sets the foundation for a secure, long-lasting insulation job. Use proper tools and techniques to ensure each component is installed without damaging the garage door surface.
Securing Clips Properly
Press the insulation panels firmly against the garage door and position the retention clips over the edges where the panels meet the door frame. This guarantees the panels stay in place during door movement.
Before attaching clips, clean the door surface thoroughly to improve adhesive bonding. Use double-sided tape to temporarily hold clips or panels, then cut small slits or X-shaped openings in the insulation where clips pass through for a secure fit.
Keep these tips in mind:
Install clips at panel edges to prevent shifting during operation. Use adhesive tape for a firm initial hold before fastening clips. Confirm all clips are snug but not overly tight to avoid damaging insulation.
Properly secured clips maintain insulation integrity and improve energy efficiency. For best results, ensure the surface is free of dust and debris by removing loose dirt before applying adhesive or clips.
Upgrading Weatherstripping to Seal Garage Door Gaps
If you want to keep your garage nice and cozy, upgrading the weatherstripping around the door is a great place to start.
First things first, check that bottom seal. If it’s looking worn out or a bit squished, it’s time for a replacement. A fresh seal can make a big difference!
Next, let’s tackle the sides. Adding weatherstripping there will really help in blocking those pesky drafts.
You’d be surprised how much of a difference it can make.
Oh, and don’t forget about the floor! Installing a threshold seal can really seal the deal when it comes to reducing air leaks.
With these upgrades, your garage will be much more energy-efficient, and you’ll feel the difference!
Regular maintenance and inspection of seals ensure the long-term effectiveness of your weatherproofing efforts.
Bottom Seal Replacement
Start by inspecting the bottom seal of your garage door for signs of wear, damage, or compression. These issues allow drafts and moisture to sneak in.
Replacing the bottom seal improves insulation and keeps pests out. When you select a replacement, consider:
- Material type: Choose durable rubber or vinyl sweeps that resist cracking and flattening.
- Fit and length: Measure your door width accurately to ensure a snug, gap-free seal.
- Installation method: Most seals slide into a channel or attach with screws; some use adhesive for easy retrofit.
Before installing, clean the door’s bottom edge thoroughly to help the new seal adhere correctly. Trim the seal to size, then attach it securely.
Make sure it brushes the floor evenly without interfering with door movement. This simple upgrade enhances your garage’s energy efficiency and comfort. For best results when attaching seals with screws, use corrosion-resistant fasteners to ensure long-lasting durability and prevent rust.
Side Weatherstripping Installation
Upgrade your garage door’s efficiency by installing side weatherstripping to seal gaps along the door edges.
Start by cleaning the door frame thoroughly to ensure good adhesion. Measure the height of each side carefully, then cut weatherstripping material to exact lengths.
Peel back any protective tape on the adhesive side and press the strip firmly along the vertical edges where the door meets the frame.
Use nails or screws if your weatherstripping requires extra fastening, making sure it’s snug but doesn’t obstruct door movement.
This upgrade prevents drafts and moisture from sneaking in, improving insulation performance overall.
Check the fit by closing the door slowly to verify the seal compresses evenly without binding.
Side weatherstripping is a simple yet effective step to boost your garage’s comfort and energy efficiency.
For additional protection, consider inspecting your garage door’s foundation regularly to identify any early signs of water intrusion that could affect insulation and structural integrity.
Threshold Seal Benefits
After sealing the door edges with side weatherstripping, addressing the gap beneath your garage door can make a big difference in stopping drafts and moisture.
Upgrading to a quality threshold seal improves your garage’s energy efficiency by creating a tighter barrier where the door meets the floor.
This upgrade reduces air infiltration and prevents water from seeping inside during rain or snowmelt.
You’ll also notice less dust and pests entering through the bottom gap.
When choosing or installing a threshold seal, consider:
- Durable materials like rubber or vinyl for long-lasting protection
- Proper fit and secure attachment to avoid gaps or movement
- Compatibility with your floor surface and door clearance for smooth operation
This simple step complements your insulation efforts and enhances overall garage comfort.
Adjust Garage Door Springs After Adding Insulation
Because adding insulation increases your garage door’s weight, you’ll likely need to adjust the springs to maintain proper balance and safe operation.
Start by disconnecting the garage door opener and carefully lifting the door halfway. If it doesn’t stay put, your springs are either too tight or too loose.
Use winding bars to adjust the tension. Turn the torsion springs in small increments, usually a quarter turn at a time, to compensate for the added weight.
Always wear safety gear and follow manufacturer instructions, since spring tension can be dangerous.
After adjusting, test the door’s balance by lifting it manually; it should move smoothly and stay open around the halfway point.
Proper spring adjustment prevents strain on the opener and extends the door’s lifespan. If unsure, consult a professional.
Extending Garage Insulation Beyond the Door
While insulating your garage door is a great start, extending insulation to the walls, ceiling, and floor markedly improves temperature control and energy efficiency.
Don’t overlook these key areas to maximize comfort and reduce heat loss. Seal gaps and cracks in wall cavities with foam or fiberglass batts, then cover with drywall for a clean finish.
For the ceiling, use insulation rated R-30 or higher to block heat transfer effectively. Flooring insulation or a proper seal at the threshold prevents cold drafts from creeping in beneath the door.
Consider these practical steps:
Fill wall cavities with foam or fiberglass batts and seal with drywall.
Insulate ceilings with R-30 or better materials for enhanced thermal protection.
Install threshold seals or insulate floors to block drafts and moisture.
This all-encompassing approach complements door insulation and boosts energy savings.
Frequently Asked Questions
Can I Paint Foam Board Insulation After Installation on My Garage Door?
Yes, you can paint foam board insulation after installing it on your garage door.
Just make sure to use a paint that’s compatible with foam, like water-based latex paint, to avoid damaging the material.
Before painting, clean the surface and allow the insulation to fully adhere.
Painting helps protect the foam and gives a finished look.
Avoid solvent-based paints, as they can dissolve the foam and ruin your insulation.
How Long Does Garage Door Insulation Typically Last Before Replacement?
Garage door insulation typically lasts 10 to 15 years before you might need to replace it. Its lifespan depends on material quality, exposure to moisture, and door use frequency.
Foam board insulation can degrade if exposed to water or physical damage. To extend its life, keep the door clean and dry, check seals regularly, and repair any damage promptly.
Proper maintenance helps you avoid premature replacement and keeps insulation effective.
Are There Eco-Friendly Foam Board Insulation Options Available?
You don’t have to reinvent the wheel to find eco-friendly foam board insulation. You can choose panels made from recycled materials or those with low global warming potential blowing agents.
Some brands offer plant-based or bio-based foam boards, reducing reliance on petroleum. Look for certifications like GREENGUARD or Energy Star to guarantee environmental standards.
These options give you solid insulation without compromising your green values or budget.
Will Insulating My Garage Door Affect My Home Insurance Policy?
Insulating your garage door usually won’t affect your home insurance policy directly. However, if you add significant weight or modify the door’s structure, it might impact its operation and safety, which could be a concern.
To avoid issues, check with your insurer before installation. Also, make certain the door’s balance and spring tension are adjusted properly after adding insulation to maintain safe function and prevent potential claims linked to mechanical failure.
Can I Install Garage Door Insulation Myself Without Professional Tools?
Yes, you can install garage door insulation yourself without professional tools. Foam board panels cut cleanly with a utility knife.
You’ll just need measuring tools and basic supplies like double-sided tape and retention clips. Clean the door surface first, measure each panel carefully, then fit and secure the insulation snugly.
Adding weatherstripping around the edges improves sealing, and you can trim pieces for a tight fit. It’s a practical DIY project anyone can handle.
Take the Next Step Toward a Better-Insulated Garage
You might think insulating your garage door is just about comfort, but it’s also about saving energy and protecting your belongings.
By choosing foam board insulation with the right R-value, measuring precisely, and securing it with retention clips and adhesive, you’ll get a perfect fit.
Don’t forget to upgrade weatherstripping and adjust springs after insulating.
These small steps not only improve your garage’s efficiency but also make your entire home more comfortable and energy-efficient.