How to Remove Mould From Rubber Seal: Beat the Black Marks
To remove mould from a rubber seal, start by wearing gloves, a mask, and goggles for protection. Apply a bleach-based cleaner or baking soda paste to a microfiber cloth.
Then gently scrub with a soft brush, focusing on folds and crevices. Rinse thoroughly with warm water and wipe away residue. Air dry with the door open to prevent moisture buildup.
For tough stains and lasting prevention, follow these detailed cleaning and maintenance steps to keep your seals mould-free.
Key Takeaways
- Wear protective gloves, masks, and goggles to prevent skin contact and inhalation of mould spores during cleaning.
- Apply bleach-based cleaner or baking soda paste onto a microfiber cloth and let it sit on the rubber seal for 10–15 minutes.
- Use a soft brush or toothbrush to scrub mould from folds and crevices without damaging the rubber seal.
- Rinse the rubber seal thoroughly with warm water (40–50°C), turning it inside out to flush all folds and crevices.
- Leave the washing machine door open to air dry seals completely, preventing moisture buildup and mould regrowth.
Prepare Your Workspace and Safety Gear

Before you start removing mould from rubber seals, make sure you prepare your workspace properly and wear protective gloves to keep your hands safe from harsh cleaners.
First, guarantee the washing machine or container is empty and dry to avoid spreading moisture.
Ensure the washing machine or container is completely empty and dry to prevent moisture spread.
Gather essential tools like a microfibre cloth, a soft brush, or a toothbrush to reach crevices.
Clear the area around your workspace to prevent accidents and make cleaning easier.
Position the machine door open to allow airflow during and after cleaning.
Wearing gloves protects your skin from chemicals and mould spores, reducing irritation risk.
Proper preparation not only guarantees safety but also makes the cleaning process more efficient and thorough, helping you tackle mould effectively from the start.
Additionally, using protective gear such as masks and goggles can prevent inhalation of harmful mould spores during cleaning.
Best Cleaning Solutions for Mould on Rubber Seals
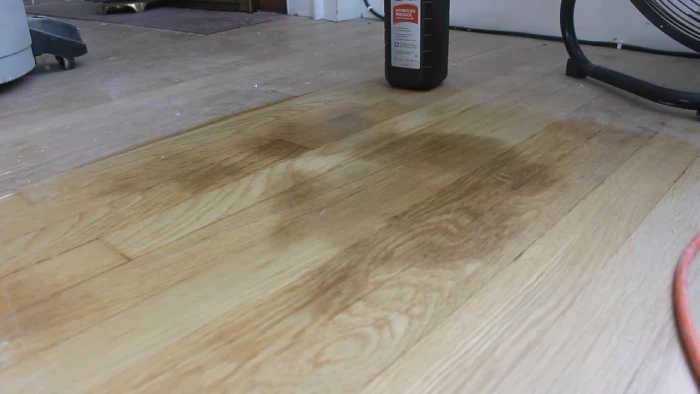
When tackling mould on rubber seals, choosing the right cleaning solution makes all the difference in effectiveness and safety. You can rely on bleach-based mould cleaners, which are powerful and effective when sprayed on a cloth first to avoid overuse.
Lysol antibacterial spray offers good antiviral action and can be applied directly. For a gentler approach, mix warm water with mild detergent or mildew remover. Baking soda paste combined with water provides a mild abrasive to lift stubborn mould.
Hydrogen peroxide (3%) diluted 1:4 with water is another great option that’s safe and effective. Each solution targets mould differently, so pick one based on your sensitivity and the mould’s severity.
Always test a small area first to prevent damage to the rubber seal. Avoid using harsh chemicals such as bleach or ammonia directly on rubber seals to prevent material degradation.
Applying Cleaning Products the Right Way
When you’re ready to tackle those rubber seals, start by applying your favorite cleaning solution. You can either spray it directly onto the seal or spray it onto a cloth for a more controlled approach—whichever works best for you!
Just make sure to cover all the folds and crevices. Those little spots can hide mould, and we definitely want to get to them.
After you’ve applied the solution, let it sit for about 10 to 30 minutes. This waiting time is super important because it helps the product work its magic.
Once the time’s up, you can jump in with some scrubbing! Always ensure proper ventilation and wear personal protective equipment when using chemical cleaners to keep yourself safe.
Proper Solution Application
Spray your chosen cleaning solution directly onto a microfibre cloth or the rubber seal itself to guarantee even coverage.
Make sure you cover the entire circumference of the seal, including folds and crevices where mould often hides.
Gently pull back the seal to access hard-to-reach areas, applying the cleaner thoroughly.
Avoid oversaturating the seal, as excessive liquid can seep inside and cause damage.
Use a soft brush or toothbrush to work the solution into stubborn spots without damaging the rubber.
Wipe the seal with the damp cloth to distribute the cleaner evenly, assuring all surfaces receive treatment.
Taking these careful steps secures the cleaning product works effectively, setting you up for successful mould removal without harming the seal’s integrity.
Ensure you wear non-latex gloves and maintain proper ventilation during cleaning to protect yourself from mold exposure and chemical fumes.
Effective Contact Time
Although applying the cleaning solution thoroughly is essential, it’s equally important to let it sit on the rubber seal for the recommended contact time.
This allows the product to penetrate mould spores and break them down effectively. Rushing this step can leave residues behind, causing mould to return.
Typically, you’ll want to leave the solution on for 10 to 30 minutes, depending on the product instructions. During this time, avoid wiping or rinsing off prematurely.
Keep these tips in mind for effective contact time:
- Follow manufacturer’s recommended duration precisely.
- Make certain the seal stays wet with cleaner throughout.
- Avoid scrubbing until after contact time ends.
- Use a spray bottle to reapply if drying occurs.
- Work in well-ventilated areas for safety and drying.
Patience here leads to a more thorough mould removal. Additionally, always wear N-95 respirators and protective gloves to ensure safety during cleaning.
How to Scrub Mould From Rubber Seals?
Focus on gently scrubbing the rubber seal’s entire surface, including folds and crevices, to remove mould effectively. Use a soft brush or toothbrush to reach tight spots and avoid damaging the rubber.
Apply your chosen cleaning solution, such as a bleach-based cleaner, antibacterial spray, or baking soda paste, directly or on a cloth. Work methodically, turning out the seal if possible for full access.
For stubborn mould, scrub firmly but carefully and repeat as needed.
A key preventative measure is to act quickly when moisture or contaminants appear to minimize damage and mold growth.
| Tool | Purpose |
|---|---|
| Microfibre cloth | Wipe and lift surface dirt |
| Soft brush/toothbrush | Scrub folds and crevices |
| Cleaning solution | Break down mould |
| Plastic scraper | Remove tough grime gently |
This approach guarantees thorough mould removal without harming the seal.
Rinse and Dry Rubber Seals to Stop Mould Growth
After you’ve scrubbed the rubber seals, make sure to rinse them thoroughly with warm water. This step is crucial to get rid of any cleaning residues that might linger. You don’t want those hanging around!
Next, grab a damp cloth and wipe away any leftover grime or cleaning solution. It’s important to ensure there are no moisture traps left behind.
Finally, leave the door open for a bit to let the seals air dry completely. This little step helps prevent mould from coming back. Easy, right?
Regularly drying rubber seals is essential because stagnant water can foster rapid mold growth and persistent odors.
Thorough Warm Water Rinse
To effectively stop mould growth on rubber seals, you’ll need to rinse them thoroughly with warm water. This step removes loosened mould spores and cleaning residues that could encourage new growth.
Use a gentle, steady flow to reach all folds and crevices where mould hides. Avoid cold water, as it won’t dissolve residues as well or help dry the seal quickly.
Keep these tips in mind for a proper warm water rinse:
- Use water around 40-50°C (104-122°F) for best results.
- Rinse the entire seal, including hidden folds.
- Avoid soaking the seal to prevent water retention.
- Use a damp cloth to wipe off loosened debris afterward.
- Make certain the seal is dry before closing the appliance door.
This thorough rinse sets the stage for effective drying and mould prevention. Monitoring moisture levels with a moisture meter can help ensure the seal is completely dry to prevent mould recurrence.
Complete Residue Removal
Make sure you remove every trace of cleaning solution and loosened mould by rinsing the rubber seals thoroughly with warm water.
Use a gentle stream to flush out all residues from the folds and crevices, turning the seal inside out if possible for better access.
After rinsing, wipe the seal with a damp microfiber cloth to catch any remaining particles or cleaner.
Avoid leaving any wet spots or detergent behind, as these can encourage mould regrowth.
Pay special attention to the seal’s inner edges and plastic paddles, where moisture tends to linger.
Once you’ve removed all residues, promptly dry the rubber seal with a clean cloth to prevent dampness.
This thorough residue removal is essential to stop mould from returning and keep the seal clean longer.
For best results, use a microfiber cloth to avoid scratching or damaging the rubber surface during cleaning.
Effective Air Drying
Consistently leaving the door open after cleaning lets air circulate freely around the rubber seals. This helps them dry completely and prevents moisture buildup that encourages mould growth.
After rinsing thoroughly with warm water, wipe down the seals with a damp cloth to remove any leftover residue. Prop the door open for at least an hour to allow full air drying.
Avoid relying on natural air-drying alone, especially on food container gaskets. Trapped moisture can trigger mould regrowth.
To ensure effective air drying, remember to:
- Rinse seals thoroughly to remove cleaning agents
- Wipe with a damp cloth to clear residues
- Leave the door open for sufficient airflow
- Avoid sealing the door immediately after cleaning
- Check seals for dampness before closing the door
These steps stop mould before it can take hold again. Proper cleaning also involves removing all residues to prepare surfaces and prevent damage, as residue buildup can promote further mould growth adhesive residue removal.
How to Handle Stubborn Black Marks on Rubber Seals?
How do you tackle stubborn black marks that refuse to come off rubber seals? Start by wearing protective gloves and preparing a bleach-based mould cleaner or a baking soda paste for gentle abrasion.
Spray the solution onto a microfibre cloth or directly on the seal, then let it sit for 10-15 minutes to break down the grime.
Gently pull out the seal’s folds to access hidden areas. Use a soft brush or an old toothbrush to scrub the marks thoroughly, focusing on crevices and plastic paddles.
Repeat this process if needed. After scrubbing, rinse the seal with warm water and wipe away residue with a damp cloth.
Finally, leave the door open to air dry completely, preventing moisture buildup that causes black marks to return.
How to Keep Mould Off Rubber Seals?
Regularly leaving the door ajar after using your washing machine is one of the simplest ways to keep mould off rubber seals. This allows moisture to evaporate, preventing the damp conditions mould thrives in.
You should also wipe the seal dry immediately after each use to remove water and detergent residues. Minimizing grease and dirt buildup helps reduce mould growth, so clean the seal regularly.
Occasionally applying a mould removal treatment after cleaning keeps the seal protected. Remember, maintaining dryness and cleanliness is key.
Here are five essential tips to keep mould off rubber seals:
- Leave the door open to air out moisture.
- Wipe seals dry promptly after washing.
- Clean seals with mild detergent regularly.
- Reduce grease and debris on seals.
- Apply mould prevention treatments post-cleaning.
When and How to Use Sanitizing Cycles and DIY Cleaners?
Although you can manually clean rubber seals to remove mould, running a sanitizing cycle with a DIY cleaner adds an extra layer of protection. This thoroughly disinfects hard-to-reach areas inside your washing machine.
Use this cycle after a deep clean or when you notice lingering musty smells. Prepare a solution by mixing warm water with a mild detergent, or create a diluted hydrogen peroxide spray (1 part peroxide to 4 parts water).
Pour your solution into the detergent drawer or directly into the drum. Run the sanitizing cycle on the hottest setting to kill mould spores effectively. This method helps tackle hidden mould inside seals and pipes, reducing regrowth.
Daily Maintenance Tips to Keep Rubber Seals Mould-Free
Consistently keeping rubber seals dry and clean prevents mould from taking hold in the first place. You can maintain mould-free seals by adopting simple daily habits that reduce moisture and residue buildup.
Keeping rubber seals dry and clean daily effectively prevents mould growth and residue buildup.
After each use, wipe the seal thoroughly with a dry cloth to remove any dampness or grime. Always leave the door or lid slightly open to allow air circulation and faster drying.
Avoid letting water or detergent pool in the crevices, as this encourages mould growth. Regularly inspect the seal for early signs of mould and address them immediately.
Here are five daily maintenance tips to keep rubber seals mould-free:
- Wipe seals dry immediately after cleaning or use
- Leave doors or lids propped open to air out
- Run sanitizing cycles regularly with mild cleaners
- Minimize grease and water residue on seals
- Apply mould removal treatment after deep cleaning
Frequently Asked Questions
Can Mould on Rubber Seals Cause Health Problems?
Yes, mould on rubber seals can cause health problems, especially if you’re sensitive or allergic. You might experience respiratory issues, coughing, or skin irritation from mold spores.
It’s important to clean and dry those seals regularly to prevent mould buildup. Taking care of mould promptly protects your health and keeps your appliances working well.
Don’t ignore black marks or musty smells; they’re signs you need to act fast.
What Types of Gloves Are Best for Handling Mould Cleaners?
When it comes to handling mould cleaners, you should always wear nitrile or rubber gloves. They’re the cream of the crop for protection.
These gloves resist harsh chemicals like bleach and antibacterial sprays, keeping your hands safe from irritation or burns. Make sure they fit snugly to avoid any leaks.
Avoid latex if you’re sensitive. Wearing the right gloves means you can tackle mould without biting off more than you can chew.
Are Natural Cleaning Alternatives Effective Against Mould on Rubber Seals?
You can use natural cleaning alternatives like baking soda paste or diluted hydrogen peroxide to tackle mould on rubber seals effectively.
They work by gently abrading and disinfecting without harsh chemicals. However, they might need repeated applications for stubborn mould.
Always scrub thoroughly and rinse well. While natural options are safer, they may not act as quickly as bleach-based cleaners. Be patient and consistent to prevent regrowth.
How Often Should Rubber Seals Be Professionally Inspected for Mould?
You should have rubber seals professionally inspected for mould at least once a year, especially if you notice persistent dampness or musty odors.
If you live in a humid environment or use the appliance frequently, consider inspections every six months. Regular checks catch hidden mould early, preventing damage and health risks.
Meanwhile, keep up with your routine cleaning and drying to minimize mould growth between professional inspections.
Can Mould on Seals Damage the Washing Machine or Container?
Yes, mould on seals can damage your washing machine or container.
It causes rubber to degrade, leading to cracks and leaks. This lets water escape, potentially harming internal components and causing unpleasant odors.
If you ignore mould, it also promotes bacterial growth, which affects hygiene.
You’ll want to clean mould promptly and regularly inspect seals to keep your appliance working well and avoid costly repairs.
From Stained to Spotless: Winning the Battle Against Mould
You’d think mould on rubber seals is impossible to beat, but with the right steps, you can erase it like it never existed. Just suit up, choose the best cleaners, scrub smart, and dry thoroughly; it’s that simple.
Don’t let stubborn black marks scare you; persistence wins. Keep up daily maintenance, and your seals will stay spotless, saving you from a mouldy nightmare that feels like it’s taken over your whole home.