Laser Guide for Chop Saw: Improve Cutting Precision Easily
You’ll want a laser guide that fits your chop saw’s blade size and arbor flange, especially models like the Oshlun LG-M01 for easy installation and strong performance.
Before you start, unplug the saw and remove the blade carefully. Then mount the laser flush against the blade for accurate cuts and recessed protection.
Align the beam precisely along the blade edge to boost cutting accuracy and safety. Keep it tight and clear to avoid shifts and blurry lines.
There’s more to know about compatibility, troubleshooting, and maximizing benefits.
- Fits Most 7-1/4, 8, 8-1/4, 10, And 12-Inch Miter, Sliding Compound Miter, Chop, And Portable Saws
- New Recessed Laser Design To Protect The Laser From Hitting The Material On Deep Cuts
- New Thinner Design To Fit More Saws
Key Takeaways
- Laser guides fit most chop saw blade sizes (7-1/4 to 12 inches) but verify flange compatibility before purchase.
- Install laser guides by mounting flush between blade and arbor flange, ensuring a snug, wobble-free fit.
- Align the laser beam to run precisely along the blade edge for an accurate cutting path.
- Use match marks on the saw and laser to maintain consistent alignment after removal or battery changes.
- Laser guides enhance safety by clearly showing the cut line, reducing hand positioning risks and improving cutting precision.
Which Chop Saws Are Compatible With Laser Guides?

When choosing a laser guide for your chop saw, you’ll find that most models fit 7-1/4, 8, 8-1/4, 10, and 12-inch saws, including miter, sliding miter, and portable varieties.
These guides serve as retrofit accessories, ideal if your saw lacks factory-installed lasers. Newer, thinner designs improve compatibility across more saw brands and styles.
Keep in mind, some 12-inch saws with interlocking arbor flanges won’t work due to mounting challenges. The laser’s recessed construction protects it during deep cuts, ensuring durability.
If you want a laser guide that fits flush and aligns precisely, verify your saw’s blade size and flange type before purchasing. This way, you’ll avoid compatibility issues and get the most out of your upgrade.
For enhanced accuracy and ease of use in finish work, consider tools featuring tool-free depth adjustment mechanisms similar to those found in top brad nailers.
How to Install a Laser Guide on Your Chop Saw?
Sure! Here’s a more conversational version of the text:
First things first, let’s get your chop saw ready. You’ll want to start by carefully removing the blade and the blade bolt. Just a heads-up—some of those bolts have reverse threads, so keep an eye out for that!
Once you’ve got the blade off, it’s time to mount the laser guide. Make sure to position it flush against the blade. This step is super important because you want it to be secure and safe.
Now comes the fun part! Align the laser beam so it’s spot on with the blade path. This will help you get those precise cuts you’re after. Once you’ve got everything lined up, just tighten everything down, and you’re good to go!
For the best results, consider using a blade with laser-cut stabilizer vents to reduce vibration and improve cutting accuracy.
Preparing The Saw
Begin by ensuring your chop saw is unplugged and the blade is fully stopped to guarantee safety during installation. Next, remove the blade bolt and blade assembly carefully. Remember, many saws use reverse-thread bolts, so turn them opposite to what you might expect.
Inspect the blade and arbor flange to confirm compatibility with your laser guide. Some 12-inch saws have interlocking flanges that won’t fit.
Here’s a quick compatibility check:
| Saw Size (inches) | Arbor Type | Laser Fit Status |
|---|---|---|
| 7-1/4 to 10 | Standard flange | Compatible |
| 12 | Interlocking flange | Possibly incompatible |
| 12 | Standard flange | Compatible |
Ensure the saw is clean and free from debris before proceeding to mounting. Proper maintenance, including cleaning dust and debris, helps maintain consistent operation and prolongs tool life.
Mounting The Laser
Loosen the blade bolt and carefully remove the blade assembly to prepare for mounting your laser guide.
Keep in mind that many saws use reverse-threaded bolts, so turn the bolt opposite to what you may expect.
Position the laser guide flush against the blade arbor, guaranteeing it sits securely without wobble.
Tighten the blade bolt firmly to lock the laser in place, avoiding any gaps that could affect accuracy or safety.
Before final tightening, check that the laser housing doesn’t interfere with blade rotation or saw components.
Most laser guides open via rear screws or battery compartments, so install batteries now if needed.
Proper mounting protects the unit during deep cuts and guarantees it remains stable throughout use.
With the laser solidly mounted, you’re ready for beam alignment next.
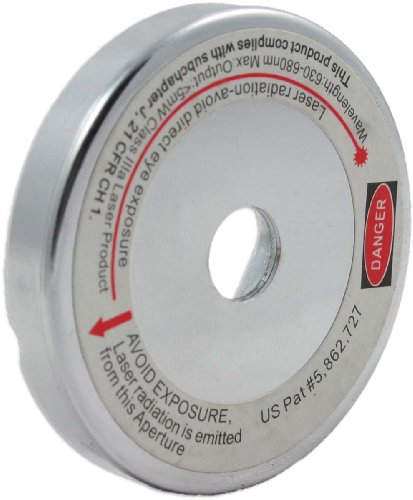
For best results, ensure your laser guide is a Class IIIA laser, as commonly featured on quality drill presses for precise alignment.
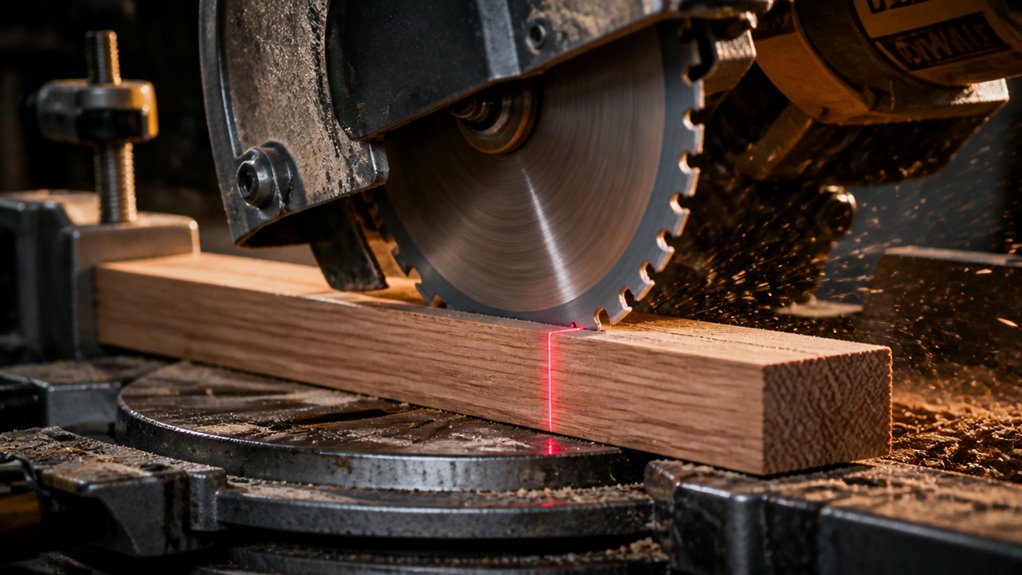
Aligning The Beam
Focus on aligning the laser beam so it accurately marks the blade’s cut line before you make any cuts. Start by powering on the laser and lowering the blade to a safe position.
Adjust the laser housing so the beam runs flush along the blade’s edge, ensuring it points exactly where the blade will cut. Use fine-tuning screws or sliding mounts if available to achieve precise alignment.
To maintain accuracy over time, mark the laser’s position on the saw head with a permanent marker. Avoid blurry or offset beams by checking visibility from your typical working angle.
Proper alignment boosts your cutting precision and enhances safety by clearly indicating the blade’s path. Don’t rush; take your time to get the beam perfectly aligned before proceeding.
For optimal results, ensure your adjustments are as precise and user-friendly as the digital readouts and quick-lever adjustments found on high-quality woodworking equipment.
- Fits Most 7-1/4, 8, 8-1/4, 10, And 12-Inch Miter, Sliding Compound Miter, Chop, And Portable Saws
- New Recessed Laser Design To Protect The Laser From Hitting The Material On Deep Cuts
- New Thinner Design To Fit More Saws
Troubleshooting Laser Guide Installation
If your laser guide isn’t mounting securely, the first thing to do is double-check the direction of the blade bolt. You want to make sure it’s fitted flush against the blade. Trust me, misalignment is one of the biggest culprits behind inaccurate cut lines.
So, take a moment to match-mark the laser to the saw head. This little step can make a big difference in getting that precise adjustment you’re looking for.
Also, ensure your saw has an adjustable pivoting shoe to maintain consistent blade contact and improve cut accuracy when using the laser guide.
Common Installation Challenges
Though the installation process for laser guides is generally straightforward, you may encounter challenges like removing the blade bolt due to reverse-thread hardware or guaranteeing the laser sits perfectly flush against the blade. These issues can slow you down, but knowing what to expect helps.
Here are common challenges you might face:
1. Reverse-thread blade bolt
Unlike standard bolts, you turn it the opposite way. Make sure you apply the correct torque to avoid damage.
2. Laser alignment flushness
The laser unit must sit snugly against the blade to tighten securely and prevent shifting during use.
3. Compatibility with arbor flanges
Some 12-inch saws have interlocking flanges that prevent proper laser mounting, requiring alternative solutions or adapters.
Being aware of these hurdles guarantees smoother installation and safer operation. Additionally, understanding blade features like laser-cut stabilizer vents can help you choose blades that reduce vibration and improve cut accuracy, complementing your laser guide setup.
Aligning Laser For Accuracy
Since precise alignment directly affects your cut quality, you’ll want to carefully adjust the laser guide so its beam matches the blade’s cutting path exactly. Start by loosening the mount screws just enough to shift the laser.
Make small adjustments while lowering the blade to verify the laser line aligns with the blade teeth at the cutting point. Once aligned, tighten the screws securely to prevent movement.
Use match-marking for repeatable accuracy after removal or battery changes.
For enhanced precision in your projects, consider drills with variable speed control to adapt to different materials and maintain consistent performance.
| Common Issue | Solution |
|---|---|
| Laser shifted after use | Retighten screws, realign beam |
| Blurry laser line | Clean lens, replace batteries |
| Misalignment after install | Use match marks, adjust mount |
How to Align a Laser Guide With Your Saw Blade?
To line up your laser guide accurately with the saw blade, start by ensuring the saw is unplugged and the blade securely mounted. Proper mounting is vital because the laser must sit flush against the blade for consistent alignment.
Here’s how to proceed:
- Loosen the blade bolt just enough to fit the laser guide between the blade and arbor flange, then tighten securely.
- Switch the saw on briefly to verify the laser line matches the blade’s cutting path. Adjust the guide laterally if needed.
- Once aligned, mark the laser guide and saw head with a pencil or tape to maintain alignment after future adjustments or battery changes.
This method guarantees your laser guide reliably indicates the cut line, improving your setup’s safety and precision. For best results, always wear safety glasses and other protective gear while making adjustments or cuts.
Improving Cutting Accuracy With Laser Guides
Once you’ve aligned your laser guide with the saw blade, you can markedly improve the accuracy of your cuts. The laser projects a precise cut line directly onto your material, letting you position the workpiece exactly where the blade will bite.
Aligning your laser guide with the blade ensures precise cuts by clearly marking the exact cutting line.
This eliminates guesswork and reduces miscuts greatly. Because the laser beam closely matches the blade’s path, you’ll see where the cut will land before you start the saw.
For best results, maintain alignment by match-marking the laser on the saw head after installation. This keeps your setup consistent over time.
Also, make sure the laser line is clear and bright; a blurry line compromises precision. With this setup, you’ll transform your chop saw into a precision cutting tool, especially useful for fine crosscuts and angle cuts.
Regular maintenance and calibration of the laser guide are essential to prevent alignment drift that can reduce cutting accuracy over time.
Safety Benefits of Using a Laser Guide on Chop Saws
Although chop saws are powerful tools, adding a laser guide markedly enhances your safety by clearly showing where the blade will cut before you start.
This visual aid helps prevent mistakes and reduces the chance of accidents. Here’s how a laser guide boosts safety:
- Improved alignment: You see the exact cut line, so you avoid awkward hand positions that increase injury risk.
- Consistent setup: Proper laser mounting guarantees the beam matches the blade path, keeping your cuts predictable and safe.
- Reduced material kickback: By confirming the cut line visually, you minimize unexpected material movement during operation.
Materials You Can Cut With a Laser-Guided Chop Saw
When you add a laser guide to your chop saw, you gain the confidence to cut a variety of materials with precision. The laser clearly marks the cut line, helping you make accurate crosscuts and angle cuts on common shop materials.
You can work efficiently on wood, plastics like PVC and nylon, and light metals such as aluminum. This versatility turns your saw into a precision tool for multiple projects.
| Material Type | Common Uses | Cutting Tips |
|---|---|---|
| Wood | Framing, trim | Use sharp blades for clean cuts |
| Plastics | PVC pipes, nylon parts | Cut slowly to avoid melting |
| Aluminum | Light metal framing | Use blades designed for metal |
| Composite | Laminate, MDF | Support material to reduce tear-out |
With laser guidance, you’ll cut these materials more confidently and accurately every time.
Best Laser Guide Models for Chop Saws, Including the Oshlun LG-M01
If you’re looking to upgrade your chop saw with a reliable laser guide, models like the Oshlun LG-M01 stand out for their balance of performance and ease of installation. The LG-M01 fits most common saw sizes and offers recessed laser protection during deep cuts. It’s a straightforward retrofit accessory that enhances cutting precision without complex setup.
Upgrade your chop saw with the Oshlun LG-M01 for reliable, precise laser guidance and easy installation.
Here are three top considerations when choosing a laser guide:
- Compatibility: Make sure the guide fits your saw’s blade size and arbor flange design.
- Installation: Look for models with quick mounting that secure flush against the blade for accuracy.
- Laser clarity: A bright, crisp line aligned with the blade path improves your cut precision.
The Oshlun LG-M01 excels in these areas, making it a practical upgrade for most chop saw users.
Frequently Asked Questions
How Long Do the Batteries Typically Last in a Laser Guide Unit?
You can expect batteries in a laser guide unit to last several hours of continuous use, typically between 8 to 12 hours depending on the battery type and laser brightness.
Since most units use silver oxide batteries, they offer steady power for extended periods.
To maximize battery life, turn the laser off when not cutting and keep spare batteries handy.
Proper installation of batteries also guarantees consistent performance throughout your projects.
Can Laser Guides Be Used Outdoors in Bright Sunlight?
Think of a laser guide as a flashlight trying to cut through midday sun. It struggles.
You can use laser guides outdoors, but bright sunlight often dims the laser line, making it hard to see clearly.
For best results, work in shaded areas or during lower light conditions like early morning or late afternoon. This way, you’ll maintain accuracy and keep your cuts precise without fighting the glare.
Are There Any Maintenance Tips to Extend Laser Guide Lifespan?
To extend your laser guide’s lifespan, keep the laser lens clean and free from dust or debris using a soft cloth.
Avoid impacts and rough handling, especially around the recessed laser area.
Replace batteries promptly to prevent leakage and corrosion.
Always mount the unit flush and secure to reduce wear from vibrations.
Store your saw and laser in a dry place to prevent moisture damage.
These simple steps keep your laser accurate and reliable longer.
Will a Laser Guide Affect the Saw’s Warranty or Resale Value?
Oh sure, because every manufacturer is just dying to void your warranty over a tiny laser guide!
In reality, adding a laser guide usually won’t affect your saw’s warranty if you install it carefully and avoid damaging any parts.
However, be cautious; some warranties might frown on aftermarket modifications.
As for resale value, a well-installed laser guide can actually boost it by showcasing precision upgrades.
This makes your saw more appealing to buyers.
Can Laser Guides Be Used on Non-Miter Chop Saws or Other Tools?
Yes, you can use laser guides on non-miter chop saws and some other portable saws, as long as the size fits—usually 7-1/4 to 12 inches.
Just make sure the laser mounts flush against the blade and the saw’s arbor flange allows secure installation.
However, some 12-inch saws with interlocking flanges mightn’t be compatible. Always check the laser guide’s compatibility with your specific tool before buying or installing.
- Fits Most 7-1/4, 8, 8-1/4, 10, And 12-Inch Miter, Sliding Compound Miter, Chop, And Portable Saws
- New Recessed Laser Design To Protect The Laser From Hitting The Material On Deep Cuts
- New Thinner Design To Fit More Saws
Laser Guides Help Deliver Cleaner and More Accurate Cuts Every Time
You might think a chop saw’s precision relies solely on your skill, but adding a laser guide flips that notion.
It’s not just about cutting wood or metal. It’s about cutting mistakes and wasted time.
With proper installation and alignment, a laser guide transforms your saw into a precision tool.
This boosts accuracy and safety. Don’t settle for guesswork when you can have clear, confident cuts every time.
Last update on 2026-06-17 / Affiliate links / Images from Amazon Product Advertising API