What Causes White Spots on Hardwood Floors?
White spots on your hardwood floors usually stem from moisture intrusion, which lifts the finish and traps water in wood fibers. This causes discoloration and swelling. Improper finish application, such as curing in unsuitable temperatures or layering incompatible sealants, can also create cloudy white patches.
Surface damage from chemical exposure or inadequate maintenance further highlights these spots. Understanding the specific causes and maintenance actions will help you address and prevent these blemishes effectively.
Key Takeaways
- White spots often result from moisture trapped beneath the hardwood finish due to spills, humidity, or leaks.
- Improper curing of finishes, especially under unsuitable temperature or humidity, causes milky white discoloration.
- Applying water-based finishes over oil-based sealers without proper sanding leads to uneven, blotchy white spots.
- Surface discoloration can occur from finish wear, chemical exposure, or incompatible rug pads causing dull white patches.
- Spider droppings appear as tiny white spots, usually near webs, and require prompt cleaning to prevent staining.
Moisture and Water Damage Effects on Hardwood Floors
When hardwood floors absorb moisture from humidity, leaks, or flooding, the wood fibers swell and expand, causing physical deformations such as cupping and crowning. Regular cleaning and maintenance help minimize such damage and distinguish it from water damage.
Cupping manifests when board edges rise above the center due to moisture penetrating from below, while crowning occurs when the center swells beyond the edges after uneven moisture absorption. Prolonged exposure leads to warping and buckling, creating uneven surfaces and gaps between boards.
This moisture infiltration compromises the floor’s structural integrity, weakening load-bearing capacity and increasing susceptibility to rot and permanent deformation. Quick action involves removing water with vacuums or towels and using dehumidifiers and fans to mitigate damage.
Additionally, water often seeps into subfloors like plywood or OSB, causing swelling and structural weakening beneath the hardwood. If not addressed promptly, these effects necessitate professional repair or replacement to restore floor stability and safety.
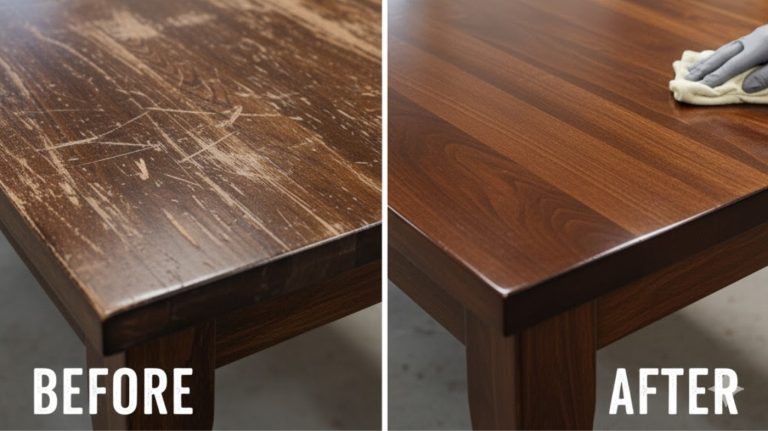
Techniques for Removing White Spots From Wood
So, if you’ve got those pesky white spots on your wood, don’t worry! You can start tackling them with some simple home remedies. Things like mineral oil, a baking soda paste, or even gentle heat can be really effective.
These methods are great for tackling surface-level stains without risking any damage to the finish. White stains are surface discolorations that usually only affect the finish and are more common on newer lacquered floors. Regular gentle cleaning methods, like using a microfiber dust mop, can help maintain the floor’s appearance and prevent further buildup.
Now, if those tricks don’t completely get rid of the spots, you might need to think about professional refinishing. This is especially true if the damage goes deeper than just the surface.
It’s all about making sure you choose the right approach to keep your hardwood in great shape while also getting rid of that discoloration. Proper maintenance, including occasional vacuuming with soft attachments, can extend the life of your hardwood floors and minimize damage.
Home Remedies
Although white spots on hardwood floors can seem stubborn, several effective home remedies leverage common household ingredients and gentle techniques to restore your wood’s appearance.
You can use a 50/50 mixture of white vinegar and water, sprayed lightly and agitated with a soft bristle brush to break down residue without damaging the finish. It is recommended to test solution on a small, hidden area first to ensure your floor’s finish is not dulled by the vinegar.
Always apply cleaning solutions with a pH-neutral cleaner to maintain the wood’s protective finish. Baking soda paste, applied with circular motions and wiped off promptly, acts as a mild abrasive to lift stains safely.
For deeper conditioning, a blend of vinegar and vegetable oil simultaneously cleans and moisturizes finishes sensitive to water. Mayonnaise’s oil content also penetrates wood fibers to reduce water stains when left on for several hours.
Applying low heat with a covered iron can drive out trapped moisture but must be done cautiously to avoid scorching. Quick action and gentle methods yield the best results.
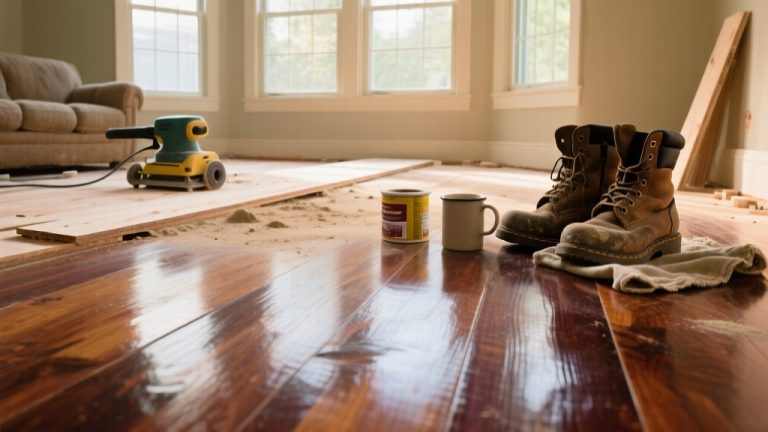
Professional Refinishing
Home remedies can address minor white spots on hardwood floors, but persistent or widespread damage often requires professional refinishing techniques.
Start by using a floor buffer with a maroon or fine sanding screen to gently abrade the damaged finish layer. Hand-sand corners and edges with 180-grit sandpaper where buffers can’t reach.
Progress from coarse to finer grits (100-120) to smooth the surface. Patch cracks with wood filler before sanding, and thoroughly vacuum between passes to remove dust.
After sanding, clean the floor with hardwood-specific cleaners and apply a tack cloth to eliminate fine particles. Use a stain matching the wood tone, applying it evenly with the grain.
Finish with multiple thin coats of water-based polyurethane, allowing each to dry fully and scuff sanding lightly for adhesion. Maintain low humidity and control dust to prevent recurring white spots.
For stubborn or deep-seated spots, consider that sanding and refinishing may be the most effective solution to restore your hardwood floor’s appearance.
Issues Related to Finish and Sealant Application
When you’re applying sealant, it’s super important to make sure the wood’s moisture content is just right. Plus, you want to ensure that the product is well-mixed. If not, you might end up with some annoying white spots due to curing problems.
White stains often indicate moisture trapped in timber fibers, which can happen if the finish is worn or improperly applied. Using a fire retardant product can also affect how finishes cure if not applied correctly.
Also, keep in mind that improper curing can happen if the environment isn’t ideal. For example, high humidity or low temperatures can lead to issues like cloudiness or uneven pigmented areas. Ensuring proper drying and curing time is essential for achieving a durable and clear finish on hardwood floors.
Sealant Application Errors
Because sealant application plays a critical role in the durability and appearance of hardwood floors, you must apply sealants correctly to avoid common errors. Incorrect techniques, such as uneven spreading or poor wetting, cause inconsistent finish and white spotting.
Failing to prepare the surface thoroughly leads to contamination, compromising adhesion. Applying sealants in unsuitable temperatures or humidity disrupts drying and finish integrity. It is also essential to choose a finish that matches the space’s demands, as finish impact greatly influences floor performance.
Using incompatible sealants or finishes with the wood type often results in peeling or finish failure. Additionally, insufficient coats or premature recoating reduce protection and promote white spots. Proper surface preparation before sealant application helps ensure better adhesion and finish durability.
To prevent poly beads, small dried polyurethane spheres, maintain stable site conditions and control humidity. Sidebonding, where boards glue together, occurs with waterborne finishes but can be mitigated by oil-modified sealers and consistent humidity.
Finish Curing Problems
Although sealant application sets the stage, finish curing plays an equally critical role in achieving a flawless hardwood floor surface.
You must control environmental factors carefully. High heat, direct sunlight, low humidity, or excessive airflow accelerate drying, causing incomplete film formation and milky white spots. Maintaining consistent environmental conditions is essential to avoid defects such as uneven gloss. These conditions can also affect how the finish interacts with the wood grain, influencing the final appearance and durability.
Conversely, cold temperatures slow curing, trapping moisture or solvents, which also results in cloudiness. Always maintain manufacturer-recommended temperature and humidity levels. Additionally, guarantee surfaces are thoroughly cleaned and free from contaminants like oil or residue before application. Use fresh, compatible finish products and mix them thoroughly.
Avoid overworking or applying excessively thick coats, as these lead to bubbles and uneven drying. Finally, respect proper recoat windows to prevent solvent entrapment.
Attention to these finish curing details will minimize white spot defects and ensure ideal floor appearance. Proper care, including avoiding harsh chemicals and maintaining surface quality, helps prolong the lifespan of the finish and the hardwood floor itself.
Uneven Pigmented Spots
Uneven pigmented spots often arise from a combination of finish and sealant application errors that compromise the floor’s color uniformity.
When staining over uncured sealants or applying water-based finishes atop oil-based sealers without proper sanding, you risk blotchy discoloration and uneven pigmentation. It is also important to allow floors to be fully dried before applying any finishes to avoid such issues, as proper drying times ensure better pigment absorption and uniformity.
Inconsistent water-popping or uneven stain and sealer coverage further exacerbate spotty appearances. Environmental factors like moisture and temperature fluctuations during application also impact pigment distribution, causing patchiness.
Additionally, using incompatible rug pads or chemical exposure after finishing can contribute to discoloration and dullness, worsening uneven pigmentation.
To avoid uneven pigmentation, consider these critical points:
- Ensure thorough sanding and removal of contaminants before stain or sealer application.
- Apply stains and sealants evenly, respecting curing times and compatibility.
- Control environmental conditions, humidity, temperature, and moisture to promote uniform drying and pigment absorption.
Adhering to these practices preserves your floor’s consistent, rich finish.
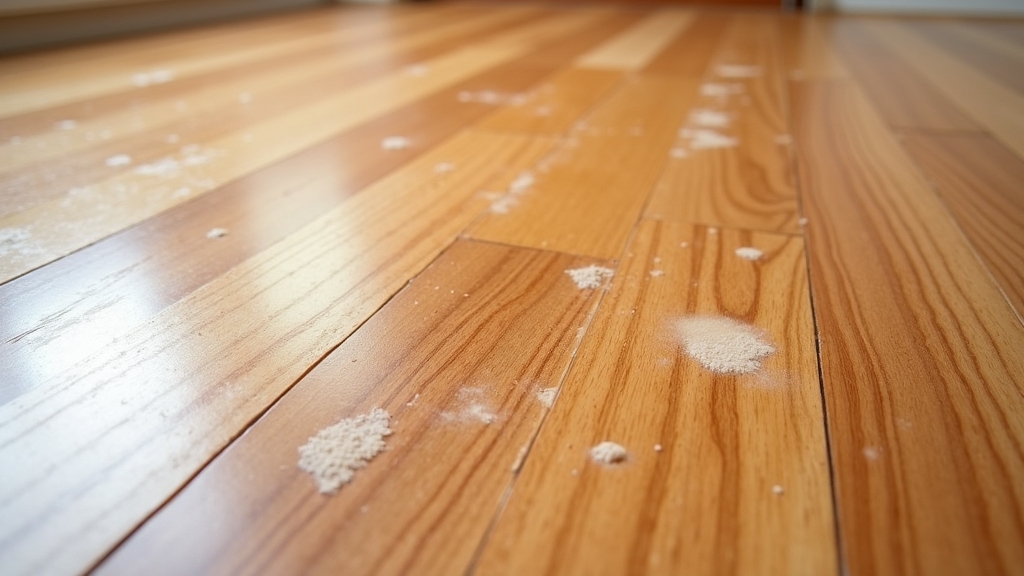
Identifying Spider Droppings on Hardwood Surfaces
When you spot tiny, pinhead-sized splats in shades ranging from white to black on your hardwood floors, you might be encountering spider droppings. These droppings, composed of digested insect remains and waste, typically appear beneath spider webs, especially in corners or under furniture where disturbance is minimal.
You’ll notice clusters of these spots near active webs or live spiders, often accompanied by egg sacs. Proper cleaning techniques and surface preparation help protect your hardwood floors from stains and damage.
Unlike mold or paint splatters, spider droppings have distinct size, shape, and coloration patterns. Fresh droppings wipe away easily with a damp microfiber cloth, but dried ones may require gentle scraping or specialized cleaners. They can leave yellowish stains if not cleaned promptly.
Though they pose minimal health risks, these droppings can stain and damage hardwood surfaces if left untreated, so prompt identification and cleaning are essential for maintaining your floors’ appearance.
Environmental and Usage Factors Contributing to White Spots
While white spots on hardwood floors can stem from various sources, environmental conditions and usage patterns play a pivotal role in their development.
Moisture intrusion from spills, humidity fluctuations, or condensation near HVAC systems can penetrate and lift the finish, creating those characteristic white stains. Choosing floors with advanced Aluminum oxide finishes can help resist such moisture damage by providing a durable protective layer.
Moisture from spills, humidity changes, or HVAC condensation can seep in and lift the wood floor finish, causing white stains.
Additionally, everyday wear and tear, including scratches and chemical exposure, degrade the protective coating, making your floor more susceptible to moisture damage. Temperature changes further stress the wood and finish, accelerating finish breakdown and spot formation.
Key contributing factors include:
- Moisture exposure from spills, humidity, and condensation
- Finish wear from abrasion, chemical cleaners, and aging
- Environmental variations in temperature and indoor humidity levels
Regular inspection and maintenance are essential to detect early signs of water stains and prevent permanent damage.
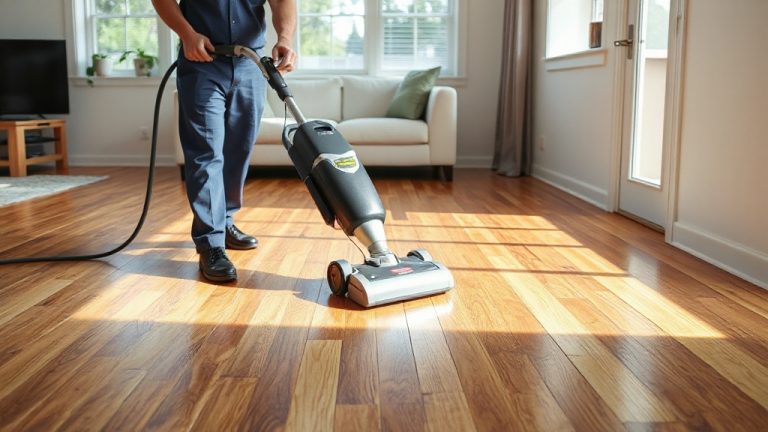
Preventive Measures and Maintenance Tips for Hardwood Floors
Addressing the environmental and usage factors that lead to white spots on hardwood floors requires consistent preventive care and maintenance. You should dust daily with a microfiber mop and vacuum weekly using a hard floor setting to avoid scratches. Using vacuums with rubber wheels further prevents damage to the floor finish.
Wipe spills immediately with a soft cloth and avoid wet mopping. If mopping, use a barely damp mop with pH-neutral, wood-specific cleaners. Protect floors by placing felt pads under furniture, using rugs without rubber backing, and avoiding high heels.
Maintain indoor humidity at 35%-45% and temperature between 60-80°F to minimize moisture-related finish damage. Perform deep cleanings monthly and professional inspections annually. Avoid harsh chemicals and use fine steel wool sparingly for stain removal.
Consistently applying these measures preserves the finish and prevents white spots caused by moisture, abrasion, or chemical damage.
Frequently Asked Questions
Can White Spots on Hardwood Floors Cause Structural Damage Over Time?
Yes, white spots on hardwood floors can cause structural damage over time. When moisture penetrates the wood finish, it leads to swelling, warping, and weakening of floorboards. If you ignore these spots, the trapped moisture can foster mold growth, degrade wood fibers, and loosen nails or adhesives.
Addressing white spots promptly helps you prevent costly repairs like plank replacement or full floor renovation by maintaining your floor’s structural integrity.
Do Certain Wood Species Resist White Spot Formation Better Than Others?
Yes, you’ll find that dense hardwoods like oak, maple, and hickory resist white spots better due to their tight grain limiting moisture absorption. Woods such as teak and mahogany, rich in natural oils, also fend off moisture-related discoloration effectively.
In contrast, softer species like pine absorb moisture more readily, increasing white spot risk. Choosing species with natural oils and tighter grains, combined with proper finishes, enhances resistance considerably.
Are Professional Refinishing Services Necessary for All White Spot Cases?
You don’t always need professional refinishing for every white spot. Imagine a small, cloudy ring from a cold glass. Often, household remedies like mineral oil or gentle heat can lift it.
But if the spots are large, darkened, or the finish feels raised, that’s when expert sanding and sealing become essential. Professionals restore your floor’s integrity and uniform look, especially when moisture penetrates deeply or repeated DIY tries fail to clear the blemish.
Can Pets Contribute to or Worsen White Spots on Hardwood Flooring?
Yes, pets can contribute to and worsen white spots on hardwood flooring. Their water bowls often spill, saturating the finish and causing stains. Pet accidents, if not cleaned promptly, allow moisture to penetrate the wood, intensifying discoloration.
Additionally, pets increase foot traffic, bringing in dirt and moisture that break down the finish over time. To protect your floors, use mats, clean spills quickly, and maintain stable indoor humidity levels.
How Long Does It Take for White Spots to Appear After Water Exposure?
White spots typically appear within hours to a few days after water exposure, depending on the amount of water and your floor’s finish type. Small spills may take several hours to show spotting, while larger or prolonged exposure causes quicker, more noticeable damage.
Environmental factors like humidity and temperature also influence timing. If water remains trapped beneath the finish, white spots can persist or worsen over days or even weeks.
Preserve the Natural Tone and Texture of Your Wood Floors
Think of your hardwood floor as a finely tuned instrument. White spots are like unwanted static disrupting its harmony. These blemishes often signal moisture intrusion, finish issues, or environmental stress.
By understanding their causes and applying precise removal techniques, you maintain its flawless tone. Regular maintenance acts as diligent tuning, preventing damage and preserving beauty. With careful attention and expert care, you guarantee your hardwood floor performs perfectly for years to come.