Prefinished Oak Stair Treads: Protect Every Edge
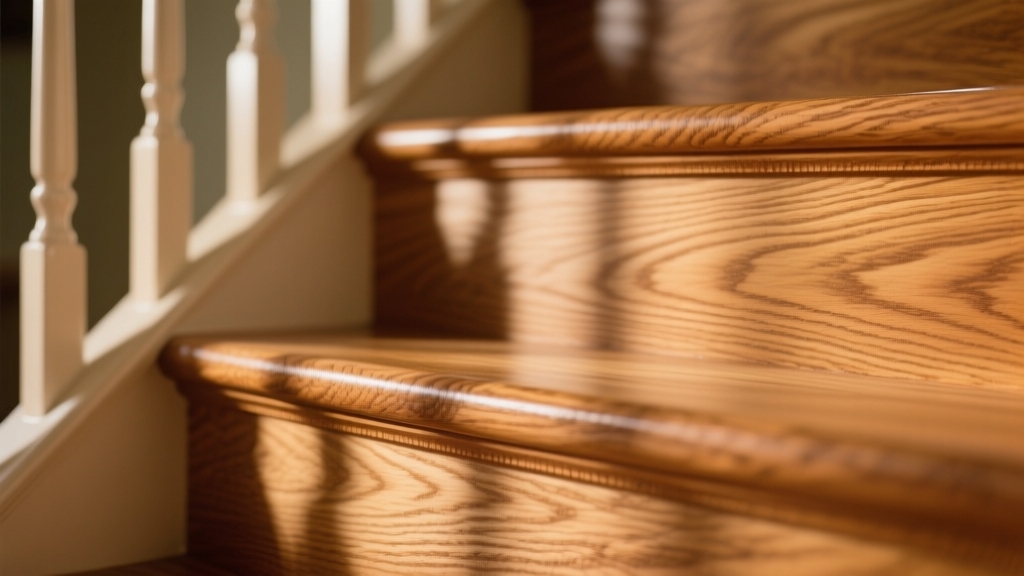
Prefinished oak stair treads offer you a durable, scratch-resistant finish applied in the factory, saving you time and ensuring consistent color with no on-site staining.
They install quickly and come ready to fit after precise measuring and cutting. Protect any fresh cut edges by sealing immediately to maintain the finish.
Use the right fastening methods for stability. For a professional, long-lasting result, understanding preparation, installation, and care is key. There’s more to learn about achieving that.
Key Takeaways
- Prefinished oak stair treads offer a durable, factory-applied finish that saves time and ensures consistent color and scratch resistance.
- Immediate installation is possible, reducing project timelines and avoiding on-site staining or finishing mess.
- Edge sealing of freshly cut edges with water-based polyurethane protects against moisture and wood damage.
- Regular cleaning with soft tools and controlling indoor humidity prolongs tread lifespan and maintains appearance.
- Accurate measuring, precise cutting, and dry fitting ensure proper installation and alignment with existing stairs.
Benefits of Choosing Prefinished Oak Stair Treads
When you choose prefinished oak stair treads, you save time and avoid the hassle of on-site staining and finishing. These treads come factory-finished with consistent color and grain, eliminating tricky stain matching and uneven coatings.
The controlled environment ensures a flawless, durable finish that won’t suffer from dust or debris contamination. This finish also provides enhanced scratch resistance compared to site-applied coatings.
You can install them right away, cutting days off your project timeline and reducing disruption at home. This speed is possible because the treads are ready for installation immediately.
Plus, factory finishes offer superior resistance to wear, scratches, and stains, often backed by warranties. Since there’s no sanding or finishing on-site, you avoid dust and harmful fumes, keeping indoor air clean.
Types of Oak Materials Used in Prefinished Treads
Prefinished oak stair treads offer convenience and durability, but understanding the types of oak materials used can help you make the best choice for your staircase.
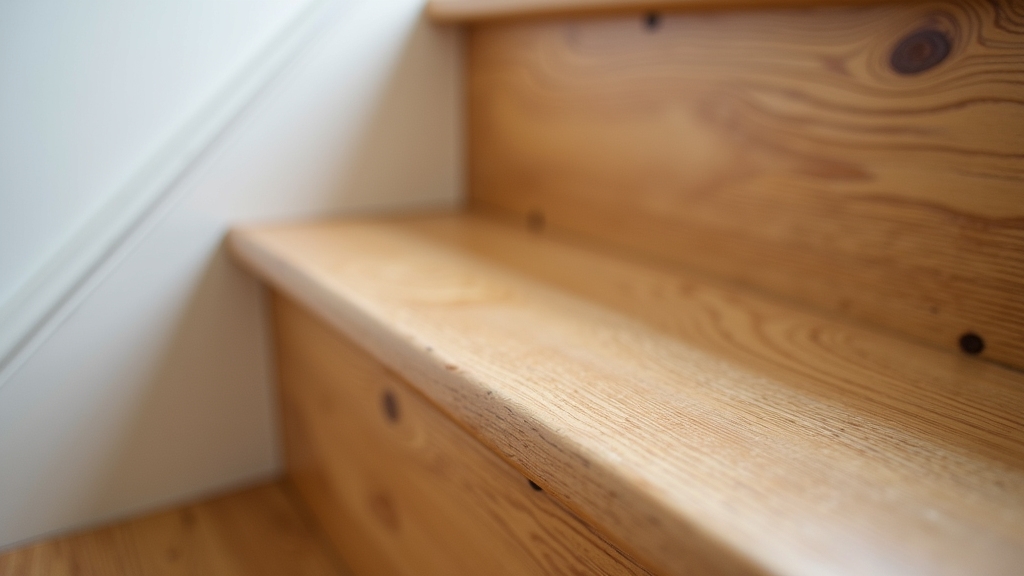
Red oak, known for its warm color and prominent grain, is widely available and durable. White oak provides greater hardness and moisture resistance, making it ideal for humid areas. Both types benefit from durable build qualities that maintain their finish and shape over time.
Red oak offers warmth and durability, while white oak excels in hardness and moisture resistance for humid spaces.
For enhanced stability and distinctive grain, quartersawn versions of both red and white oak are premium options. You’ll also find select grades, which have fewer knots for a cleaner look, and character grades, which include knots and streaks for a rustic feel.
Engineered oak treads use oak veneers over plywood cores, offering stability and cost savings compared to solid oak. All options feature a pre-applied finish for convenience and durability.
Knowing these types lets you pick the perfect balance of appearance, strength, and budget for your stairs.
Preparing Existing Stairs for Installation
Before installing new oak stair treads, you need to thoroughly remove all old coverings and hardware to expose the sub-tread layer. Strip away carpets, padding, nails, staples, and adhesives, using pliers or crowbars to avoid damaging the sub-floor.
Once exposed, clean the surface thoroughly, removing dust, dirt, and residue to guarantee a strong bond. Check for any damage or loose plywood; secure squeaky spots with screws and hammer down protruding fasteners.
Inspect the stair framing to confirm it meets local codes and can support the new treads without flex or squeak. Make sure risers and nosing align properly for safety.
The maximum allowed height for risers should not exceed 7 ¾ inches to comply with safety standards. A clean, level, and solid base is essential for a precise, durable installation of your prefinished oak stair treads.
Measuring and Cutting Prefinished Stair Treads
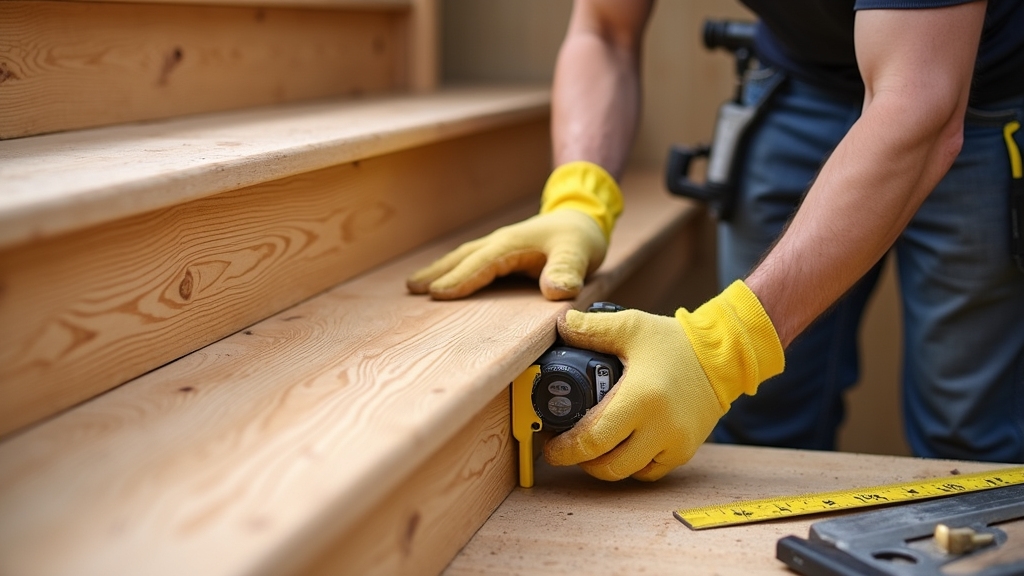
When you’re getting ready to install those prefinished stair treads, the first thing you want to do is measure each stair carefully. Make sure to take note of the width, depth, and tread type so you can ensure a perfect fit.
It’s really important to get those measurements right! Additionally, protecting adjacent surfaces such as baseboards during installation can help maintain a professional finish.
Now, when it comes to cutting the treads, I recommend using a track saw along with a stair jig. This combination will help you achieve clean, precise edges that look great. Remember that all boards come with end sealing to protect the wood, so be mindful if you need to cut or customize the ends.
And don’t forget to dry fit everything before you go for the final installation—it’s a crucial step to ensure everything fits just the way you want it.
Once you’ve made your cuts, it’s a good idea to seal any exposed edges right away. This will help protect the finish and keep your treads looking durable for years to come. Happy installing!
Accurate Stair Measurement
How do you guarantee your stair treads fit perfectly and safely? Start by counting all steps and measuring each tread’s depth from nosing front to back edge and width side to side.
Ensure at least 10 inches depth and proper coverage. Remember to avoid excess moisture during installation, as Swedish finish hardwood floors require careful moisture control to prevent warping or damage.
Measure each riser’s height between treads, aiming for uniform 7-to-7¾-inch rises to meet code and avoid trip hazards. Use a framing square and rigid tape measure to check angles and edges, especially on stairs with 90° turns or winders.
Separate nosing measurements from stringer layout to prevent stacking errors. Record all dimensions carefully step-by-step.
Calculate total stair length by multiplying the sum of riser height and tread depth by step count, adding a small allowance for adjustments. It is also important to add a 5% surplus to your total measurement to ensure enough material for errors or adjustments.
Accurate measurement ensures safe, comfortable, and compliant stair tread installation. Proper routine maintenance after installation will preserve the finish and extend the life of your stair treads.
Cutting Techniques
When cutting prefinished oak stair treads, precise measurement and careful technique are essential to maintain the clean, polished look of the finish. First, measure and mark both sides of each tread accurately, using a stair jig to ensure consistency.
Use fine-toothed, carbide-tipped blades with 60 to 100 teeth on a miter saw or circular saw for clean, chip-free cuts. Apply tape along cut lines to minimize splintering.
For mitered returns, cut at a precise 45-degree angle and dry fit pieces before gluing. Adjust blade depth slightly beyond the tread thickness, locking it securely. Always cut from the backside if possible to reduce tear-out.
Before starting, clear stairs of overspray, dirt, and dust to ensure a clean working surface. Removing debris regularly is crucial to prevent surface scratches and maintain the wood’s finish integrity, as emphasized in hardwood floor maintenance.
Finally, dry fit each piece on the staircase to confirm fit, avoiding installation issues and ensuring a seamless, professional finish.
Edge Sealing Methods
After carefully measuring and cutting your prefinished oak stair treads, sealing the edges becomes the next key step to preserve their appearance and durability.
Proper edge sealing prevents moisture absorption that causes swelling or cupping and protects vulnerable edges from wear. Regular maintenance, including gentle cleaning methods, helps extend the life of your stair treads by minimizing damage from dirt and debris.
Start by sanding edges smooth and cleaning off dust. Then, apply a sanding sealer or wood conditioner to enhance adhesion and prevent blotching. Sand oak with 120 grit parallel to the grain, then wipe with a wet cloth to raise fibers before sealing.
Follow with multiple coats of polyurethane: oil-based for rich durability or water-based for faster drying. Using painter’s tape is recommended to mask adjacent surfaces for clean lines, ensuring a professional finish without accidental damage.
Use painter’s tape to mask adjacent surfaces for clean lines. Don’t forget to fill any gaps or imperfections with compatible caulk or wood filler before sealing.
After installation, inspect edges regularly and touch up sealant to maintain protection and keep your stair treads looking their best. Incorporating routine cleaning with soft-bristled brushes can prevent dirt buildup that might otherwise degrade the sealant over time.
Recommended Adhesives and Fastening Methods
Since stair treads endure constant foot traffic and environmental changes, choosing the right adhesives and fastening methods is critical to guarantee a secure, long-lasting installation.
Use polyurethane construction adhesive or hybrid polymer adhesives for their strength, flexibility, and moisture resistance. Avoid water-based adhesives, as they can cause cupping.
Surface preparation is essential; ensure all surfaces are clean, dry, and free of contaminants before applying adhesive to enhance bonding strength. Proper installation techniques also help prevent common issues such as squeaks and premature wear.
For added security, combine adhesive with 15- or 16-gauge finishing nails, angled to minimize visible heads and maximize hold. Screws are ideal in high-traffic areas or when quick curing is needed.
Always check adhesive compatibility with your subfloor. Polyurethane bonds well to wood but may require primers for concrete or metal.
Apply adhesive strategically to ensure full contact and prevent squeaks. Follow manufacturer guidelines for adhesive type, fastener size, and spacing to ensure a durable, stable installation.
Understanding the limitations of engineered wood can guide selection of adhesives and fastening methods appropriate for prefinished hardwood stair treads.
Techniques for Proper Tread and Riser Installation
Although proper preparation may seem time-consuming, it’s essential to start by thoroughly cleaning the stair surface.
Remove old carpet, padding, nails, and staples to create a smooth, safe base for your new treads and risers. Remove old carpet to expose the sub tread and create a clean surface for installation.
Next, check that stairs meet code requirements and ensure the subfloor is level and undamaged. When there are height differences, consider using underlayment to achieve a level surface before installing treads.
Measure each tread individually with a template, then cut precisely using painter’s tape to guide clean cuts. Use a stair measuring tool to mark cut lines on new treads for accuracy.
During installation, use shims for leveling and align treads flush with risers for uniformity.
Fasten securely with nails and screws to prevent movement and squeaks. Drive 2-inch deck screws into the sub tread to help prevent squeaks and secure the tread firmly in place.
Protecting Cut Edges and Maintaining Finish Quality
When you’re cutting stair treads to fit, it’s super important to sand and seal those fresh edges right away. This helps protect the wood from moisture and keeps the finish looking consistent. Applying a fire retardant treatment can also add an extra layer of protection for the wood’s safety.
You know, applying multiple thin coats of polyurethane can really strengthen those edges and keep them safe from damage over time. Finishing both sides of solid oak treads before installation is a great way to prevent cupping and extend the lifespan of the wood.
And just a heads up—once everything’s installed, be careful with harsh cleaners and any physical wear. They can really take a toll on the finish. So, keeping it in good shape with periodic maintenance is key!
Sealing Fresh Cut Edges
Because fresh cut edges expose raw wood, you need to seal them promptly to prevent moisture absorption that can cause warping, cupping, or finish failure.
Start by sanding edges smooth with fine-grit paper, then clean off dust thoroughly. Use a microfiber cloth to remove all debris and dust for optimal adhesion.
Use a water-based polyurethane or sanding sealer, applying 2–3 thin coats with a small brush for precise coverage. Allow proper drying time between coats, lightly sanding for better adhesion.
Overlap slightly onto the factory finish to ensure a seamless seal. When sealing, apply the product with careful attention to maintain a smooth, even coat and avoid heavy spots.
Key steps to remember:
- Sand edges with 220–320 grit paper before sealing
- Clean dust completely to ensure adhesion
- Apply multiple thin coats of water-based polyurethane
- Allow drying time between coats
- Inspect and reseal edges if wear appears to maintain long-term finish durability
Sealing keeps your stair treads durable and looking great.
Preventing Finish Damage
To keep your oak stair treads looking their best, you’ll want to apply multiple coats of polyurethane to safeguard the finish and edges from wear and damage.
Lightly sanding between 3 or more coats with 220-grit sandpaper ensures smooth adhesion and durability. Use high-quality brushes or rollers to avoid uneven spots that can weaken finish protection.
Additionally, protect your treads by using felt pads, stair runners, and enforcing soft-soled shoe policies to reduce abrasion. Hardwood stair treads are highly durable and suitable for high foot traffic areas, but proper care is essential to extend their lifespan.
| Protection Method | Benefit | Maintenance Tip |
|---|---|---|
| Multiple Polyurethane Coats | Increased abrasion resistance | Sand lightly between coats |
| Felt Pads | Scratch reduction | Replace or clean regularly |
| Stair Runners | Protect high-traffic areas | Clean and replace as needed |
| Soft-soled Shoes | Limits grit damage | Enforce at entry points |
Installing Bullnose Moldings and Finishing Details
Although installing bullnose moldings requires careful measurement and precise cuts, you can achieve a seamless, professional look by following specific techniques.
Start by measuring tread edges accurately and trimming molding with slightly extended angled cuts to avoid exposing unfinished ends.
Use polyurethane adhesive applied in “S”-shaped beads for strong bonding, pressing molding firmly in place. It is important to clean stair surfaces thoroughly before applying adhesive to ensure a strong bond.
Routing dado slots for spline joints will hide end grains and secure connections. Finally, smooth cut edges with light sanding and apply matching finishes to conceal imperfections and maintain a consistent appearance.
- Measure tread edges precisely; use stair gauges for repeatability.
- Trim molding with angled cuts slightly beyond marks for clean edges.
- Apply adhesive evenly; press molding firmly and allow proper curing.
- Rout slots for spline joints to strengthen and conceal connections.
- Sand edges lightly and touch up finish to maintain consistent look.
Warranty and Care Considerations for Prefinished Treads
When you invest in prefinished oak stair treads, understanding the warranty terms and proper care is essential to protect your investment and guarantee long-lasting performance.
Warranties typically cover manufacturing defects in finishes and structural issues, ranging from 1 to 25 years, sometimes longer for UV-cured finishes.
However, normal wear, moisture damage, improper installation, or incorrect adhesives usually void coverage.
To maintain your warranty, follow manufacturer instructions closely. This includes professional installation and using specified adhesives. It is also important not to tape directly onto the finished surface of pre-finished treads to avoid damage to the protective finish installation precautions.
Care for your treads by controlling indoor humidity (30–50%), cleaning with recommended products, avoiding excess water, and protecting against sunlight and heavy impacts.
Store and acclimate treads flat in climate-controlled spaces, avoiding stacking without spacers. Following these guidelines ensures durability and keeps warranty valid, safeguarding your prefinished oak stair treads for years.
Frequently Asked Questions
Can Prefinished Oak Treads Be Installed Over Radiant Floor Heating?
Yes, you can install prefinished oak treads over radiant floor heating if you follow proper steps. Acclimate the wood to your home’s temperature and humidity before installation to prevent warping.
Gradually increase the heat after installation and keep floor temperatures moderate, around 80°F max. Using engineered oak treads improves stability, but solid oak works too with careful moisture control.
Always hire experienced installers to guarantee proper subfloor prep and heat distribution.
How Do Prefinished Oak Stair Treads Perform in High-Humidity Areas?
Prefinished oak stair treads perform well in high-humidity areas if you control indoor humidity between 35-65%. The factory-applied finish creates a strong moisture barrier, reducing swelling and warping.
You’ll want to seal all edges and allow proper acclimation before installation to prevent moisture absorption. Regular cleaning and maintenance also help preserve the finish, especially in humid environments where dirt and moisture can accelerate wear and damage.
Are Prefinished Oak Stair Treads Compatible With Under-Stair Storage Modifications?
You’ll find prefinished oak stair treads quite adaptable when working with under-stair storage modifications. Their customizable thickness, length, and nosing profiles let you balance sturdy steps with the clearance needed below.
Just watch for added thickness in retrofit treads that might eat into your storage space. With proper planning on dimensions and finish, you can maintain both safe stairs and functional storage without compromising either’s integrity or appearance.
What Tools Are Best for Maintaining Prefinished Oak Stair Treads Long-Term?
To maintain your prefinished oak stair treads long-term, use 320-grit sandpaper for light touch-ups without damaging the finish. Apply high-quality clear coats with hardener additives to protect against wear.
Clean regularly with wood floor cleaners designed for finished hardwood, and use microfiber cloths or pads to avoid scratches. Keep heavy loads off during curing, and address any minor damage promptly to preserve the treads’ appearance and durability.
Can Prefinished Oak Treads Be Refinished if Damaged After Installation?
You can’t make a silk purse out of a sow’s ear, but you can refinish damaged oak treads if you’re careful.
You’ll need to strip the factory finish completely, sand gently to avoid exposing veneer layers, fill deep scratches, then restain and seal.
Keep in mind, the process is labor-intensive and repeated refinishing shortens tread life. For heavy damage, consider replacement or hire a pro to ensure a smooth, lasting result.
Maintaining Your Staircase: Care Tips for Timeless Appeal
Choosing prefinished oak stair treads is like laying a strong foundation for both style and durability in your home. By carefully measuring, cutting, and installing each piece, you’re not just building stairs. You’re crafting a pathway that stands the test of time.
Protecting every edge and finishing detail guarantees your investment shines. Proper care maintains your stairs as welcoming as the first step you took onto them.