How to Seal Hardwood Floors: Flawless Sealing Application
To seal hardwood floors, first remove furniture, clean thoroughly, and sand with progressively finer grit to get a smooth surface free of dust. Choose either oil-based sealers for deep amber tones and durability or water-based for faster drying and natural color.
Use high-quality brushes or t-bars, apply thin, even coats following the wood grain, and sand lightly between coats. After sealing, avoid traffic until fully cured and maintain regularly.
Explore further for detailed techniques and best products.
Key Takeaways
- Thoroughly clean, sand, and fill cracks to prepare a smooth, dust-free hardwood floor surface before sealing.
- Choose between oil-based (deep color, durable) or water-based (fast-drying, clear finish) sealers based on wood type and desired appearance.
- Apply thin, even coats using high-quality brushes or t-bars, maintaining a wet edge and sanding lightly between coats for smoothness.
- Allow full drying and curing time before foot traffic or furniture placement to ensure maximum durability and finish quality.
- Follow safety precautions like wearing gloves, ensuring ventilation, and avoiding ignition sources during application.
Preparing Hardwood Floors for Sealing
Before sealing your hardwood floors, you need to thoroughly prepare the surface to guarantee ideal sealant adhesion and a smooth finish.
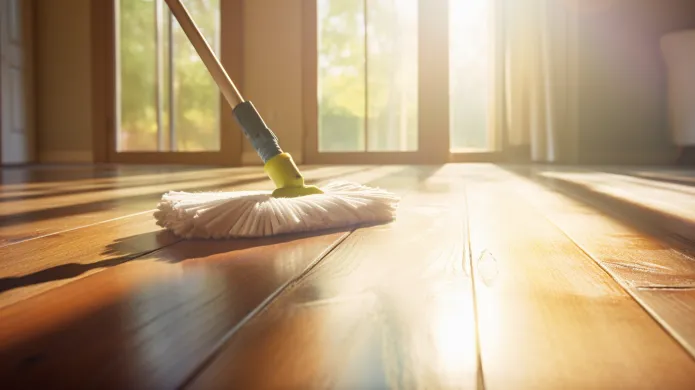
Start by removing all dust, dirt, and debris through sweeping and vacuuming.
Begin by thoroughly sweeping and vacuuming to clear away all dust, dirt, and debris.
Follow with a damp mop using a gentle hardwood cleaner, ensuring no residue remains.
Let the floor dry completely before sanding.
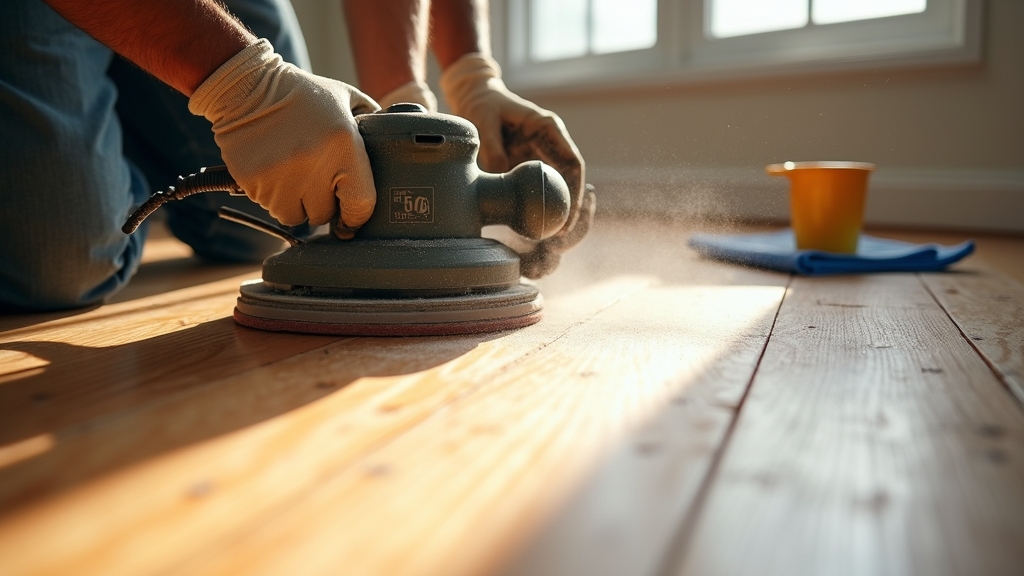
Sand the entire surface using coarse-grit sandpaper first, then progress to finer grits, always sanding along the wood grain to avoid scratches.
This removes old finishes and opens the wood grain for better sealant penetration.
Proper preparation also improves color and grain visibility, enhancing the final polished look.
After sanding, vacuum thoroughly and wipe with a tack cloth or damp mop to eliminate fine dust.
Inspect the floor for damage or uneven areas, addressing minor repairs and applying conditioner if needed to guarantee uniformity prior to sealing.
To ensure a smooth transition in rooms where hardwood meets other flooring types, consider installing transition strips during preparation.
Choosing the Right Sealer for Your Floors
When you’re picking a sealer, it’s important to think about a couple of things. For instance, oil-based options have these amazing rich amber tones and they penetrate deep into the wood. Additionally, proper preparation and leveling of the subfloor can impact how well sealers perform on engineered hardwood floors, ensuring long-lasting protection.
On the flip side, water-based sealers offer a clear finish and dry much faster. They also tend to be more low odor and have lower VOCs, making them a good choice for allergy-sensitive households.
Now, let’s talk about the wood species you’re dealing with. If you’re working with lighter woods, you’ll definitely want to go for a non-yellowing water-based sealer. But if you have denser or antique floors, penetrating oils might be the way to go.
Also, don’t forget to evaluate what kind of finish and durability you need. It’s all about matching it to how you use your floors and the look you want to achieve, while considering the moisture resistance of the underlying materials.
Oil-Based vs Water-Based
How do you decide between oil-based and water-based polyurethane for sealing your hardwood floors?
Consider drying time, color effects, odor, application difficulty, and environmental impact.
Oil-based polyurethane takes 8–12 hours per coat, adds a warm amber tone, and emits strong VOC odors. It also provides a durable finish that can help protect against surface damage.
Water-based dries in 2–3 hours, keeps the wood’s natural color, and has minimal odor.
Application-wise, oil-based is easier to apply but slower to dry, while water-based demands precision due to fast drying.
Environmentally, water-based is safer with lower VOCs, ideal for occupied homes.
Oil-based adds amber tone; water-based stays clear.
Water-based dries faster, enabling quicker use.
Oil-based emits strong odors requiring ventilation.
Water-based requires skill to avoid bubbles.
Water-based is environmentally safer and less toxic.
Additionally, water-based finishes typically require three coats to achieve optimal durability.
Finish and Durability
Although selecting a sealer often focuses on appearance, you must prioritize finish durability to protect your hardwood floors effectively.
Consider hardness and scratch resistance; oil-based polyurethane and Absco Finish offer superior resilience for high-traffic zones. Water-based polyurethane is also a popular choice due to its high scratch-resistance and durable layers. Many water-based options also provide a clear, natural look that preserves the wood’s original color without yellowing.
Moisture resistance varies; waterborne polyurethanes resist moisture well but demand prompt spill cleanup. Additionally, water-based finishes tend to dry faster, allowing quicker recoating and less downtime during application.
The curing process impacts longevity; acid-cured finishes provide exceptional durability but require long curing times and emit high VOCs.
Penetrating oils seal wood pores deeply but yellow over time and need extended drying.
Avoid wax and shellac if durability is critical, as they wear quickly and need frequent maintenance.
Selecting a sealer that balances hardness, moisture resistance, and curing properties guarantees your floors remain protected and maintain their aesthetic appeal under daily wear and environmental exposure.
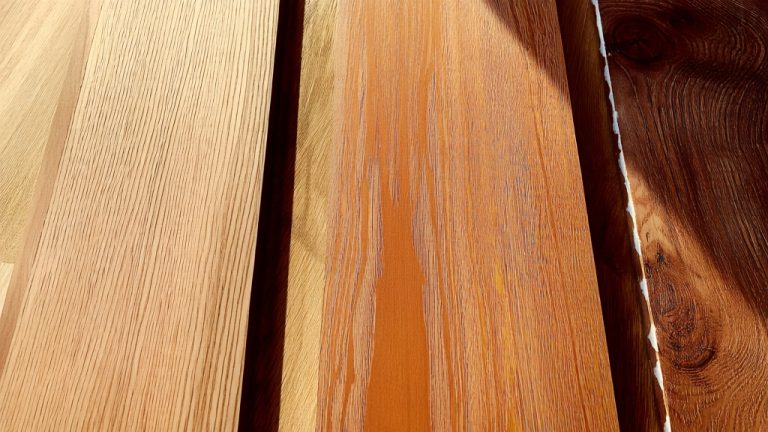
Wood Type Compatibility
Selecting the right sealer hinges on understanding your hardwood’s species and porosity, as these factors directly affect sealer absorption and finish performance. Different woods demand specific sealers to optimize durability and appearance.
Always ensure that cleaning and maintenance practices, such as using a pH-balanced cleaner, are compatible with the wood type to maintain sealer integrity.
For instance, open-grain woods like oak absorb penetrating oil sealers, enhancing grain detail. Closed-grain woods such as maple need sealers designed for smooth application. Consider the wood’s natural oil content and color to prevent discoloration or uneven finishes.
Use penetrating oils for softer or antique woods to preserve texture. These finishes are very durable with mild odor and low VOC, making them suitable for delicate surfaces. Choose water-based polyurethanes for fast drying and low VOC on domestic hardwoods.
Opt for oil-based polyurethanes for hardness and color depth on dense woods. Test sealers on uneven grain woods to ensure uniformity. Select UV-protective sealers for woods prone to fading or yellowing.
Tools Needed for Applying Floor Sealant
When you apply floor sealant, having the right tools guarantees an even, professional finish while streamlining the process. For main areas, use T-bar handles with synthetic or lambswool pads. Many professionals prefer Padco Mohair refills for lambswool applicators to achieve smooth application.
12” models suit most residential floors, while 18” work best commercially. Microfiber rollers excel on uneven or patterned floors, preventing streaks and lint. Edges and trim require angled brushes or trim pads for precision. It is important to avoid using abrasive tools like steel wool or scouring pads to prevent surface damage.
Equip yourself with paint trays to hold sealant and extension poles to reach distant spots without stepping on wet surfaces. Prepare surfaces with sanding pads and ensure cleanliness using vacuums and microfiber mops.
Safety gear like knee pads, gloves, and respirators is essential. Choose applicator types and materials based on floor pattern and finish viscosity to secure consistent, streak-free coverage and maintain the integrity of hardwood flooring.
Step-by-Step Guide to Applying Sealant
First off, make sure you give that hardwood surface a good clean and sand it down. This step is super important because it helps the sealant stick better and gives you that nice, smooth finish we all want. Proper preparation includes removing dust using a vacuum or tack cloth to ensure a dust-free surface.
Now, when you’re ready to apply the sealant, just take your time and work along with the grain of the wood. It’s really helpful to use quality tools for this. They’ll help you keep those wet edges and prevent any overlap marks that can be a bit of a hassle.
Surface Preparation Steps
Before applying sealant, you must thoroughly prepare the hardwood floor to guarantee ideal adhesion and a smooth finish. Begin by removing all furniture and obstacles to prevent contamination. Inspect the floor for damage and fill cracks with wood filler.
Clean the surface meticulously, removing dirt, grease, and residues with appropriate cleaners, then allow it to dry fully. This step protects against moisture absorption and helps maintain the wood’s structural integrity. It is important to avoid excess water during cleaning to prevent wood warping.
Sand the floor starting with coarse grit, progressing to finer grits for a smooth base, including edges and corners. Finally, condition the wood if necessary, and perform a final dust removal and inspection under strong light.
- Clear all furnishings and debris
- Repair cracks and imperfections
- Deep clean and dry the floor
- Sand progressively for uniform smoothness
- Apply conditioner and ensure dust-free surface
Sealant Application Techniques
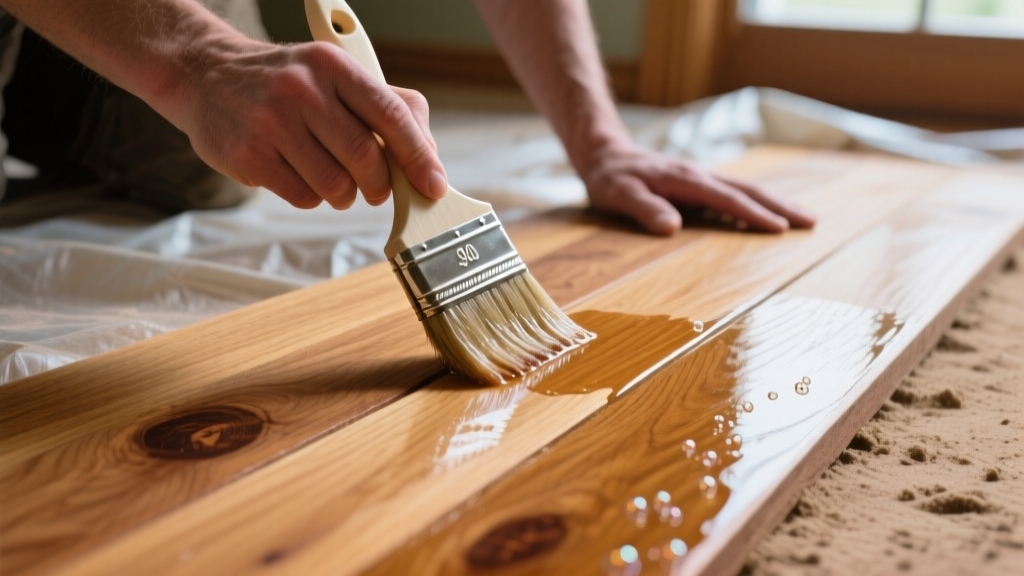
Although precise preparation sets the foundation, applying sealant correctly is essential to achieving a durable, even finish on hardwood floors.
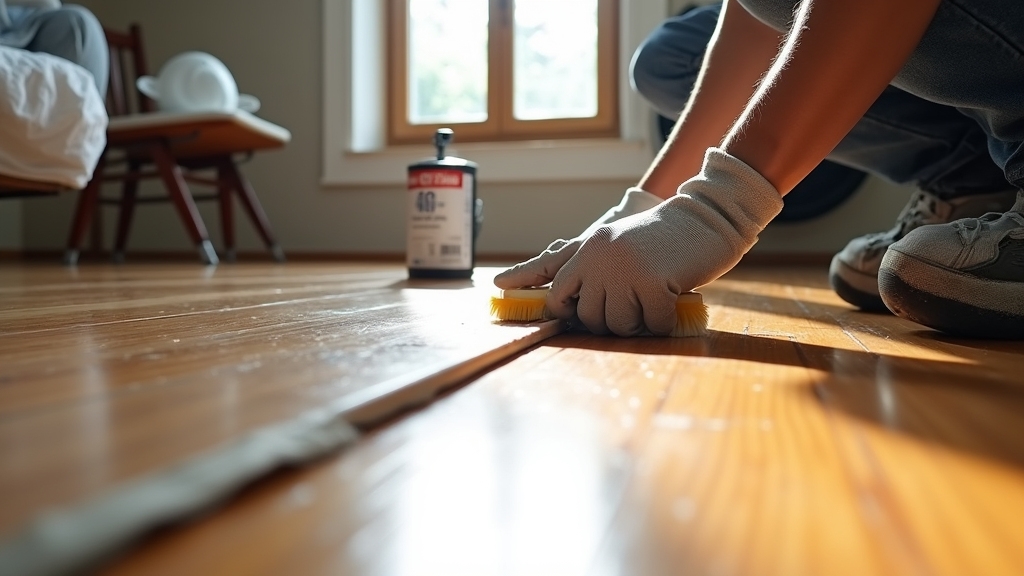
Start by pouring a narrow 6-inch line of sealant along the farthest wall. Then use a primed t-bar or high-quality brush angled at 30 degrees to spread it evenly, following the wood grain. This technique protects against moisture damage and ensures the sealant forms a strong protective barrier. Using tools designed for hardwood floors helps prevent damage during application and results in a smoother surface.
Maintain a wet edge to avoid lap marks and work systematically in small sections toward the exit. Apply thin, uniform coats, feathering edges for seamless blending, and avoid over-brushing to prevent bubbles.
Allow recommended drying time before sanding lightly with 220-grit paper. Then vacuum and use a tack cloth. Repeat for at least three coats to maintain the floor’s long-term durability. Use high-quality applicators and maintain proper ventilation and temperature for ideal curing and finish quality.
Differences Between Oil-Based and Water-Based Sealers
When choosing between oil-based and water-based sealers for hardwood floors, understanding their distinct characteristics is crucial for achieving the desired finish and performance.
Oil-based sealers add a warm amber tint and gloss, ideal for darker woods. Water-based sealers dry clear, preserving natural color with a matte finish. Engineered hardwood floors often benefit from water-based sealers due to their compatibility with the ScufResist finish.
Water-based products dry faster, allowing quicker recoats and room use. Oil-based sealers cure slower but are easier to apply and correct.
Consider these key differences:
- Oil-based sealers deepen wood color; water-based stay clear.
- Water-based dries in 2-4 hours; oil-based takes 8-12 hours per coat.
- Both offer comparable durability but differ in hardness and stain resistance.
- Water-based requires multiple thin coats; oil-based applies thicker coats.
Oil-based emits strong odors; water-based has minimal VOCs, making them safer and more comfortable to apply due to their low smell.
Safety Precautions When Sealing Hardwood Floors
Since sealing hardwood floors involves chemicals and physical work, you must prioritize safety throughout the process. Always wear gloves and safety glasses to protect your skin and eyes from irritants.
Confirm proper ventilation to avoid inhaling harmful vapors, and use a respirator when working with strong fumes. Proper ventilation also helps control odors that may arise during the sealing process. Keep ignition sources away from flammable sealants to prevent fire hazards.
Clear your work area to avoid accidents and follow manufacturer instructions carefully. Proper sealing creates a protective barrier, helping to preserve floor quality and safety over time.
| Hazard Type | Safety Measure |
|---|---|
| Inhalation | Use respirator and ventilate properly |
| Skin and Eye Contact | Wear gloves and protective eyewear |
| Fire Risk | Avoid sparks and flames; ventilate |
| Work Environment | Clear clutter; inspect equipment |
Tips for Achieving a Smooth and Even Finish
To achieve a smooth and even finish, the first step is to really prepare the floor surface. This means cleaning it well, sanding it down, and filling in any imperfections you might find. It’s all about getting that base just right! Ensure the hardwood surface is clean, dry, and free of dust or debris to create a smooth base for the finish.
When you start applying the sealer, make sure to use controlled, consistent strokes. Follow the wood grain as you go, and remember to apply thin coats. This way, you’ll ensure full coverage without any pesky puddles or bare spots.
In the end, it comes down to proper preparation and precise application. Nail those two, and you’ll be on your way to a durable, flawless finish!
Proper Surface Preparation
How do you guarantee your hardwood floor finish turns out perfectly smooth and even? It starts with meticulous surface preparation. First, clear the room completely and vacuum thoroughly to remove all debris.
Next, sand the floor progressively from coarse to fine grit, always following the wood grain to avoid scratches. Address imperfections by filling gaps or replacing damaged boards and sanding again for uniformity.
Checking for squeaky or loose boards before sealing ensures a stable surface that prevents future finish issues. Finally, remove all dust using a vacuum, tack cloth, and a mineral spirits wipe before sealing.
- Remove furniture and vacuum to eliminate dust and debris.
- Sand progressively with 36-120 grit sandpaper, following the grain.
- Fill cracks with color-matched wood filler and sand smooth.
- Use tack cloth and mineral spirits for thorough dust removal.
- Seal off the room to prevent airborne dust contamination during finishing.
Application Techniques
With a properly prepared surface, the next step focuses on carefully applying the sealer to achieve a smooth, even finish.
Use high-quality synthetic brushes, rollers, or t-bar applicators compatible with your sealer type to guarantee thin, uniform coats.
Pour a 6-inch line along the starting wall and spread it evenly with the grain using smooth, overlapping strokes, maintaining a wet edge to avoid lap marks.
Feather edges at each pass’s end and work progressively without backtracking. For edges and corners, use small brushes to prevent thick deposits.
Allow each coat to dry fully, lightly sand between coats, and clean dust with a damp microfiber mop. This process helps extend the lifespan of hardwood floors by ensuring proper adhesion and protection.
Avoid thick applications or skipping sanding to prevent bubbles and adhesion issues, ensuring a durable, flawless finish.
Protecting Floors From Damage After Sealing
Although sealing hardwood floors provides a durable protective layer, you must take specific precautions immediately afterward to maintain the seal’s integrity.
Avoid walking on the floor until the sealant fully dries. This varies by product from a few hours to over 24 hours. Keep heavy furniture off the floor for at least 48 hours to prevent dents.
Ensure proper ventilation to speed curing and reduce fumes. Refrain from placing rugs or mats until the sealant cures completely to avoid moisture trapping or adhesion issues.
- Avoid heavy furniture or appliance placement for 48+ hours
- Don’t walk on floor until sealant dries fully
- Provide adequate ventilation during and after sealing
- Avoid rugs or mats until sealant is cured
- Use soft buffing after curing to enhance sheen
Sealing also prevents moisture penetration, which is critical right after application to ensure the floor’s durability.
Maintenance Practices to Extend Floor Life
Since hardwood floors endure daily wear, implementing proper maintenance practices is essential to preserve their appearance and structural integrity.
Start by sweeping daily with a soft-bristled broom or dust mop to remove grit that can cause scratches. Vacuum weekly using a vacuum without a beater bar to prevent damage. Use manufacturer-recommended cleaning products especially if you know the floor’s finish type to avoid damaging the surface.
Clean spills immediately with a dry or slightly damp microfiber cloth to avoid staining or warping. Protect furniture legs with felt pads and avoid dragging furniture to prevent dents.
Place scatter rugs at entrances and doormats to reduce debris. Avoid wet or steam mops, rubber-backed rugs, and shoes that can damage floors.
Conduct quarterly inspections for wear and consider annual recoating or professional maintenance based on usage, especially in high-traffic areas or homes with pets and children.
Popular Finish Options and Trends for Hardwood Floors
When selecting a finish for your hardwood floors, you’ll want to evaluate both performance and aesthetics to guarantee long-lasting beauty and protection. Popular finishes include water-based polyurethane for eco-friendliness and color retention, oil-based polyurethane for enhanced durability and warm tones, and aluminum oxide for exceptional wear resistance.
Trends favor matte and satin finishes, which mask scratches and highlight the wood’s natural texture. Textured and distressed surfaces add character. These finishes often complement the growing preference for warm, earthy hues in wood tones seen in 2025.
Consider stain colors and sustainable options to match your interior design and environmental values.
- Water-based polyurethane: low VOC, natural color preservation
- Matte and satin finishes: scratch-hiding, subtle sheen
- Textured finishes: wire-brushed, hand-scraped for depth
- Rich stain tones: warm honey, classic walnut, or bold charcoal
- Sustainable finishes: reclaimed wood, low VOC, natural matte
Frequently Asked Questions
How Long Should I Wait Before Moving Furniture Back Onto Sealed Floors?
You should wait at least 24 hours before moving light furniture onto water-based polyurethane finishes, using felt pads to prevent scratches.
For oil-based finishes, wait 4 to 7 days before replacing light furniture.
Heavy furniture and rugs require longer: 3 to 5 days for water-based finishes and 7 to 14 days for oil-based finishes.
Always follow your specific product’s instructions to guarantee the finish cures properly and avoids damage.
Can I Seal Hardwood Floors Myself Without Professional Help?
Yes, you can seal hardwood floors yourself if you’re prepared to invest time and follow detailed steps.
You’ll need to thoroughly clean, sand, and apply sealer evenly, allowing proper drying between coats.
Using the right tools and protective gear is essential.
Be meticulous to avoid dust and uneven application, which can compromise durability.
While DIY sealing is feasible, it requires patience and precision to achieve professional-quality results.
What Is the Environmental Impact of Different Floor Sealers?
You reduce environmental harm by choosing water-based sealers, bio-based finishes, or natural oils.
You avoid petroleum solvents, minimize VOC emissions, and lower hazardous waste.
You save energy during manufacturing and simplify disposal.
You balance durability with eco-friendliness by picking finishes that last longer and require less frequent maintenance.
You protect indoor air quality by selecting low- or zero-VOC products, ensuring healthier living spaces while limiting your carbon footprint and chemical exposure.
How Do Humidity and Temperature Affect the Sealing Process?
Humidity slows drying times and can cause wood to absorb moisture, leading to expansion or finish defects like bubbles.
Temperature impacts curing; too low, and the sealant won’t set properly, reducing durability.
You should maintain humidity between 35%-55% and temperature between 60°F-80°F for ideal results.
Monitoring and controlling these conditions ensures even curing, prevents warping, and guarantees a smooth, durable finish on your hardwood floors.
Are There Eco-Friendly or Non-Toxic Sealant Options Available?
Yes, you can choose eco-friendly, non-toxic sealants like water-based polyurethanes with low or zero VOCs, natural oils (e.g., linseed or tung oil), and plant-based options such as Vermont Natural Coatings’ PolyWhey.
These lower indoor pollutants an environmental impact. Brands like AFM Safecoat, Earthpaint, and BioShield offer durable, low-odor finishes suitable for sensitive users.
Selecting these guarantees safer air quality and sustainable flooring protection without harsh chemicals.
Preparation Is Power: Setting the Hardwood Floors for a Perfect Seal
Sealing your hardwood floors is like applying armor; just as a knight’s shield protects in battle, your sealant guards against wear and moisture. Studies show properly sealed floors can last over 20 years with minimal damage.
By preparing carefully, choosing the right sealer, and applying it evenly, you guarantee durability and beauty. Follow maintenance tips, and your floors won’t just survive; they’ll thrive, maintaining their elegance through daily life’s challenges.