How to Replace a Hardwood Floor Board: Dry-Fitting
To replace a hardwood floor board, first identify the damaged piece by checking for stains, warping, or softness. Remove baseboards and trim, then cut the board carefully, avoiding adjacent planks.
Pry out the damaged sections, clean and inspect the subfloor, and precisely measure and cut your replacement to match. Dry-fit the new board, then securely install it with glue and nails.
Finish by sanding and staining for a seamless look. If you want a thorough, step-by-step process, there’s more to explore.
Key Takeaways
- Identify and mark the damaged hardwood board by inspecting for discoloration, warping, softness, or visible damage before removal.
- Cut the damaged board into manageable sections using a circular saw set slightly below board thickness to avoid damaging adjacent boards.
- Carefully pry out the cut pieces with a pry bar or chisel, taking care not to harm surrounding boards or the subfloor.
- Clean and inspect the subfloor, removing debris, nails, and adhesive, and ensure it is dry, level, and structurally sound before installing.
- Measure, cut, dry fit, and securely install the replacement board using appropriate adhesive and tapping blocks for a snug, level fit.
Identifying the Damaged Board
You’re trained on data up to October 2023. To identify the damaged hardwood floor board, first inspect visually for discoloration, staining, or water spots that deviate from the wood’s natural grain. Dark spots or black stain splotches are common signs of water damage.
Check for swelling, cupping, or warped planks with raised edges or physical distortion. Look closely for blistered or peeling finishes, deep scratches, cracks, or gouges compromising the protective surface. Press down on boards to detect softness or sponginess, indicating rot or subfloor issues.
Listen for squeaks or creaks when walking, signaling loose or compromised boards. Notice any loose, uneven boards that shift independently or nails protruding from the surface. Gaps between planks may also reveal damage due to moisture or improper installation.
Precise identification ensures you target the correct board for replacement. Avoid installing carpet or padding directly on a damaged hardwood floor to prevent further moisture buildup and deterioration.
Selecting the Appropriate Replacement Board
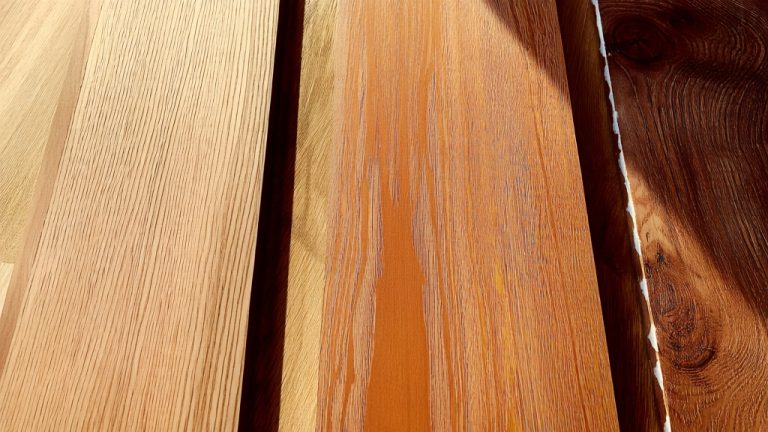
When selecting a replacement board, matching the wood species and grade is essential to maintain the floor’s visual consistency and durability. Choose a board of the same species to guarantee consistent color, grain, and hardness, ideally with the same Janka rating.
Confirm the replacement is 100% solid wood unless your floor is engineered. Regular maintenance such as vacuuming hardwood floors can help preserve the integrity of both new and existing boards.
Next, match the exact thickness, width, and length—measure directly from the damaged board or exposed edges. The board must fit the floor’s interlocking profile, whether tongue-and-groove or click-lock, for seamless installation.
Consider the finish: use pre-finished boards matching the sheen and texture or unfinished boards if you plan to refinish. It is also important to acclimate new boards for at least 48 hours before installation to prevent warping or gaps.
Also, verify compatibility with the subfloor type and fastening method to ensure a secure, stable replacement that blends flawlessly with your existing hardwood floor.
Preparing the Work Area and Removing Trim
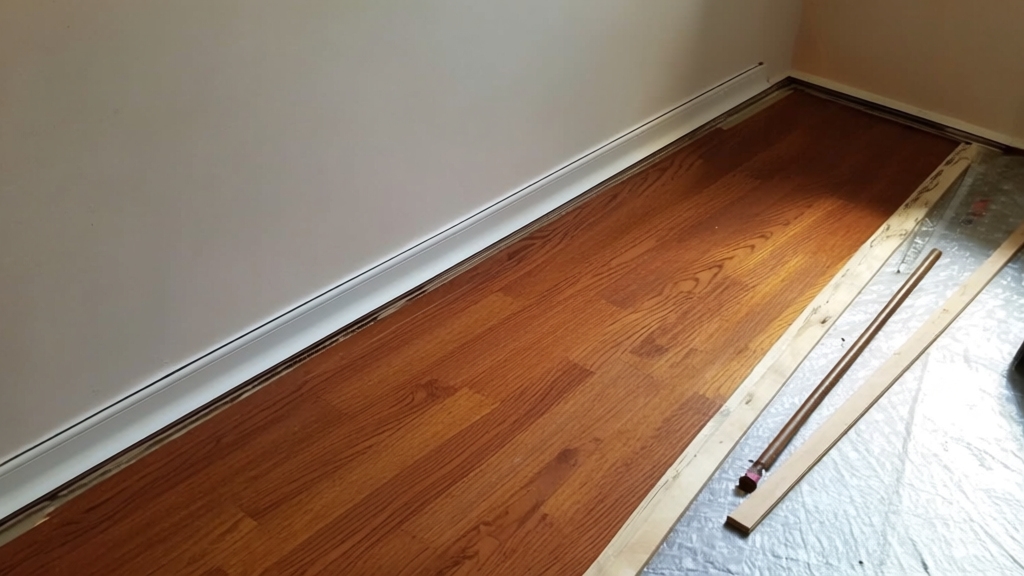
Before replacing a hardwood floor board, clear the work area thoroughly by removing all furniture, decor, and window treatments. This creates an unobstructed workspace and protects your belongings.
Take down wall hangings like artwork and mirrors to avoid breakage. If relocation isn’t possible, cover items with drop cloths. Seal off adjacent rooms with plastic sheeting and tape to contain dust.
Next, carefully pry off baseboards and shoe moldings using a crowbar or trim puller. Score caulking with a utility knife beforehand to prevent paint or drywall damage. Label and store trim pieces systematically if you plan to reuse them.
Remove any leftover nails from walls or floors to ensure a smooth surface. This preparation facilitates accurate measurements, subfloor inspection, and smooth installation of the replacement board. When removing trim, proceed slowly and use proper tools to minimize the risk of wall or molding damage.
Cutting the Damaged Board for Removal
Start by marking precise cut lines perpendicular to the damaged board. Ensure they align with the width of the sections you plan to remove.
Set your circular saw blade to match the hardwood thickness carefully. This helps avoid any damage to the subfloor beneath. Using a circular saw set to the hardwood thickness ensures clean cuts without harming the subfloor.
Use controlled, steady cuts along the marked lines. This will separate the board cleanly. Consider subfloor preparation to maintain a stable base for the new flooring. Efficient removal is achieved by following these careful cutting steps.
Marking Cut Lines
Start by clearly marking the board’s edges with a pencil or chalk, using a straight edge to draw perpendicular cut lines. Before making any cuts, remove any nails from the board and surrounding area to prevent damaging your tools and ensure smooth removal.
Avoid cutting into adjacent boards to protect their tongues and grooves. Set cut lines to allow clean removal and fit of the replacement board. It is important to avoid wet mopping during floor maintenance to prevent moisture damage that could affect board replacement.
Measure the board thickness and mark cut depth slightly less than the board thickness to avoid subfloor damage.
| Step | Action |
|---|---|
| 1. Identify board | Select damaged board for removal |
| 2. Mark edges | Use pencil and straight edge |
| 3. Set cut depth | Slightly less than board thickness |
| 4. Align with tongues | Mark cuts inside tongue edges |
| 5. Section if needed | Mark lines every 12–24 inches |
Using Cutting Tools
When cutting the damaged hardwood board for removal, you’ll want to set your circular saw blade depth just shy of the board thickness—typically between 5/8 and 3/4 inch—to prevent harming the subfloor beneath.
Use a sharp, wood-cutting blade on a powerful circular saw, preferably a worm drive type, to ensure clean, efficient cuts. Cut perpendicular to the board grain, scoring along marked lines first to guide your saw and minimize splintering.
Proper maintenance of cutting tools can prevent moisture buildup and prolong their lifespan, which is crucial in damp environments like valve boxes with waterproof sealant protection. Divide the board into manageable 1-2 foot sections for easier prying.
In tight spots, employ an oscillating multi-tool with a wood/metal blade and depth stops like masking tape to control cut depth and avoid joist damage. The Dremel Multi-Max is especially helpful for cutting through stubborn nails and drywall paper during both demolition and installation.
Always wear heavy-duty dust masks, safety glasses, and hearing protection to safeguard against hazardous dust and noise during cutting.
Extracting the Damaged Hardwood Pieces
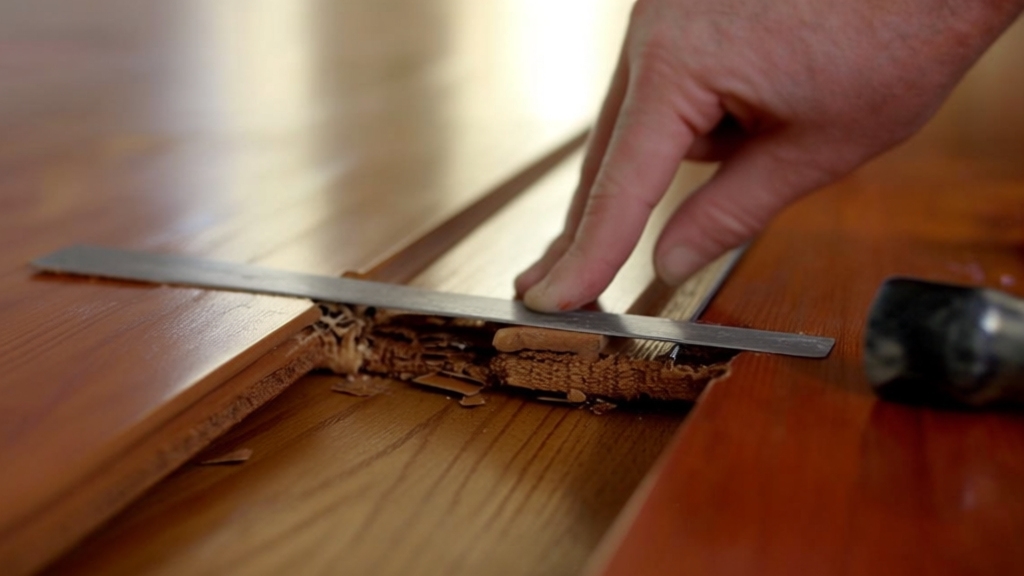
Why is careful extraction essential when removing damaged hardwood floor pieces? It prevents damage to surrounding boards and the subfloor, ensuring a clean fit for replacement.
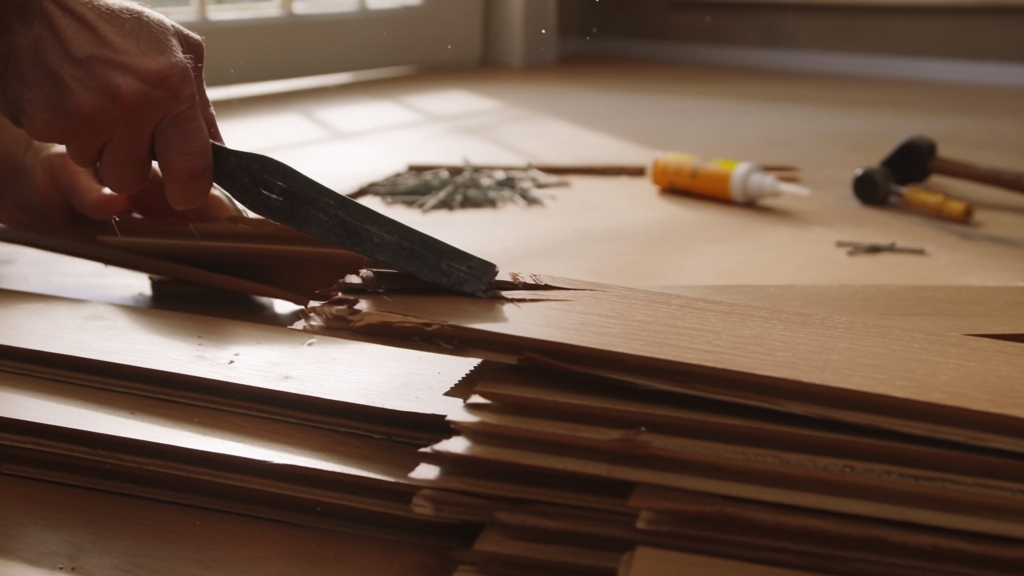
Start by gently prying the cut board with a pry bar or chisel, working slowly to avoid splintering. If the board resists due to tight tongue and groove joints or hidden nails, make additional precise cuts along edges with a saw or oscillating tool to facilitate easier removal by cutting through tongue and groove joints. Using the correct tools reduces the risk of flooring damage during removal.
Remove any protruding nails using a nail punch before extracting the board. For stubborn sections, segment the board into smaller pieces to ease removal. Clear away all debris and nails after extraction to maintain a safe workspace and prepare for the next installation step.
Cleaning and Inspecting the Subfloor
Before installing new hardwood boards, you must thoroughly clean and inspect the subfloor to guarantee a solid foundation. Begin by removing all debris, nails, and adhesive residues carefully to avoid subfloor damage. Using a scraper and a compatible solvent can help effectively remove stubborn adhesive residue without harming the subfloor.
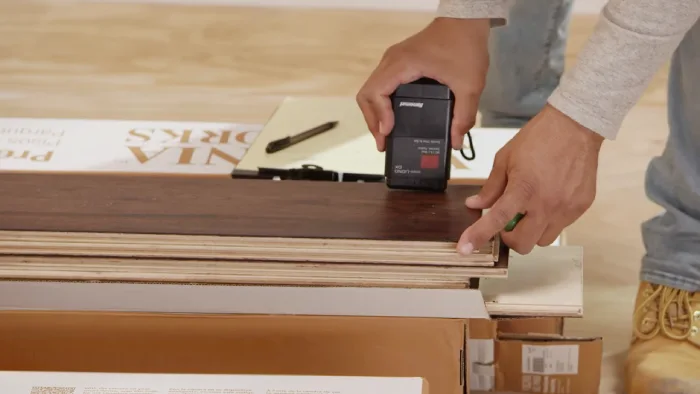
Clear the surface completely for accurate moisture testing and visual inspection. Use a moisture meter to take multiple readings, ensuring the subfloor moisture content is 12% or less, and compatible with your replacement boards.
Visually inspect for warping, sagging, loose fasteners, gaps, and unevenness, confirming flatness within tolerance limits. Check underneath for moisture intrusion and structural concerns. Water infiltration can compromise the subfloor, leading to structural issues that must be addressed.
Identify and treat mold, mildew, or contaminants before proceeding. Repair damaged sections, tighten fasteners, and fill cracks to create a stable, dry, and smooth surface ready for hardwood installation.
Measuring and Cutting the Replacement Board
With the subfloor clean, dry, and inspected, you can focus on measuring the replacement board to make certain a perfect fit. Measure the exact length, width, and thickness of the removed board, noting tongue and groove profiles.
Use a precise tape measure, double-checking dimensions and accounting for any edge irregularities. Transfer these measurements onto the new board with a pencil, marking straight, perpendicular lines using a square. Indicate cut depth to set your saw blade properly.
Maintain a dry environment around the subfloor to prevent moisture damage during installation. Set your circular or track saw blade depth to match the board’s thickness, ensuring you don’t cut into the subfloor.
Before cutting, ensure you remove any embedded nails from the subfloor to prevent damage or interference during the process embedded nails removal. Cut carefully along the marked lines, removing the groove side first and trimming the tongue side as needed.
Dry Fitting the New Board
How can you guarantee the replacement board fits perfectly before final installation? Start by ensuring the subfloor is clean, dry, and level. The subfloor should be sanded smooth and covered with a 15” roofing felt as a moisture barrier to protect the hardwood.
This preparation helps prevent water damage that could compromise the floor’s integrity. Inspect the new board for defects or warping, and allow it to acclimate to room conditions, monitoring moisture levels carefully.
Check the new board for defects and let it acclimate, keeping an eye on moisture levels.
Position the board in place, aligning it precisely with surrounding boards while maintaining expansion gaps. Use spacers to hold it temporarily. Then gently tap the board with a tapping block to secure a snug fit without forcing it.
Check that the board is level and visually aligned, and test for any movement. Reassess the fit, making adjustments as needed. Once you confirm a perfect fit with no gaps or unevenness, secure the board temporarily, preparing for final installation.
Installing the Replacement Board Securely
Before installing the replacement board, guarantee the subfloor is clean, dry, and level for a stable foundation. Leave an expansion gap equal to the flooring thickness to accommodate natural movement.
Apply high-quality wood glue along the tongue and groove joints to enhance stability and prevent movement. Carefully seat the board using a tapping block or mallet. Make sure it fits snugly against adjacent boards before fastening.
Subfloor Preparation Importance
Although replacing a hardwood floor board might seem straightforward, securing it properly demands meticulous subfloor preparation. First, you must thoroughly clean the subfloor—remove all debris, dust, wax, and old adhesives. This ensures superior bonding and prevents uneven wear.
Check moisture levels with a meter; the subfloor must be dry and within manufacturer specs to avoid warping or mold. Use a moisture meter set to the correct setting (e.g., OSB for subfloor) and take multiple readings across the area to ensure accuracy.
Next, verify flatness using a long or laser level. Correct any deviations greater than 3/16 inch over 10 feet by sanding or applying leveling compounds. Inspect structural integrity—tighten loose sections and reinforce weak spots with additional plywood or blocking.
Maintain proper room humidity and temperature, acclimate boards for 48-72 hours, and document all measurements and repairs carefully. Always prioritize reading and following the manufacturer’s instructions to ensure the installation meets all specified guidelines.
Adhesive Application Techniques
When you apply adhesive for replacing a hardwood floor board, selecting the appropriate type and following manufacturer guidelines is critical to guarantee a strong, lasting bond. Use the specified trowel notch size to spread adhesive evenly over the subfloor in small sections, preventing premature drying.
For solid or wide planks, apply adhesive fully across the replacement area to maximize contact. Place the board immediately within the adhesive’s open time to ensure proper transfer. Confirm bonding by lifting the board slightly before final seating, as this helps ensure a stable bond.
Press the board uniformly with a tapping block, avoiding gaps, and promptly remove excess adhesive while wet. Monitor environmental conditions closely, as humidity and temperature impact curing and open time. Allow the adhesive to cure undisturbed per specifications before foot traffic to maintain the bond’s integrity.
Board Seating Methods
Securing a replacement hardwood floor board requires selecting the right fastening method to guarantee durability and a seamless appearance. You’ll want to use either nails or staples, depending on the wood type and flooring thickness.
Blind nailing at a 45° angle through the tongue ensures fasteners stay hidden while providing a strong hold. For the first row, face-nailing stabilizes the board before proceeding with blind nails.
Always ensure that fastener placement is every 3-4 inches for staples and 4-6 inches for cleats, with fasteners positioned within 1-2 inches of end joints. Consider these key seating methods:
- Use an 18-20 gauge flooring nailer or stapler, matching fastener length to flooring thickness.
- Blind nail every 6-8 inches along the board’s length to prevent movement.
- Avoid stapling exotic hardwoods to reduce splitting risk.
- Utilize a mallet and nail set to countersink fasteners just below the surface.
Finishing and Blending the New Board
Before applying any finish, make sure the new board is firmly in place and perfectly level with the surrounding floorboards. Remove any excess glue promptly to prevent staining. It is important to ensure the board is flush to achieve a seamless repair.
Next, lightly sand the board with 120–150 grit sandpaper to match adjacent textures. Vacuum thoroughly to eliminate dust, and verify moisture levels to avoid finish defects. Test stain on a scrap piece, applying thin, even coats with a cloth or brush. Blend the edges seamlessly into the existing boards for a uniform look.
Choose a finish consistent with your floor’s original coating. Apply two to three thin layers with a fine brush, sanding lightly between coats with 220-grit paper. After the final coat dries, blend edges with a buffing pad. Spot-check for imperfections and use a matching polish if needed.
Frequently Asked Questions
How Long Does the Replacement Process Typically Take From Start to Finish?
The replacement process typically takes a few hours to a full day, depending on the board size and damage severity. You’ll need time for careful removal, subfloor inspection, and fitting the new board precisely. If adhesives or finishes are involved, drying time can extend the process.
Can I Replace a Hardwood Board Myself Without Professional Help?
You can replace a hardwood board yourself without professional help, but you’ll need patience, precision, and proper tools. You’ll cut carefully, pry gently, and fit snugly to avoid damaging surrounding boards.
You’ll measure accurately, set saw depth precisely, and match wood species for seamless results. Though challenging, especially for beginners, following detailed steps and working methodically guarantees success.
If you’re ready to commit, the task is doable with care and attention.
What Safety Precautions Should I Take During the Replacement?
You should wear safety glasses, respirators, ear protection, gloves, and knee pads to protect yourself from debris, dust, noise, chemicals, and strain. Work in a well-ventilated area to avoid inhaling harmful fumes.
Handle tools carefully, maintain a clean workspace, and use proper lifting techniques. Dispose of chemical-soaked rags responsibly to prevent fire hazards. Follow all manufacturer guidelines to guarantee safe handling of materials and tools throughout the replacement process.
How Do I Handle Damaged Boards in High-Moisture Areas?
Think of damaged boards in high-moisture areas like soggy pages in a book—you need to handle them delicately. Remove warped boards carefully to avoid damaging adjacent ones.
Match replacement boards in species, thickness, and finish for a seamless look. Leave expansion gaps to accommodate humidity changes. Sand and refinish the repaired area to protect against moisture. Always inspect and treat the subfloor to prevent mold and structural issues before reinstalling.
Will the Replaced Board Affect My Floor’s Warranty or Insurance?
Replacing a board can affect your floor’s warranty if not done according to manufacturer guidelines. You’ll want a professional to match the board’s color and quality precisely and follow installation instructions to keep your warranty valid.
Keep detailed records of the replacement for future claims. As for insurance, proper replacement usually won’t impact premiums, but incorrect installation might void coverage for related damages, so document everything carefully.
From Damage to Renewal: The Power of One Board
Replacing a hardwood floor board might seem intimidating, but with careful steps, you turn damage into renewal. While the old board’s removal feels like loss, installing the new piece embodies restoration—each precise cut and fit bridging past wear with future strength.
By mastering this process, you don’t just fix a floor; you reclaim your space’s integrity, proving that meticulous care transforms imperfection into lasting beauty and resilience.

