Best Way to Paint Vinyl Shutters Without Peeling
To paint vinyl shutters effectively, start by carefully removing and labeling each shutter to avoid damage.
Thoroughly clean and dry them in shade to prevent warping. Then lightly sand with fine-grit paper for primer adhesion.
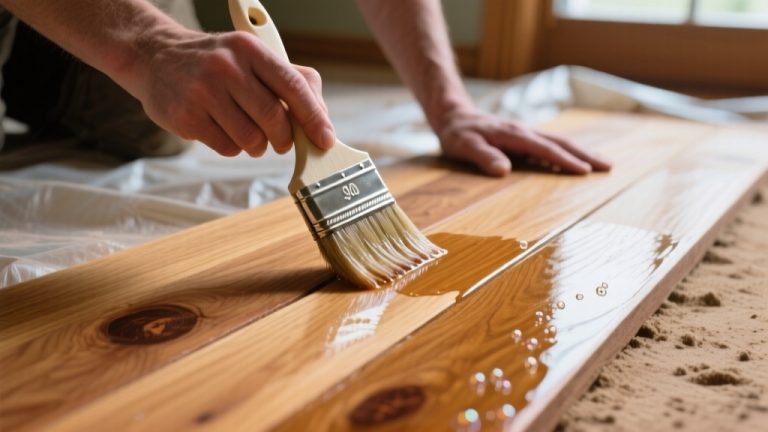
Apply a plastic-specific bonding primer, letting it dry fully before applying two to three thin coats of 100% acrylic exterior paint designed for vinyl.
Avoid painting in direct sunlight or thick layers to guarantee durability. Following these steps guarantees a long-lasting, professional finish. Further guidance will help perfect your technique.
Key Takeaways
- Remove shutters carefully, label them with a numbered template for accurate reinstallation.
- Clean shutters thoroughly with mild detergent, rinse, and dry completely in the shade to prevent warping.
- Lightly sand shutters with 220-grit paper to dull the surface and improve primer adhesion without damaging the vinyl.
- Apply a plastic-specific bonding primer, then use 100% acrylic exterior paint formulated for vinyl in thin, even coats.
- Allow paint to fully cure for 24–48 hours before reinstalling, and use exterior caulk to seal gaps for durability.
How to Remove Vinyl Shutters Safely?

Begin by carefully removing your vinyl shutters to prevent damage and secure a smooth reinstallation later.
Start by gently removing vinyl shutters to avoid damage and ensure easy reattachment later.
Start by creating a numbered template to track each shutter’s position, ensuring you can reattach them correctly.
Use a sturdy ladder and a drill to remove screws holding the shutters to the house.
Work methodically, loosening screws without forcing them to avoid stripping or cracking the vinyl.
Once detached, handle shutters gently to prevent warping or breakage.
Place them on a soft surface to protect finishes.
Label each shutter clearly according to your template, so reassembly is straightforward.
Taking these precise steps minimizes damage risk and saves time during repainting and reinstalling.
This ensures your vinyl shutters look professional after the project.
For ongoing maintenance, it is important to regularly clean surfaces with gentle methods similar to sweeping hardwood floors to avoid damage.
Cleaning Vinyl Shutters Before Painting
Thoroughly cleaning your vinyl shutters before painting is essential to guarantee proper paint adhesion and a smooth finish. Dirt, grime, and oils can prevent paint from bonding correctly, causing premature peeling.
Follow these steps to prepare your shutters:
- Rinse the shutters with a garden hose to remove loose debris. Avoid direct sunlight to prevent streaking and premature drying.
- Mix a cleaning solution using mild detergent or a product like Simple Green. Scrub the shutters with a soft brush to remove stubborn dirt and contaminants.
- Rinse thoroughly with clean water, then allow the shutters to dry completely in a shaded area. Make certain no moisture remains before proceeding to sanding or priming.
Using cleaning methods that control moisture is important to protect surfaces, similar to how minimal moisture is crucial when using Swiffer on hardwood floors.
Choosing the Right Paint for Vinyl Shutters
When selecting paint for your vinyl shutters, you need a product specifically formulated to adhere to plastic surfaces and withstand outdoor conditions.
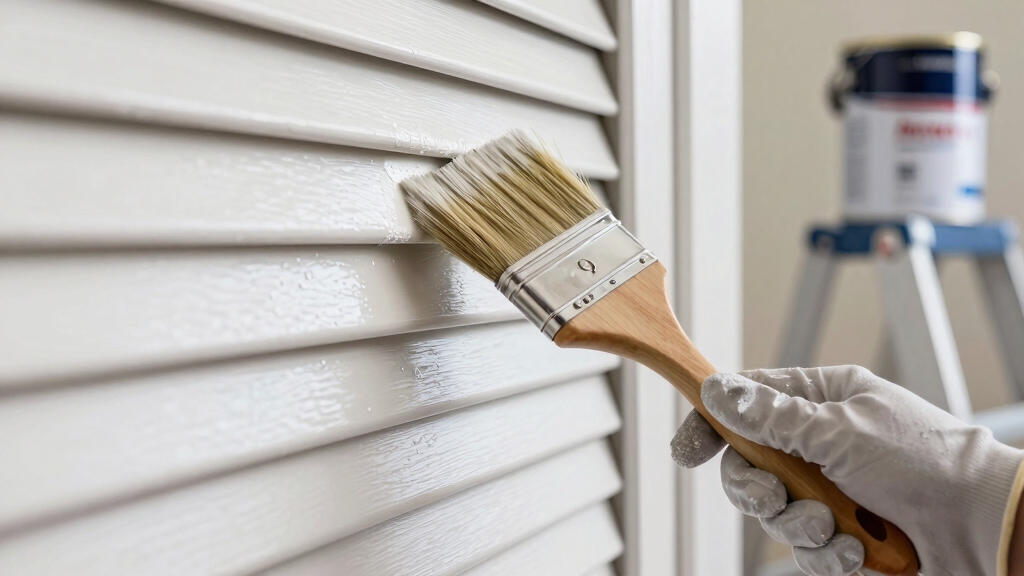
Opt for 100% acrylic latex paint designed for exterior use, ensuring flexibility and durability against weathering. Choose paints labeled safe for vinyl or plastics to promote strong adhesion and prevent cracking or peeling.
UV protection is essential to maintain color vibrancy and reduce fading; lighter shades typically perform better in this regard. Avoid vinyl-based primers or paints as they lack the necessary bonding properties and can cause paint failure.
Trusted brands like Benjamin Moore’s exterior line or Sherwin Williams offer suitable options. By selecting the right paint, you guarantee a long-lasting, professional finish that resists environmental challenges and preserves your shutters’ appearance.
For best results, apply two to three thin coats and allow full drying between each to ensure durability and avoid peeling, following paint application guidelines.
How to Prime Vinyl Shutters for Best Paint Adhesion?
First things first, you’ll want to give your shutters a good clean and dry. This step is super important because it gets rid of any dirt or grease, making sure the surface is ready for paint.
Once they’re clean, grab some 220-grit sandpaper. Lightly sanding the vinyl will dull that glossy finish, and trust me, this little trick helps the primer stick much better.
Now, it’s time to choose your primer. Look for one that’s specifically made for plastic or designed for bonding with vinyl. Apply an even coat and make sure to let it dry completely before you start painting.
Also, using a primer creates a strong bond between paint and substrate, which is key to achieving proper adhesion and durability.
Surface Preparation Techniques
Although vinyl shutters come with a smooth surface that resists paint adhesion, you can guarantee a lasting finish by properly preparing them before priming.
Start by thoroughly cleaning to remove dirt and grime that block primer bonding. Use a mild detergent or a TSP solution, rinsing well and letting shutters dry completely.
Next, lightly sand the surface with 220-grit sandpaper to dull the glossy finish and create texture for primer grip.
Finally, make certain shutters stay out of direct sunlight while drying to avoid warping.
Follow these steps:
- Clean with detergent or TSP, rinse thoroughly, and dry fully.
- Lightly sand with fine-grit paper to remove gloss.
- Keep shutters shaded during prep for peak adhesion.
Proper prep assures primer and paint adhere securely for a durable finish. Additionally, ensure proper ventilation and use of personal protective equipment when working with chemical primers or cleaners to maintain safety.
Primer Selection Tips
Since vinyl shutters have a slick surface that resists paint adhesion, choosing the right primer is essential to guarantee your paint lasts.
Opt for a plastic-specific or bonding primer designed for vinyl, like Sherwin Williams Adhesion Primer. Lightly sand shutters first to improve primer grip.
One coat typically suffices, but apply a second if changing drastically from dark to light colors. Allow full drying time before painting.
Using a primer with superior adhesion properties ensures better durability and moisture resistance for exterior vinyl surfaces.
| Primer Type | Purpose | Application Notes |
|---|---|---|
| Plastic-specific | Bonds to slick vinyl | Usually one coat, dries fast |
| Bonding primer | Enhances paint adhesion | Ideal for difficult surfaces |
| High-adhesion latex | For color changes | Apply extra coat if needed |
| Shellac-based | Seals stains or odors | Use only if necessary |
Painting Vinyl Shutters Step-by-Step (Including Common Mistakes)
Begin by carefully removing the shutters using a drill and ladder. Label each one with a numbered template to guarantee accurate reassembly later.
Next, rinse the shutters thoroughly with a garden hose to clear away loose dirt. Clean them using a detergent-water mix and a scrubbing brush, then let them dry completely.
Rinse shutters with a hose, scrub with detergent solution, then allow to dry fully before proceeding.
Lightly sand the surface with 220-grit sandpaper to remove gloss and improve paint adhesion. Follow this with applying a plastic-specific primer.
Once primed, apply two thin coats of 100% acrylic latex paint in the shade, using an airless sprayer or brush for detailed areas.
Common mistakes to avoid:
- Painting without proper cleaning or sanding
- Applying thick paint layers causing runs
- Painting in direct sunlight or extreme temperatures
For best results, ensure the surface is properly prepared to prevent paint issues related to surface imperfections.
How to Reinstall and Finish Painted Vinyl Shutters?
Once the paint has fully cured, typically after 24 to 48 hours, you can proceed with reinstalling the shutters.
Begin by referencing your numbered template to make certain each shutter returns to its original location. Use a drill to secure the shutters firmly, avoiding overtightening to prevent damage.
Before final attachment, inspect and touch up any screw heads or hardware with a small brush. Fill any gaps between the shutter and siding with high-quality exterior caulk, smoothing it flush for a seamless finish.
Allow the caulk to dry completely before painting over it. Carefully realign louvers and edges to maintain uniformity.
This meticulous approach guarantees a durable, professional look and extends the life of your freshly painted vinyl shutters while preserving curb appeal. For best results, take extra care during the reinstallation process to avoid damage, similar to the precautions recommended when refinishing floors and protecting baseboards from harm during sanding and finishing protective coverings.
Frequently Asked Questions
Can I Paint Vinyl Shutters Without Removing Them From the House?
You can paint vinyl shutters without removing them, but it’s not ideal.
Leaving them in place makes thorough cleaning, sanding, and priming harder, which compromises paint adhesion and durability.
You’ll also struggle to reach all edges and louvers evenly.
For a professional finish that lasts, you should remove the shutters, clean and prep them properly, then paint in a controlled environment before reinstalling.
It’s worth the extra effort.
How Long Does Painted Vinyl Shutter Paint Typically Last Outdoors?
Imagine your vinyl shutters as a shield guarding your home’s charm. When properly prepped, primed, and painted with quality acrylic latex paint, their finish typically lasts 5 to 7 years outdoors.
This lifespan depends on sunlight exposure, weather conditions, and maintenance. To keep that vibrant defense strong, avoid harsh cleaners and repaint when you notice fading or peeling.
Your care guarantees they stay both beautiful and resilient against time’s elements.
What Is the Best Weather Condition for Painting Vinyl Shutters?
You want to paint vinyl shutters on dry days with temperatures between 60-90°F.
Avoid direct sunlight to prevent paint from drying too fast and causing runs or poor adhesion.
Also, pick a day with low humidity to guarantee smooth drying.
Don’t paint if rain or strong winds are forecasted within 24-48 hours after painting, since moisture can ruin the finish.
Ideal weather guarantees your paint lasts longer and looks flawless.
Can I Use a Regular Spray Paint on Vinyl Shutters?
You might think regular spray paint is a quick fix, but it won’t hold up well on vinyl shutters.
Unlike specialized exterior acrylic latex paint, regular spray paint often lacks the flexibility and adhesion needed for vinyl surfaces, leading to peeling and cracking.
Instead, choose a vinyl-safe, exterior-grade acrylic paint with UV protection. This guarantees durability, prevents damage from sun exposure, and keeps your shutters looking fresh for years.
How Do I Fix Peeling Paint on Vinyl Shutters?
To fix peeling paint on vinyl shutters, start by removing the peeling paint with a scraper or wire brush.
Clean the surface thoroughly using a mild detergent or TSP mixture to remove dirt and oils.
Rinse and let dry completely.
Lightly sand with 220-grit sandpaper to promote adhesion.
Apply a vinyl-specific bonding primer, allow it to dry, then repaint with a 100% acrylic latex paint formulated for vinyl.
This guarantees durability and prevents future peeling.
Get Professional Results With the Best Painting Method
So, you’ve conquered vinyl shutters like a pro—removing, cleaning, priming, painting, and reinstalling with military precision.
Now, sit back and admire your handiwork, knowing you’ve avoided the classic disasters of peeling paint and uneven coats.
Because, really, who doesn’t want their shutters to look like a showroom model rather than a weather-beaten relic?
Follow these steps, and your vinyl shutters will thank you. If only they could talk, they’d probably say, “Finally, someone who gets it.”