Best Way to Paint Pressure Treated Wood: Don’t Rush It
To paint pressure-treated wood effectively, first make sure it’s completely dry. This may take weeks to months.
Clean it thoroughly to remove dirt and mildew. Repair any damage, then use a high-quality, water-based acrylic primer made for treated wood to secure adhesion.
Apply two to three thin coats of exterior latex paint in dry, moderate weather for lasting protection. Follow these steps carefully, and you’ll discover detailed tips for achieving a durable, beautiful finish.
Key Takeaways
- Allow pressure-treated wood to dry completely, typically several weeks to months, before painting to prevent trapped moisture and paint failure.
- Clean the wood surface thoroughly with a mild detergent and nylon brush, removing dirt, mildew, and debris before priming.
- Use a high-quality, water-based latex primer formulated for pressure-treated wood to ensure strong adhesion and block chemical migration.
- Apply two to three thin coats of exterior 100% acrylic or latex paint, allowing each coat to dry fully between applications.
- Paint only in dry weather with temperatures between 50°F and 85°F, avoiding high humidity, rain, or overnight dew for optimal curing.
How to Tell If Pressure Treated Wood Is Ready for Painting?
When determining if pressure-treated wood is ready for painting, you need to make sure it’s fully dry to prevent peeling or blistering.
Freshly treated wood contains high moisture levels and preservatives that inhibit paint adhesion. Drying times vary from weeks to months depending on climate and wood type.
To check readiness, sprinkle water on the surface: if it absorbs, the wood is ready; if it beads, more drying is necessary.
Typically, waiting up to six months guarantees thorough curing and moisture escape, critical for coating durability.
Kiln-dried after treatment (KDAT) wood dries faster and allows earlier painting.
Avoid rushing this process because premature painting leads to coating failure and costly repairs.
Accurately evaluating dryness guarantees your paint job lasts and protects effectively.
Proper acclimation and moisture content monitoring, similar to the process used for engineered hardwood floors, can help ensure the wood is ready for finishing.
Prepare Pressure Treated Wood for Painting: Clean, Dry, Repair
Hey there! So, if you’re looking to paint your pressure-treated wood, the first thing you’ll want to do is give it a good clean. Grab a nylon-bristle brush and some mild detergent—this will help you scrub away any dirt, mildew, or debris that might be stuck on there.
Once you’ve cleaned it up, it’s super important to let the wood dry out completely. This usually takes a few weeks, but trust me, it’s worth the wait. Proper drying is key for making sure your paint sticks well and doesn’t start peeling later on.
Now, while you’re waiting for it to dry, take a moment to inspect the wood for any damage. If you spot any nicks or cracks, you can easily fix them with a two-part epoxy wood filler. Just fill in those areas and smooth it out to create a nice, stable surface.
Once you’ve done that, you’ll be all set to start priming! For best results, make sure to sand the surface with appropriate grit to create a smooth base that helps paint adhere better.
Thorough Cleaning Techniques
Cleaning pressure-treated wood thoroughly is essential to guarantee proper paint adhesion and long-lasting results.
Start by removing all debris from the surface and surrounding area to prevent contamination.
Use a nylon-bristle brush combined with a mild cleaner, like soapy water, to scrub away dirt, mildew, and mold.
Avoid harsh chemicals that could damage the wood or interfere with paint bonding.
Rinse the surface well with clean water to eliminate residue.
Focus on crevices and grooves where contaminants accumulate.
After cleaning, allow the wood to dry completely before proceeding.
Inspect for any remaining stains or buildup and repeat cleaning if necessary.
This meticulous approach assures the wood is free from contaminants that could cause peeling or blistering, setting a solid foundation for a durable paint job.
It is also important to maintain the wood’s moisture content within recommended levels to prevent paint failure caused by expansion and contraction due to temperature fluctuations.
Proper Drying Time
Although pressure-treated wood provides excellent durability, you can’t rush the drying process before painting. Freshly treated lumber contains high moisture and chemical preservatives that prevent paint from adhering properly.
To avoid peeling or blistering, let the wood dry thoroughly—typically six months in most climates. You can test readiness by sprinkling water on the surface; if it absorbs, you’re ready to paint. If water beads, the wood needs more drying time.
Kiln-dried after treatment (KDAT) wood dries faster, allowing earlier painting. Always make sure the wood is completely dry, as trapped moisture leads to coating failure and shortens paint life.
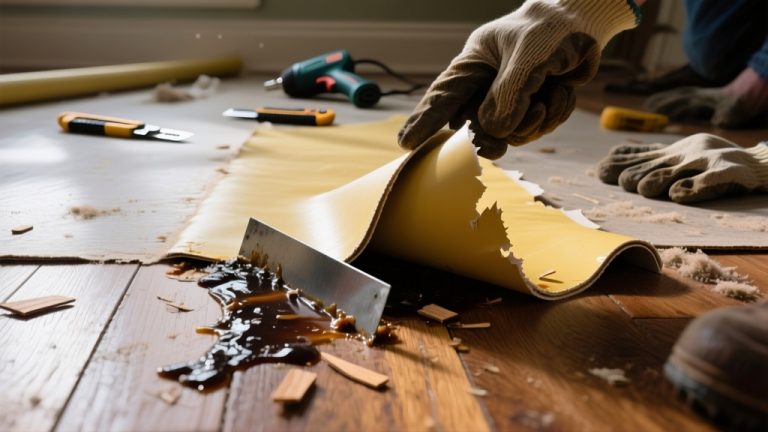
Patience during this stage guarantees a smooth, long-lasting finish on your pressure-treated wood project. Proper surface preparation, including cleaning and removing residual layers, is essential for optimal paint adhesion and durability.
Repairing Wood Damage
Before applying primer and paint, you’ll want to repair any damage to the pressure-treated wood to guarantee a smooth, durable finish.
Begin by inspecting the wood for cracks, holes, or gouges. Remove loose debris and dirt from damaged areas to secure proper adhesion.
Use a two-part epoxy wood filler to fill holes and deep cracks; it bonds strongly and resists moisture. Apply the filler with a putty knife, smoothing it flush with the surface.
Allow it to cure fully according to manufacturer instructions. Sand the repaired spots lightly to create an even surface.
Properly repairing damage prevents moisture infiltration and paint failure, enhancing longevity. Taking these precise steps secures your paint adheres well and your project maintains its durability over time.
For the best results, choose an epoxy with water resistance and durable tensile strength to withstand outdoor conditions and daily wear.
Choose the Right Primer for Pressure Treated Wood
When it comes to painting pressure-treated wood, choosing the right primer is essential. It’s best to go for a high-quality primer specifically designed for this type of wood. This will help ensure strong paint adhesion and durability in the long run.
Now, you might be wondering, should you pick an oil-based primer or a latex one? Well, oil-based primers tend to penetrate deeper into the wood, which is great for long-lasting results. On the other hand, latex primers are super easy to clean up and offer excellent moisture resistance, making them a popular choice too.
When you’re ready to apply the primer, take your time. Use a brush for those tight spots where a roller just won’t fit, and grab a roller for the larger surfaces. This way, you’ll create a consistent and protective base layer that will make your paint job look fantastic!
Also, just like you need to avoid excessive moisture when cleaning hardwood floors to prevent damage, it’s important to ensure the wood is dry before priming to maintain paint adhesion and durability.
Primer Types Comparison
When painting pressure-treated wood, selecting the right primer is crucial to guarantee strong adhesion and long-lasting protection. You’ll mainly choose between water-based (latex) and oil-based primers.
Water-based primers dry faster and clean up easily, while oil-based primers provide deeper penetration and block tannin bleed. Acrylic primers offer excellent flexibility to accommodate wood movement.
Consider drying time, cleanup, and wood condition when deciding.
| Primer Type | Key Features |
|---|---|
| Water-Based | Fast drying, easy cleanup, flexible |
| Oil-Based | Deep penetration, stain blocking |
| Acrylic | Durable, moisture-resistant |
| Shellac-Based | Excellent stain sealing |
| Alkyd | Strong adhesion, good for rough surfaces |
Choose a primer that matches your wood’s moisture level and your project needs for best results. Keep in mind that improper treatment, such as exposure to chemical degradation, can weaken wood fibers and affect primer adhesion.
Application Tips
Although selecting the right primer is essential, applying it correctly on pressure-treated wood guarantees peak adhesion and durability. First, make sure the wood is completely dry; moisture hinders primer bonding.
Use a high-quality exterior latex or water-based primer, applying it evenly with a brush on tight spots and a roller on flat surfaces. Avoid thick coats; apply two to three thin layers for optimal coverage and adhesion.
Allow each coat to dry thoroughly before the next. Focus on sealing end grains and joints to prevent moisture infiltration. Clean brushes and rollers promptly to maintain tool quality.
Proper application minimizes peeling and blistering, extending the life of your paint job on pressure-treated wood. Following these steps makes certain your project withstands weather and time effectively. For best results, always allow sufficient drying time before applying subsequent coats to ensure proper paint adhesion and durability.
Pick the Best Paint for Pressure Treated Wood
Selecting the right paint for pressure-treated wood guarantees durability and a visually appealing finish.
You should choose high-quality, water-based exterior latex or acrylic paints because they flex with the wood’s natural expansion and contraction.
Avoid oil-based paints; they often fail to adhere properly to the chemically treated surface.
Satin or semi-gloss finishes offer the best balance of durability and ease of maintenance, while flat paints require more frequent touch-ups.
Always verify the paint’s compatibility with your primer and lumber type by checking manufacturer labels.
Sticking to premium products from the same manufacturer assures peak bonding and longevity.
For enhanced durability and a pleasing sheen, consider finishes with semi-gloss reflection, which balance appearance with maintenance needs.
Apply Primer and Paint Step-by-Step
Alright, let’s get started! First, you’ll want to grab a high-quality exterior primer. It’s important to apply this evenly—use a brush for those tricky corners and a roller for the flat surfaces.
This way, you’ll ensure a strong adhesion for what’s coming next.
Once the primer is on, it’s time for the paint. Make sure to go with thin and consistent coats.
Oh, and don’t forget to let each layer dry fully before adding the next one! This little step is key to preventing any peeling or blistering down the line.
For added protection, consider using oil-based sealers that penetrate deeply and provide durable water and UV resistance before painting.
Primer Application Tips
Before you begin applying primer on pressure-treated wood, make sure the surface is completely dry and clean. This sets the foundation for strong paint adhesion.
Choose a high-quality exterior latex or 100% acrylic primer designed specifically for pressure-treated lumber. Use a brush to cut in narrow or recessed areas, ensuring primer penetrates grooves and end grains.
Follow with a roller for even coverage on flat surfaces. Apply thin, uniform coats to prevent drips and pooling. Avoid thick layers that trap moisture and cause peeling.
Allow the primer to dry fully according to the manufacturer’s instructions before painting. Proper application enhances paint durability and helps resist moisture and chemical migration from the wood.
This ensures your finish lasts longer and withstands environmental stress effectively.
Paint Coating Techniques
Once your primer has fully dried, you can move on to applying the paint coats that will protect and beautify your pressure-treated wood.
Begin by applying thin, even coats using a high-quality exterior latex or acrylic paint designed for flexibility and durability.
Start with a brush to cover corners and recessed areas, then use a 3/8″ nap roller for smooth, uniform coverage on flat surfaces.
Apply two to three thin coats rather than one thick coat to prevent peeling and guarantee longevity.
Allow each coat to dry completely before applying the next.
For larger projects, consider a paint sprayer to achieve a professional finish.
Always maintain proper ventilation and follow manufacturer drying times to maximize adhesion and durability.
How Many Coats of Paint Should You Apply?
Typically, you’ll want to apply two to three thin coats of paint on pressure-treated wood to guarantee proper adhesion and durability.
Applying multiple thin layers helps the paint bond effectively and reduces the risk of peeling or blistering caused by trapped moisture.
Start with a high-quality primer to create a stable base, then follow with your chosen exterior latex or acrylic paint.
Allow each coat to dry thoroughly before applying the next; this makes certain of even coverage and prevents trapping moisture beneath the surface.
Avoid thick, heavy applications, as they can crack when the wood expands or contracts.
How to Handle Weather When Painting Pressure Treated Wood?
Although pressure-treated wood offers durability, weather conditions play a vital role in achieving a lasting paint finish. You must consider moisture levels and temperature to guarantee proper adhesion and prevent peeling or blistering.
Paint only when the wood is fully dry; wait weeks to months after treatment. Avoid painting in high humidity or rain to prevent trapping moisture.
Choose a dry forecast window of at least 24-48 hours for drying between coats. Apply paint when temperatures range between 50°F and 85°F for optimal curing. Protect freshly painted surfaces from overnight dew or sudden weather changes.
Common Mistakes to Avoid When Painting Pressure Treated Wood
If you skip proper drying or surface preparation, your paint job on pressure-treated wood will likely fail prematurely.
Never paint wood still damp or fresh from treatment; moisture causes blistering, peeling, and poor adhesion.
Avoid neglecting thorough cleaning. Dirt, mildew, and residues prevent primer and paint from bonding.
Don’t overlook repairing holes or cracks. Damaged areas undermine paint durability.
Using the wrong primer or skipping it altogether leads to peeling and flaking.
Avoid oil-based paints, which don’t adhere well to pressure-treated lumber.
Applying thick coats instead of multiple thin layers causes uneven drying and cracking.
Finally, don’t paint in extreme temperatures or high humidity, which impede curing.
Follow drying, preparation, and product guidelines precisely to guarantee a long-lasting, professional finish.
Maintain and Repaint Pressure Treated Wood for Longevity
Maintaining and repainting pressure-treated wood regularly guarantees its protective qualities and aesthetic appeal endure over time. You should inspect the wood annually for signs of wear, peeling paint, or moisture damage. Address any issues immediately to prevent decay.
Regular maintenance and repainting preserve the protection and beauty of pressure-treated wood over time.
Follow these key steps to maintain and repaint effectively:
Clean the surface thoroughly with a mild detergent and nylon brush to remove dirt and mildew. Sand peeling or rough areas to create a smooth, paint-ready surface. Apply a compatible primer to bare or repaired spots before repainting. Use high-quality exterior paint designed for pressure-treated wood.
Make certain proper drying time between coats and monitor moisture levels to avoid coating failure. Consistent upkeep extends the wood’s lifespan and keeps it looking fresh.
Select Eco-Friendly Primers and Paints for Pressure Treated Wood
To preserve both the longevity of your pressure-treated wood and the environment, choosing eco-friendly primers and paints plays a significant role.
Look for products labeled low-VOC or no-VOC to minimize harmful emissions. Water-based primers and paints are preferable since they offer excellent adhesion and flexibility without toxic solvents.
| Feature | Eco-Friendly Primer | Eco-Friendly Paint |
|---|---|---|
| Base | Water-based, latex | Acrylic or latex |
| VOC Content | <50 g/L | <50 g/L |
| Benefits | Strong adhesion, mildew resistant | Durable, flexible, low odor |
Selecting these products guarantees durability and environmental responsibility. Always confirm compatibility with your pressure-treated wood type and follow manufacturer guidelines for best results.
Frequently Asked Questions
Can Pressure-Treated Wood Be Stained Instead of Painted?
Yes, you can stain pressure-treated wood instead of painting it.
Just make sure the wood is fully dried; this often takes several months because moisture and preservatives can block stain absorption.
Clean the surface thoroughly, then apply a high-quality, exterior wood stain designed for pressure-treated lumber.
Staining enhances the wood’s natural grain, provides some protection, and requires less maintenance than paint.
Proper preparation is essential for a lasting finish.
How Long Does Pressure-Treated Wood Last Without Paint?
Pressure-treated wood typically lasts 20 to 40 years without paint, thanks to its chemical preservatives that resist rot, decay, fungus, and termites.
However, exposure to harsh weather and moisture can shorten its lifespan if left uncoated. You’ll want to monitor its condition regularly and consider sealing or painting to protect it further.
Proper maintenance extends durability and keeps the wood structurally sound over time.
Is Sealing Necessary After Painting Pressure-Treated Wood?
You don’t necessarily need to seal pressure-treated wood after painting. Proper primer and paint usually provide sufficient protection.
Since pressure-treated wood can last 20-40 years under the right conditions, sealing adds an extra moisture barrier but isn’t mandatory if you apply 2-3 coats of high-quality exterior acrylic paint.
However, using a compatible sealer can extend paint life and prevent peeling, especially in harsh climates. Choose based on your wood’s exposure and finish durability.
Can Pressure-Treated Wood Cause Health Issues During Painting?
Yes, pressure-treated wood can pose health risks while painting because it contains chemical preservatives that may release harmful fumes or dust.
You should wear protective gear like gloves, a mask, and eye protection to avoid skin irritation and inhalation of toxic particles.
Work in a well-ventilated area and avoid sanding dry treated wood without proper respiratory protection.
Taking these precautions keeps you safe during your painting project.
What Tools Clean Brushes After Painting Pressure-Treated Wood?
To clean brushes after painting pressure-treated wood, you’ll need the right tools: warm water, mild soap or brush cleaner, and a stiff brush or comb.
Rinse your brushes thoroughly under warm running water, then work soap into the bristles to break down paint residue.
Use a brush comb to remove dried paint and debris.
Finish by rinsing well and reshaping bristles before drying.
These steps keep your brushes in great condition for future use.
Timing Is Everything: Protect Your Wood the Smart Way
Think of painting pressure treated wood like nurturing a garden. You wouldn’t rush planting seeds in frozen soil. Waiting until the wood is truly dry, usually 2-3 weeks, guarantees your paint sticks and lasts. Skipping this step is like watering seeds too soon, washing away your efforts.
By prepping carefully, choosing the right primer and paint, and respecting weather conditions, you’ll protect your wood beautifully. This extends its life and saves you time and money down the road.