Best Way to Remove Moss From Roof: Action Today
To remove moss from your roof effectively, start by securing safety gear like a full-body harness. Clear loose debris with a leaf blower.
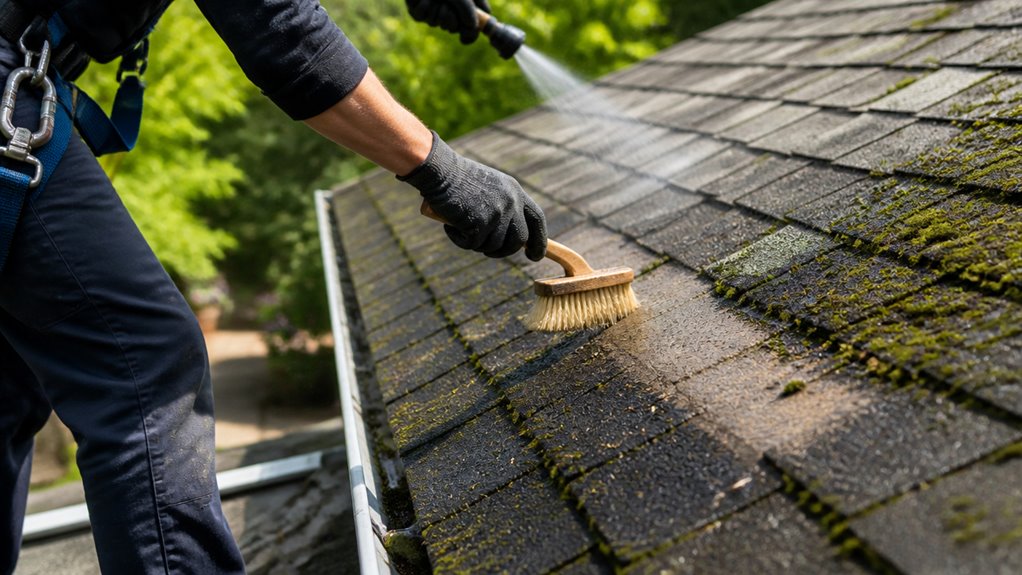
Treat moss with a zinc sulfate solution or a bleach-based cleaner applied via low-pressure sprayer on a dry day. Gently brush moss away using a soft nylon broom.
Rinse with low-pressure water to avoid shingle damage. Prevent regrowth by installing zinc strips and maintaining proper roof care.
Explore detailed steps and precautions to ensure lasting results.
Key Takeaways
- Gently remove moss using a soft synthetic brush or push broom to avoid damaging shingles.
- Apply a bleach-based or horticultural oil cleaning solution, let sit 15–30 minutes, then rinse with low-pressure water.
- Wet surrounding plants before and after treatment to protect vegetation from chemical runoff.
- Use zinc strips near the ridge to prevent moss growth by releasing zinc particulates with rainwater.
- Schedule biannual roof inspections and trim overhanging branches to reduce moisture and moss buildup.
Why You Should Remove Moss From Your Roof?

Although moss might seem harmless, you should remove it from your roof promptly. It retains moisture that accelerates shingle deterioration and promotes structural damage.
Remove moss from your roof promptly to prevent moisture buildup that damages shingles and causes structural issues.
Moss growth lifts shingles, compromising their seal and allowing water infiltration that leads to rot and leaks. The persistent dampness encourages fungal growth, further weakening roofing materials and the underlying structure.
Additionally, moss traps debris that clogs gutters, causing water backup and potential foundation issues. By addressing moss early, you prevent these cascading damages and extend your roof’s lifespan.
Timely removal also maintains your roof’s integrity and appearance, reducing costly repairs. Ignoring moss can lead to premature roofing failure, so you must act decisively to protect your investment and safeguard your home’s structural safety.
Proper surface preparation is essential to ensure long-term effectiveness when treating and preventing moss regrowth on roofing materials.
Preparing Your Roof and Surroundings Safely
Before you kick things off, take a moment to secure your harness system. This is super important for ensuring safe access to the roof. You definitely want to feel secure up there!
Next, let’s protect those plants and the grass below. Just give them a good soak to prevent any chemical runoff while you’re cleaning. It’s a small step that makes a big difference!
Now, to prep the surface for treatment, grab a gas-powered leaf blower and clear away any loose debris and moss. This will make your job a lot smoother. Trust me, you’ll thank yourself later!
Proper preparation, including thorough cleaning and removal of debris, is key to effective treatment and long-lasting results on your roof surface, similar to surface preparation techniques used in other home maintenance projects.
Harness System Safety
Securing a harness system properly is essential for maintaining your safety while working on the roof. Begin by selecting a full-body harness that fits snugly and meets industry safety standards.
Attach the harness to a secure anchor point rated to support your weight and potential fall forces. Inspect all components, including webbing, buckles, and connectors, for wear or damage before use.
Connect the lanyard or lifeline with a shock absorber to reduce impact if a fall occurs. Adjust the harness straps to prevent slack and guarantee freedom of movement.
Before ascending, verify that the anchor point is stable, preferably on structural roof elements like rafters or beams. Use a rope grab or self-retracting lifeline to maintain continuous fall protection as you navigate the roof surface.
Regular inspections and maintenance of safety equipment are as crucial as those for fire sprinkler systems to ensure reliable operation in emergencies.
Protect Surrounding Vegetation
When preparing to remove moss from your roof, protecting the surrounding vegetation is essential to prevent chemical damage from runoff.
Chemicals like bleach or trisodium phosphate can harm plants if not properly managed.
To safeguard your greenery, follow these steps:
- Thoroughly wet plants and grass below the roof before applying any cleaning solution to dilute potential runoff.
- Use low-pressure spray equipment to control application and minimize overspray onto vegetation.
- After treatment, rinse plants again to wash off any residual chemicals.
Additionally, wearing protective gloves and proper gear during application helps ensure safety when handling strong cleaning agents.
Debris Removal Preparation
Protecting your plants from chemical runoff sets the stage for safely preparing your roof for debris removal.
Begin by thoroughly wetting the vegetation and grass beneath the roof to minimize chemical absorption and damage.
Next, secure your harness system properly before accessing the roof to guarantee safety.
Use a gas-powered leaf blower to remove loose debris and excess moss, directing airflow from the roof peak toward gutters to prevent shingle damage.
After initial debris removal, clean gutters meticulously to maintain proper water flow.
Plan your work on a dry, hot day to optimize drying and treatment effectiveness.
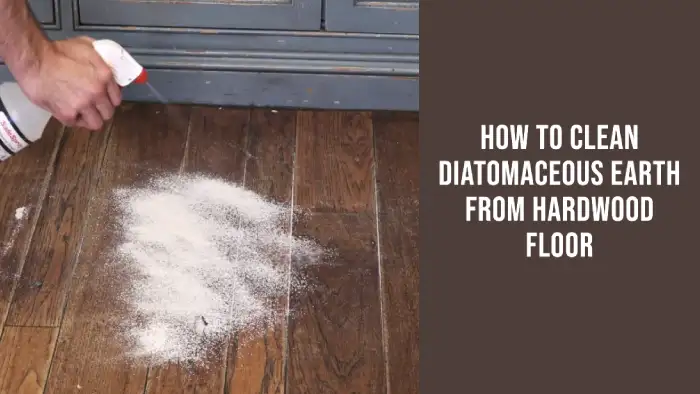
Implementing vegetation management techniques around your roof area can further protect soil and plants from runoff impacts.
These precise steps safeguard your roof’s structure and surrounding environment, enabling efficient and safe moss removal preparation.
Best DIY Cleaning Mixtures for Moss Removal
Although commercial products are available, you can effectively remove moss using several DIY cleaning mixtures that combine common household ingredients with proven moss-killing agents.
These solutions target moss by altering pH, disrupting cell walls, or suffocating growth.
Consider these three effective mixtures:
- Mix 1 gallon water, up to 1 quart bleach, and 1/4 cup trisodium phosphate for a strong oxidizing solution that kills moss efficiently.
- Combine 1 gallon water, 1/4 cup dish soap, 1/4 cup horticultural oil, and baking soda to create a surfactant and smothering blend suitable for delicate roofs.
- Use 1 gallon water, 1 cup white vinegar, and 1/4 cup salt to exploit acidity and salinity for moss control without harsh chemicals.
Each mixture requires proper application techniques for safety and effectiveness. It is important to avoid using harsh chemical cleaners or acidic solutions that can cause surface damage to the roof materials during moss removal.
Applying Moss Removal Solutions Step-by-Step
Before you dive into moss removal, let’s get everything ready. First off, make sure you’ve got your safety gear on—better safe than sorry, right? And don’t forget to wet any nearby plants to protect them from the solution. Oh, and take a moment to clear away any debris on the roof; it’ll make the whole process smoother.
Now, onto the fun part! Pick the right cleaning mixture for your needs. Once you’ve got that sorted, grab a pump sprayer or a spray bottle and apply the solution evenly across the affected areas. Give it a little time to work its magic—about 15 to 30 minutes should do the trick.
After that, gently brush the moss away and rinse everything off with low pressure. This way, you’ll avoid damaging those shingles. Easy peasy!
Remember to wear proper protective measures during the process to ensure your safety while handling cleaning solutions.
Preparing Roof Surface
Once you’ve secured your safety harness and cleared loose debris from the roof, you can begin applying the moss removal solutions.
Proper preparation guarantees effectiveness and prevents damage. Start by wetting plants and grass below the roof to shield them from chemical runoff.
Next, use a gas-powered leaf blower to remove excess moss and debris, directing airflow from the roof peak toward the gutters.
Finally, clean out gutters thoroughly to facilitate proper drainage during and after treatment.
Follow these essential preparation steps:
- Confirm harness system is securely fastened and stable.
- Protect surrounding vegetation by pre-wetting with water.
- Employ a leaf blower to clear loose moss and debris, then clean gutters.
These measures optimize solution application and safeguard your roof and environment. In addition, always wear appropriate personal protective equipment when handling chemical treatments to ensure safety.
Applying Cleaning Mixtures
After preparing the roof surface by clearing debris and protecting nearby plants, you’ll begin applying the cleaning mixtures designed to eliminate moss effectively.
Select a suitable solution, such as a bleach-based mix with trisodium phosphate or an oxygen bleach formulation.
Use a pump sprayer or spray bottle to apply the mixture evenly, targeting moss-infested areas while minimizing runoff.
Apply on a dry, hot day for peak chemical action.
Allow the solution to dwell for 15-30 minutes to penetrate moss structures thoroughly.
Afterward, gently agitate with a soft-bristle brush or broom, working from roof peak down to prevent shingle damage.
Avoid pressure washing.
Finally, rinse with low-pressure water to remove residual solution.
Re-wet plants below the roof to protect them from chemical exposure.
Controlling moisture levels after cleaning helps prevent moss and mold from returning on roof surfaces.
Tools and Techniques to Avoid Roof Damage During Moss Removal
Although removing moss is essential for roof maintenance, using improper tools or techniques can cause significant damage to shingles and roofing materials.
To protect your roof, follow these key guidelines:
- Use soft synthetic brushes or push brooms to gently agitate moss without scratching or dislodging shingles. Avoid hard scrubbing or wire brushes that can compromise shingle integrity.
- Never use high-pressure washers or blowers directed upward. Pressure washing can strip granules from shingles and damage seals, accelerating deterioration.
- Apply cleaning mixtures with low-pressure sprayers to minimize runoff and avoid oversaturation. Allow dwell time before gently rinsing with a garden hose set to low pressure.
Always wear personal protective equipment (PPE) such as gloves and safety glasses to protect yourself from debris and cleaning chemicals during moss removal.
When and Why to Hire Professionals for Moss Removal?
If you’re dealing with extensive moss growth or delicate roofing materials, hiring professionals guarantees safe and effective removal without risking damage.
Professionals use industry-grade sodium hypochlorite solutions, applying them with controlled techniques to avoid harming shingles or surrounding vegetation.
They pre-treat, agitate moss mechanically, and post-treat to assure thorough eradication.
Their expertise in safety measures, like securing harness systems and protecting plants from chemical runoff, minimizes hazards during roof access and cleaning.
You should also call in experts if your roof pitch is steep or if you lack proper equipment.
DIY attempts risk structural damage and personal injury.
Ultimately, professional services save time, assure compliance with safety protocols, and achieve longer-lasting moss removal results.
This preserves your roof’s integrity and extends its lifespan.
How to Prevent Moss From Growing Back on Your Roof?
Once you’ve removed moss from your roof, the next step is to implement strategies that prevent its return.
Effective prevention requires targeted interventions that inhibit moss growth and maintain your roof’s integrity.
- Install Zinc Strips: Secure zinc strips near the roof ridge, ensuring partial exposure under shingles. Rainwater will carry zinc particulates down the roof, naturally inhibiting moss spores.
- Apply Zinc Sulfate Solution: For larger areas, spray a mixture of 3 pounds zinc sulfate monohydrate in 9 gallons of water. Heavier infestations demand a stronger solution (1 lb per 3 gallons).
- Modify Environmental Factors: Trim overhanging branches to increase sunlight and airflow. Promptly repair leaks and clear gutters to reduce moisture buildup conducive to moss growth.
These targeted actions create an inhospitable environment for moss, greatly reducing regrowth potential.
Maintenance Tips to Keep Your Roof Moss-Free Longer
Regularly inspecting and maintaining your roof plays a crucial role in keeping moss from returning.
Consistent roof inspections and upkeep are essential to prevent moss regrowth and protect your home.
Start by trimming overhanging branches to reduce shade and moisture retention. Clean gutters frequently to prevent water buildup that encourages moss growth.
After moss removal, rinse nearby plants thoroughly to avoid chemical damage. Use a soft synthetic nylon brush or push broom for gentle debris removal without harming shingles.
Avoid pressure washing, which can damage shingle seals. Monitor roof leaks and repair promptly to minimize moisture accumulation.
Consider scheduling biannual inspections, ideally in spring and fall, to address early moss development. Maintaining proper ventilation and ensuring roof drainage efficiency also reduces moss-friendly conditions.
How Zinc Treatments Prevent Roof Moss?
Applying zinc treatments effectively inhibits moss growth by releasing zinc ions that disrupt moss cell development and reproduction.
When you apply zinc sulfate or install zinc strips near the roof ridge, zinc particles wash down with rainwater. This creates an inhospitable environment for moss spores. This proactive approach prevents moss from establishing and spreading on your roof.
To maximize effectiveness, focus on these key factors:
- Proper Application – Use a diluted zinc sulfate solution or install zinc strips securely under shingles for continuous ion release.
- Coverage Area – Treat 600-1000 square feet with the recommended concentration to guarantee uniform protection.
- Maintenance – Regularly inspect and replace zinc sources, trim overhanging trees, and clear gutters to sustain zinc efficacy.
Frequently Asked Questions
Can Moss Damage the Underlying Roof Structure Over Time?
Yes, moss can damage your roof’s underlying structure over time. It retains moisture, promoting wood rot and accelerating shingle deterioration.
Moss growth lifts shingles, allowing water infiltration, which leads to leaks and structural weakening.
If you don’t address it promptly, the trapped moisture can degrade roofing materials, shorten their lifespan, and cause costly repairs.
Regular inspection and removal are essential to maintaining your roof’s integrity and preventing long-term damage.
What Is the Environmental Impact of Moss Removal Chemicals?
You should know moss removal chemicals can harm nearby plants and aquatic life if runoff isn’t controlled.
Bleach and zinc compounds, for example, can alter soil chemistry and water quality.
To minimize impact, you must wet vegetation below and apply solutions carefully with low-pressure sprayers.
Rinsing treated areas gently and re-wetting plants afterward helps reduce chemical exposure.
Always choose biodegradable or oxygen-based mixes when possible to protect the environment.
How Long Does Moss Typically Take to Regrow After Removal?
You’ll love how quickly moss makes a comeback; typically within 6 to 12 months after removal.
Despite your thorough cleaning, spores find their way back, especially in shaded, moist areas.
To delay regrowth, maintain zinc strips and keep gutters clear.
Regular inspections and preventive treatments extend intervals between cleanings.
Understanding moss’s resilience helps you plan maintenance schedules realistically.
This ensures your roof stays protected without constant, exhaustive efforts.
Are Certain Roof Materials More Prone to Moss Growth?
Yes, certain roof materials are more prone to moss growth.
You’ll find that asphalt shingles, wood shakes, and slate roofs retain moisture longer, creating ideal conditions for moss.
In contrast, metal and tile roofs dry quickly and resist moss buildup.
If your roof material is susceptible, you should implement regular cleaning and preventive measures like zinc strips to inhibit moss growth and protect your roofing investment effectively.
Can Moss Removal Improve Home Energy Efficiency?
Can moss buildup impact your home’s energy use? Absolutely.
Moss traps moisture, which can degrade roofing materials and reduce insulation effectiveness.
This leads to heat loss in winter and heat gain in summer.
By removing moss, you restore your roof’s integrity and thermal performance.
This helps your HVAC system run more efficiently.
This preventive maintenance lowers energy consumption and utility bills while extending your roof’s lifespan.
Don’t overlook moss removal; it’s an energy-saving strategy.
Say Goodbye to Roof Moss and Hello to Lasting Protection
If you don’t remove moss from your roof, it might just swallow your entire home. Taking these expert steps guarantees your roof stays sturdy, clean, and moss-free.
With the right tools, safe preparation, and effective treatments like zinc, you’ll prevent moss from turning your roof into a green jungle. Don’t let moss win; act now to protect your investment and keep your roof performing flawlessly for years to come.