How to Seal Pressure Treated Wood: A Simple Seal
To seal pressure-treated wood effectively, wait until it’s fully dry, usually weeks to months. Check moisture content below 15% with a moisture meter.
Start by cleaning and lightly sanding the surface. Immediately treat cut ends with a preservative like copper naphthenate.
Use a penetrating, oil-based sealer with UV protection. Apply thin, even coats along the grain. Proper sealing prevents rot, moisture damage, and sun harm. This extends wood life and durability.
Keep following for detailed steps and expert tips.
Key Takeaways
- Wait until pressure-treated wood is fully dry with moisture content below 15% before sealing to ensure proper sealant adhesion.
- Clean and prepare surfaces by removing dirt, mildew, and mill glaze, and treat all cut ends immediately with a preservative.
- Choose a penetrating, oil-based, water-repellent sealer formulated specifically for pressure-treated wood with UV resistance and fungicides.
- Apply sealant evenly along the grain using a brush or sprayer, covering all surfaces including edges and cut ends with multiple thin coats.
- Seal during dry, moderate weather and maintain a wet edge to avoid lap marks and ensure thorough, long-lasting protection.
Why You Need to Seal Pressure Treated Wood?

Although pressure-treated wood comes with chemical preservatives, you still need to seal it to protect cut ends and exposed surfaces.
Pressure-treated wood requires sealing to safeguard cut ends and exposed areas despite its chemical treatment.
The treatment penetrates only the outer layer, leaving the interior vulnerable to moisture and decay, especially where the wood’s been cut.
If you skip sealing these areas, rot can set in quickly, compromising structural integrity.
Home inspections often reveal rotted posts from unsealed cuts, underscoring this risk.
Sealing prevents moisture from infiltrating the untreated interior wood, extending the lifespan of your project.
Plus, a good sealant shields the surface against UV damage, dirt, and weathering, ensuring durability.
Additionally, applying a water-repellent preservative can enhance protection by preventing moisture absorption and preserving fire-retardant properties.
When to Seal Pressure Treated Wood for Best Results?
You know, it’s really important to wait until pressure-treated wood is dry before you think about applying any sealant. This way, you can ensure that everything adheres properly and works effectively.
But here’s a tip: don’t forget to treat any cut ends right away with a preservative. This helps prevent moisture from getting in and causing decay.
Getting the timing of these steps just right is key. It not only protects the wood’s integrity but also helps extend its lifespan. So, keep that in mind as you work!
For optimal protection, consider using a water-repellent sealant that offers both UV resistance and moisture defense specifically formulated for outdoor wood.
Dryness Before Sealing
Before sealing pressure-treated wood, you need to make sure it’s thoroughly dry to achieve the best results.
Freshly treated wood contains moisture from the pressure treatment process, which can prevent sealants from properly adhering.
To check dryness, look for a dull, matte surface rather than a shiny, wet one.
You can also test by sprinkling water on the wood. If it beads up, the wood still holds moisture and isn’t ready.
Drying times vary, typically requiring several weeks to months depending on climate and wood thickness.
Only seal once the wood has lost excess moisture to guarantee the sealant penetrates deeply and bonds well.
This step prevents peeling, blistering, and premature wear, ultimately extending the life of your pressure-treated wood project.
Using a moisture-resistant adhesive can further protect the wood by ensuring strong, durable bonds even in humid conditions.
Immediate Cut End Treatment
Once the wood has dried sufficiently, the next step is to treat any freshly cut ends immediately.
Pressure treatment only penetrates the outer layers, leaving cut ends vulnerable to moisture, decay, and rot.
You must restore protection by applying a copper naphthenate solution or a similar preservative directly onto the cut surfaces.
Use a paintbrush to coat the exposed wood thoroughly, allowing the solution to soak in deeply.
This field treatment seals the interior wood fibers, preventing moisture infiltration and prolonging the wood’s structural integrity.
Neglecting this step can lead to premature rot and costly repairs.
Remember, treating cut ends right after drying guarantees the best results and maximizes your wood’s lifespan.
Don’t wait; protect those vulnerable ends immediately.
For repairing any damaged or decayed areas afterward, consider using a two-part epoxy paste which offers durable, weather-resistant restoration.
How to Prepare Pressure Treated Wood Before Sealing?
Before you start sealing your pressure-treated wood, it’s super important to make sure it’s completely dry. This step is key for ensuring that the sealant sticks properly. If the wood is still damp, the sealant won’t adhere as well, and you might run into some problems down the line.
Also, don’t forget to pay special attention to the cut ends of the wood. These areas tend to lose their preservative protection, which makes them more vulnerable to moisture and rot. It’s a good idea to inspect those cut ends closely and treat them right away to help keep your wood durable and in great shape!
For best results, always seal your wood in dry, moderate weather to ensure optimal curing and longevity.
Drying Pressure Treated Wood
Allowing pressure-treated wood to dry thoroughly is essential for achieving a durable seal. Wet wood repels sealants, causing poor adhesion and premature peeling.
You’ll want to wait until the moisture content drops below 15%. This can take several weeks depending on weather and wood thickness.
To speed drying, store wood off the ground in a well-ventilated, shaded area. Check dryness by sprinkling water on the surface. If it soaks in quickly, the wood is ready for sealing.
Keep in mind:
- Drying times vary by climate and wood type.
- Avoid sealing while wood feels damp or dark.
- Use a moisture meter for accurate readings.
- Elevate wood to promote air circulation.
- Protect wood from rain during drying.
Proper drying ensures your sealant bonds effectively and lasts longer. Additionally, maintaining consistent humidity levels during the drying process helps prevent wood expansion or contraction that could affect the sealant’s performance.
Inspecting Cut Ends
Cut ends of pressure-treated wood demand your immediate attention because they lack the preservative protection that the rest of the board received during treatment.
When you inspect these cut ends, look for fresh cuts or exposed grain that could absorb moisture and invite rot.
Since the preservative penetrates mainly the outer layers, the interior wood at cut ends remains vulnerable.
You should treat these areas promptly to maintain the wood’s durability.
Check for any signs of cracking or splintering, which can worsen moisture infiltration.
If you find any untreated or damaged cut ends, apply a copper naphthenate solution or similar field treatment immediately.
This restores protection, prevents decay, and prepares the wood for sealing.
Proper inspection guarantees your project lasts longer and resists structural damage.
Maintaining stable indoor humidity levels is also crucial to prevent moisture-related issues in pressure-treated wood over time.
How to Seal Cut Ends to Prevent Rot?
Even though pressure treatment protects most of the wood, the freshly exposed cut ends remain vulnerable to moisture and decay unless you seal them immediately. These ends lack preservative chemicals, so you need to restore protection with a field treatment.
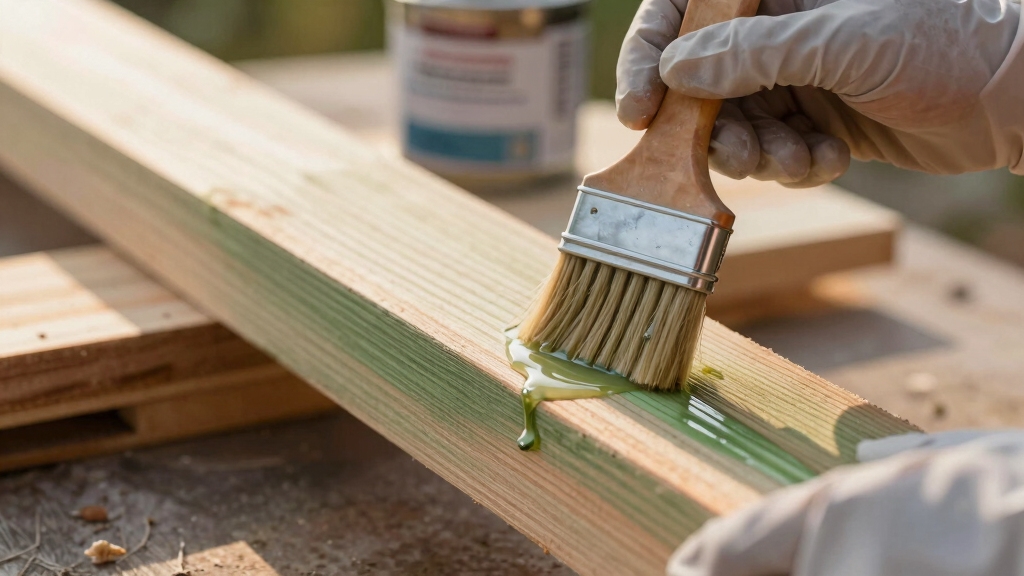
Start by applying a copper naphthenate solution directly on the cut surface using a paintbrush. The wood absorbs this quickly, creating a moisture barrier that prevents rot. Make sure the wood is dry before sealing for best results.
Apply treatment promptly after cutting to stop moisture penetration. Use a brush or dip method for thorough coverage. Focus on all freshly cut ends, including notches and holes. Allow treated ends to dry fully before further finishing. Repeat treatment over time if exposure remains high.
For professional flooring projects, using tools with adjustable depth settings ensures precise and damage-free installation on treated wood surfaces.
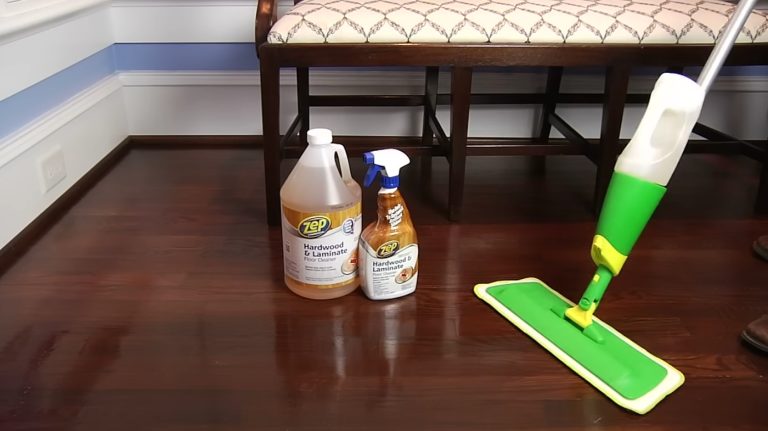
How to Choose the Best Sealant for Pressure Treated Wood?
Selecting the right sealant for pressure-treated wood is essential to maximizing its durability and appearance. You’ll want a sealant that offers strong moisture resistance and UV protection since treated wood is prone to weather exposure.
Choosing the right sealant protects pressure-treated wood from moisture and UV damage, ensuring lasting durability and beauty.
Look for water-repellent sealants labeled specifically for pressure-treated lumber. Avoid wax-based or purely decorative finishes; they won’t provide lasting protection. Penetrating sealants that soak into the wood fibers enhance longevity by repelling water while allowing the wood to breathe.
Consider oil-based or water-based sealants with fungicides to prevent mold and mildew growth. Make sure the sealant is compatible with your wood’s moisture content. Applying too soon can trap moisture, leading to peeling or mildew.
Choosing a high-quality, breathable sealant guarantees your treated wood stays strong and attractive for years. Additionally, using sealants that complement the wood’s natural pest resistance can reduce the need for chemical treatments and prolong the wood’s life by deterring wood-boring insects.
Step-by-Step: How to Apply Sealant on Pressure Treated Wood?
First things first, make sure your wood surface is completely dry and clean. You’ll want to get rid of any dirt or mildew because this helps the sealant stick better.
Once that’s done, it’s time to apply the sealant. You can use a brush or a sprayer—whatever you prefer! Just be sure to cover all surfaces, including those cut ends.
Taking your time with these steps will really help protect the wood and extend its lifespan. Happy sealing!
For the best results, apply thin, uniform coats while maintaining a wet edge to avoid lap marks and ensure an even finish.
Preparing Wood Surface
Before applying any sealant on pressure-treated wood, you need to ensure the surface is thoroughly prepared to maximize adhesion and protection.
First, allow the wood to dry completely; moisture prevents sealants from bonding properly.
Next, check for any dirt, dust, or mill glaze that can block penetration.
Don’t forget to field treat any cut ends immediately to restore protection.
Finally, guarantee the wood surface is smooth but not overly sanded, which can reduce preservative effectiveness.
Confirm wood dryness by observing water absorption or surface feel.
Clean the surface with a stiff brush or mild detergent if needed.
Apply copper naphthenate or a similar solution on fresh cuts.
Lightly sand rough spots without stripping preservatives.
Avoid sealing while the wood is damp or wet.
Proper preparation guarantees long-lasting sealant performance.
Applying Sealant Evenly
Once your pressure-treated wood is fully prepared and any cut ends have been treated, you can apply the sealant evenly to guarantee lasting protection.
Start by stirring the sealant thoroughly to assure consistent texture. Use a high-quality brush or a sprayer for application, keeping a steady, even pace to avoid puddling.
Work along the grain, applying thin, uniform coats. Pay special attention to edges and end grains, as these are prone to moisture absorption.
Avoid overloading your brush; multiple light coats seal better than one heavy coat. Allow each coat to dry completely before applying the next.
This method assures deep penetration and a smooth, protective barrier that guards against moisture, UV damage, and dirt, extending your wood’s lifespan effectively.
Why Oil-Based Primers Work Best on Pressure Treated Wood?
Because pressure-treated wood retains moisture and contains preservatives that can interfere with adhesion, oil-based primers work best to create a strong, lasting bond.
You’ll find that water-based primers often struggle to adhere properly, leading to peeling or blistering. Oil-based primers penetrate deeply, sealing in the wood’s natural moisture and chemical treatments.
This guarantees your topcoat sticks well and resists moisture penetration over time.
Key benefits of oil-based primers on pressure-treated wood include:
- Superior adhesion to oily, chemically treated surfaces
- Effective sealing of moisture within the wood fibers
- Enhanced durability against weathering and UV exposure
- Prevention of peeling and blistering on painted surfaces
- Compatibility with various oil-based topcoats for lasting protection
Choosing oil-based primers helps you preserve the integrity and appearance of your pressure-treated wood.
How to Maintain and Reapply Sealant on Pressure Treated Wood?
Regularly maintaining and reapplying sealant on pressure-treated wood guarantees long-lasting protection against moisture, UV damage, and decay.
Consistent sealant upkeep shields pressure-treated wood from moisture, UV rays, and decay for lasting durability.
Inspect the wood annually for signs of wear, peeling, or discoloration. Before reapplying, clean the surface thoroughly with a mild detergent and allow it to dry completely.
Lightly sand rough or peeling areas to ensure smooth adhesion. Use a high-quality, oil-based sealant designed for pressure-treated wood to maximize penetration and durability.
Apply evenly with a brush or sprayer, focusing on exposed ends and joints where moisture tends to accumulate.
Avoid sealing when the wood is damp or during extreme temperatures to ensure proper curing. Consistent maintenance extends the wood’s lifespan and keeps it structurally sound and visually appealing.
How to Protect Pressure Treated Wood From UV and Moisture?
To keep pressure-treated wood durable and looking its best, you need to shield it from both UV rays and moisture.
These elements break down the wood fibers and reduce the lifespan of your project. Start by choosing a high-quality sealant with UV blockers and water repellency.
Apply it evenly, ensuring all surfaces and especially cut ends are well coated. Maintain dry wood before sealing to improve absorption and adhesion.
Regularly check your wood for signs of wear and reseal as needed.
- Use sealants labeled specifically for UV protection.
- Treat cut ends immediately after cutting to prevent moisture intrusion.
- Opt for penetrating sealers to nourish and protect wood fibers.
- Apply sealants during dry weather for best results.
- Reapply every 1-2 years depending on exposure and wear.
Common Sealing Mistakes to Avoid
While sealing pressure-treated wood might seem straightforward, many homeowners make avoidable mistakes that compromise protection and longevity.
One major error is sealing the wood before it’s fully dry, which traps moisture and leads to peeling or mildew.
Another common mistake is neglecting cut ends; these exposed areas lack preservatives and must be field-treated immediately to prevent rot.
Skipping primer or using water-based primers on treated wood reduces adhesion and durability.
Applying sealant unevenly or too thinly also weakens protection against UV and moisture damage.
Finally, don’t overlook regular maintenance. Sealants degrade over time and need reapplication to maintain effectiveness.
Avoid these pitfalls to ensure your pressure-treated wood stays strong and lasts for years.
Frequently Asked Questions
What Chemicals Are Used in Pressure Treatment Preservatives?
You’ll find pressure treatment preservatives use chemicals classified into tar oil based, oil-borne, and water-borne types. These chemicals protect wood by penetrating its cells, either filling both cell walls and lumens or compressing air in lumens.
Depending on your project, the treatment might involve copper-based compounds or other preservatives designed to prevent rot, decay, and insect damage. This ensures your wood stays durable over time.
How Does the Full-Cell Pressure Treatment Method Work?
Think of the full-cell method as filling a sponge completely with protective liquid.
You start by applying a vacuum to empty air from the wood’s cells.
Then flood it with preservative at 140-150 psi, letting it soak for hours.
Afterward, the excess drains, and a final vacuum guarantees deep penetration.
This process saturates both the cell walls and lumens, making the wood highly resistant to decay and ideal for heavy-duty uses.
Why Is Field Treatment Necessary After Cutting Pressure-Treated Wood?
You need field treatment after cutting pressure-treated wood because the preservative only penetrates the outer layers.
When you cut it, the interior becomes exposed and vulnerable to moisture and rot.
Without sealing those fresh cut ends immediately, decay can set in quickly, compromising the wood’s durability and structural integrity.
Applying a preservative solution right away restores protection and extends the wood’s life, preventing costly damage and premature failure.
What Are the Differences Between Tar Oil, Oil-Borne, and Water-Borne Preservatives?
Tar oil preservatives rely on heavy, tar-based chemicals offering deep penetration and strong water resistance. They’re ideal for marine or utility uses.
Oil-borne preservatives use lighter oils carrying chemicals that protect while retaining wood’s natural feel. They’re great for outdoor structures.
Water-borne preservatives employ water as a carrier, penetrating cell walls quickly and drying faster. This makes them environmentally friendlier and suitable for residential projects.
You’ll choose based on durability needs and environmental factors.
Can Pressure-Treated Wood Be Painted Without Sealing First?
You shouldn’t paint pressure-treated wood without sealing it first. Sealing locks in preservatives, prevents moisture penetration, and guarantees paint adheres properly.
If you skip sealing, moisture can cause peeling, blistering, and premature rot.
Start with an alkyd oil-based primer to bond well with the treated surface, then apply paint.
Proper sealing extends your wood’s life and keeps the finish looking good longer, especially in outdoor conditions.
Give Your Pressure Treated Wood the Protection It Deserves
Sealing pressure treated wood isn’t just a step; it’s essential for lasting protection. You want to prevent rot, warping, and UV damage, right?
By sealing at the right time, preparing the wood properly, and choosing the best sealant, especially oil-based, you guarantee durability.
Don’t forget to maintain and reapply sealant regularly. Avoid common mistakes, and your wood will stay strong and beautiful for years. Ready to protect your investment?