How to Match Tile Height to Hardwood: Know the Proper Way
Matching the height between tiled and hardwood floors is difficult, especially regarding renovations or home projects. While you can reduce a plywood underlay or subfloor or replace the tile’s backer board to match the tile high, these methods require more labor.
The best way to match the height of your tile to your hardwood flooring is by using a floor transition strip that ramps up or down from the tile to the wood. These strips are a great solution for seamlessly blending the different heights of the two flooring materials.
Typically made of wood or lightweight aluminum, these strips are easy to install and can be cut to the desired length using a regular miter saw or hacksaw. Today we will discuss different transition strips to accommodate tile height to hardwood. So keep reading for more information.
Different Types of Floor Transition Strips to Match Tile Height to Hardwood Flooring
The transition strip acts as a smooth slope, gradually transitioning from the higher tile to the lower hardwood flooring. This not only ensures a visually appealing result but also prevents any tripping hazards.
When matching tile height to hardwood flooring, there are several different types of floor transition strips that you can consider.
- T-Strip for Hard Surfaces
- Tile-to-Laminate Transition
- Tile-to-Wood Seam Binder
- Vinyl to Tile Transition
- 4-In-1 Transition Strip
Let’s discuss these in detail:
1. T-Strip for Hard Surfaces
The T-shaped aluminum strip aims to connect and secure two hard-surface floors of different heights, ensuring a seamless transition from tile to hardwood.
Here’s why the T-strip is an excellent choice for matching tile height to hardwood:
- Durable Material: The T-strip is made of aluminum, known for its strength and resistance to corrosion. This ensures that the transition strip will withstand daily wear and tear without losing its functionality.
- Easy Installation: This strip is inserted into the joint between the two floors and secured with a special sealant. Its design allows for a straightforward installation process, saving time and effort.
- Sleek Look: The T-strip provides a sleek and minimalistic look, enhancing the overall aesthetic of your flooring. It creates a clean and seamless transition between the tile and hardwood, giving your space a polished appearance.
- Gap Coverage: The vertical portion of the T-strip is pressed into the gap between the floors, effectively covering any space and preventing debris from getting trapped. This ensures a smooth and safe surface for walking.
2. Tile-to-Laminate Hardwood Transition
One option for transitioning from tile to hardwood laminate is using a transition strip that can be stained to match the laminate color. This transition strip bridges the gap between the two different flooring materials and ensures a smooth and seamless transition.
The strip features molding with offset grooves, which allows it to accommodate the differing thicknesses of the tile and laminate. This means that regardless of the height difference between the two floors, the transition strip can be adjusted to create a level surface.
A metal channel with expandable anchors is used to install the transition strip, providing a secure connection between the strip and the floors. This method offers a visually appealing transition and ensures a durable and long-lasting solution for joining tile and hardwood laminate floors.
3. Tile-to-Wood Seam Binder
Installing a tile-to-wood seam binder can be a great solution for joining two floors of different heights without compromising the transition. Here’s why you should consider using a tile-to-wood seam binder:
- Seamless transition: A seam binder seamlessly transitions between tile and wood floors, providing a smooth and visually appealing connection.
- Expansion and contraction: Securing the seam binder to the subfloor with screws allows for the natural expansion and contraction of the floors, preventing any buckling or warping.
- Durability: Made of hardwood with beveled edges, seam binders are durable and can withstand heavy foot traffic, ensuring long-lasting performance.
- Versatility: Seam binders come in various widths and lengths, allowing you to choose the one that best matches your tile and wood flooring, ensuring a perfect fit.
4. Vinyl to Tile Transition
If you have vinyl flooring transitioning to ceramic or stone tile, you’ll need an effective solution to match the height of the two materials. One option is to use a vinyl-to-tile transition strip.
This strip is designed to seamlessly bridge the gap between the vinyl and tile floors. The strip consists of a metal channel anchored to the subfloor and a top strip that snaps into the channel to cover the seam between the floors.
The vinyl-to-tile transition strip can be easily adjusted to match the height of the tile, ensuring a smooth and even transition. It is also versatile, as the unfinished hardwood strip can be stained or painted to match the flooring, creating a cohesive and visually appealing look.
5. 4-In-1 Transition Strip
The 4-in-1 transition strip is versatile for different floor heights or materials. It includes interchangeable parts that easily match tile height to hardwood flooring.
Here’s how it works:
- Metal channel: The strip consists of a metal channel that provides a sturdy base for the transition.
- T-molding: For floors of the same height, you can use the T-molding piece to create a seamless connection between the tile and hardwood.
- Additional pieces: If you have different floor heights or materials, you can utilize the additional pieces to ensure a smooth and level transition. This is especially useful when transitioning from carpet to hardwood.
- Easy installation: The 4-in-1 transition strip is designed for easy installation. Simply choose the appropriate pieces, cut them to size if needed, and attach them to the floor using screws or adhesive.
How much gap do I need for a transition strip?
To ensure a proper fit, give your transition strip a gap of at least a quarter of an inch on either side. This allows room for expansion and contraction of the wood, preventing buckling or warping. While a quarter-inch gap is a bare minimum, giving your wood at least half an inch of space to expand is recommended.
Here is a table to help you visualize the measurements:
| Side of the Center | Gap Measurement |
| Left side | 1/4 inch |
| Right side | 1/4 inch |
| Center | Transition Strip |
What glue should I use for transition strips?
Choosing the right glue is crucial to ensure a secure and long-lasting bond between your transition strips and flooring. Here are four types of adhesive that are highly recommended for attaching transition strips:
- Liquid Nails Heavy Duty Construction Adhesive: This popular adhesive provides a strong bond and is suitable for various surfaces, including wood and tile. It is easy to apply, but be cautious as it can be runny.
- Loctite PL Premium Polyurethane Construction Adhesive: Known for its exceptional strength, this adhesive is ideal for heavy-duty applications. Its thick consistency helps prevent any runniness during application.
- Gorilla Construction Adhesive: Gorilla glue is renowned for its versatility and strength. It bonds well to many surfaces, including hardwood and tile, and dries clear for a more aesthetically pleasing finish.
- Titebond Heavy Duty Construction Adhesive: This adhesive is specifically formulated for demanding construction projects. It provides a strong bond, is easy to apply, and is resistant to moisture and heat.
What to do if the tile is significantly lower than hardwood?
If the tile is much lower than the hardwood, you can pad the tile with underlayment or plywood to level the surfaces. Underlayment is a thin material layer placed between the subfloor and the hardwood flooring.
It helps to provide a smooth and level surface for the hardwood to be installed on. Plywood, on the other hand, is a thicker option that can be used to build up the height of the wood floor.
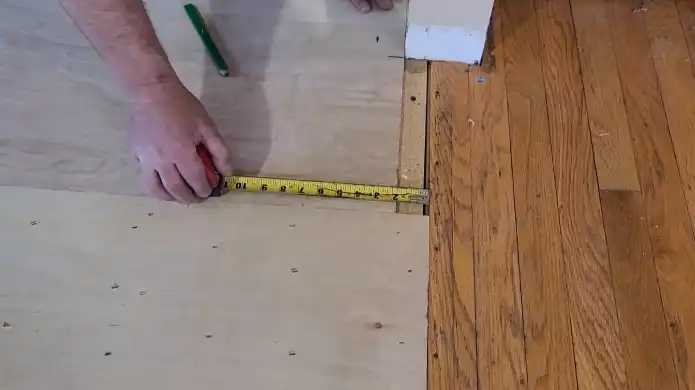
It is important to accurately measure the height difference between the tile and the hardwood before choosing the right padding method. Here is a table that shows the recommended thickness of underlayment or plywood based on the height difference:
| Height Difference (inches) | Recommended Thickness (inches) |
| 0.25 0.5 | 1/4 |
| 0.5 1 | 1/2 |
| 1 2 | 3/4 or 1 |
Can I grout between hardwood and tile?

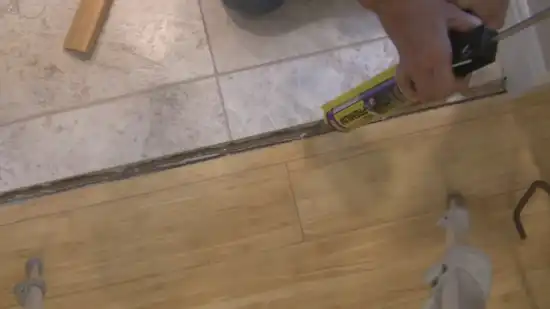
You can seamlessly transition between your hardwood and tile floors by grouting between them and using silicone caulk that matches the grout color. Here’s how:
- Start by cleaning the area between the hardwood and tile to ensure a smooth and debris-free surface.
- Apply the grout carefully along the joint, ensuring it fills the gap.
- Use a grout float to remove excess grout and create a smooth finish.
- Once the grout is dry, apply silicone caulk that matches the grout color. This will help to seal the joint and prevent any moisture or dirt from getting in.
What kind of tile looks good with wood floors?
For a cohesive and visually pleasing look, consider using tiles with a wood-like appearance to complement your hardwood floors. These tiles offer the perfect balance between the warmth and natural beauty of wood and the durability and low maintenance of tiles.
They come in various designs and colors, allowing you to find the perfect match for your hardwood floors. To help you make an informed decision, here is a comparison table showcasing three popular types of wood-look tiles:
| Tile Type | Appearance | Durability |
| Porcelain | Highly realistic wood grain patterns | Extremely durable and resistant to stains, scratches, and moisture |
| Ceramic | Varied wood textures and colors | Durable, but less resistant to moisture than porcelain |
| Vinyl | Wide range of wood designs | Durable and water-resistant, but less scratch-resistant than porcelain or ceramic |
Achieving the Perfect Match: Seamlessly Blend Tile and Hardwood Flooring
Matching tile height to hardwood flooring requires careful consideration and the use of appropriate floor transition strips. It is important to leave a sufficient gap for the transition strip and choose the right glue for secure installation.
If the tile is significantly higher than the hardwood, additional steps may be necessary to create a smooth transition. While grouting between hardwood and tile is not recommended, selecting the tile that complements wood floors can create a beautiful and cohesive look in your space.
Remember, finding the perfect balance between tile and hardwood is like finding the missing piece to complete a stunning puzzle.