How to Make Bench From Headboard?
To make a bench from a headboard, start by measuring the headboard width and cutting the footboard into 18-inch side panels.
Trim and sand all wood pieces smoothly, ensuring clean edges and surfaces. Assemble the frame with dowels, wood glue, and screws, attaching the headboard securely.
Add seat boards and support slats, reinforcing corners with braces and metal brackets for stability. Finish by priming, painting, and securing cushions with non-slip pads.
Follow detailed steps next for a durable, polished bench.
Key Takeaways
- Measure and cut the footboard into 18-inch side panels and trim headboard legs for balanced bench proportions.
- Assemble a sturdy frame with 1×6 boards, attaching sides, front, back, and support slats using screws, dowels, and wood glue.
- Sand all cut edges and surfaces smoothly, apply primer, and finish with paint for a professional look.
- Reinforce joints with wood glue, dowels, clamps, and metal brackets to ensure long-lasting bench stability.
- Add diagonal and horizontal braces beneath the seat, then position and secure cushions with non-slip pads or Velcro.
How to Pick the Best Headboard and Footboard for Your Bench?

When selecting the best headboard and footboard for your bench, start by measuring their dimensions to guarantee compatibility with your intended bench size.
Make sure the headboard width matches either a full or twin bed frame, as this dictates bench length. Confirm the footboard’s height and thickness will suit your design, especially since you’ll cut it in half for 18-inch-deep sides.
Avoid headboards with excessively tall legs; trim them by 2 inches if needed for proportional balance. Check the wood condition—opt for solid, smooth surfaces free from peeling finishes to reduce sanding effort.
Verify that the footboard’s style complements the headboard, maintaining cohesion in aesthetics. Accurately recording these dimensions before cutting ensures precise fits, structural integrity, and a professional finish in your bench assembly.
Additionally, acclimate the wood for at least 48 hours before cutting to prevent warping and ensure a stable fit with the rest of your project, following best practices for wood acclimation.
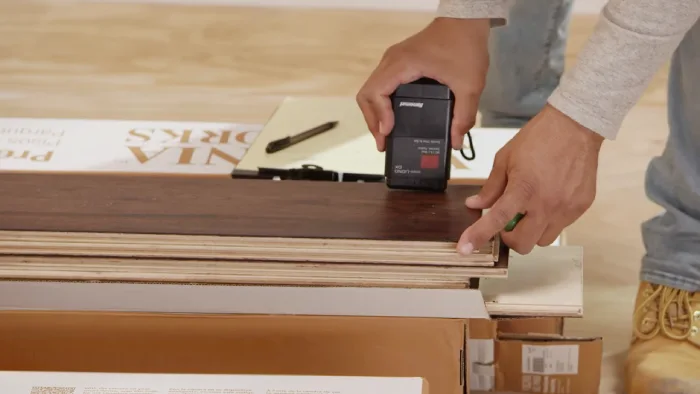
Getting Your Wood Ready: Cutting and Sanding Bench Parts
Start by accurately cutting your footboard into two 18-inch sections to form the bench’s sides, guaranteeing each piece matches the standard seating depth. Use a circular saw or jigsaw to make straight, clean cuts.
Begin by cutting your footboard into two precise 18-inch sections for the bench sides.
Next, cut your 1×6 boards to length for the front, back, and seat supports, referencing your measurements precisely. After cutting, sand all edges and surfaces thoroughly with a sander fitted with high-grit paper to remove peeling finishes and smooth any rough spots.
Focus on corners and edges to prevent splinters. Sand until the wood feels consistently smooth to the touch. This preparation ensures proper fit during assembly and a professional finish.
Finally, check each piece for accuracy and uniformity before moving on, as precise cuts and smooth surfaces are critical to a sturdy, attractive bench. Using painter’s tape along cut lines can also help minimize wood splintering during cutting for cleaner edges.
Assembling the Bench Frame and Attaching the Headboard
Alright, let’s get started on assembling that bench frame! You’ll want to grab your 1×6 boards for the front, back, and sides. Once you have those ready, secure the corners with metal brackets and screws. This will help keep everything nice and stable.
Now, moving on to the headboard—let’s attach it to the frame. Use some 3-inch screws and drive them in from the back. Make sure everything is aligned and level as you go. It can be super helpful to use clamps to hold the pieces in place during this step. This way, you’ll maintain squareness and prevent anything from shifting around. Easy peasy!
For faster and more precise assembly, consider using a tool-free depth adjustment brad nailer to secure the boards efficiently.
Frame Assembly Steps
Although the preliminary cuts and sanding prepare your materials, assembling the bench frame requires careful alignment and secure fastening to guarantee stability.
Start by attaching the inner frame to the back of the headboard with Deckmate screws, ensuring the frame sits flush and square.
Next, fasten the 18-inch side panels to the headboard using 3-inch countersunk screws driven from the rear to hide fasteners.
Confirm all corners are at 90 degrees using a carpenter’s square.
Then, connect the front and back 1×6 boards, securing them with screws and adding three support slats evenly spaced for rigidity.
Use clamps during assembly to maintain alignment.
Finally, lightly sand any rough edges or joints before proceeding to the next stage.
This precise frame assembly forms a sturdy base for your bench.
For optimal long-term stability, it’s important to use hardened fasteners that resist corrosion and maintain strong hold over time.
Headboard Attachment Techniques
Securely attaching the headboard to the bench frame is essential for overall stability and durability.
Begin by aligning the inner frame with the back of the headboard, ensuring it sits flush.
Pre-drill pilot holes to prevent wood splitting, then fasten the frame using Deckmate screws.
Next, position the bench sides against the headboard’s edges, securing them with 3-inch countersunk screws driven from the back to maintain a clean front appearance.
Use clamps to hold parts steady during fastening.
Confirm the assembly is square by measuring diagonals before fully tightening screws.
Add dowels and wood glue into drilled holes at joints for extra strength.
Finally, reinforce with a wood brace between headboard legs to prevent lateral movement and enhance long-term durability.
When refinishing the bench, consider protecting the baseboards with painter’s tape to avoid damage during sanding or finishing.
Installing Seat Boards and Support Slats on Your Bench
Place the 18-inch seat boards carefully atop the side lips of the bench frame, ensuring even spacing and alignment for a uniform surface.
Temporarily secure these boards with brad nails to check fit and levelness.
Next, position the support slats evenly between the front and back aprons to provide structural stability and prevent sagging.
Use 3-inch countersunk screws to fasten both seat boards and support slats firmly, pre-drilling pilot holes to avoid wood splitting.
Align seat boards flush with frame edges for a clean finish.
Space support slats evenly, typically three across the seat width.
Verify seat boards sit flat without gaps or warping.
Use clamps to hold boards steady during fastening.
Double-check levelness before final screw installation.
To ensure long-lasting durability, it is important to maintain consistent indoor humidity to prevent wood damage during use and cleaning.
Reinforcing Joints to Secure Your Bench Structure
To kick things off, apply wood glue to all the joint surfaces. This step is crucial because it ensures a strong bond before you start putting everything together.
Once the glue is on, it’s time to drill some precise holes. This is where you’ll insert furniture dowels, which help align and reinforce the connections. Trust me, this makes a big difference in how sturdy your bench will be!
Lastly, don’t forget to add support braces between key structural points. These will help maintain stability and prevent any wobbling over time. Taking these steps will really pay off in the long run!
For the best results, use screws with square or Torx drives to ensure secure fastening and reduce the risk of stripping during assembly.
Using Wood Glue
Enhancing the strength of your bench’s joints involves applying wood glue to the mating surfaces before assembly. Start by spreading a thin, even layer of glue on both faces to maximize adhesion.
Use a brush or roller for uniform coverage, avoiding excess that causes mess. After joining, clamp the pieces firmly to ensure tight contact. Wipe away any squeeze-out immediately with a damp cloth.
Allow the glue to cure fully as per the manufacturer’s instructions before moving the bench.
Key points to take into account:
Select a high-quality PVA wood glue for strong bonds. Apply glue on clean, dry surfaces for peak grip. Use clamps to maintain pressure during curing.
Avoid premature handling to prevent joint failure. Remove excess glue to guarantee a neat finish.
For added durability in your wood repairs, consider using water-resistant wood fillers to fill any gaps or imperfections before gluing.
Inserting Furniture Dowels
After applying wood glue and clamping the joints, reinforce the bench structure by inserting furniture dowels.
Begin by marking aligned dowel positions on both adjoining pieces to guarantee precision. Drill pilot holes carefully using a drill bit matched to your dowel diameter, maintaining perpendicularity to avoid misalignment.
Apply a thin layer of wood glue inside each hole before inserting the dowel. Tap the dowel gently until it seats firmly within the hole.
Repeat this process for all joint locations requiring reinforcement, typically at the corners and connecting frame pieces.
Once dowels are inserted, assemble the joint by fitting the dowels into corresponding holes on the mating piece, applying pressure until fully seated.
Clamp the joint securely and allow the glue to cure fully for maximum strength.
To ensure a durable and seamless connection, make sure to prepare the wood surfaces by cleaning and smoothing the areas before inserting dowels.
Adding Support Braces
Strengthen your bench structure by installing support braces at critical joints to prevent wobbling and increase durability. Focus on reinforcing connections between the headboard, seat frame, and legs.
Use appropriately sized lumber like 2×4 or 1×4 for braces to guarantee strong support. Secure each brace with screws and wood glue for maximum hold. Clamp braces during installation to maintain alignment and allow glue to set properly.
Install diagonal braces between legs and seat frame corners to resist lateral movement. Attach horizontal braces beneath the seat for even weight distribution.
Use metal corner brackets at high-stress joints for added rigidity. Reinforce the front apron connection with additional blocking pieces. Check brace placement during dry fitting to guarantee no interference with seat boards.
These steps will deliver a stable, durable bench frame. For best results, consider the durability and maintenance of your materials to ensure long-lasting support.
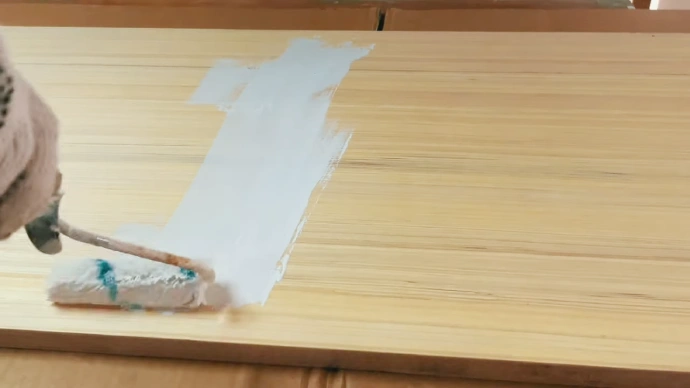
Finishing Up: Sanding, Painting, and Adding Comfy Cushions
Once you’ve assembled the bench, start by sanding all surfaces thoroughly with high-grit sandpaper to remove any rough edges, peeling finish, or imperfections.
Make sure you sand corners and joints evenly for a uniform surface.
Ensure all corners and joints are sanded evenly for a smooth, consistent finish.
Next, apply a primer coat to seal the wood, let it dry completely, then sand lightly with fine grit to smooth out raised grain.
Proceed with your chosen paint, applying thin, even coats to avoid drips; allow sufficient drying time between coats.
After the paint cures, position comfortable cushions tailored to the bench dimensions.
Secure cushions using non-slip pads or Velcro strips to prevent movement.
This final step enhances both the aesthetic and comfort of your bench, making it a functional and stylish addition to your space.
Frequently Asked Questions
Can I Use Metal Instead of Wood for the Bench Frame?
Yes, you can use metal instead of wood for the bench frame, but you’ll need proper welding skills or metal fasteners for secure assembly.
Metal frames offer greater durability and strength but require cutting with a metal saw and drilling pilot holes for screws or bolts.
Make sure you use rust-resistant materials like steel or aluminum. Consider adding rubber or plastic leg caps to protect floors and improve stability during use.
How Do I Maintain and Clean the Finished Bench?
You should dust your bench regularly with a soft, dry cloth to prevent buildup.
For deeper cleaning, use a damp cloth with mild soap, then wipe dry immediately to avoid moisture damage.
Inspect joints and screws periodically, tightening or reapplying wood glue if needed.
Avoid harsh chemicals or abrasive materials that can damage the finish.
Finally, reapply a protective wood sealant or paint every couple of years to maintain durability and appearance.
What Types of Paint Are Best for Outdoor Bench Durability?
If you want your outdoor bench to last longer than a soap bubble, choose exterior-grade acrylic latex paint or oil-based enamel.
Acrylic latex resists cracking and fading, while oil-based options provide a tougher, glossy finish.
Apply a primer first for better adhesion and durability.
Don’t forget a UV-resistant clear coat as the final step to protect against sun damage, moisture, and mildew.
This ensures your bench withstands harsh outdoor elements with minimal upkeep.
Can I Add Storage Space Under the Bench Seat?
Yes, you can add storage space under the bench seat by creating a hinged lid with seat boards attached to a frame.
Build a sturdy box frame beneath the seat using 2×4 lumber, ensuring it’s flush with the bench sides.
Use piano hinges to connect the seat, allowing easy access.
Reinforce corners with metal brackets and add support slats inside for weight distribution.
Seal and finish all surfaces to protect the storage area.
How Do I Modify the Design for a Larger Bench Size?
Think of scaling the Starship Enterprise for a bigger mission. You’ll need sturdier frames and precise adjustments.
Increase the headboard and footboard width, cutting longer 1×6 boards for front, back, and sides. Extend seat boards accordingly, maintaining the 18-inch depth.
Reinforce the seat support frame with thicker lumber, like 2x4s, for stability. Adjust screw lengths and add extra bracing to handle the larger span without compromising strength or balance.
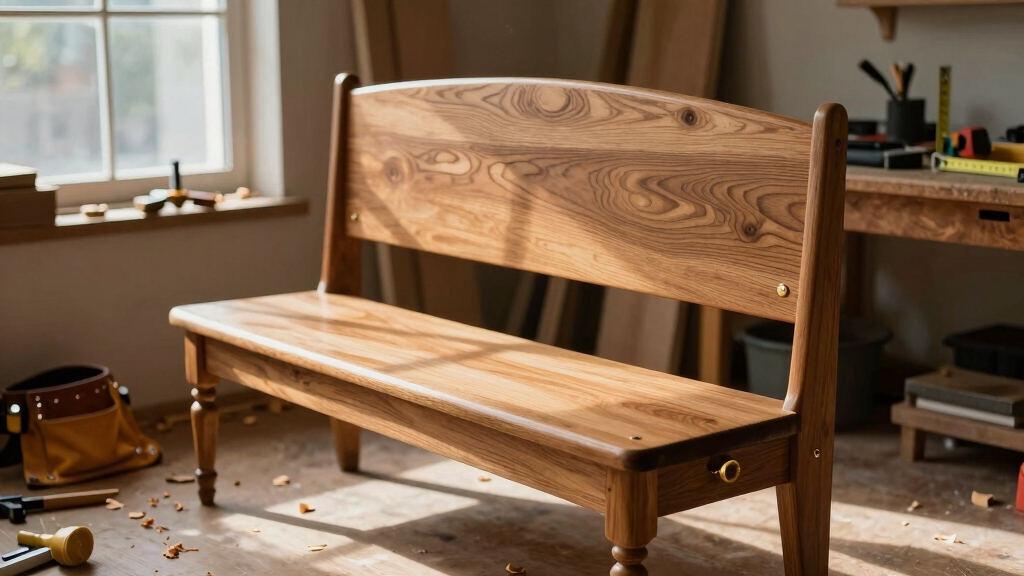
Upgrade Your Home With a Custom Headboard Bench
Now that you’ve transformed a headboard into a bench, you’ve basically turned bedroom décor into outdoor seating. Who knew?
With precise cuts, secure joints, and smooth finishes, your bench isn’t just a repurposed piece; it’s engineered for comfort and durability.
So, while it started as a backdrop for sleep, it’s now the centerpiece for relaxation. Just add cushions, and you’re done.
Nothing says DIY success like sitting on a headboard.