How to Make a Hardwood Cutting Board: Perfect Finish
To make a durable hardwood cutting board, start by selecting dense, closed-grain woods like hard maple or cherry, ensuring they’re properly dried and free from toxins. Cut precise strips about 1.5–3 inches wide, arrange them to stagger end joints, then glue with food-safe adhesive and clamp to maintain flatness.
After curing, flatten both sides and trim edges square. Shape corners and sand progressively finer before sealing with mineral oil or beeswax for protection. Keep the board dry and regularly oiled for longevity; further steps enhance durability and safety.
Key Takeaways
- Select closed-grain hardwoods like hard maple, beech, or cherry with a Janka rating of 850-1600 for durability and knife preservation.
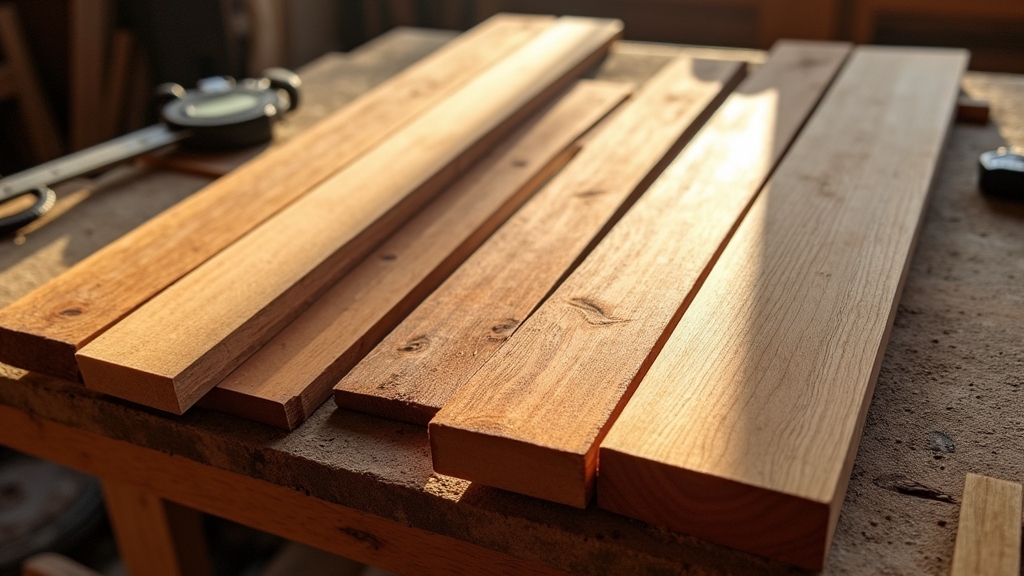
- Cut and prepare flat, straight, well-dried lumber strips sized 1.5″ to 3″ wide, planning dimensions with extra material for milling losses.
- Use waterproof, food-safe glue such as Titebond III, clamp evenly, then flatten both sides with a planer or router sled for a flat, parallel surface.
- Shape edges with roundover bits or bevels, sand progressively from coarse to fine grits, and finish with food-safe mineral oil or beeswax for protection.
- Maintain the board by cleaning with warm soapy water, drying immediately, storing upright, and regularly reapplying mineral oil or beeswax to prevent drying and cracking.
Selecting the Right Wood for Your Cutting Board
When selecting the right wood for your cutting board, you need to take into account hardness, porosity, and food safety to guarantee durability and maintain knife integrity. Proper maintenance and cleaning are essential to prolong the board’s lifespan and prevent moisture-related damage.
Hard maple is the industry standard; its closed-grain structure minimizes liquid absorption and bacterial growth while resisting scratches without dulling knives quickly. Hard maple’s closed-grain design reduces bacteria and scratches, keeping knives sharper longer.
Beech and cherry offer similar closed-grain benefits with slightly less hardness but remain knife-friendly and durable. Avoid highly porous woods like oak or mahogany, as their large pores harbor bacteria. Extremely hard woods such as hickory risk faster knife wear, while soft woods erode quickly and retain scars.
Also, steer clear of woods that exude toxic oils or saps, like pine or rosewoods. Opting for non-toxic, closed-grain hardwoods guarantees longevity, hygiene, and knife preservation.
Additionally, regular application of food-grade mineral oil or beeswax helps prevent warping and splitting, especially in woods prone to shrinkage. Ensuring proper humidity control and avoiding prolonged exposure to moisture will help maintain the board’s structural integrity over time.
Preparing and Sizing Your Lumber
You’ll start by selecting hardwoods that offer durability, tight grain, and food safety, like maple or walnut. Choosing the right wood is crucial as it helps maintain the board’s integrity and prevents damage over time, similar to how maintaining hardwood floors extends their lifespan.
Next, plan your lumber dimensions carefully to match your cutting board’s intended size and thickness. Then, prepare the wood surfaces by flattening, squaring, and trimming to guarantee precise, uniform stock ready for assembly.
It is important to avoid porous woods such as red oak and white oak, as well as soft or less attractive woods like poplar and butternut, to ensure the longevity and appearance of your cutting board.
Hardwood Selection Criteria
Although selecting the right hardwood involves multiple factors, focusing on species with appropriate hardness, grain structure, and food safety guarantees ideal cutting board performance. Aim for hardwoods with a Janka rating between 850 and 1600 to balance durability and knife edge preservation. Choosing sustainably sourced wood also reduces environmental impact and supports responsible forestry.
Maple stands out for its dense, closed-grain structure and resistance to knife marks. Walnut offers softer texture and good durability, while cherry provides moderate hardness with proven food safety. Treating the wood surface with a fire retardant product can enhance its longevity and safety in the kitchen environment.
Avoid open-pored woods like oak or mahogany due to moisture absorption and bacterial risk. Prioritize closed-grain woods that inhibit moisture penetration and stains. Additionally, select food-safe species free from toxic oils or sap; cypress, with its natural antibacterial hinokitiol, enhances hygiene.
Lumber Dimensions Planning
Since lumber dimensions directly influence the cutting board’s durability, stability, and functionality, careful planning of thickness, width, and length is essential before milling.
Select hardwood stock between 1 1/2″ and 2″ thick; 8/4 lumber (2″ nominal) is ideal for end grain boards, allowing planing down to approximately 1 3/4″ final thickness. 8/4 lumber is recommended by experts like The Wood Whisperer for simplifying the process of achieving a thicker final product.
Plan the board’s dimensions according to use. Common sizes range from 12″x18″ to 18″x24″. Keeping moisture levels in check during the milling process is critical to prevent warping and swelling in the finished board. Account for trimming and milling losses by purchasing slightly oversized lumber.
Use strips 1.5″ to 3″ wide for edge-gluing, balancing glue joint quantity and grain movement for stability. Verify lumber is flat, straight, and well-dried to reduce warping risk. Always oversize length and width to accommodate jointing, planing, and trimming.
Preparing Wood Surfaces
After selecting and planning your lumber dimensions, focus on preparing the wood surfaces to guarantee accuracy and stability in your cutting board assembly. Start by inspecting hardwoods like maple or walnut for defects, straightness, and low moisture content, ensuring durability and minimal warping.
Flatten one face using a jointer, then square an adjacent edge to establish perpendicularity. Next, use a planer to flatten the opposite face, making both faces parallel. Rip the final edge on a table saw to square the board fully. Control moisture levels during preparation to prevent warping and maintain wood stability.
Cut strips slightly oversized, using the first as a pattern for consistent widths. Maintain safety by using push sticks and controlling the wood feed.
Before assembly, clean surfaces, check moisture uniformity, and re-inspect flatness, adjusting as needed for tight glue joints. Proper finishing and treatment, such as applying food-grade mineral oil, help preserve the wood and extend the cutting board’s lifespan.
Cutting and Arranging Wood Strips
When you begin cutting wood strips for your hardwood cutting board, precise setup and careful handling are essential to guarantee clean, uniform edges and tight joints. Start by setting your table saw fence accurately and use a push jig to rip strips between 1/8” and 1-1/8” wide, depending on your design.
Maintain blade height and squareness to ensure smooth, square edges. Regularly inspect your tools and work area to prevent moisture exposure that can affect wood quality and cutting precision, similar to how one should inspect valve box regularly to maintain equipment.
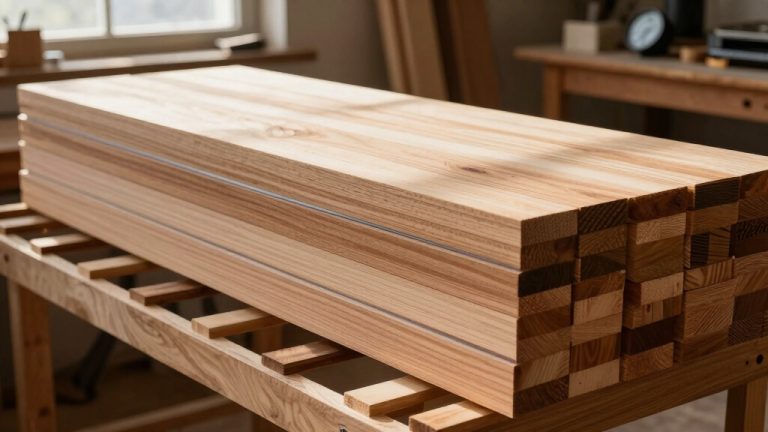
Cut strips approximately 18” long and 7/8” thick, trimming ends with a stop block for consistency. Arrange strips by species and width in a repeating or graduated pattern, marking sequence and orientation with dual pencil lines. Lay strips flat, checking for tight joints and no gaps.
Rotate some strips 90 degrees to vary end grain orientation, and stagger glue joints to enhance stability and prevent warping. Using hardwoods like maple or cherry is recommended as they offer durability and food safety, making your cutting board long-lasting and safe for kitchen use.
Gluing Up the Cutting Board Panels
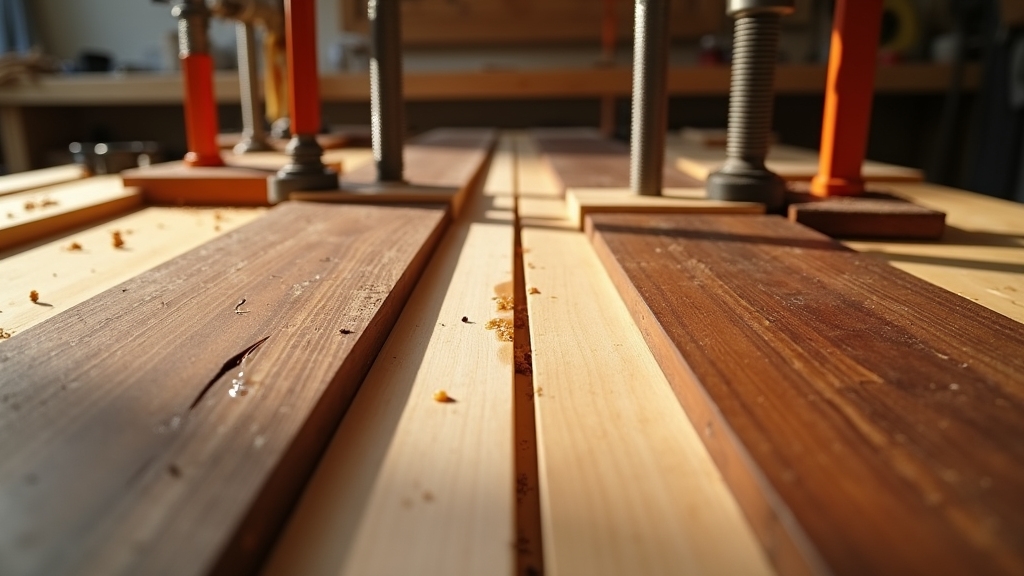
Although gluing up cutting board panels demands careful timing and technique, mastering this step guarantees strong, waterproof joints essential for durability. Start by selecting Titebond III or polyurethane glue for optimal waterproof, food-safe bonds.
Apply a thin, even bead of glue along every mating edge using a bottle, then spread with a brush or finger, ensuring full coverage without dry spots or excess squeeze-out. Clean any glue drips promptly to prevent residue buildup that can affect the finish.
Use parallel or bar clamps spaced every 8 to 10 inches, applying pressure gradually and evenly across clamps to avoid gaps or distortion. Employ cauls to maintain flatness. For best results, glue entire panels at once, using jigs if needed to maintain alignment.
Allow the glue to set for 30 to 60 minutes before unclamping. Using bar pipe or F-style clamps helps apply even force across joints, ensuring a strong and durable bond. Proper clamping technique is crucial to prevent gaps and distortion, which can compromise the board’s integrity.
Flattening and Trimming the Board
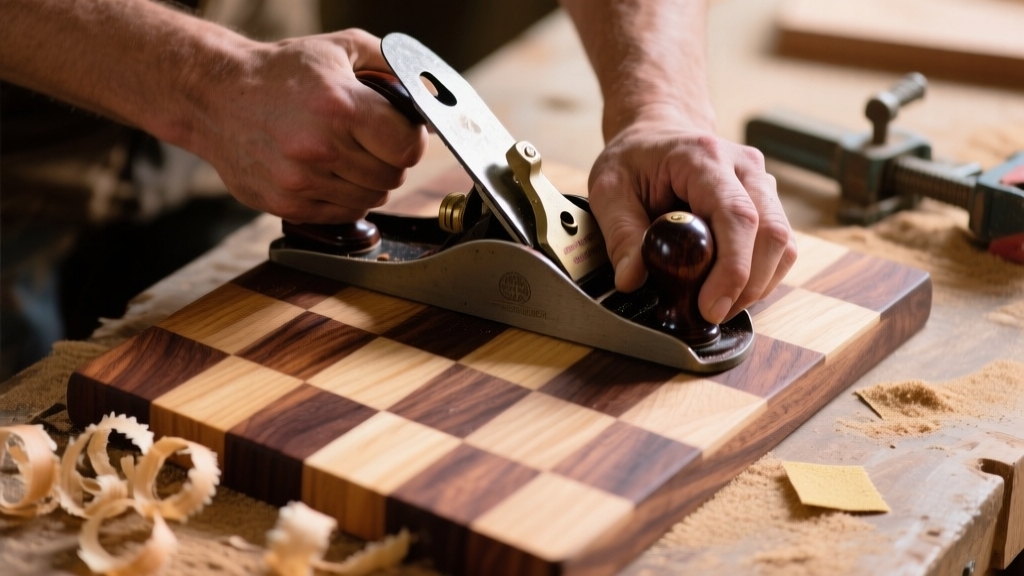
Once the glue has fully set and the panels form a solid, bonded unit, you’ll need to establish a perfectly flat reference surface by flattening the first side of the cutting board.
Use a router or planer sled for wide boards, securing the board rigidly with clamping dogs or wedges to prevent movement. Take light passes—about 1/64 inch or less—to avoid removing excessive material. Slab clamping dogs can be set on one side with marks made for screw placement to keep the board firmly in place during flattening.
Always ensure the board is dry before working to prevent moisture damage that could warp the wood. Next, flip and secure the board to flatten the second side, ensuring both sides are parallel to prevent rocking. Finally, trim the edges squarely on a table saw or jointer to define dimensions and remove any low spots.
Key steps:
- Flatten first side evenly using router sled and light passes
- Flip board and flatten second side, maintaining parallelism
- Trim edges squarely and check for flatness before final sanding
Shaping Edges and Adding Design Details
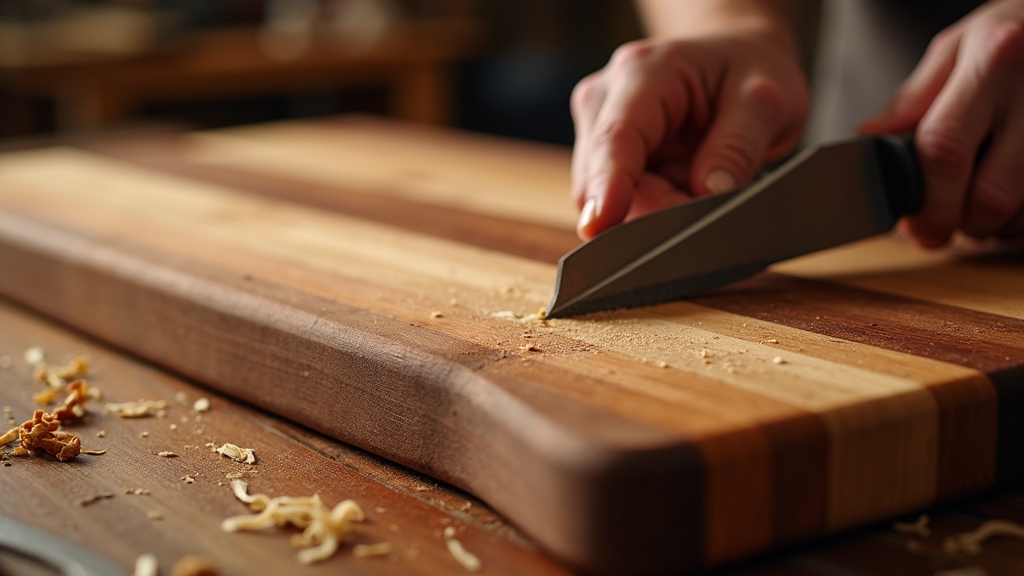
As you refine the board’s form, shaping the edges with precise router bits and bevel cuts enhances both safety and aesthetics. Use a bearing-guided roundover bit on your router to create smooth edges that prevent finger injuries.
Employ a radius jig for uniform corner rounding, ensuring consistent curves. For thicker boards, cut 45-degree bevels on all edges using a table saw set precisely with a digital angle gauge. Align the saw with a straight edge and crosscut sled for accuracy.
Sand through progressively finer grits, such as 120, 180, and 220, to achieve a smooth surface before finishing, using the pencil trick to ensure evenness. Incorporate finger grips by routing bullnose profiles with a fence for secure handling.
Flip and rotate the board throughout to maintain symmetry, referencing one long edge for squareness. Finish detail cuts by hand filing to preserve sharp lines, avoiding unintended rounding that can compromise design intent and usability. When applying finishes, ensure the surface is properly sealed, as sealed surfaces help protect the wood and maintain durability.
Sanding Techniques for a Smooth Surface
You’ll want to start sanding your cutting board with coarse grit to remove tool marks, then progressively move through medium to fine grits without skipping steps to guarantee an even, smooth surface.
Using a progression of grits such as 80, 100, 120, and 150 ensures thorough sanding and removal of previous sanding marks. Lightly dampen the wood between sanding passes to raise the grain, allowing you to sand it down again for a glass-like finish.
Consistent sanding with the grain and maintaining steady pressure will prevent scratches and preserve your board’s flatness.
Progressive Grit Sanding
Although sanding may seem straightforward, mastering progressive grit sanding is essential for achieving a smooth, defect-free cutting board surface. Start with an 80 grit to remove surface flaws efficiently, then systematically advance through finer grits such as 120, 150, 180, and finally 220.
Avoid skipping grits to ensure previous scratches are fully eliminated, reducing scratch depth by roughly half each time.
- Alternate sanding directions between grits—radial, then longitudinal—to cross-cut scratches and ensure uniform coverage.
- Maintain consistent pressure and movement when using a machine sander to prevent uneven surfaces.
- Stop sanding between 150 and 220 grit before finishing to avoid burnishing wood fibers, which hinders finish adhesion.
This precise progression guarantees a smooth, structurally sound surface ready for finishing. Using the proper underlayment techniques can also help in preparing the work surface for sanding, ensuring evenness and stability during the process.
Wet Sanding Benefits
Why choose wet sanding over dry sanding when finishing your hardwood cutting board? Wet sanding lubricates the interface between sandpaper and wood using water, reducing friction and heat buildup. This minimizes premature abrasive clogging and washes away grit, preventing embedded particles from scratching the surface. It allows you to remove surface scratches gently while preserving the material.
Wet sanding also drastically suppresses dust, creating a cleaner workspace and improving indoor air quality. You’ll use lighter pressure and linear strokes, refining the surface between finish coats without aggressive material removal.
Additionally, dry thoroughly between grits to avoid over-soaking the wood. Wet sanding yields smoother, finer finishes essential for clear coatings like polyurethane. However, avoid excessive saturation to prevent soggy wood and use waterproof sandpaper to maintain consistency. This technique guarantees precise, controlled abrasion for flawless cutting boards.
Applying Food-Safe Finishes
When finishing a hardwood cutting board, selecting and properly applying a food-safe finish is essential to protect the wood while maintaining its usability and safety. You’ll want to choose a finish that penetrates the wood to enhance water resistance without forming a brittle surface film.
- Mineral oil is the most common finish, applied evenly and allowed to soak for at least 20 minutes. It’s colorless, odorless, and requires frequent reapplication. Mineral oil is preferred because it does not go rancid or alter the taste of food, making it ideal for cutting boards.
- Beeswax combined with mineral oil forms a protective wax layer, improving water resistance and surface feel. Apply as a paste and buff after drying. These oils and waxes wear off gradually, so reapplication is simple and requires no sanding.
- Pure tung oil penetrates deeply and hardens, providing superior durability. Apply thin coats with extended curing times to avoid tackiness.
Maintaining and Caring for Your Cutting Board
Once you’ve applied a food-safe finish to your cutting board, maintaining its condition through proper care guarantees longevity and performance. Scrape off food residue before washing with warm, soapy water, emphasizing thorough scrubbing over soap type.
Rinse well, then sanitize stains or odors using lemon juice or white vinegar. Scraping off food residue immediately helps prevent buildup that complicates cleaning and reduces bacteria growth.
Never soak or submerge the board; dry immediately with a towel, then air dry upright to prevent warping. Avoid dishwashers, extreme temperatures, hot pots, serrated knives, and harsh abrasives to protect wood integrity. Store boards in dry, ventilated spaces upright.
Perform deep cleaning and sanding as needed every few months, followed by mineral oil application to restore moisture. Routine monthly oiling with food-safe mineral oil or beeswax prevents drying and cracking, ensuring safe, smooth surfaces and extended board life.
Frequently Asked Questions
Can I Use Softwoods Instead of Hardwoods for My Cutting Board?
You shouldn’t use softwoods for cutting boards because their large pores absorb moisture and bacteria, increasing hygiene risks. Softwoods dent and splinter easily, reducing durability and safety. They also release sap and oils that may be toxic.
Hardwoods like maple or walnut offer denser grains, resisting bacteria and knife damage. Though more expensive, hardwoods guarantee a safer, longer-lasting cutting surface.
What Tools Are Essential for a Beginner Making Cutting Boards?
You’ll need a few key tools to get started: a saw (table or hand) to cut wood accurately, a planer or jointer for straight edges, and clamps to hold pieces tight during glue-up. Don’t forget a good-quality, food-safe wood glue like TiteBond III.
For smoothing, a random orbit sander or belt sander is essential. Safety gear including goggles, ear protection, and a dust mask must never be skipped to keep your workspace safe.
How Long Should I Clamp the Glued Board Panels Before Sanding?
You should clamp the glued panels for at least 30 to 60 minutes to achieve sufficient bond strength, depending on your glue type. Remove clamps after this period but wait at least 24 hours before sanding or planing to guarantee full cure and avoid joint stress or swelling.
Clean any glue squeeze-out within the first hour for easier removal. Adjust clamp time if ambient conditions or wood species require longer curing to maintain joint integrity.
Is It Necessary to Seal the End Grain Differently Than the Face Grain?
Oh sure, treat end grain and face grain the same if you want your cutting board to crack, warp, and become a bacteria breeding ground! You’ve got to seal end grain differently because it’s way more porous, absorbing oils like a thirsty sponge.
Use penetrating oils or balms frequently, every 6 to 8 weeks, to protect fibers and maintain durability. Face grain needs less attention, but end grain demands meticulous, deeper sealing for longevity.
Can I Use Food-Safe Finishes Other Than Mineral or Butcher Block Oil?
Yes, you can use other food-safe finishes like pure tung oil, raw linseed oil, and walnut oil, but each requires multiple coats and longer curing times. Beeswax or a mineral oil-beeswax blend offers added surface protection.
Avoid film finishes like polyurethane or varnish since knives damage the film, risking contamination. Always choose finishes without additives or synthetic polymers, and maintain regular reapplication to guarantee durability and food safety.
Choose the Best Wood for a Long-Lasting Cutting Board
Now that your hardwood cutting board gleams with a smooth, polished surface and precisely rounded edges, imagine the satisfying weight in your hands as you prep your next meal. With every slice, you’ll appreciate the careful grain alignment and durable finish you crafted.
By maintaining it regularly, your board will stay resilient and beautiful, becoming an enduring kitchen essential that marries function with artisanal craftsmanship. Your effort truly transforms raw wood into culinary art.