How to Fix Soft Spot in Hardwood Floor: 7 Steps [Easy]
If you have noticed a soft spot in your hardwood floor, you may wonder what is causing it and how to fix it.
Soft spots can signify water damage, structural issues, or wear and tear over time. Whatever the cause, it is important to address the issue promptly to prevent further damage and ensure your floor remains safe and sturdy.
To fix a soft spot in hardwood floors, you need to remove the damaged floorboard and apply a generous amount of carpenter’s glue. After this, insert the replacement board and secure it in place.
We will discuss everything you need to know about fixing a soft spot in your hardwood floor. Also, we’ll talk about the common causes of soft spots and how to tell if they’re serious.
How to Fix Soft Spot in Hardwood Floor: A Comprehensive Guide
Here’s what you need to do if your hardwood floor has a soft spot:
- Step #1: Identify the Soft Spot
- Step #2: Gather Materials
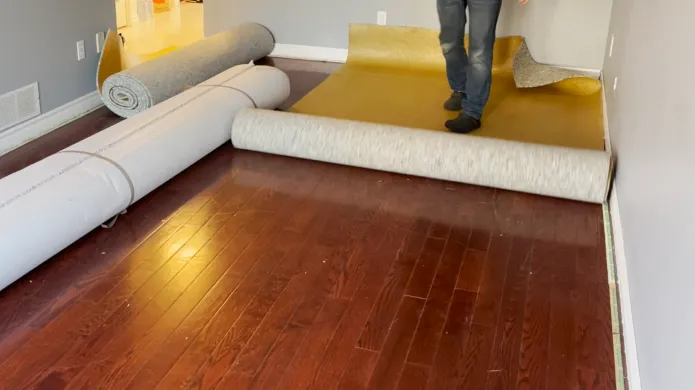
- Step #3: Remove the Damaged Floorboard
- Step #4: Apply Carpenter’s Glue
- Step #5: Insert the Replacement Board
- Step #6: Secure the Replacement Board
- Step #7: Finish the Repair
Let’s take a look at each step.
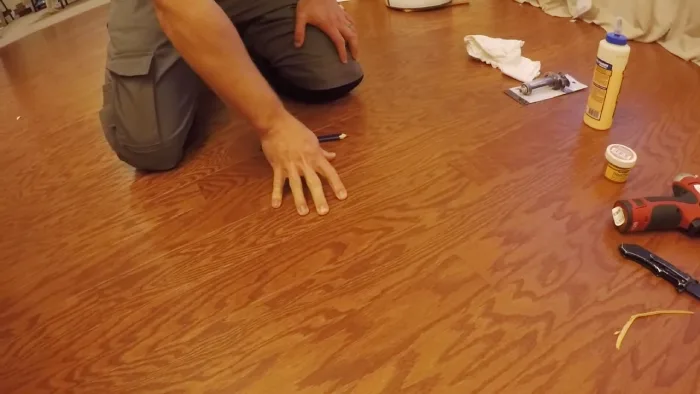
Step #1: Identify the Soft Spot
Locate the area on the hardwood floor that’s spongy or soft when stepped on and that’s the spot in need of repair.
This is the first step in fixing a soft spot on hardwood floors. It’s important to identify the exact location of the damage, as this will determine the extent of the repair needed.
A small soft spot limited to one floorboard may only require the replacement of that specific board. However, if the damage extends to multiple boards or the subfloor, a more extensive repair may be necessary.
To help you identify the soft spot, you can use a simple table with a 2-column and 5-row format.
In the first column, list the areas of the floor where you feel softness or sponginess when you step on them.
In the second column, note the extent of the damage in each area, such as whether it’s limited to one board or extends to multiple boards and the subfloor.
By using this table, you can get a clear picture of the extent of the damage and determine the best course of action to repair it.
Remember to clear the area around the soft spot and remove any furniture or obstructions before beginning any repair work, and always wear eye protection when working with tools to prevent any potential injury.
Step #2: Gather Materials
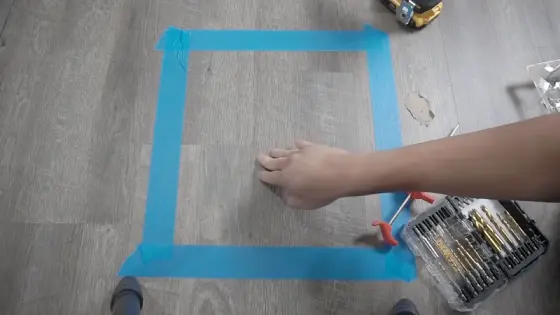
After identifying the area in need of repair, make sure you have all the necessary tools and materials. These include a circular saw, pry bar, hammer, replacement floorboards, carpenter’s glue, nails, and a nail gun or hammer.
The circular saw will be used to cut out the damaged floorboard, while the pry bar and hammer will be used to remove it carefully. Replacement floorboards should be purchased beforehand, ensuring they match the existing hardwood in both species and color.
Carpenter’s glue will be used to secure the new floorboard in place, while nails and a nail gun or hammer will be used to secure it further. The nail gun is recommended for a faster and more efficient process, although a hammer and nails can also be used.
Ensure the replacement floorboard fits snugly, with no gaps between the surrounding floorboards. With the right tools and materials, it can be done quickly and effectively.
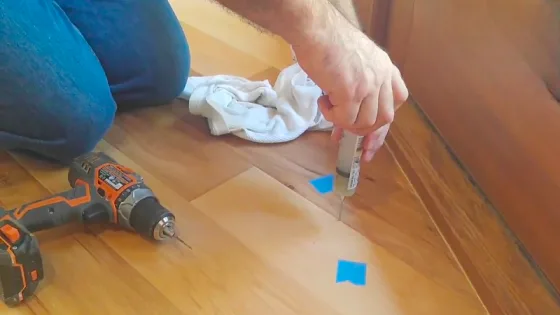
Step #3: Remove the Damaged Floorboard
Using a circular saw, carefully cut out the damaged board without causing further damage to surrounding boards. It’s crucial for successfully repairing your hardwood flooring.
Start the cut near the center of the board and make straight cuts along the length. Take your time and be patient during this process to ensure a clean cut.
Once the cuts are made, use a pry bar and hammer to pry and knock the sides of the damaged board inward, removing it completely.
Be gentle but firm with your prying and knocking to avoid causing any additional damage. Remove any remaining nails or staples from the subfloor so that the new board can be installed securely.
Sweep up any debris and dust to prepare the area for the next step in the repair process.
Step #4: Apply Carpenter’s Glue
Apply the carpenter’s glue to the groove of the replacement board and the top of the adjacent board’s tongue, creating a strong bond that will withstand everyday wear and tear. Ensure that the glue is evenly distributed along the joint and wipe away any excess before it dries.
This step is crucial in securing the new board in place and preventing any future movement or squeaking. Once the glue has been applied, carefully insert the replacement board into the gap, ensuring it is flush with the surrounding boards.
Use a rubber mallet to gently tap the board into place, being careful not to damage the surrounding boards.
Wipe away any excess glue that may have oozed out from the joint and allow the glue to dry for at least 24 hours before walking to the repaired area.
With the damaged board removed and replaced with a new one securely glued in place, your hardwood floor should now be restored to its former beauty and strength.
Step #5: Insert the Replacement Board
Now it’s time to carefully insert the replacement board into the space where the soft spot in the hardwood floor used to be. Make sure that the tongue on the replacement board is inserted into the groove of the adjacent board tightly, as this will ensure a secure fit.
It’s important to press down firmly on the replacement board to ensure that it is held in place and doesn’t move around.
Remember that once the replacement board is in place, it’s important to let it dry completely before walking on it or putting any furniture on it. This will ensure that the board is fully secured and won’t shift or move around.
Step #6: Secure the Replacement Board
Once the replacement board is in place, securing it with nails or a nail gun along both edges is essential to ensure it doesn’t shift or move around. This will help prevent future damage and keep your hardwood floors looking their best for years to come.
Use a nail gun or hammer to secure the replacement board in place, spacing the nails about every foot. Make sure the nails penetrate the replacement board and the subfloor below. This will create a secure hold and keep the replacement board from buckling or warping over time.
Take your time with this step and ensure the board is securely fastened before moving on to the next step. With the replacement board securely in place, you can move on to the final step of finishing the repair and restoring your hardwood floor to its former glory.
Step #7: Finish the Repair
To complete the repair, sand the area around the replacement board until it blends seamlessly with the rest of the flooring, leaving no visible seams or gaps.
Use fine-grit sandpaper to avoid damaging the surrounding floorboards, and work in a circular motion to ensure a smooth finish. Once the sanding is complete, vacuum the area to remove any dust or debris.
After sanding, apply stain or finish to the repaired area to match the surrounding floorboards. Use a small brush or roller to apply the finish evenly, and allow it to dry completely before walking on the repaired area. If necessary, apply a second finish coat for a more polished look.
Once the finish is dry, the repaired area should blend in seamlessly with the rest of the flooring, giving your hardwood floor a fresh and rejuvenated look.
What Causes of Soft Spots on Your Hardwood Floor
If you notice soft spots on your hardwood floor, several potential causes exist. The causes are as follows:
1. Water Damage
You’ll need to identify the source of the water damage before you can fix the soft spot in your hardwood floor. Here’s what you need to do:
Start by removing any standing water from the affected area. Use a wet/dry vacuum or towels to soak up as much moisture as possible.
- Once the surface moisture is gone, use a moisture meter to determine how much water has seeped into the floorboards. This will help you determine the extent of the damage and whether or not you need to replace any boards.
- If the damage is limited to a small area, you may be able to sand down the affected boards and refinish them. However, if the damage is more widespread, you may need to remove and replace the affected boards.
- After the repairs are complete, take steps to prevent future water damage. This may include fixing any leaks, using a dehumidifier to reduce moisture levels, and avoiding excessive mopping or steam cleaning.
Water damage can be a serious issue for hardwood floors, but with prompt action and the right tools and techniques, you can restore your flooring to its former glory. Just be sure to find out what caused the water damage and take steps to prevent future problems.
2. Termites and Pests
Don’t let those pesky termites and wood-destroying pests ruin your beautiful hardwood flooring.
If left untreated, these pests can compromise the structural integrity of your floor, causing extensive damage and soft spots. It’s important to identify the presence of termites and other pests early on and take immediate action to prevent further damage.
One way to prevent termites and other pests from infesting your hardwood flooring is to ensure that your home’s foundation and surrounding soil are properly treated with pest control products.
You can also install a moisture barrier underneath your subfloor to prevent moisture buildup, which can attract pests. In addition, regular inspections and maintenance can help detect and prevent any potential pest infestations.
To further help you understand how to fix soft spots caused by termites and other pests, here is a table outlining the common signs of termite and pest damage and the corresponding solutions:
| Common Signs of Damage | Solutions |
| Soft or Hollow Spots | Replace damaged floorboards and subfloor |
| Visible Termite Tunnels | Call a professional pest control service |
| Squeaking Floors | Tighten loose floorboards or replace damaged subfloor |
| Buckling or Cupping | Address moisture issues and replace damaged flooring |
| Insect Droppings or Dead Bugs | Remove any infested wood and call a professional pest control service |
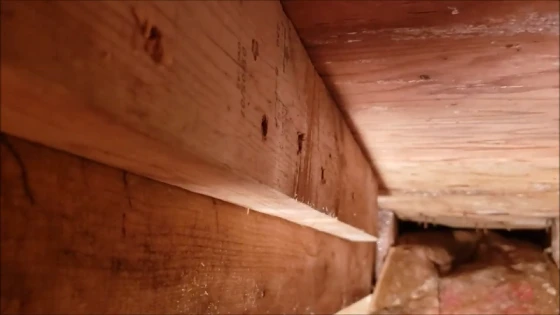
3. Subfloor Damage
When the foundation beneath your hardwood oasis is compromised, it’s like a crack in the windshield of your home’s structural integrity.
Subfloor damage is a serious issue that can cause soft spots in your hardwood floor. Here are three common causes of subfloor damage:
- Poor installation: If the subfloor wasn’t installed properly, it can cause dips and low spots in your hardwood floor. Make sure the subfloor is level and stable before installing the hardwood.
- Water damage: Water can seep into the subfloor and cause it to rot or warp. This can create soft spots in your hardwood floor as well as other issues such as mold and mildew. Make sure to fix any leaks or water damage as soon as possible.
- Age: Over time, the subfloor can naturally settle or shift, causing dips and low spots in the hardwood floor. If your home is older, it’s important to inspect the subfloor regularly to catch any issues before they become bigger problems.
4. Improper Installation
Now that you’ve learned about subfloor damage, it’s time to move on to another common cause of soft spots in hardwood floors: improper installation.
As mentioned in the Background Information, using the wrong type of underlayment or double-layered underlayment can lead to an uneven subfloor, which can cause the floorboards to sag and become soft over time.
In addition to underlayment issues, other improper installation practices can also contribute to soft spots. For example, failing to acclimate the hardwood to the room’s humidity and temperature before installation can cause the boards to expand or contract, leading to gaps or buckling.
Similarly, not leaving enough space around the room’s perimeter for the hardwood to expand and contract can also cause issues.
5. Lack of Expansion Gap
One of the most common reasons for uneven hardwood floors is the lack of an appropriate expansion gap, which allows for natural expansion and contraction due to temperature and humidity changes.
When the hardwood floorboards are installed without leaving a sufficient expansion gap, the boards tend to push against each other when they expand, causing the boards to cup.
Cupping is when the edges of the boards are higher than the center, making the floor uneven and creating soft spots.
To fix a soft spot caused by a lack of expansion gap, you must first remove the affected boards. Next, you’ll need to cut a new groove into the subfloor where the boards were previously installed to create an expansion gap.
Once the new groove is cut, install the boards back in their original place, leaving the appropriate expansion gap between each board.
If the damage is severe, it may be necessary to replace the affected boards entirely. It’s important to have a professional handle any repair work to ensure the job is completed correctly and to avoid further damage to the hardwood floor.
6. Foundation Problems
If you notice a sinking feeling in your stomach as you walk across your once-solid floors, it could be a sign of foundation issues.
Soft spots in hardwood floors can indicate underlying foundation problems, which can cause the floor to become uneven.
This can be caused by foundation settlement or shifting, which can also lead to cracks in walls and floors, gaps between windows and walls, and doors that don’t close properly.
If you suspect that foundation problems cause your soft spots, addressing the issue as soon as possible is important. Ignoring the problem can lead to further damage and potentially dangerous conditions.
Contacting a professional foundation repair company can help you identify and address any underlying issues, ensuring your home is safe and structurally sound for years.
7. Improper Maintenance
Refrain from regular upkeep and failing to address any water damage or excess moisture promptly can contribute to the deterioration and weakening of wooden flooring.
When water seeps into floorboards, it can leave water spots and also cause the wood to expand, leading to warping and buckling. This creates hazardous and unsightly soft spots in the flooring.
To prevent this, it’s important to prioritize regular maintenance and address any water leaks or spills immediately.
Here are some reasons why you should prioritize proper maintenance of your hardwood floors:
- Taking care of your flooring regularly can extend its lifespan, saving you money.
- Soft spots and other damage can be dangerous to walk on, leading to slips and falls.
- Damaged flooring can detract from the overall look and feel of your home.
- Soft spots can indicate underlying structural issues, which can be costly and time-consuming to repair.
Can heavy furniture cause hardwood floors to sag?
Heavy furniture can cause hardwood floors to sag over time, so taking precautions to protect your flooring is important.
When heavy furniture is concentrated in a small area or if the weight is not adequately distributed, it can place excessive pressure on the floorboards beneath. This continuous and concentrated weight can lead to compression of the wood fibers, resulting in the floor sagging or becoming uneven.
Additionally, if the furniture is moved or dragged across the floor without proper precautions, it can cause scratches, dents, or indentations, further compromising the structural integrity of the hardwood floor.
To prevent sagging, it is recommended to use furniture pads or coasters under heavy furniture to distribute the weight more evenly and protect the flooring.
Regularly moving furniture around and using protective measures can minimize the risk of sagging and maintain the longevity of the hardwood floor.
How much weight can a hardwood floor support before it collapses?
On average, a residential hardwood floor can withstand a load of around 40 to 50 pounds per square foot. This weight limit provides a safety factor and distributes the load evenly across the floor’s surface.
However, it is essential to note that concentrated heavy loads in a small area, such as a large aquarium, can cause damage to the floor and possibly lead to collapse.
Therefore, it is crucial to consider weight distribution when placing heavy objects on a hardwood floor to prevent any mishaps.
How long does it take for water damage to show on the wood floor?
You’ll start to see the effects of water damage on your wooden floors in as little as 48 to 72 hours, with mold growth creeping in like a silent intruder.
If the conditions are favorable, mold can quickly take hold, causing a host of problems, such as respiratory issues and allergic reactions.
Other signs of water damage, like staining or buckling of the wood, may become apparent within two to seven days. It’s important to address water damage as soon as possible to prevent further damage to your hardwood floors.
This includes drying out the affected area thoroughly and identifying the source of the water. If left untreated, water damage can weaken the structure of your floors and create an unsafe environment.
Keep Your Hardwood Floor Strong and Beautiful
Now you know how to fix a soft spot in hardwood. Repairing soft spots in hardwood floors requires following a comprehensive guide. Find the damaged area, gather materials, remove the damaged floorboard, apply the carpenter’s glue, insert the replacement board, secure it, and finish the job.
Various factors, such as water damage, pests, subfloor issues, improper installation, lack of expansion gap, foundation problems of hardwood floors can cause soft spots.
Additionally, heavy furniture has the potential to cause sagging, so it is important to use furniture pads and distribute weight evenly. Take preventive measures to keep your hardwood floor strong and beautiful for a long time.