Can You Use Gel Stain on Hardwood Floors: In-Depth Explanation
Are you considering using gel stains on your hardwood floors? Due to their thicker consistency and ease of use, gel stains have become increasingly popular with DIYers and professionals. But can you use gel stain on hardwood floors?
The answer is yes. You can use gel stain on hardwood floors. Gel stain is the perfect solution for old, outdated wood floors that need an update. Generally, gel stains cover imperfections better and dry slower, so they apply more evenly than traditional wood stains.
However, you must understand the differences between traditional and gel wood stains. Knowing the proper techniques for applying and finishing hardwood floors to achieve the best results is also essential. So let’s explore gel stain and hardwood floors and discover everything you need to know.
How to Use Gel Stain on Hardwood Floors: Step-by-Step Guide

Gel stain is a popular choice for hardwood floor refinishing, as it provides a rich, long-lasting finish that is easy to apply. You must follow a step-by-step guide when applying gel stain to your hardwood floors, from preparing the surface to sealing the finish.
- Step 1: Prepare the Hardwood Floors
- Step 2: Sand the Hardwood Floors
- Step 3: Apply the Gel Stain
- Step 4: Allow the Stained Wood to Dry
- Step 5: Apply a Sealer or Top Coat
- Step 6: Post-Staining Care
Step 1: Prepare the Hardwood Floors
Before applying gel stain to hardwood floors, prepare the surface by sanding it to remove any existing finish or blemishes. A recent survey found that properly prepping the floors can increase the stain’s longevity by up to 50%.
Here are the steps to follow when preparing your hardwood floors for gel stain:
- Start by clearing the room of any furniture or obstacles that could hinder your sanding. This will give you more space to work with and prevent accidental damage to your belongings.
- Sweep or vacuum the floors once the room is clear to remove debris. This will ensure the sandpaper doesn’t get clogged and allow you to achieve a smoother finish.
- Tape off any walls or baseboards to protect them from the sanding process. This will prevent the walls from getting scratched or damaged by sandpaper as you work on the floors.
By taking the time to properly prepare your hardwood floors before applying gel stain, you can ensure that the stain will adhere properly and last for years to come. Following these steps will help you achieve a professional-looking finish that will enhance the beauty of your floors.
Step 2: Sand the Hardwood Floors
After clearing the room and taping off the walls, it’s time to smooth out the surface of your hardwood flooring by lightly sanding it down. This is an important step to ensure the gel stain adheres properly to the floor and creates an even finish.
You can use a floor sander or a hand-held sander with fine-grit sandpaper to achieve the desired smoothness and remove any debris or dust left on the floor after sanding.
When sanding, be careful not to overdo it, as this can damage the hardwood. Only sand until the surface is smooth and any imperfections or scratches are removed. It’s also important to sand in the same direction as the wood grain to avoid any unwanted patterns or marks.
Once you’ve finished sanding, use a vacuum or damp cloth to remove any remaining dust or debris. Your hardwood floors are now ready for the next step in the gel staining process.
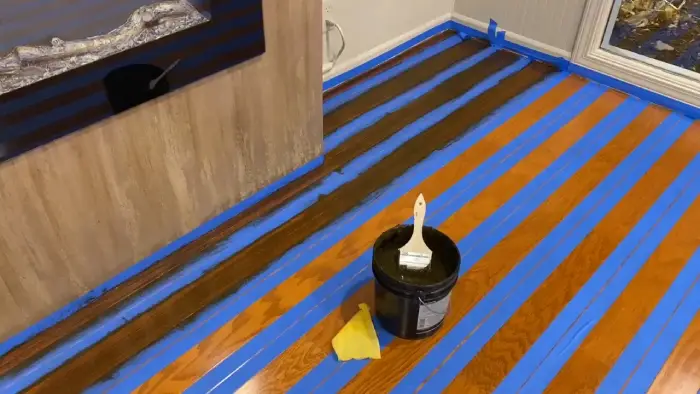
Step 3: Apply the Gel Stain
Congratulations, you’re now ready to transform your dull, lifeless floor into a work of art with the magical application of gel stain. Applying gel stain on hardwood floors is a great way to give them a new lease of life.
Here’s a step-by-step guide to help you achieve the perfect finish:
- Stir the gel stain thoroughly before use to ensure it’s mixed well. This will help to achieve consistent color on your hardwood floors.
- Using a brush or roller, apply the gel stain in a thin, even layer. Make sure to work in small sections to ensure that you have a consistent finish.
Step 4: Allow the Stained Wood to Dry
Now, let that beautiful stained hardwood floor dry completely before proceeding. This step is crucial to achieving a flawless finish.
The drying time for gel stain can vary depending on several factors, such as humidity and temperature. It’s best to wait at least 24 hours before applying the next coat of stain or finish.
During the drying process, it’s important to keep the area well-ventilated and avoid walking or placing any objects on the stained surface. This ensures that the stain dries evenly and prevents any unwanted marks or blemishes.
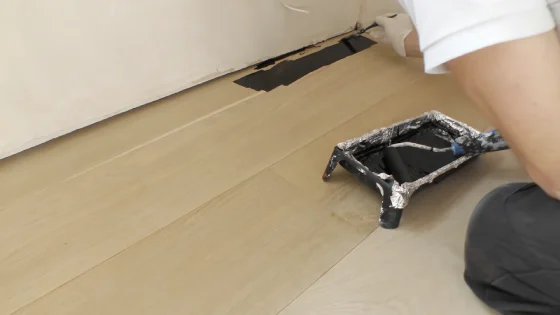
Step 5: Apply a Sealer or Top Coat
To protect your newly stained hardwood floors, applying a sealer or top coat is essential. Here are the steps to follow:
- Choose the right sealer or top coat for your specific type of wood. Many types of sealers and top coats are available on the market, so make sure to select one suitable for your hardwood floors.
- Apply the sealer or top coat using a brush or roller to cover every inch of the surface. This will help to prevent moisture and dirt from penetrating the wood and causing damage.
- Allow the sealer or top coat to dry completely before walking or placing any furniture on the hardwood floors. This will ensure that the coating is fully cured and provides optimal protection.
- For enhanced protection and shine, you can also apply a coat of wax over the sealer or top coat. However, this step is optional for properly sealing the hardwood floors.
Step 6: Post-Staining Care
Maintain the beauty and longevity of your newly stained hardwood floors by taking care of them properly after the staining process.
Begin by avoiding heavy traffic and placing heavy furniture on the floors for the first few days after staining. This will allow the stain and sealer to fully dry and cure, preventing accidental scratches or damage.
If you must move furniture, use felt pads or sliders to avoid direct contact with the floors. Regular maintenance is also crucial for the upkeep of your stained hardwood floors.
Sweep or vacuum the floors regularly to remove any dirt and debris. Avoid harsh chemicals or abrasive tools that damage the floors or strip away the stain and sealer.
Instead, use a damp mop with a gentle cleaner designed for hardwood floors. With proper care and maintenance, your newly stained hardwood floors can remain beautiful and durable for years.
What is the primary difference between wood stain and wood gel stain?
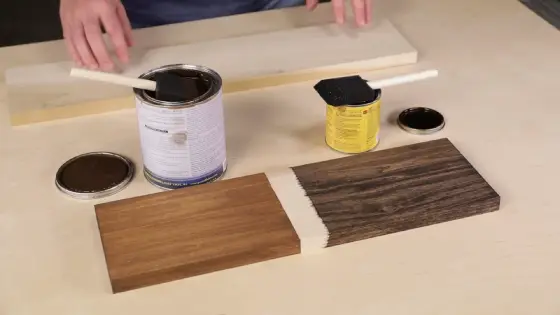
You’ll notice that the biggest difference between wood and gel stain is between sinking into a cozy armchair versus sitting on top of it.
While traditional wood stain soaks into the wood, gel stain sits on top of it. This results in a different finish, with gel stain allowing more of the wood’s natural markings and texture to shine through.
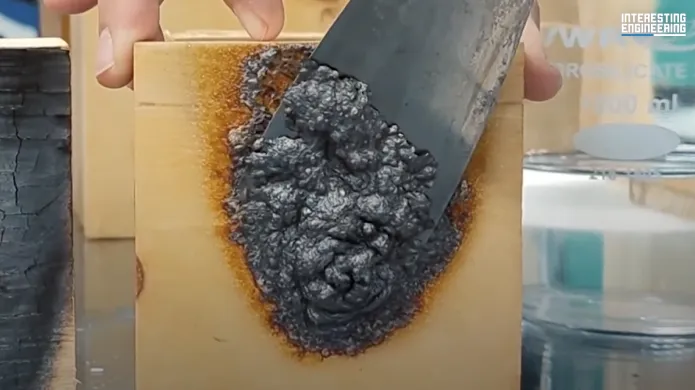
Another difference between the two is in their consistency. Traditional wood stain is thinner and more liquid, while gel stain is thicker and more viscous. This makes gel stain easier to apply without dripping or splattering, and it also allows for better control over the amount of stain applied.
Which is better, wood stain or gel stain?
If you want a finish that brings out wood natural grain and texture, consider using gel stain. Gel stains are thicker and easier to apply on non-porous surfaces.
They spread easily and provide excellent coverage, making them ideal for large projects like hardwood floors. While liquid stains work well on porous surfaces like wood, they don’t absorb as well into painted or metal surfaces.
Gel stains, on the other hand, are designed to work on a range of surfaces, including hardwood floors. However, note that gel stains do less to bring out the wood’s natural grain than traditional wood stains.
To emphasize the differences between wood stain and gel stain, here’s a table comparing the two:
| Wood Stain | Gel Stain |
| Thinner consistency | Thicker consistency |
| Absorbs well into porous surfaces like wood | Works well on non-porous surfaces like metal or painted wood |
| Brings out the natural grain of the wood | Does less to bring out the hardwood’s natural grain |
Can I use gel stain on real wood?
Now that you know the advantages of using gel stain, let’s dive into whether it can be used on real wood. The answer is a resounding yes!
Gel stain works on most surfaces, including real wood, metal, and even painted surfaces. This makes it a versatile option for various projects, including hardwood floors.
If you’re considering using gel stain on your hardwood floors, here are a few reasons why it’s a great choice:
- Gel stain is easy to apply and requires no special tools or techniques.
- It dries quickly, meaning you can have your floors stained and ready to use in less time.
- Gel stain is available in various colors, allowing you to choose the perfect shade for your floors.
- It’s also very durable, making it a great option for high-traffic areas.
Do I need to sand the hardwood floor before using gel stain?
Before applying the gel stain, sand the surface of the hardwood floors enough to scuff up the existing finish and make the surface even. This will allow the gel stain to adhere properly and ensure an even finish.
However, you don’t need to worry about sanding down to bare wood. Simply sand enough to remove any gloss or sheen from the existing finish.
When sanding, it’s important to use the proper grit sandpaper. Start with a coarse grit, such as 60 or 80, to remove rough spots or scratches. Then, move to a finer grit, such as 120 or 150, to smooth out the surface and prepare it for the gel stain.
Does gel stain cover better than regular stain?
A flawless finish on your hardwood floors is possible with gel stain, as it has superior coverage to regular stain. Here are three reasons why:
- Gel stains have a thicker consistency than regular stains, allowing for better adhesion to the surface of the wood. This means the stain will be less likely to penetrate unevenly or leave blotches.
- The opacity of gel stains also makes them ideal for hiding imperfections in the wood. This can be especially helpful for floors that have scratches or other damage.
- Gel stains have a slower drying time than regular stains, allowing more time to work with the product. This makes achieving an even and consistent coat easier, even on larger surfaces like hardwood floors.
Do I need to put polyurethane over the gel stain?
To get the most out of your beautiful new finish, seal in color with a layer of polyurethane top coat over the gel stain. The thick urethane in gel stain allows for a rich, deep color to be applied to any surface, but without a protective top coat, the color can fade, and the wood itself can dry out over time.
Polyurethane top coat not only seals in color but also provides a protective layer that helps to prevent scratches and scuffs on your hardwood floors. When applying a polyurethane top coat over a gel stain, use a high-quality brush and apply the top coat in thin, even layers.
Allow each layer to dry completely before applying the next layer. Depending on the level of foot traffic in the area, you may need to apply multiple coats to ensure adequate protection.
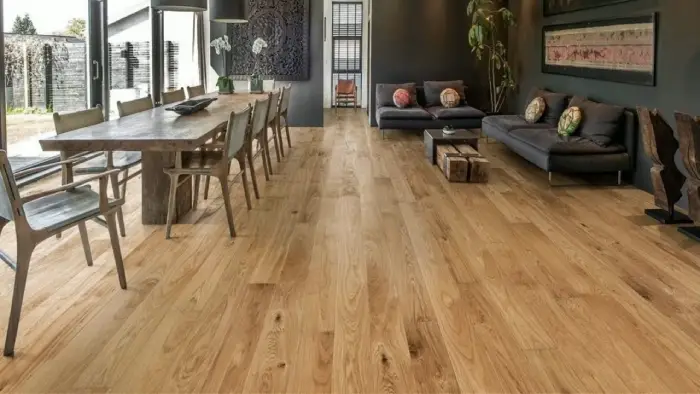
Revamp Your Old Hardwood Floors with Gel Stain
Using gel stain on hardwood floors can be a great way to give them a fresh, new look. You can achieve a beautiful finish lasting for years with the right tools and techniques. Using gel stain on your floors is a simple process that can be done with a few steps.
However, remember some differences between wood stain and wood gel stain. As you may already know, a wood stain is a liquid that penetrates the wood. Gel stain, on the other hand, is a thicker consistency that sits on top of the wood.
While both stains can be used on hardwood floors, gel stain offers some advantages. This could be because gel stain is easier to use and provides a more consistent finish than traditional wood stain.