How to Cut Hardwood Floor for Professional-Looking Floors
To cut hardwood flooring cleanly, choose the right saw, miter saw for crosscuts, table or circular saw for rip cuts, and jigsaw for curves. Always select a sharp, carbide-tipped blade and set its depth just to the board thickness to avoid subfloor damage.
Secure boards firmly on padded supports, measure carefully, and mark cut lines with painter’s tape to reduce splintering. Wear safety gear and maintain steady, even pressure while cutting.
Follow these steps, and you’ll achieve precise results while avoiding common pitfalls.
Key Takeaways
- Choose the right saw and blade, like a miter saw for crosscuts or a table saw for rip cuts, ensuring sharp, carbide-tipped blades.
- Measure and mark cut lines accurately, applying painter’s tape to minimize splintering along the cut edges.
- Adjust blade depth to just penetrate the hardwood thickness, protecting the subfloor and preventing burn marks.
- Secure boards on padded sawhorses and use clamps, edge guides, or stop blocks for stable, precise cutting.
- Wear safety gear, maintain a clean workspace, and cut slowly and steadily for clean, accurate hardwood floor cuts.
Essential Tools and Equipment for Cutting Hardwood Floors
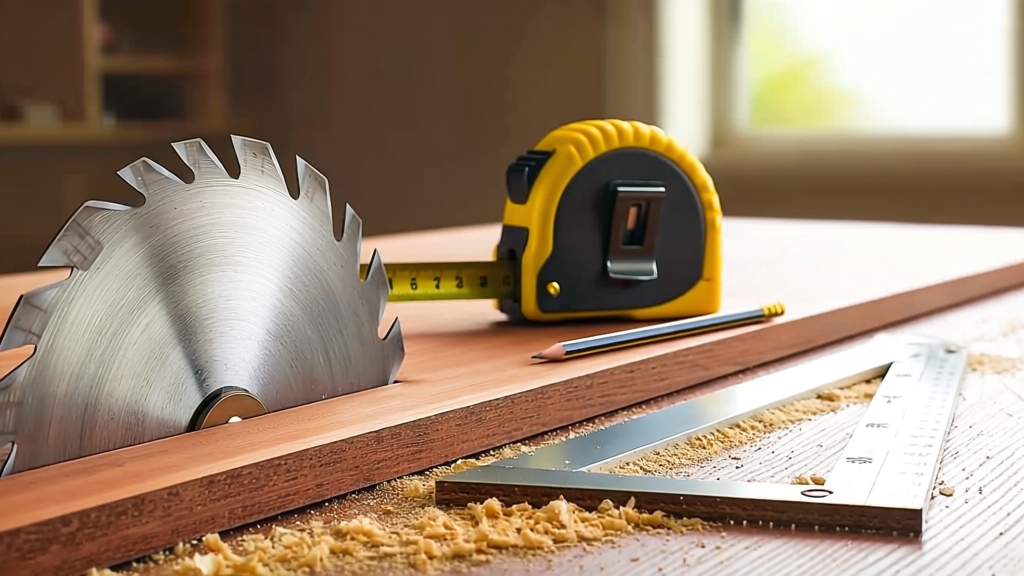
When preparing to cut hardwood floors, you’ll need a specific set of tools tailored to different cutting tasks and installation challenges. For precise crosscuts and angled trim, a miter saw provides stable, clean cuts.
Modern miter saws often feature a glide-action system that allows for smoother, more accurate cuts in thick hardwood. Proper maintenance and gentle handling of these tools help preserve the floor’s finish during installation.
Long rip cuts call for a powerful table saw to ensure consistent plank width. A circular saw offers versatility for straight cuts where a table saw isn’t practical. Use appropriate cutting methods to avoid scratches and dents on the hardwood surface.
A jigsaw handles curves and irregular shapes with ease. Undercutting door casings requires a jamb saw, either manual or powered, for a neat fit. Don’t overlook manual tools—handsaws, coping saws, and utility knives handle small, detailed cuts and underlayment scoring. Measure and mark accurately with tape, chalk lines, and straight edges.
Finally, use spacers, tapping blocks, and pull bars to maintain proper gaps and fit during installation. Ensuring the floor is clean and free of debris before installation can prevent damage and improve the longevity of your hardwood floor.
Types of Cuts Needed for Hardwood Flooring
You’ll encounter several common hardwood cuts—plain sawn, quarter sawn, rift sawn, and live sawn. Each cut features distinct grain patterns and stability characteristics.
Understanding these cuts helps you choose the right technique for your flooring’s aesthetic needs. It also plays a key role in performance and durability. The cutting method influences the final look of the hardwood flooring and its behavior over time.
Proper preparation, such as clearing the area and removing debris, is essential before making any cuts to ensure accuracy. Mastering specialized cutting methods ensures precise fitting. This precision contributes to long-lasting results in your hardwood flooring project.
Common Hardwood Cuts
Although selecting hardwood flooring often focuses on species and finish, understanding the common cuts of hardwood is essential for achieving the desired stability and grain appearance.
Plainsawn, the most common cut, offers a dynamic “cathedral” grain but is prone to lateral movement and cupping, especially in wider boards. It can move approximately twice as much across the width compared to rift and quarter sawn boards, depending on species. Proper assessment of wood damage before installation can help prevent future issues related to this movement.
Quarter sawn boards, with growth rings at 60° to 90°, provide superior dimensional stability and a refined, straight grain ideal for variable humidity. Rift sawn, cut at about 45°, delivers a consistent linear grain and excellent stability, making it suitable for radiant heat installations.
Live sawn combines these patterns within one board, offering unique aesthetics and enhanced stability for wide planks. This cut contains all three growth ring angles from 0–90°, showcasing mixed grain patterns in a single board.
Specialized Cutting Techniques
How do professionals achieve the flawless fit and finish essential to hardwood flooring? They rely on specialized cutting techniques tailored to each scenario.
Use a miter saw for precision crosscuts and miters, adjusting the bevel angle for tight corners and trim. For rip cuts, set your table saw fence parallel and control blade depth to avoid burn marks. Choosing the right cutting method also influences the grain pattern and overall appearance of the floor.
Additionally, treating wood with a fire retardant product before installation can enhance safety. When cutting end grain or existing floors, a circular saw with a fine-tooth carbide blade or a Sawzall with clamps provides accurate rough cuts. Routers clean edges cautiously.
Chamfer and bevel cuts require blades with higher tooth counts and precise angle settings for smooth, splinter-free edges. Employ stop blocks and clamps to ensure repeatable, consistent cuts, enhancing both accuracy and safety throughout your hardwood flooring installation.
Selecting the Right Saw and Cutting Technique
When selecting the right saw for cutting hardwood floors, consider both the type of cut and the material thickness to guarantee precision and efficiency.
Use a miter saw for cross-grain, bevel, or angled cuts on wide or thick planks, especially with laser guides for accuracy. The Metabo HPT 10-Inch Miter Saw is a good choice for beginners due to its lightweight design and adjustable features.
A miter saw excels at cross-grain, bevel, or angled cuts on wide, thick hardwood planks with precise laser guidance.
For straight rip cuts, opt for a table saw or circular saw fitted with rip or combination blades. It is also important to ensure the subfloor is level using underlayment material before cutting and installing to avoid uneven surfaces.
Jig saws suit intricate or curved cuts where straight lines aren’t required. Hand saws demand skill, but work for thick hardwoods if power tools aren’t available.
Choose carbide-tipped blades to maintain sharpness and reduce tear-out. Adjust saw features like motor power and sliding mechanisms based on project scale and workspace constraints to achieve clean, precise cuts efficiently.
Safety Measures and Preparation Before Cutting
Selecting the right saw and cutting technique sets the foundation for accurate hardwood floor cuts, but guaranteeing your safety and preparing your workspace properly comes next.
Always wear safety glasses, a dust mask, and ear protection to shield your eyes, lungs, and hearing. Choose snug clothing and woodworking gloves for hand protection without sacrificing dexterity.
Clear your work area of debris and unnecessary tools to prevent trips and slips. Maintain good lighting for precise measurements. It is also important to secure the saw firmly to prevent movement during operation. During the preparation, ensure you have a clean workspace to avoid dust buildup that could affect cutting accuracy.
Inspect all electrical tools and cords for damage, ensure proper grounding, and unplug before blade changes. Use push sticks and stand clear of blade paths to avoid injuries. Check that blades are sharp, aligned, and securely attached. Keep fire extinguishers and first aid kits nearby to quickly handle emergencies.
Step-by-Step Hardwood Floor Cutting Process
Before cutting hardwood flooring, set up your tools and workspace meticulously to guarantee accuracy and safety. Choose the right saw table, circular with a hardwood blade, or miter based on your cut type. A rip blade with fewer teeth is recommended for smoother cuts when using a table saw.
It is also important to ensure the floor surface is clean and free of debris to avoid damage during cutting, as proper preparation and protection can significantly affect results.
Stabilize boards on padded sawhorses to prevent damage and ensure clean cuts. Install an edge guide for straight, controlled cuts and adjust blade depth to just penetrate the board thickness. Clear the area for unobstructed workflow.
Measure and mark cut lines precisely, accounting for blade kerf width. Secure the board against a stop block or fence to maintain alignment. Feed the board steadily through the saw, maintaining even pressure to minimize splintering.
Tips for Achieving Precise and Clean Cuts
Accurate cuts depend heavily on choosing the right saw and blade combination tailored to your specific hardwood flooring type and cut style. Use a miter saw with crosscut blades for angled joints, and a table saw equipped with a rip blade for long, straight cuts.
Choosing the right saw and blade is crucial for precise hardwood flooring cuts.
Adjust blade depth to cut only through the flooring thickness, protecting the subfloor. Secure boards firmly with clamps and employ edge guides to maintain straight lines. Considering the installation options available can also influence the cutting approach and precision.
Apply painter’s tape along cut marks to minimize splintering, and cut slowly to reduce tear-out. For curved cuts, a jigsaw offers better control and maneuverability, especially useful for intricate patterns. Keep blades sharp and replace them regularly. Integrate zero-clearance inserts and stop blocks for cleaner edges and repeatability.
Always double-check measurements and tool setup before cutting to ensure precision and safety. Additionally, wearing appropriate protective gear such as goggles and dust masks is essential for workspace safety during cutting operations.
Frequently Asked Questions
Can Hardwood Floor Scraps Be Reused for Repairs or Crafts?
Yes, you can definitely reuse hardwood floor scraps for repairs and crafts. Keep a few matching planks to fix dents or scratches, guaranteeing consistent color and grain.
For crafts, you can sand and seal scraps to create furniture, wainscoting, or décor items like coasters and frames. Just remove nails and consider wood type and finish to assure durability and a seamless look. This approach saves money, reduces waste, and enhances your home’s value.
How Does Humidity Affect Hardwood Floor Cutting and Installation?
You should know that wood can expand or contract by up to 8% with humidity changes, directly affecting cutting and installation accuracy. If you cut hardwood without acclimating it to your indoor humidity (ideally 30-55% RH), boards may warp or gap later.
Always acclimate flooring 5-7 days indoors, cut precisely with expansion gaps in mind, and install during stable humidity to guarantee tight, durable seams and prevent future movement issues.
What Is the Best Way to Dispose of Hardwood Floor Cut-Offs?
The best way to dispose of hardwood floor cut-offs is by renting a dumpster. It handles large volumes efficiently, prevents overloading your trash, and includes delivery and pickup with flat-rate pricing.
If you prefer, you can donate or sell usable pieces to reduce waste and support sustainability. Otherwise, take non-reusable cut-offs to a wood recycling center or landfill after confirming acceptance policies and fees for proper disposal.
Are There Eco-Friendly Alternatives to Traditional Hardwood Flooring?
You don’t have to choose the “forest’s ransom” with traditional hardwood. Bamboo and cork flooring offer sustainable, fast-regenerating alternatives that reduce carbon footprints and preserve biodiversity.
Engineered hardwood uses less material and minimizes waste, while reclaimed wood repurposes existing lumber, cutting landfill waste. These options combine durability, water resistance, and low emissions, making them smart, eco-conscious choices that meet both your design needs and environmental responsibility.
How Do Different Hardwood Species Impact the Choice of Adhesives?
Different hardwood species impact your adhesive choice mainly through their porosity, extractives, and grain density. For example, oily or resinous woods like teak need acrylic or specially formulated adhesives to guarantee bonding.
Dense species with high tannins, like oak, may require phenol-formaldehyde adhesives, but beware of staining. Porous woods bond well with polyurethane adhesives. You’ll want to tailor your adhesive type and application rate to the species’ surface characteristics for ideal strength and durability.
Practice Makes Perfect: Sharpening Your Cutting Skills
Cutting hardwood floors accurately is essential, as 80% of installation errors stem from improper cuts. By selecting the right tools and mastering precise techniques, you’ll guarantee a flawless fit and durable finish.
Always prioritize safety and preparation to avoid costly mistakes. With practice, your cuts will be cleaner and more efficient, enhancing both the look and longevity of your flooring. Stay methodical, and you’ll achieve professional results every time.