How Do You Buff Hardwood Floors: Tips for a Smooth Finish
To buff hardwood floors, first sweep and clean thoroughly to remove dust and debris. Choose a low-speed orbital buffer with a soft microfiber pad to avoid scratches. Work steadily along the wood grain, starting with coarser grits if needed and progressing to finer ones for a smooth finish.
Protect adjacent surfaces and ensure proper ventilation while working. After buffing, apply polish evenly and let it dry before buffing again for shine. Explore how to select equipment, pad types, and safety measures to perfect your process.
Key Takeaways
- Thoroughly clean and dry the hardwood floor, removing dust, debris, and sticky spots before buffing.
- Use a low-RPM orbital buffer with a soft microfiber pad to prevent scratches and ensure even buffing.
- Buff in small sections following the wood grain with steady, overlapping passes for consistent results.
- Apply a thin, even layer of polish after buffing, let it dry to a haze, then buff again to enhance shine.
- Ensure proper ventilation, wear safety gear, and avoid foot traffic until the finish is fully cured.
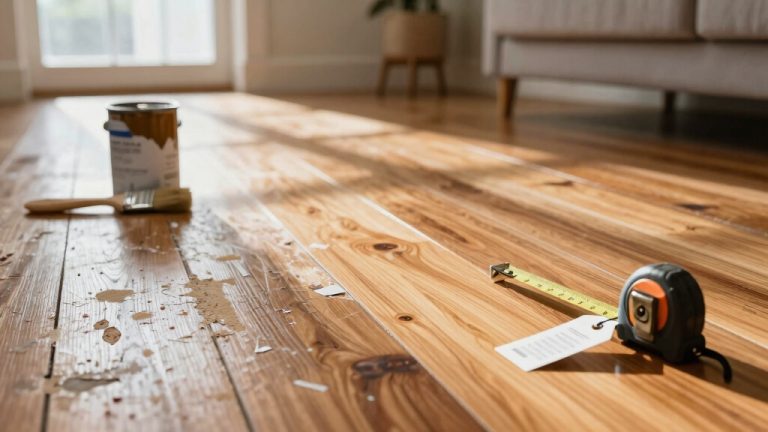
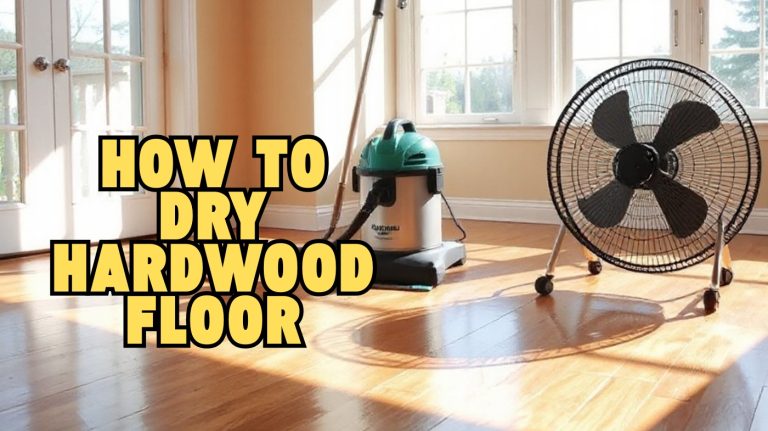
Preparing Your Hardwood Floor for Buffing
Before you begin buffing, you need to prepare your hardwood floor meticulously to guarantee ideal results and prevent damage.
Start by thoroughly sweeping or vacuuming to eliminate loose debris, then wipe the surface with a damp microfiber cloth, ensuring it’s completely dry before proceeding. This thorough cleaning helps to avoid debris scratches during buffing.
Prepare your hardwood floor by sweeping, vacuuming, and wiping with a damp microfiber cloth until dry.
Inspect for sticky spots, stains, or damages; clean stains with appropriate hardwood cleaners, fill cracks with wood filler, and sand rough areas smooth. Allow the floor to be fully dry, as moisture can harm finishes and affect buffing effectiveness.
Remove all furniture and obstacles for unobstructed access. Clear dust sources, close windows, and protect walls or baseboards to maintain a controlled work environment. Using protective coverings like drop cloths can help prevent accidental damage during the process.
Wear gloves and a mask for safety. Finally, sweep or vacuum again to remove any settled dust. These steps ensure the floor is perfectly clean, dry, and smooth for an effective buffing process.
Choosing the Right Buffing Machine and Pads
When selecting a buffing machine for hardwood floors, you’ll need to prioritize adjustable speed settings and an orbital motion to protect the finish from damage. Machines like the Oreck Orbiter or Bissell BigGreen with low RPM (under 200) ensure gentle yet effective buffing.
Many floor buffers operate at speeds ranging from approximately 175 to 350 RPM, making them suitable for careful hardwood floor maintenance. It is also important to avoid using harsh chemicals like ammonia during cleaning, as they can dull or damage the wood finish.
Choose lightweight, ergonomic models for easier handling, especially those with corded power for consistent performance. For pads, select soft microfiber or synthetic types, typically white or beige, to avoid scratching the surface.
Guarantee pad size matches your machine’s head—commonly 12 to 17 inches. Avoid abrasive or heavy-duty pads designed for scrubbing. Follow manufacturer guidelines strictly, and opt for machine-washable pads for routine jobs or disposables for heavily soiled floors.
Step-by-Step Buffing Process
Although buffing hardwood floors requires careful preparation, following a systematic process guarantees ideal results. First, clear the room and thoroughly clean the floor, removing dust and debris to prevent scratches. Protect baseboards with painter’s tape or foam to avoid damage during buffing and sanding.
Start buffing from the farthest corner, moving left to right along the wood grain with overlapping passes. Maintain a steady, slow pace, holding the buffer firmly with both hands to ensure control. Avoid pausing to prevent burn marks.
Regularly inspect and replace the buffing pad if clogged or worn. Buffing lifts light marks penetrating the protective layer and smooths small imperfections effectively. For edges and corners, use a smaller buffer or hand sanding tools, applying light pressure to avoid damage.
After buffing, clean the floor thoroughly and inspect for any imperfections. Address these as needed before proceeding to finishing steps. Removing or protecting baseboards during floor refinishing ensures a flawless finish and prevents accidental damage.
Selecting the Appropriate Grit for Buffing
Mastering the buffing process means selecting the right grit to match your floor’s condition. Start with a coarse grit like 24 or 36 if your floor has old finishes, adhesives, or heavy wood imperfections. Use 24 grit for floors not sanded in decades or with sander flaws.
Transitionively progress to finer grits, 60 grit removes scratches from coarser sanding, and 100 grit prepares the surface for staining. For final smoothing, apply 120 grit or higher to achieve a polished finish.
If you encounter heavy adhesive or paint on edges, use a 12-grit edger pad. Always follow a course-to-fine grit sequence, ensuring you remove previous sanding marks without damaging the wood. This precise grit selection optimizes buffing efficiency and guarantees a smooth, professional finish.
When preparing to refinish floors adjoining tile, ensure you address height discrepancies to achieve a seamless transition and prevent damage during buffing.
Ensuring Safety and Proper Ventilation
Because buffing hardwood floors generates dust, debris, and fumes, you must prioritize safety gear and proper ventilation to protect yourself and maintain a safe work environment. Equip yourself with safety goggles, a dust mask or respirator, ear protection, gloves, and closed-toe shoes to minimize injury risks.
Confirm the workspace is clear of clutter with intact electrical cords, and secure loose clothing to prevent accidents. It is also critical to avoid walking on newly finished floors with shoes immediately after buffing to prevent damage during the finish curing.
Maintain good airflow by opening windows or using fans to dissipate chemical fumes and dust particles. Additionally, always follow manufacturer instructions for operating buffing equipment safely and inspect machines regularly.
Use equipment suited to your skill level to avoid mishandling or accidents during the buffing process equipment suitability.
- Wear safety goggles and dust masks
- Use ear protection and gloves
- Clear workspace and secure loose clothing
- Ensure proper ventilation with fresh airflow
- Inspect electrical cords and equipment before use
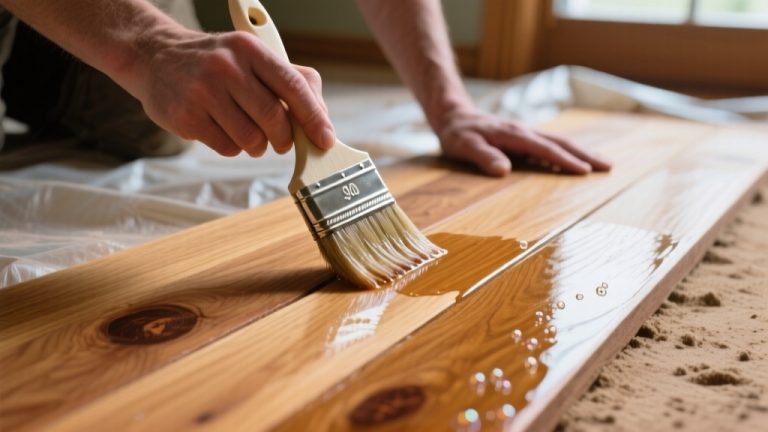
Applying Finish and Maintaining Buffed Floors
You’ll want to apply wax evenly using a clean applicator to enhance protection without buildup. Matte finishes, for example, are known for low maintenance and can influence your choice of wax. Polishing the floor after waxing restores a uniform shine and smooth surface.
To maintain your buffed floors, follow a routine cleaning schedule and address wear promptly to extend the finish’s lifespan. Additionally, make sure to work with the grain of the floor during application to ensure even coverage and avoid streaking.
Wax Application Techniques
When applying wax to hardwood floors, start by thoroughly cleaning the surface to remove dust and dirt, ensuring proper adhesion. In some cases, using a vacuum cleaner like a rainbow vacuum before waxing can help remove fine debris for a cleaner surface.
Choose the appropriate wax type liquid wax with a sponge mop or solid paste wax applied by hand using a putty knife and soft cloth. Maintain proper humidity levels during application to prevent any water damage that can affect the finish.
Work in small sections along the floorboards’ grain for even coverage. Allow each coat to dry as per manufacturer’s instructions, typically between 10 minutes and an hour. After drying, buff the surface to a smooth, even finish.
Keep in mind:
- Clean thoroughly before waxing
- Apply wax in manageable sections
- Use proper tools for wax type
- Follow drying times strictly
- Buff only after wax dries to a haze
Polishing for Shine
How do you achieve that lasting, high-gloss shine on your hardwood floors? Start by thoroughly cleaning the surface with a vacuum or microfiber mop, ensuring it’s free of dust and debris.
Use gentle hardwood cleaners and avoid excess moisture to protect the wood. Drying times can vary depending on environmental conditions like humidity and temperature, which affect polish curing.
Once dry, apply a thin, even layer of hardwood-specific polish following the wood grain with a flat mop or applicator pad. Avoid over-application to prevent streaks or sticky residue. For professional results, consider hiring hardwood floor cleaning specialists to ensure proper care.
Some polishes don’t require buffing, but if needed, attach a polishing cloth to a buffing machine and use appropriate grit pads to enhance gloss and remove minor scratches. Allow polish to dry fully between coats and before foot traffic to ensure proper bonding and durability.
Routine Floor Maintenance
Maintaining the shine achieved through polishing requires consistent care and proper application of finishes. First, choose a finish compatible with your hardwood and follow manufacturer instructions carefully to ensure adhesion and drying.
Allow ample drying time before resuming floor use. Using a buffer with a soft pad and gentle overlapping motions can help achieve a more even shine.
Regularly buff floors using a buffer with a soft pad, avoiding over-buffing to preserve the finish. Clean thoroughly before buffing to remove debris that can cause scratches. Proper maintenance is essential for ensuring durability despite daily wear and tear.
To keep your floors in excellent condition, focus on these routine maintenance tasks:
- Dust daily with a microfiber mop to prevent scratches.
- Vacuum weekly using soft settings.
- Mop high-traffic areas twice monthly with a damp mop.
- Use pH-neutral cleaners to protect the finish.
- Inspect floors regularly and reapply finish based on wear and recommendations.
Frequently Asked Questions
Can Buffing Fix Deep Scratches on Hardwood Floors?
You can’t fix deep scratches on hardwood floors by buffing alone because buffing only smooths out surface imperfections. Deep scratches penetrate the wood, requiring sanding, wood filler, or refinishing to restore the floor properly.
Buffing works best on minor scratches and general maintenance by applying polish and using a buffing machine to enhance shine. For deep damage, you’ll need more intensive repair methods to achieve a smooth, even finish.
How Often Should Hardwood Floors Be Professionally Buffed?
You might think buffing hardwood floors is a once-in-a-while task, but it’s more nuanced. Typically, you should have your floors professionally buffed every three years to maintain their finish and durability.
High-traffic areas need buffing every two years. Regular inspections help determine the exact timing. Factors like traffic, floor type, and lifestyle also influence frequency. Following these guidelines extends your floor’s life and keeps it looking its best.
Will Buffing Remove Water Stains From Hardwood Floors?
Buffing alone won’t remove water stains from hardwood floors because stains often penetrate the finish or wood fibers. You’ll need specialized treatments like mild abrasives, chemical solutions, or heat methods to address stains effectively.
Buffing can improve shine and smooth minor scratches but may spread or highlight water stains if used prematurely. Always tackle stain removal first, then buff to restore the floor’s smoothness and sheen safely.
Can Buffing Hardwood Floors Cause Damage if Done Incorrectly?
Yes, buffing hardwood floors can cause damage if you do it incorrectly. Over-buffing may overheat and weaken the finish, while using abrasive pads can scratch the surface.
Failing to clean the floor beforehand might embed dirt, causing imperfections. Ignoring deep scratches or stains can worsen them. To avoid costly repairs and finish failure, always assess floor condition, select proper equipment, and apply correct techniques with adequate training.
Is It Necessary to Refinish Floors After Multiple Buffing Sessions?
You might wonder if multiple buffing sessions mean you’ll definitely need to refinish your floors. Not necessarily. Buffing restores surface shine and addresses minor wear, but once scratches deepen or the finish wears thin, refinishing becomes essential.
It depends on traffic, finish type, and maintenance. If you see discoloration, heavy scratches, or dullness beyond buffing’s reach, it’s time to refinish for lasting protection and appearance.
From Coarse to Fine: Mastering the Grit Sequence
Now that you’ve prepped and buffed your hardwood floors with the right grit and tools, your surface will gleam like polished glass under sunlight. Think of buffing as giving your floors a fresh coat of armor strengthening and reviving their natural beauty.
Remember to finish with proper sealing and maintain ventilation to keep your floors resilient and radiant. With these steps, you’ll guarantee your hardwood floors stay flawless and durable for years to come.