Can You Install Engineered Hardwood Over Existing Hardwood: In-Depth Explanation
Installing engineered hardwood over existing hardwood flooring can be a great way to update your space while preserving the beauty of the original floor. However, many homeowners wonder if they can install engineered hardwood over existing hardwood floors. It’s possible, and it can save you time and money.
But there are some important factors to consider before embarking on this project. It’s not recommended to glue your new engineered hardwood directly onto existing hardwood due to the seasonal growth and shrinkage of the wood. Therefore, installing a minimum 1/4′ approved subfloor on top is best.
Today we’ll discuss installing engineered hardwood over your existing hardwood floors. We will provide detailed instructions on how to do it and what to consider before starting the installation process. Please continue reading.
How to Install Engineered Hardwood Over Existing Hardwood Flooring?
There are a few steps you need to follow before you install engineered hardwood over existing hardwood:
- STEP 1. Assess the Existing Hardwood Floor Condition
- STEP 2. Prepare the Subfloor
- STEP 3. Level the Existing Floor
- STEP 4. Acclimate the Engineered Hardwood
- STEP 5. Lay Down Underlayment (if necessary)
- STEP 6. Create a Gap between Wall and Planks
- STEP 7. Install the First Row
- STEP 8. Install Subsequent Rows
- STEP 9. Nail the Hardwood Planks
- STEP 10. Trim and Make Special Cuts
- STEP 11. Address Transition Areas
- STEP 12. Install the Final Row
- STEP 13. Remove Spacers and Install Trim
STEP 1. Assess the Existing Hardwood Floor Condition
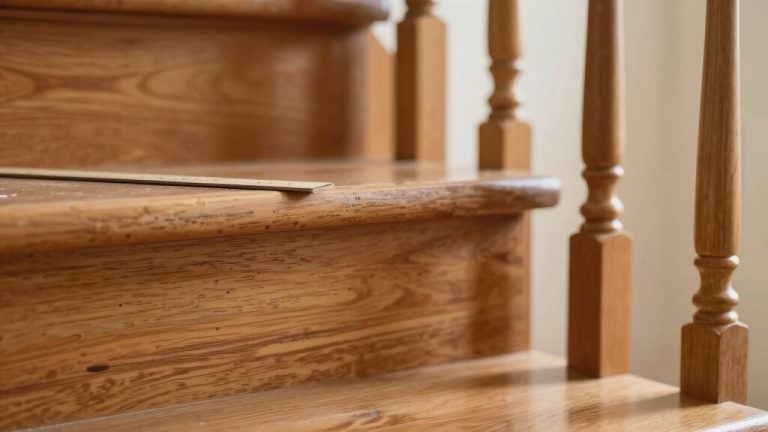
Inspecting the existing hardwood floor is crucial to ensure that engineered hardwood installation can be done. You should thoroughly check for any signs of damage, such as rot, cupping, or warping, as these issues must be addressed before proceeding with the installation.
Make sure the existing floor is flat, clean, dry, structurally sound, and free of squeaks. Also, ensure there are no protruding fasteners or nails, as they can cause problems during the installation process. Make sure the existing floor is in good shape before you install the engineered hardwood.
STEP 2. Prepare the Subfloor:
Now that the existing hardwood floor has been assessed, let’s prepare the subfloor for the new flooring like a chef preparing a canvas for a masterpiece dish. The subfloor preparation is crucial to ensure the longevity and stability of the new flooring.
Clean the hardwood floor thoroughly to remove dirt, debris, or adhesive residue. Use a vacuum cleaner or a broom and dustpan. Then check for any loose or damaged boards and fix them. Hammer down any protruding nails or screws and replace any damaged boards.
You can sand the existing hardwood floor lightly to create a rough surface for the adhesive to bond with. Then apply a primer or a sealer to the existing hardwood floor to prevent moisture from seeping through and causing damage to the new flooring.
STEP 3. Level the Existing Floor:
To achieve a flat surface for the new flooring, analyze the level of the current hardwood floor. Use a level to identify any humps or depressions. Once you have identified the problem areas, sand down any high spots on the floor and fill in the low spots with a suitable patching compound.
This process is essential to ensure the existing surface is flat and smooth, providing a suitable base for installing the engineered hardwood. By taking the time to level the existing floor, you can avoid any potential problems, such as unwanted gaps or unevenness, that could arise during the installation process.
STEP 4. Acclimate the Engineered Hardwood:
Before laying down the new flooring, ensure the engineered hardwood has had time to adapt to the room’s temperature and humidity for at least 72 hours. This lets it settle into new surroundings like a cozy sweater on a brisk autumn day.
This step is crucial as it reduces the risk of expansion or contraction after installation. During this acclimation process, keep the flooring in the room where it will be installed, and ensure that the temperature and humidity levels are consistent with the room’s typical conditions.
STEP 5. Lay Down Underlayment (if necessary):
Installing an underlayment over your existing hardwood floor is a necessary step when laying engineered hardwood on top. The underlayment helps reduce noise and create a barrier between the two flooring layers, preventing any moisture from seeping through and causing damage.
Choosing the right underlayment for your specific flooring needs, as different types offer different levels of sound reduction and moisture protection. Be sure to follow the manufacturer’s instructions when installing the underlayment.
STEP 6. Create a Gap between Wall and Planks:
Using spacers along the walls creates a gap between the first row of planks and the wall, allowing for natural expansion and reduction of the flooring. This step is crucial when installing engineered hardwood over an existing hardwood floor.
The gap is necessary because the underlayment and the new planks will raise the height of the floor, restricting the movement of the original flooring. Without this gap, the flooring could buckle, warp, or develop gaps.
The spacers should be placed every 12-18 inches along the walls, and their size should be determined by the planks’ thickness and the room’s dimensions. A professional installer will know how to properly use spacers to create the right gap size for your specific flooring project.
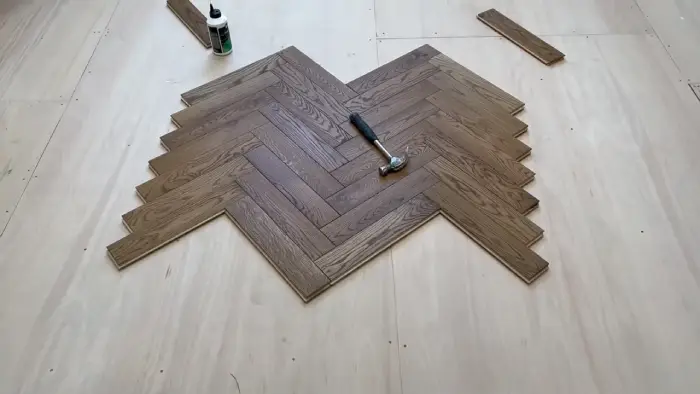
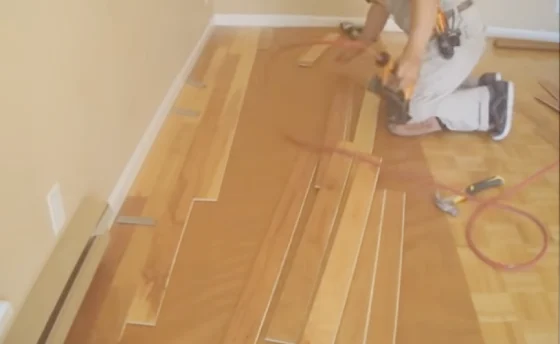
STEP 7. Install the First Row:
Now it’s time to lay down those planks and bring your vision to life. Make sure you secure them tightly with either nails or a Brad nailer.
Begin in the corner of the room and lay the first row of engineered hardwood planks, ensuring they are firmly attached and level. To do this, use either nails or a Brad nailer to secure the planks to the subfloor.
As you work your way across the room, continue to check that the planks are level and that they are aligned correctly. Remember, the first row is crucial to the success of your flooring project, so take your time and ensure everything is done correctly.
STEP 8. Install Subsequent Rows:
After securing the first row, it’s time to continue the installation by overlapping and tapping together subsequent rows with a rubber mallet and tapping block. It’s important to take care and maintain a snug fit between the planks. This will create a uniform and visually appealing installation.
By overlapping the locking edges of the planks, you can ensure that the installation is secure and won’t come apart over time. Using a rubber mallet and tapping block is essential to prevent damage to the planks during installation.
With these tools and techniques, you can confidently install engineered hardwood over existing hardwood and achieve a beautiful and long-lasting result.
STEP 9. Nail the Hardwood Planks:
To make sure the planks stay put, hammer nails into the tongue of each plank at an angle. This ensures a tight fit and creates a secure hold lasting for years.
Follow the manufacturer’s instructions and your personal preference for securing subsequent rows. Though adhesive can be used instead of nails, nailing the planks together is a traditional and reliable method for installation.
Be sure to use the recommended size and type of nail and space them appropriately. A nail gun can also be used for efficiency and precision. Remember to take precautions, such as wearing safety goggles and ear protection, when using a hammer or nail gun.
STEP 10. Trim and Make Special Cuts:
Make the installation process even more precise and customized by using an oscillating saw, jigsaw, or miter saw to make special cuts for AC vents, cabinet angles, and door casings. These areas may require specific cuts that aren’t possible with standard flooring tools.
Use the right tool to ensure a seamless and professional-looking finish. When making cuts for AC vents or cabinet angles, an oscillating saw or jigsaw can provide the necessary precision. A miter saw may be necessary for door casings to allow the new flooring to slide underneath.
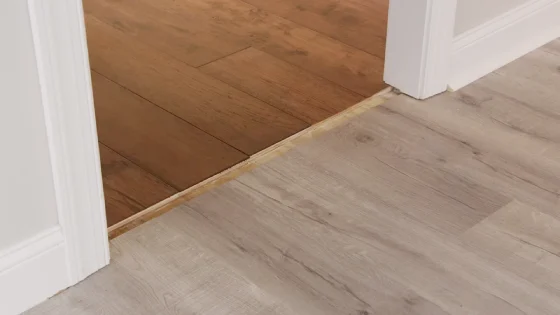
STEP 11. Address Transition Areas:
Addressing transition areas is crucial for achieving a seamless finish in your engineered hardwood flooring installation. When your new flooring meets other types of flooring or changes direction, transition pieces may be necessary.
These pieces should be installed according to the manufacturer’s instructions to ensure a professional and polished look. Before installing the transition pieces, properly trim and make any special cuts. Also, ensure the transition pieces are securely fastened to prevent movement or gaps.
STEP 12. Install the Final Row:
Now it’s time to tackle the final row of engineered hardwood installation. Use a table saw to cut the planks to fit the remaining space while maintaining a consistent and visually pleasing appearance.
Here are some tips to keep in mind:
- To avoid making mistakes, measure twice and cut once.
- Use a straight edge or guide to ensure accurate cuts.
- Double-check the width of the plank before cutting, as different rows may have slightly different widths.
- Remember to use safety equipment, such as goggles and ear protection, when operating the table saw.
STEP 13. Remove Spacers and Install Trim:
After completing the installation, it’s time to give your floors a finished look by removing the spacers and adding baseboard trim or quarter-round. This step is important as it not only enhances the appearance of your floors but also covers the expansion gap left by the spacers.
The baseboard trim or quarter round should be installed along the walls, ensuring a snug fit with the flooring. You can use a finish nailer or adhesive to secure the trim.
Leaving the expansion gap uncovered can cause the floor to buckle or warp over time. Therefore, removing the spacers and installing the trim is a crucial step in the installation process.
What to Consider When Installing Engineered Hardwood over Existing Hardwood Flooring?

Before installing engineered hardwood over existing hardwood flooring, there are several key points to consider.
#1 Condition of the Existing Hardwood:
Assuming your existing hardwood is in good condition and free of moisture damage, mold, and rot, you can install engineered hardwood over it for a fresh look.
It’s important to ensure that the existing hardwood is structurally sound and has no issues that could affect the installation and performance of the engineered hardwood.
Before proceeding with the installation, inspecting the existing hardwood and addressing any issues that may arise is recommended. This will ensure the new flooring is installed on a stable and secure base, resulting in a beautiful and long-lasting finish.
#2 Compatibility:
Now that you have assessed the condition of your existing hardwood, it’s time to consider the compatibility of installing engineered hardwood over it. Before proceeding, check the thickness of the existing hardwood and compare it to the thickness of the engineered hardwood you plan to install.
This is crucial because the new floor should not significantly raise the overall height of the floor or create level differences with adjacent flooring.
#3 Direction and Alignment:
For a truly seamless and cohesive look, make sure to align your new engineered hardwood in the same direction as your existing hardwood. This will create a stunning visual flow that will leave your guests in awe.
Determining the direction of the existing hardwood is crucial in achieving a consistent visual flow throughout the space. By aligning the planks, you can create a consistent pattern that will draw the eye and make the room feel more spacious.
#4 Underlayment:
Adding an underlayment can provide extra cushioning and sound reduction for your new flooring, giving it a more durable and comfortable feel underfoot.
While it may not always be necessary, using underlayment can help prevent the existing hardwood from telegraphing through the new flooring and provide a moisture barrier.
Also, an underlayment can help even out any minor imperfections in the subfloor, making for a smoother installation process.
#5 Door Clearance and Trim:
Don’t forget to measure door clearance before installation to avoid any potential snags or scrapes while opening and closing doors. Make sure to trim any casings or door bottoms if needed to accommodate the new flooring’s height.
Installing the new engineered hardwood may affect door clearance, so it’s important to plan for the removal and reinstallation of baseboards, trim, and casings as needed. This will ensure that your doors can open and close smoothly without any issues.
How should I prepare the existing hardwood floor for installation?
Inspect the existing hardwood flooring for any moisture damage and conduct necessary testing before securing loose areas with nails or screws. It’s important to ensure that the subfloor is stable and level before installing engineered hardwood over existing hardwood.
If the existing hardwood is in good condition, sanding and cleaning the surface may be sufficient preparation. However, if the existing hardwood is damaged or uneven, it may need to be removed or covered with a plywood subfloor.
Also, consider the thickness of the engineered hardwood being installed and the height of any adjacent flooring or trim to ensure proper door clearance. Taking the time to prepare the existing hardwood floor properly will ensure a successful installation of engineered hardwood.
Can I install the new engineered hardwood parallel to the existing hardwood floor?
While it’s recommended to use plywood for increased stability, imagine the striking visual effect of installing the new engineered hardwood parallel to your existing hardwood floor. This method can seamlessly transition between the old and new flooring, giving the room a cohesive and polished look.
However, before installation, ensure the existing hardwood is in good condition and level. Any imperfections or damage should be repaired or replaced before laying the new flooring.
Also, consider the height difference between the old and new floors, as this can affect the installation process and may require additional preparation.
Should I remove the old hardwood before installing the vinyl plank?
While it is possible to install vinyl flooring over pre-existing hardwood, note that a smooth and level subfloor is crucial for a successful installation. If your old hardwood is uneven, warped, or damaged, it may be best to remove it before installing vinyl plank.
To help you make the best decision for your project, let’s take a closer look at the pros and cons of removing the old hardwood versus installing over it, using the following table:
| Pros of Removing Old Hardwood | Cons of Removing Old Hardwood | Pros of Installing Over Old Hardwood |
| Ensures a smooth and level subfloor | Time-consuming and labor-intensive | Saves time and money on removing old flooring |
| Allows for easy access to subfloor for repairs or modifications | May require additional subfloor preparation | Provides additional insulation and soundproofing |
| Reduces the risk of future problems with subfloor | May reduce the overall height of flooring system, causing issues with doors and appliances | Can retain the character and charm of the old hardwood flooring |
Upgrade Your Home with Engineered Hardwood – Quickly and Affordably
If you’re looking for a quick and cost-effective way to give your home a stunning new look, installing engineered hardwood over existing hardwood may be just what you need.
With proper preparation and consideration of important factors, you can easily install engineered hardwood over existing hardwood flooring. This can give your home an amazing look.
However, before diving into the installation process, consider certain factors, such as the condition of the existing hardwood and the type of engineered hardwood you plan to install. It’s also essential to properly prepare the existing hardwood floor by sanding and cleaning it before installation.
So, start planning your next home renovation project with this knowledge.