Best Way to Clean Mold and Mildew From Shower: Healthy Way
To effectively clean mold and mildew from your shower, wear N95 respirators, gloves, and sealed goggles for protection.
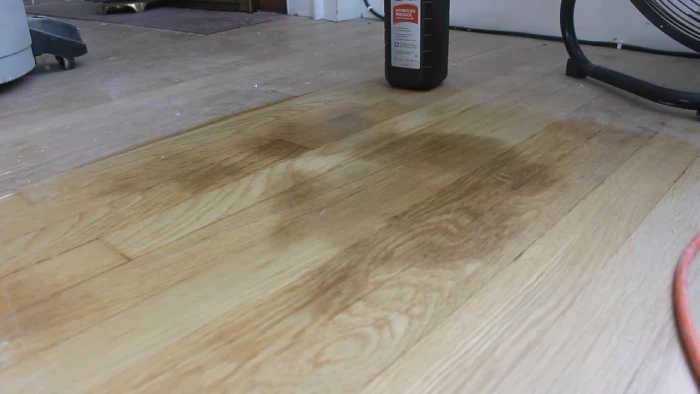
Apply undiluted white vinegar or a commercial mold remover on affected surfaces. Let it sit, then scrub with appropriate brushes to remove growth without damaging tiles or grout.
Rinse thoroughly and dry with squeegees or absorbent cloths. Make certain proper ventilation and routinely maintain dryness to prevent regrowth.
Learn how material choices and humidity control further enhance mold prevention.
Key Takeaways
- Wear N95 respirator, gloves, and sealed goggles for protection before cleaning mold and mildew in the shower.
- Apply undiluted white vinegar or commercial mold remover, let dwell, then scrub affected grout, tiles, and corners.
- Rinse thoroughly with warm water and dry immediately using a squeegee and absorbent cloths to prevent moisture retention.
- Maintain bathroom humidity between 30%-50% and use proper ventilation like exhaust fans to reduce mold regrowth.
- Regularly squeegee shower walls after use and clean with mild, non-abrasive agents to prevent organic residue buildup.
Why Mold and Mildew Grow in Showers?

Mold and mildew frequently develop in showers because these environments provide the moisture, warmth, and organic materials they need to thrive.
When you shower, humidity levels spike, creating a damp atmosphere ideal for mold spores to settle and grow.
Showers raise humidity, creating the perfect damp environment for mold spores to thrive and multiply.
Warm temperatures further accelerate their reproduction.
Organic residues like soap scum, body oils, and shampoo residues supply nutrients that support their proliferation on grout, tiles, and glass surfaces.
Poor ventilation traps moisture, prolonging wet conditions and increasing mold risk.
Additionally, porous materials like grout retain water longer, offering mold an extended habitat.
Understanding these factors helps you recognize why mold flourishes in showers.
It also underscores the importance of controlling moisture, temperature, and organic buildup to inhibit its growth effectively.
Maintaining indoor humidity between 30% and 50% using dehumidifiers can significantly reduce mold growth in shower areas.
How to Protect Yourself With Safety Gear for Mold Cleaning?
Because exposure to mold spores can cause respiratory and skin irritation, you should wear appropriate safety gear when cleaning mold.
Start by donning a NIOSH-approved N95 respirator to protect your mouth and nose from inhaling spores. For extensive removal, consider a half-face or full-face respirator.
Wear non-latex gloves made of vinyl, nitrile, or rubber to prevent skin contact. Protect your eyes with goggles that fully seal against dust and particles; avoid vented safety glasses.
Make certain proper ventilation by opening windows or doors to reduce airborne contaminants and chemical fumes.
These precautions minimize health risks associated with mold exposure and chemical cleaners, allowing you to clean effectively and safely.
Prioritize safety gear to maintain respiratory and dermal health during mold remediation.
It is also recommended to wear disposable coveralls or washable clothing and waterproof boots to reduce skin exposure and contamination.
Best Cleaning Agents for Removing Mold and Mildew
Commercial mold and mildew removers typically offer the most effective solution for eliminating spores due to their specialized formulations.
Specialized commercial mold removers provide the most effective solution for eliminating mold spores efficiently.
These products contain biocides tailored to break down mold cell structures efficiently.
Alternatively, undiluted white vinegar serves as a natural, acidic option that disrupts mold growth by altering pH levels.
Bleach, when diluted at a ratio of 1 cup per gallon of water, can disinfect non-porous surfaces by oxidizing mold compounds.
However, it must never be mixed with ammonia or other chemicals to avoid toxic fumes.
Dish detergents aid in loosening mold residues by emulsifying oils and organic matter.
For delicate surfaces, use soft brushes or cloths to prevent damage, while scrub brushes improve removal on porous materials.
Selecting the right agent depends on surface type and mold severity for the most effective eradication.
When cleaning, avoid using harsh or acidic cleaners that can damage surfaces and instead opt for pH-neutral solutions to protect finishes.
Step-by-Step Mold Cleaning for Shower Surfaces
Before diving into mold cleaning in your shower, it’s really important to gear up properly. Make sure to wear N95 respirators, gloves, and goggles. This will help protect you from any spores and harsh chemicals you might encounter.
Now, let’s talk about cleaning solutions. You can go for something simple like undiluted vinegar, or if you prefer, a commercial mold remover that’s suitable for your shower surfaces. Once you’ve got your cleaner ready, apply it thoroughly.
When scrubbing, just be mindful of the materials in your shower. You can scrub gently on delicate surfaces, but if you’re dealing with something more robust, feel free to use a firmer hand.
After you’ve scrubbed away the mold, rinse everything down with hot water. This step is key to getting rid of any residues and helping to prevent that pesky mold from coming back!
Regular cleaning and drying are essential because stagnant moisture creates ideal conditions for mold growth.
Prepare Safety Gear
When tackling mold removal in your shower, you’ll need to equip yourself with proper safety gear to minimize exposure to harmful spores.
Begin by selecting a NIOSH-approved N95 respirator to protect your respiratory system.
Use non-latex gloves, such as vinyl, nitrile, or rubber, to prevent direct skin contact with mold and cleaning agents.
Wear goggles designed to seal out dust and small particles; regular safety glasses with vents aren’t sufficient.
Make certain your bathroom is well-ventilated by opening windows or doors to allow fresh air circulation during cleaning.
This protective setup reduces inhalation and contact risks, essential for safe mold remediation.
Avoid skipping these precautions, as mold spores can cause respiratory irritation and allergic reactions during the cleaning process.
Maintaining proper ventilation in the bathroom during and after cleaning helps control indoor humidity, reducing mold regrowth.
Select Cleaning Solutions
To effectively remove mold from your shower surfaces, you’ll need to choose appropriate cleaning solutions that target mold spores and their organic food sources.
Commercial mold removers offer strong biocidal action, outperforming basic soap and water.
If you prefer natural options, undiluted white vinegar disrupts mold cell membranes and inhibits growth.
Bleach diluted to one cup per gallon of water kills mold effectively but must never be mixed with ammonia or other chemicals due to toxic gas risks.
Dish detergent can assist in removing organic residues, improving cleaner penetration.
Select cleaning agents based on surface type: use soft brushes or cloths on glass and delicate areas, while firmer scrub brushes suit porous tiles and grout.
Always ensure proper ventilation and personal protective equipment during application.
Acting promptly is important because mold can begin to develop within 24–48 hours under favorable conditions.
Clean And Rinse Surfaces
During the cleaning process, start by applying your chosen mold remover evenly across affected shower surfaces, guaranteeing thorough coverage of grout lines, tiles, and corners.
Let the solution dwell for the recommended time to penetrate mold colonies effectively. Next, use a soft brush for delicate glass and a scrub brush on porous surfaces to dislodge spores without damaging materials.
Follow these steps precisely:
- Scrub surfaces gently but thoroughly to break up mold and mildew.
- Rinse all areas with warm water to wash away loosened mold and cleaning agents.
- Use a handheld showerhead or a spray bottle for controlled rinsing.
- Dry surfaces immediately using absorbent rags or a squeegee to prevent moisture retention.
This method guarantees maximal mold removal and reduces regrowth risk. To ensure thorough cleaning and prevent damage, always rinse the area after scrubbing to remove residual cleaning agents and moisture.
How to Dry and Maintain Shower Surfaces to Prevent Mold?
Although moisture naturally accumulates in shower areas, you can markedly reduce mold growth by promptly drying surfaces after use.
Use a squeegee to wipe down walls and glass doors every couple of showers, removing excess water that fosters mold spores.
Follow up with absorbent cotton rags to reach corners and crevices where water lingers.
Keep bathroom doors open and run exhaust fans during and after showers to enhance air circulation and humidity control.
Regularly towel-dry sinks and surfaces to prevent persistent dampness.
Additionally, applying daily shower spray cleaners can create protective barriers, inhibiting organic residue buildup that mold feeds on.
Consistently implementing these drying and maintenance practices disrupts mold’s lifecycle and preserves a hygienic shower environment.
For best results, ensure proper air circulation by using an exhaust fan with a HEPA filter to reduce airborne mold spores and improve air quality.
Best Shower Materials and Fixtures to Resist Mold Growth?
When it comes to preventing mold growth in your shower, it’s all about the materials you choose. First off, look for shower materials that have anti-microbial properties. These kinds of materials do a great job at keeping those pesky fungi at bay.
Also, don’t forget about the grout! Going for mold-resistant grout options is a smart move. It really helps by reducing the number of porous surfaces where mold loves to hang out.
And let’s talk about surfaces. Smooth surfaces are your friends! They make it easier for water to drain off, which means less moisture hanging around. Less moisture equals less chance for mold to make itself at home in your shower. So, keep these tips in mind, and you’ll be well on your way to a mold-free shower experience!
Ensuring proper ventilation and humidity control in your bathroom is essential to minimize moisture buildup and prevent mold growth effectively.
Mold-Resistant Grout Options
Selecting mold-resistant grout substantially reduces the risk of mold growth in showers by limiting moisture retention and organic buildup.
When choosing grout, consider these options to enhance mold resistance:
- Epoxy grout: Non-porous and highly resistant to water absorption and staining, making it ideal for wet environments.
- Urethane grout: Flexible and less prone to cracking, it also resists mold and mildew growth effectively.
- Cementitious grout with antimicrobial additives: Incorporates mold inhibitors to prevent microbial proliferation.
- Sealed grout: Regularly applying a high-quality grout sealer minimizes porosity and blocks moisture infiltration.
Each option improves durability and hygiene but requires proper installation and maintenance.
Using mold-resistant grout complements ventilation and cleaning practices, creating a thorough defense against mold in your shower. Proper installation and moisture resistance are critical factors that ensure long-lasting protection against mold growth.
Anti-Microbial Shower Materials
Frequently, choosing shower materials with built-in anti-microbial properties can markedly reduce mold growth by inhibiting the development of mold spores on surfaces.
These materials limit organic buildup, decreasing mold’s food sources. When selecting fixtures or renovating, prioritize materials that actively resist microbial colonization to maintain a cleaner, healthier shower environment.
| Material Type | Anti-Microbial Benefit |
|---|---|
| Porcelain Tile | Dense, non-porous surface limits mold spore adhesion |
| Solid Surface | Contains antimicrobial additives, reducing microbes |
| Glass | Smooth, non-absorbent, easy to clean and disinfect |
| Mold-Resistant Grout | Formulated with anti-fungal agents to inhibit growth |
Smooth Surfaces For Drainage
Promoting efficient water drainage substantially reduces mold growth by minimizing moisture retention on shower surfaces.
To resist mold, you should select shower materials and fixtures that facilitate quick drying and prevent water pooling.
Consider these key features:
- Non-porous surfaces like glass, acrylic, or glazed ceramic tile repel water and inhibit mold colonization.
- Sloped shower floors assure water naturally flows toward drains, preventing stagnant moisture.
- Smooth fixtures such as stainless steel or polished chrome resist biofilm formation better than textured metals.
- Integrated linear drains promote faster water removal compared to traditional center drains, reducing damp areas.
How to Control Humidity and Ventilation in Your Bathroom?
To effectively control humidity in your bathroom, ensuring proper ventilation is essential for preventing mold growth and maintaining air quality.
Run exhaust fans during showers and continue for several minutes afterward to remove excess moisture.
Leaving the bathroom door open further assists in dispersing humid air and promoting fresh air circulation.
Installing humidity-sensing fans provides automatic regulation by activating when moisture rises and shutting off once normalized.
Regularly inspect and repair leaks or standing water to eliminate persistent dampness that fosters mold.
Replace HEPA filters frequently to maintain their efficiency in capturing airborne mold spores.
Consistently managing humidity and ventilation reduces the conditions mold requires to thrive, directly supporting a cleaner, healthier bathroom environment.
How to Prevent Soap and Body Oil Buildup That Causes Mold?
Soap residue and body oils build up on shower surfaces, creating an ideal environment for mold growth by providing organic nutrients mold spores feed on.
To prevent this buildup, you need to adopt effective cleaning and maintenance habits. Follow these steps:
- Use a handheld showerhead to rinse walls and grout thoroughly, removing soap and oil residues after each use.
- Apply daily shower sprays that create a protective barrier, preventing organic matter from adhering to surfaces.
- Clean grout and tile weekly with non-abrasive cleaners designed to remove organic buildup.
- Dry shower surfaces with squeegees or absorbent cloths to eliminate excess moisture that fosters mold growth.
Frequently Asked Questions
Can Mold Cause Health Problems Beyond Allergies?
Yes, mold can cause health problems beyond allergies. When you inhale mold spores, you risk respiratory issues like asthma exacerbation, chronic cough, and sinus infections.
Some molds produce mycotoxins that may lead to neurological symptoms or immune system suppression. You should protect yourself by avoiding prolonged exposure, especially if you have weakened immunity or existing lung conditions.
Wearing appropriate respiratory protection and ensuring good ventilation helps minimize these health risks.
How Often Should Mold Inspections Be Done in Bathrooms?
Think of your bathroom as a greenhouse where mold spores are seeds waiting for the right conditions.
You should inspect for mold at least every three months to catch early growth before it becomes a full bloom. If your bathroom is prone to humidity or leaks, increase inspections to monthly.
Regular checks, combined with proper ventilation and moisture control, scientifically reduce mold proliferation and protect your indoor air quality and health effectively.
Are Natural Remedies as Effective as Commercial Mold Removers?
Natural remedies like undiluted vinegar can be effective alternatives to commercial mold removers, especially if you prefer avoiding manufactured chemicals.
However, commercial products tend to kill mold spores more efficiently due to their specialized formulations.
You should consider the severity of mold growth: for light cases, vinegar or dish detergent may suffice.
But for stubborn or extensive mold, commercial removers or diluted bleach solutions provide more reliable results.
Always follow safety guidelines regardless of your choice.
Can Mold Grow Behind Bathroom Tiles or Walls Unnoticed?
You might be shocked to learn mold can stealthily grow behind bathroom tiles or walls, hidden from sight like a microscopic ninja.
Moisture trapped by leaks or poor ventilation creates an ideal environment for mold spores to colonize unseen.
Without proper moisture control and thorough inspection, mold can damage structural materials and impact indoor air quality.
Keep an eye on humidity levels and address leaks promptly to prevent hidden mold growth behind surfaces.
What Should I Do if Mold Returns Quickly After Cleaning?
If mold returns quickly after cleaning, you need to address moisture sources immediately.
Run exhaust fans during and after showers, keep doors open for ventilation, and fix leaks or standing water promptly.
Use mold-resistant materials and apply daily shower sprays to prevent buildup.
Regularly squeegee and towel-dry surfaces, and clean grout with non-abrasive cleaners to remove organic food sources.
Improving airflow and controlling humidity are essential to stopping mold’s rapid return.
Stop Mold Before It Starts: Keep Your Shower Fresh & Safe
Did you know that mold can begin growing within 24 to 48 hours in damp shower environments?
This rapid development highlights the importance of promptly cleaning and drying your shower.
By using the right cleaning agents, wearing protective gear, and maintaining proper ventilation, you can effectively combat mold and mildew.
Consistent care not only preserves your bathroom’s appearance but also protects your health from potential respiratory issues caused by mold exposure.