Best Way to Apply Polyurethane to a Floor for Durability
To apply polyurethane to your floor effectively, start by sanding thoroughly with 80- to 180-grit to expose bare wood. Remove dust using a tack cloth.
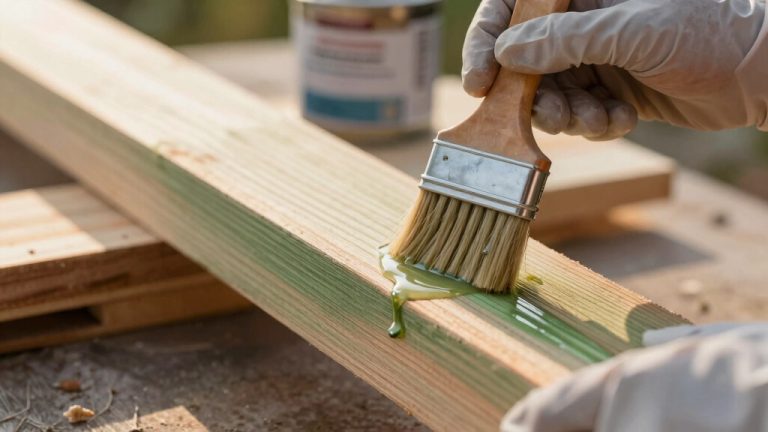
Use a 3/8-inch nap roller and tapered bristle brush for edges to apply thin, even coats along the wood grain.
Let each coat dry fully: oil-based takes 24 hours, water-based 4–6. Lightly sand with 220-grit between coats.
Avoid thick layers, bubbles, and rushing drying for a flawless finish. Learn how to optimize every step for lasting durability.
Key Takeaways
- Thoroughly sand the floor using progressively finer grits, finishing with 220-grit before coating for optimal polyurethane adhesion.
- Use a 3/8-inch nap roller for large areas and a tapered bristle brush to cut in edges precisely, following the wood grain.
- Stir polyurethane gently without shaking, pour carefully into a roller tray, and apply thin, even coats to avoid bubbles and streaks.
- Roll slowly along the wood grain, maintain a wet edge, and finish each section with strokes aligned to the grain direction.
- Lightly sand between coats with 220-grit, remove dust with a tack cloth, and apply two to three thin coats for durability.
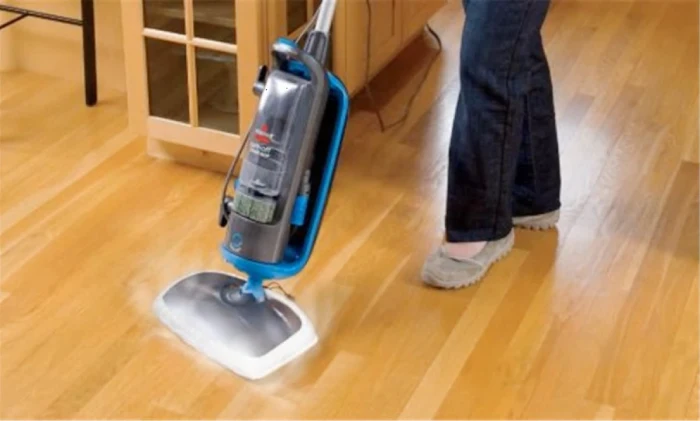
Preparing Your Floor Surface for Polyurethane

Begin by sanding your floor thoroughly to expose bare timber, ensuring a solid foundation for polyurethane adhesion. Use 80-grit sandpaper if the wood is new, or 120-grit if refinished. Then progress to 180-grit to level the surface and remove coarse scratches.
After sanding, wipe away dust and loose grit with a clean cloth to prevent imperfections in the finish. Before applying the final coat, lightly sand with 220-grit paper to eliminate dust and resin nodules, ensuring smoothness.
Maintain consistent pressure and overlapping strokes while sanding to avoid uneven areas. Proper surface preparation is critical; it maximizes polyurethane bonding, enhances durability, and produces a flawless finish that resists peeling and wear.
Don’t rush this step; it sets the stage for a professional-quality result. Using a tack cloth to capture fine dust after sanding ensures a clean, stable surface for applying polyurethane.
Selecting Tools and Materials for Polyurethane Floors
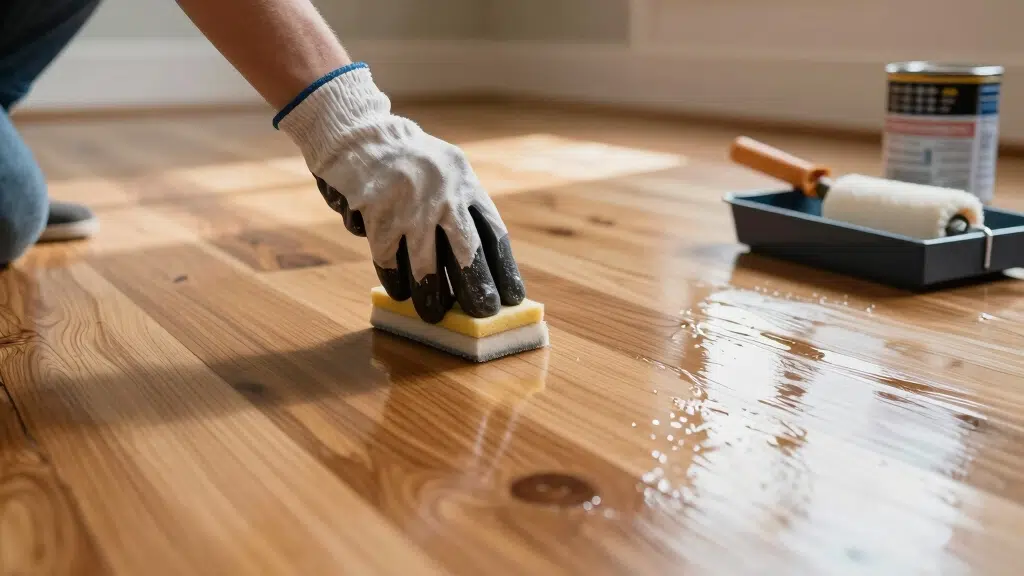
To apply polyurethane effectively, you’ll want to gather some specific tools. Think about the right rollers, brushes, and applicator pads that are designed to give you smooth, even coats.
For instance, a 3/8-inch nap roller cover is a great choice, along with a tapered bristle brush. These options really help ensure you get peak coverage and a nice finish.
And don’t forget, selecting quality supplies that are tailored to your particular floor type is key. It really sets the foundation for achieving that professional look you’re after. So, take your time to choose wisely! Proper ventilation during varnishing is also crucial to ensure safety and optimal drying conditions for your floor finish, especially when using oil-based polyurethane.
Essential Application Tools
Select application tools that guarantee a smooth, even polyurethane finish while optimizing efficiency.
Use a 3/8-inch nap roller cover specified by the manufacturer to apply consistent film thickness across large floor areas.
Pair it with a PAL No.10 waterborne roller sleeve or a lambswool applicator pad attached to an extension pole for extended reach and control.
For edges and corners, opt for a 50mm or 63mm tapered bristle brush to cut in precisely without leaving brush marks.
Keep a roller tray handy to evenly load the roller and minimize drips.
For contoured or tight spaces, employ a microfiber towel or synthetic applicator pad to maintain uniform coating.
These tools reduce application errors and guarantee a professional finish while helping you work methodically and efficiently.
Ensure the floor surface is properly prepared by cleaning and lightly sanding to improve mechanical adhesion before applying polyurethane.
Choosing Proper Materials
Achieving a flawless polyurethane floor starts with choosing materials that match your project’s demands and the finish you want. You’ll need to select the right applicators, polyurethane type, and sanding tools to ensure even coverage and durability.
Opt for a 3/8-inch nap roller or a tapered bristle brush depending on surface texture. Use oil-based polyurethane for enhanced hardness, covering roughly 500 sq ft per gallon.
| Material Type | Recommended Tool | Purpose |
|---|---|---|
| Oil-Based Polyurethane | 3/8-inch nap roller | Durable, smooth finish |
| Waterborne Polyurethane | PAL No.10 roller sleeve | Low odor, fast drying |
| Sandpaper | 120 to 220 grit | Surface prep and smoothing |
| Applicators | Lambswool, synthetic pad | Large areas, even spread |
Proper surface preparation, including thorough sanding and dust removal, is essential to maximize sealer adhesion and ensure a smooth, durable finish.
Choose tools precisely to optimize application and final finish quality.
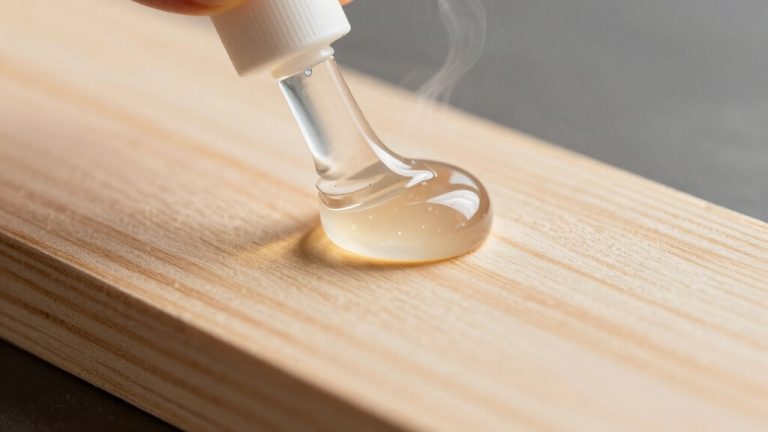
Mix Polyurethane Properly
When it comes to mixing polyurethane, you’ll want to stir it gently with a stick. This way, you blend the components without trapping air bubbles. Trust me, shaking the can is a big no-no!
It introduces bubbles that can really mess up your finish.
Now, if you’re using a two-part product, make sure to mix in the maximum recommended hardener. This little step is key to ensuring you get the best durability possible.
It’s all about getting that perfect blend!
For optimal results, applying polyurethane with lambswool or synthetic pads helps create an even, bubble-free finish.
Gentle Stirring Technique
When mixing polyurethane, stir the product gently to blend components thoroughly without introducing air bubbles.
Vigorous stirring or shaking traps air, leading to bubbles that mar your finish.
Use a flat-edged stirring stick, moving slowly in a circular motion along the container walls.
Make sure to scrape the bottom to evenly distribute settled solids, essential for consistent durability and appearance.
Key points to follow:
Stir just enough to homogenize without agitation that creates foam.
Avoid rapid or jerky movements; maintain a steady, controlled pace.
Use a clean, dry stick to prevent contamination or clumping.
This gentle stirring technique guarantees a smooth, defect-free application, setting a solid foundation for the subsequent coating steps.
Selecting the right brush material for applying polyurethane further helps ensure an even finish without streaks or bubbles.
Avoid Shaking Bubbles
Having stirred polyurethane gently to avoid bubbles, resist the urge to shake the container. Shaking introduces air pockets that manifest as unsightly bubbles on the floor surface, compromising the finish.
Instead, use a steady, slow stirring motion to mix the product thoroughly without agitating air. When you pour polyurethane into your roller tray or applicator, do so carefully to prevent splashing.
Bubbles trapped in the finish cause uneven curing and require additional sanding, wasting time and materials. If you notice bubbles forming during application, pause briefly to allow them to dissipate before proceeding.
Proper mixing guarantees a smooth, durable coat and peak adhesion. Remember, controlling air incorporation at every step from stirring to pouring forms the foundation of a flawless polyurethane finish. Maintaining proper ventilation during application also helps ensure even drying and prevents air saturation that could disrupt the finish.
Hardener Mixing Tips
Make sure you add the hardener to the base polyurethane at the manufacturer’s recommended ratio to achieve peak durability and curing performance.
Precise measurement is vital; an incorrect ratio can compromise the finish’s strength and drying time. After combining, stir the mixture gently with a clean stick to avoid introducing air bubbles that can mar the surface.
Keep these tips in mind when mixing your polyurethane:
Use a clean, dry container to prevent contamination.
Stir slowly and thoroughly, ensuring uniform hardener distribution.
Mix only the amount you’ll use within the pot life to avoid waste and inconsistent curing.
Following these steps guarantees the polyurethane cures evenly, delivering a tough, smooth finish that lasts. Proper maintenance, including avoiding harsh chemicals and using suitable cleaning solutions, is essential to preserve the polyurethane finish and maintain floor durability.
How to Cut In and Apply Your First Polyurethane Coat?
Start by cutting in the edges and borders with a tapered bristle brush, extending the polyurethane about 50mm onto the main floor. This creates a clean boundary for rolling without missing corners.
Begin by cutting in edges with a tapered brush, extending polyurethane 50mm onto the floor for a clean boundary.
Pour three-quarters of your well-mixed polyurethane into a roller tray. Then load your PAL No.10 waterborne roller sleeve evenly.
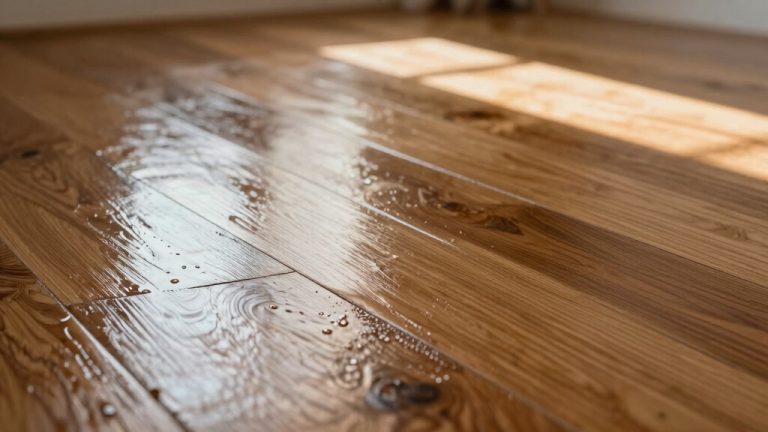
Apply the first coat in thin, uniform strokes, working along the wood grain to guarantee adhesion and avoid puddles. Roll lengthwise up and down each board, then lay off lightly to minimize air bubbles.
Maintain a wet edge by working systematically and avoid trapping yourself in corners. This methodical cut-in and rolling approach sets the foundation for a durable, smooth first coat. It’s critical before proceeding with additional layers or sanding.
For optimal results, consider the drying and curing time to avoid traffic or furniture placement before the finish is fully set.
Techniques for an Even Polyurethane Finish
Consistently dipping your roller lightly into the polyurethane helps maintain an even coat without overloading. Avoid puddles that can cause runs or uneven drying.
Roll slowly along the wood grain, tracking coverage to prevent lap marks. Squat low periodically to spot missed areas or thick spots that appear white under reflection.
Keep your roller moving to prevent tackiness, finishing each section with strokes aligned to the grain.
Key techniques include rolling up and down the board length, then sideways to guarantee uniform thickness.
Applying from multiple angles while always finishing with the grain direction is crucial.
Monitoring reflection angles closely helps identify inconsistencies early.
These precise practices assure a smooth, consistent polyurethane finish, essential for durability and aesthetics.
For best results, apply thin coats and allow adequate drying time between layers to ensure proper curing and adhesion.
Common Polyurethane Application Mistakes to Avoid
Although applying polyurethane may seem straightforward, several common mistakes can compromise the finish’s durability and appearance.
First, avoid applying thick coats; they cause uneven drying, bubbles, and extended tack times.
Don’t rush the process. Improper drying leads to a soft, easily damaged surface.
Skipping thorough surface preparation, like sanding to 180-grit and cleaning dust, results in poor adhesion and visible imperfections.
Be cautious not to trap yourself in corners. Plan your application sequence to maintain smooth coverage.
Avoid shaking the polyurethane container, which introduces bubbles.
Never overwork the roller; this creates streaks and lap marks.
Finally, neglecting to maintain a wet edge or letting the product puddle on the floor can cause uneven texture and cloudiness.
Prevent these errors to ensure a flawless, long-lasting finish.
Polyurethane Drying Times and When to Sand
When applying polyurethane, understanding drying times is essential to achieving a durable finish without defects.
Typically, oil-based polyurethane takes 24 hours to dry, while water-based formulas dry faster, often within 4-6 hours.
However, these times vary with temperature, humidity, and ventilation. You should wait until the surface feels dry to touch but not fully cured before sanding.
Light sanding with 220-grit paper removes dust nibs and promotes adhesion between coats without damaging the finish.
Key points to remember:
Allow manufacturer-recommended drying time before sanding to avoid film tearing.
Sand lightly and evenly to create a smooth base for the next coat.
Work in a well-ventilated space to ensure consistent drying and minimize dust contamination.
Following these guidelines ensures a flawless, long-lasting polyurethane floor finish.
Applying Multiple Polyurethane Coats for Durability
After allowing each coat to dry properly and sanding lightly to prepare the surface, you’ll need to apply multiple polyurethane layers to build durability and depth. Typically, two to three coats are necessary, depending on floor traffic and product specifications.
Use a fine 220-grit sandpaper between coats to remove dust nibs and promote adhesion. Apply thin, uniform coats with a brush or roller, following the wood grain to avoid lap marks and bubbles. Maintain consistent pressure and direction for an even film thickness.
Ensure good ventilation to manage fumes and dust. For oil-based polyurethanes, plan for longer drying times between coats. Remember, each additional layer enhances resistance to wear, moisture, and scratches, creating a robust, long-lasting finish that preserves your floor’s appearance and structural integrity.
Frequently Asked Questions
Can I Apply Polyurethane Over Stained Wood Without Sanding?
You shouldn’t apply polyurethane over stained wood without sanding first.
Light sanding with 220-grit paper is vital to remove dust, resin nodules, and guarantee proper adhesion.
Skipping this step risks peeling or uneven finish.
Always wipe the surface clean after sanding.
This prepares the wood for a smooth, durable polyurethane coat, enhancing both appearance and longevity.
Proper prep guarantees the best results for your floor finish.
How Long Does Polyurethane Last on High-Traffic Floors?
Polyurethane typically lasts 5 to 10 years on high-traffic floors, depending on the product quality and maintenance.
Oil-based versions generally offer greater durability than waterborne types.
You’ll extend its lifespan by applying multiple thin coats, sanding between each, and ensuring proper curing.
Regular cleaning and avoiding harsh chemicals also help maintain the finish.
When wear appears, lightly sand and recoat to restore protection without stripping the entire surface.
What Safety Gear Should I Wear When Applying Polyurethane?
You should wear chemical-resistant gloves to protect your skin from solvents and irritants.
Use a respirator rated for organic vapors to avoid inhaling harmful fumes, especially with oil-based polyurethane.
Safety goggles will shield your eyes from splashes.
Wear long sleeves and pants to minimize skin exposure.
Make sure you work in a well-ventilated area with fans to disperse fumes, reducing inhalation risks.
Proper gear keeps you safe during application.
Can I Use Polyurethane on Painted Floors?
Yes, you can use polyurethane on painted floors, but preparation is critical.
You’ll need to sand the painted surface lightly with 120- to 180-grit sandpaper to guarantee adhesion, then clean off all dust.
Avoid applying polyurethane directly over glossy or poorly cured paint.
Test a small area first to check compatibility.
Use thin, even coats, following the grain if wood shows beneath.
Allow proper drying times between coats for a durable finish.
How Do I Remove Polyurethane Spills From Hardwood Floors?
To remove polyurethane spills from hardwood floors, start by gently scraping excess with a plastic putty knife to avoid damage.
Next, use mineral spirits on a soft cloth to dissolve fresh spills, working carefully along the grain.
For dried spills, lightly sand with 220-grit sandpaper, then clean dust thoroughly.
Always test solvents on a hidden area first to prevent finish damage.
Work patiently to restore the surface without over-sanding.
Ready to Transform Your Floor? Apply Polyurethane the Right Way
Applying polyurethane to your floor is like crafting a shield. Each precise stroke builds a barrier that protects and enhances.
By preparing your surface meticulously and selecting the right tools, you guarantee a flawless, durable finish.
Avoid common pitfalls and respect drying times to let your work cure properly.
In mastering these steps, you don’t just coat wood; you create a resilient masterpiece that stands the test of time.