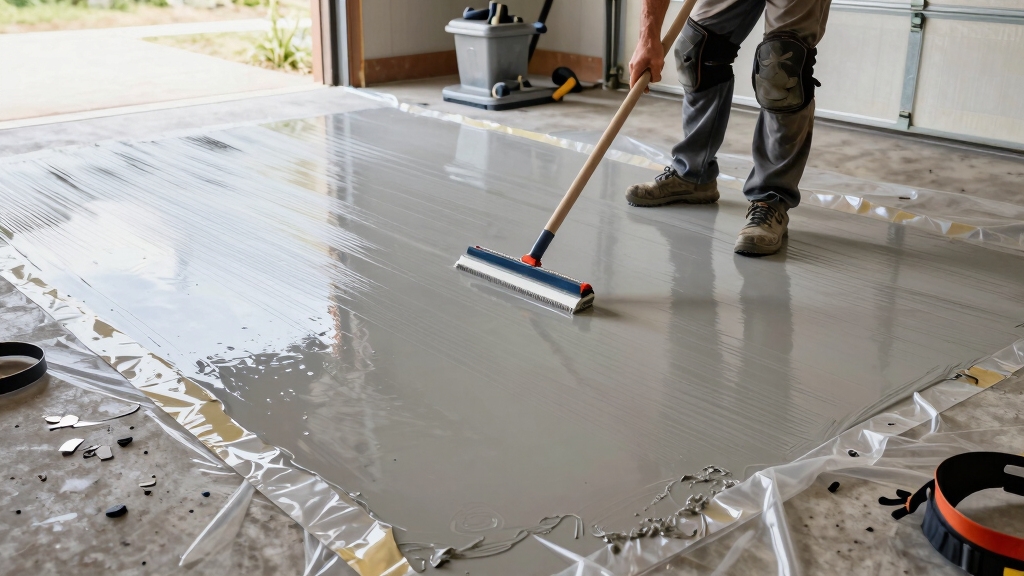
How Long Does It Take to Epoxy a Garage Floor?
Epoxy your garage floor in a day to over a week based on prep, coats, and curing.
You’ll spend hours cleaning, repairing, and profiling the surface. New concrete needs 28 days curing first.
Typically, apply two coats, each requiring 12–24 hours drying, with longer times for decorative layers.
Temperature, humidity, and product type also affect curing, with full use after about seven days.
Understanding these steps helps you plan the project efficiently and guarantee lasting results.
Key Takeaways
- Floor preparation, including cleaning and repairs, typically takes from a few hours up to several days depending on floor condition and moisture issues.
- Applying two coats (primer/base and topcoat) generally requires 2 to 4 days including drying times between coats.
- Drying times between coats usually range from 10 to 36 hours, with full chemical cure taking about 7 days.
- Decorative layers or multi-coat systems add 1 to 2 extra days to the overall project timeline.
- Environmental factors like temperature (60–80°F) and humidity significantly affect drying and curing times.
Garage Floor Epoxy Preparation Time
Although it might be tempting to rush, you need to allow sufficient time for garage floor epoxy preparation to guarantee proper adhesion and durability.
Preparation typically takes from a few hours up to a couple of days, depending on the floor’s condition, size, and necessary repairs.
You must thoroughly clean the concrete, removing contaminants like oil, grease, and dust to assure strong bonding.
If your concrete is new, it requires at least 28 days of curing before you apply epoxy.
Address any moisture issues and cracks beforehand, as these can markedly extend prep time.
Skipping or shortening this step compromises the coating’s lifespan and performance.
Proper surface profiling, such as grinding or etching, is essential to create a rough texture that enhances epoxy adhesion and prevents premature failure.
Additionally, using proper surface preparation techniques helps ensure the epoxy sealer bonds effectively and maintains long-term durability.
How Many Coats Are Needed and Their Impact on Timeline
When working with epoxy, you’ll usually need to apply two coats.
It’s important to let each coat dry for about 10 to 36 hours before adding the next one. This waiting time is crucial because it ensures that everything adheres properly and holds up well over time.
If you’re thinking about adding some decorative touches, like flakes or metallic pigments, keep in mind that this can push the timeline out by another day or two.
Additionally, environmental factors such as humidity and temperature can significantly affect drying and curing times, potentially extending the overall project duration.
Number Of Coats
Determining the right number of epoxy coats is essential because each layer adds drying and curing time, directly impacting your project’s overall timeline.
Typically, a two-coat system, primer/base coat followed by a topcoat, is standard for durability and appearance.
Some projects might require a third coat, especially if decorative flakes or metallic effects are involved. This can extend total application time by a day or more.
Each coat must fully dry before the next is applied, so additional coats multiply the waiting periods. While a single coat dries faster, it compromises adhesion and protection.
Consequently, balancing the number of coats with performance needs is critical for an efficient schedule and long-lasting results.
Ultimately, the number of coats greatly influences how long your garage floor project takes from start to finish.
Proper surface preparation and light sanding between coats with 220-grit sandpaper can significantly improve adhesion and the durability of each layer.
Drying Time Between
Because each epoxy coat requires sufficient drying time before applying the next, you need to carefully schedule intervals to maintain adhesion and finish quality.
Typically, drying times between coats range from 10 to 36 hours depending on product and conditions. Multiple coats improve durability but extend total project time.
Planning your schedule around these windows guarantees optimal bonding and finish integrity.
Maintaining proper ventilation and temperature during the drying period is essential to ensure a strong, even cure and prevent issues such as bubbling or uneven finish.
| Coats Applied | Drying Time Between | Impact on Timeline |
|---|---|---|
| 1 | N/A | Fastest completion |
| 2 | 10-36 hours | Moderate extension |
| 3 | 10-36 hours each | Significant delay |
| Primer + Base | 12-24 hours | Adds preparation time |
| Topcoat | 12-24 hours | Final finish, adds time |
Additional Decorative Layers
Following the drying times between coats, the number of additional decorative layers you apply markedly affects the overall project duration.
Each layer requires a specific drying window, so adding more coats extends your timeline proportionally.
Here’s how layers impact timing:
- Base coat: Essential for adhesion; typically takes 24 hours to dry before the next layer.
- Decorative flakes or pigments: Add 12 to 24 hours drying time, depending on the product.
- Metallic or multi-layer effects: Often require multiple layers; each adds up to 24 hours drying.
- Topcoat application: Adds 24 to 48 hours for drying and curing, sealing decoration and durability.
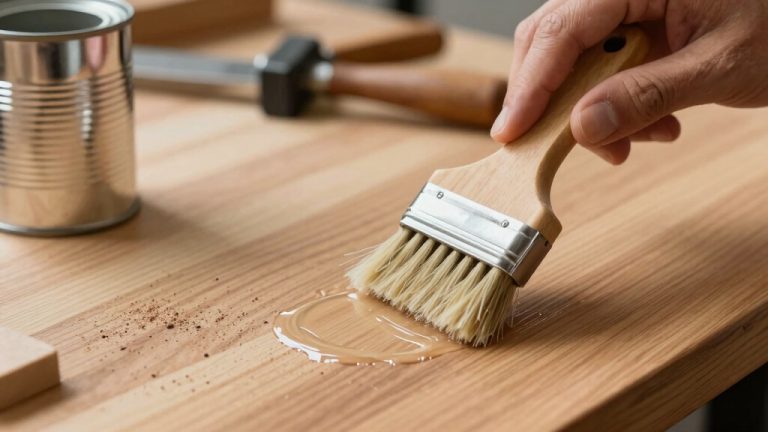
Plan for extra days when choosing additional decorative layers to guarantee proper curing, peak adhesion, and long-lasting results. Proper application tools, such as foam brushes, can help ensure even coating and reduce application issues during these stages.
What Influences Epoxy Drying and Recoat Times?
When it comes to epoxy drying and recoat times, environmental factors play a significant role. For instance, temperature and humidity can really impact how quickly epoxy dries and when you can apply that second coat. If it’s too cold or too humid, you might find yourself waiting longer than expected.
Also, keep in mind that different epoxy products have unique drying and recoat windows. This variation is all due to their chemical formulations. So, it’s super helpful to understand these factors. That way, you can plan your project better and avoid any potential issues with adhesion or curing. Maintaining workspace temperature at or below 68℉ is crucial for optimal curing conditions and achieving the best surface quality.
Environmental Conditions Impact
When environmental conditions vary, epoxy drying and recoat times respond accordingly, markedly affecting your project schedule.
You’ll find that temperature, humidity, ventilation, and substrate moisture all play vital roles in curing speed and adhesion.
To optimize drying and recoating, consider these factors:
- Temperature: Ideal ranges (typically 60-80°F) accelerate curing. Lower temps slow chemical reactions, extending drying times.
- Humidity: High humidity can delay solvent evaporation and promote surface tackiness. This requires longer wait times before recoating.
- Ventilation: Proper airflow removes moisture and solvents, facilitating faster drying and reducing off-gassing issues.
- Substrate Moisture: Excess moisture in concrete impedes epoxy bonding and slows cure. This can potentially cause adhesion failure if unaddressed.
Managing these variables guarantees you hit recommended recoat windows and achieve durable, high-quality results. Maintaining indoor humidity between 40–60% and temperature within 60°F–80°F also supports optimal drying conditions for coatings and substrates.
Product Type Variations
Different epoxy products bring distinct drying and recoat times that can markedly impact your garage floor project schedule.
Traditional two-part epoxy coatings typically require 24 hours to dry before you can apply a second coat, with full cure taking about seven days.
Faster-curing polyurea or polyaspartic systems can reduce drying and recoat times to just a few hours, allowing you to complete the floor in a day or two.
However, these rapid systems often have shorter pot lives, meaning you must apply them quickly after mixing.
Additionally, multi-coat systems with decorative flakes or topcoats extend the timeline due to required drying intervals between layers.
Selecting the right product based on your time constraints and environmental conditions helps guarantee a durable, properly cured finish.
Proper surface preparation, including cleaning and light abrasion, is essential to ensure strong adhesion and long-lasting results.
How Temperature and Humidity Affect Garage Floor Epoxy Cure
Although epoxy curing times can seem fixed, temperature and humidity markedly influence the chemical reaction speed and final hardness of your garage floor coating.
When conditions stray from ideal, the curing process slows or accelerates, impacting durability and timing.
Key factors include:
- Temperature Range: Epoxy cures best between 60°F and 80°F. Below 60°F, curing slows. Above 80°F, it may cure too fast, risking improper bonding.
- Humidity Levels: High humidity can cause surface blush or amine blush, weakening adhesion and finish quality.
- Moisture in Concrete: Excess moisture from the slab can interfere with epoxy bonding, extending cure time.
- Ventilation: Proper airflow helps regulate temperature and humidity, promoting consistent cure.
Monitoring these variables guarantees a strong, durable epoxy floor with predictable curing behavior. Implementing proper maintenance practices ensures the longevity and effectiveness of your floor coating.
When Can You Walk, Drive, and Fully Use Your Epoxy Garage Floor?
Temperature and humidity not only influence how fast your epoxy cures but also dictate when you can safely walk, drive, or fully use your garage floor.
Temperature and humidity affect epoxy curing speed and determine when your garage floor is safe to use.
Typically, light foot traffic is possible within 10 to 12 hours under ideal conditions. Most epoxy systems become dry to the touch around 24 hours.
You can usually drive on the floor after about 36 hours, but this depends on the specific product and environmental factors.
However, full chemical cure and maximum hardness typically require about 7 days. During this period, the epoxy gains its full resistance to abrasion, chemicals, and heavy loads.
To avoid damage, refrain from placing heavy objects or subjecting the surface to intense traffic until the coating is fully cured. Always follow manufacturer guidelines tailored to your epoxy product.
Proper ventilation and controlling humidity levels during curing can help ensure the best results and reduce potential issues.
How Polyurea and Polyaspartic Coatings Compare to Traditional Epoxy
When you want a faster curing time and enhanced durability, polyurea and polyaspartic coatings offer compelling alternatives to traditional epoxy.
These coatings cure much quicker and resist UV damage better, making them ideal for garage floors exposed to sunlight.
Consider these key differences:
- Cure Time: Polyurea/polyaspartic coatings can be walkable within hours, whereas epoxy often requires 24+ hours.
- Durability: Polyurea exhibits superior chemical and abrasion resistance.
- Temperature Tolerance: Polyaspartics cure effectively in a wider temperature range.
- Application Complexity: Polyurea/polyaspartic coatings have shorter pot lives, demanding faster, more precise application.
If speed and longevity are priorities, these coatings can markedly reduce downtime compared to traditional epoxy floors.
Timeframes for Each Step in Garage Floor Epoxy Projects (Summary)
Understanding the specific timeframes for each step in an epoxy garage floor project helps you plan effectively and set realistic expectations.
Preparation can take from a few hours to several days, depending on floor condition and repairs. New concrete requires a 28-day cure before coating.
Primer and base coats typically need 1 to 2 days, including drying, while decorative flakes or pigments add extra time.
After application, epoxy dries to the touch in about 24 hours but usually requires 7 days for full cure.
Light foot traffic may be possible after 10–12 hours, with vehicle access around 36 hours.
Recoat windows range from 10 to 36 hours.
Environmental conditions and product type greatly affect these durations, so you should adjust timing accordingly.
Frequently Asked Questions
Can I Apply Epoxy Over Existing Paint or Coatings?
You generally shouldn’t apply epoxy directly over existing paint or coatings without proper preparation.
You’ll need to remove or thoroughly roughen the surface to ensure reliable adhesion.
Any peeling, flaking, or glossy paint must be stripped or sanded down.
Otherwise, the epoxy mightn’t bond well, causing premature failure.
Always test a small area first and consider professional advice if the existing coating is unknown or problematic.
What Safety Precautions Are Needed During Epoxy Application?
Think of epoxy fumes as invisible flames. You need protection. You’ll want a respirator mask rated for organic vapors to guard your lungs.
Wear chemical-resistant gloves and long sleeves to prevent skin contact. Make sure your workspace is well-ventilated, using fans or open doors to keep the air flowing.
Eye protection is essential too, since splashes can harm your eyes. Following these safety steps minimizes risks during application.
How Do I Clean and Maintain an Epoxy Garage Floor?
You clean your epoxy garage floor by sweeping debris regularly and mopping with a mild detergent diluted in water.
Avoid harsh chemicals or abrasive tools that can damage the finish.
Maintain the floor by promptly wiping spills and placing protective pads under heavy objects.
Inspect for chips or cracks to ensure longevity. Routine care preserves the epoxy’s durability and appearance, extending its lifespan effectively.
Will Epoxy Flooring Resist Oil Stains and Chemicals?
Like a knight’s armor guarding its wearer, epoxy flooring resists oil stains and most chemicals effectively.
You’ll find its dense, non-porous surface prevents oil, gasoline, and common garage chemicals from penetrating, making cleanup easier.
However, harsh solvents or prolonged chemical exposure can degrade it, so prompt cleaning matters.
Choosing high-quality, chemical-resistant epoxy formulations enhances durability, ensuring your garage floor stays protected against spills and stains over time.
Can I Customize Epoxy Colors and Designs?
Yes, you can customize epoxy colors and designs extensively.
Epoxy systems allow you to choose from a wide range of pigments, flakes, and metallic additives to create unique finishes.
You can apply decorative flakes for texture or metallic pigments for a shimmering effect.
Custom patterns, logos, or color blends are also possible through professional techniques.
Just make sure your installer uses compatible materials and applies multiple coats to achieve durable, vibrant results.
Get Better Results by Respecting Each Epoxy Step
Epoxying your garage floor is like painting a masterpiece. Each step demands careful timing for the best results.
Preparation, multiple coats, and curing depend heavily on temperature and humidity. You’ll usually wait 24 hours between coats and around 72 hours before heavy use.
Polyurea and polyaspartic coatings cure faster but cost more. Knowing these timelines helps you plan efficiently, ensuring a durable, flawless finish that stands the test of time.