How to Match Wood Floors: Crafting Continuity in Every Plank
To match wood floors, start by identifying your existing floor’s species, plank width, and thickness to guarantee compatibility. Measure carefully and select the same hardwood grade for consistent character.
Match the stain and finish by testing samples and applying feathering techniques to blend edges seamlessly. Refinishing both old and new flooring helps unify appearance.
Thoughtful shifts to other materials complete the look. Understanding these steps will guide you toward a flawless wood floor match.
Key Takeaways
- Identify floor type, species, plank width, and thickness to ensure compatibility with existing hardwood flooring.
- Measure and match wood species, grade, and plank dimensions to maintain consistent grain, color, and structural integrity.
- Use unfinished wood samples and custom stains to accurately match the color, accounting for natural aging and sunlight effects.
- Refinish both new and old flooring simultaneously, sanding and staining to create a seamless blend and consistent gloss level.
- Employ threshold strips or transition pieces to bridge differences between hardwood and other floor materials smoothly and safely.
Identifying Your Existing Hardwood Floor Type, Plank Width, and Thickness

To match your existing hardwood floor seamlessly, you’ll first need to identify its type, plank width, and thickness with precision.
Start by determining whether your floor is solid hardwood or engineered wood, as this affects compatibility and installation.
Use a ruler or tape measure to gauge the plank width accurately. Older homes often feature non-standard widths, especially with Douglas fir, which may require custom milling.
Measure thickness carefully; most hardwood floors are 3/4 inch thick, but variations like 1/2 inch or 5/8 inch exist.
Ensuring consistency in thickness is essential so the new floor lies flush with the old. This foundational knowledge guides your selection process and prevents visual breaks, maintaining the elegant, uninterrupted flow that defines high-quality wood flooring.
Additionally, understanding the construction methods helps ensure the new flooring will perform well in your specific environment and installation type.
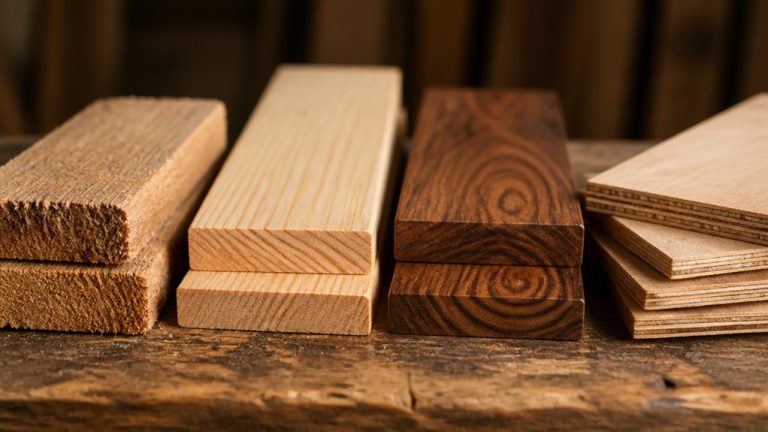
Measuring and Matching Hardwood Species, Grade, and Dimensions
Start by carefully identifying the hardwood species and grade of your existing floor, as these elements form the cornerstone of a flawless match.
Begin by precisely identifying your floor’s hardwood species and grade for a perfect match.
Matching wood species makes certain consistent grain patterns and natural hues, while grade selection impacts the floor’s character and uniformity.
Next, measure dimensions precisely:
- Plank Width: Use a ruler or tape measure; older floors may require custom milling for non-standard widths.
- Thickness: Confirm thickness, typically 3/4 inch, to maintain flush installation with existing flooring.
- Length and Profile: Note plank lengths and edge profiles to replicate the original layout seamlessly.
Accurate measurements and matching species and grade preserve both aesthetics and structural integrity.
This establishes a harmonious, uninterrupted wood floor appearance throughout your space. Additionally, considering the surface finish of your existing floor helps ensure a cohesive and polished look when matching new flooring.
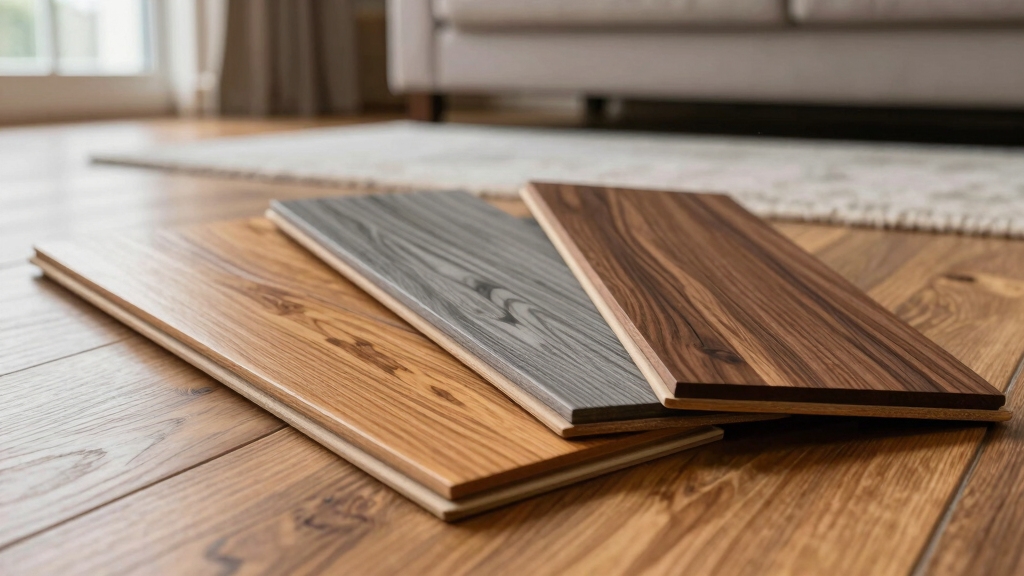
Techniques to Match Color, Stain, and Finish on New Hardwood Flooring
Once you’ve identified and measured the species, grade, and dimensions of your existing hardwood, matching the color, stain, and finish becomes the next priority to guarantee visual harmony.
Start by evaluating your floor’s current tone, noting natural aging effects that alter color over time. Use unfinished wood samples to test custom stains, feathering applications to blend edges subtly.
Employ advanced color-matching systems or consult professionals to replicate the precise stain shade. Match finish gloss levels—satin, low-gloss, or natural oil—to maintain consistent visual texture.
Consider the impact of natural sunlight on wood tones, as it can shift warmth and color perception throughout the day, affecting the match.
Refinishing Hardwood Floors to Achieve a Seamless Match
Although matching new hardwood to existing floors can be challenging, refinishing both surfaces simultaneously guarantees a flawless, unified appearance.
Refinishing new and existing hardwood together ensures a seamless, perfectly matched floor finish every time.
When you refinish, you remove old finishes and stains. This allows for a consistent base to apply color and protective coatings evenly across all flooring.
To achieve this seamless match, focus on:
- Sanding both old and new hardwood to the same smoothness and depth, ensuring no unevenness.
- Applying custom stain blends that replicate the aged tone of existing floors, using feathering techniques for gradual shifts.
- Selecting a finish with matching gloss and texture to unify the entire floor’s appearance and protect it from wear.
It is important to consider the limitations of prefinished hardwood floors to avoid damage during sanding and refinishing.
Transitioning Between Hardwood and Other Flooring Materials
When blending hardwood with other flooring materials, you’ll want to focus on creating smooth, visually appealing junctions that respect both surfaces.
Use threshold boards designed to separate hardwood from laminate, tile, or carpet, allowing each material to stand out while maintaining harmony.
Select threshold pieces that complement the wood’s undertone and grain to avoid visual dissonance.
Consider thickness differences carefully; threshold strips should bridge these gaps without creating tripping hazards.
Rugs can also soften thresholds when you prefer less rigid separations.
Pay attention to color, texture, and finish, ensuring the contrast feels intentional and stylish rather than jarring.
For significant height differences, installing an underlayment or plywood can effectively level the surfaces before applying a transition strip.
Frequently Asked Questions
How Long Does the Entire Wood Floor Matching Process Typically Take?
You can expect simple wood floor matching projects in one room to take about 1-3 days.
Complex custom matches spanning multiple areas may require 2-4 weeks.
This timeline includes sourcing materials, custom milling, staining, professional installation, and refinishing.
Coordinating thickness, species, and color precisely guarantees seamless integration.
Patience during this process results in a flawless, visually continuous floor that enhances your space’s aesthetic and value beautifully.
Can Reclaimed Wood Be Used to Match Older Hardwood Floors?
Like finding a hidden treasure, reclaimed wood can beautifully match older hardwood floors, adding character and history to your space.
You’ll need to make certain the species, thickness, and plank width align perfectly.
Custom staining and finishing techniques help blend the new with the old seamlessly.
Using reclaimed wood not only preserves authenticity but also offers a sustainable, aesthetic solution that breathes new life into your flooring project.
What Are Common Issues When Matching Floors in Historic Homes?
You’ll commonly face challenges like non-standard plank widths and varying thicknesses in historic homes, especially with Douglas fir floors.
Color matching is tricky since aged wood changes tone over time, making new pieces stand out.
Subfloor irregularities can complicate installation, and sourcing exact species or grades might require custom milling or reclaimed materials.
Finally, achieving seamless junctions often demands professional staining, sanding, and refinishing to unify old and new sections flawlessly.
How Do Environmental Factors Affect Matching New and Old Wood Floors?
Environmental factors like sunlight, humidity, and temperature changes affect wood’s color and moisture content.
You’ll notice older floors have naturally aged hues and slight dimensional shifts. When matching new wood, you must account for this by allowing acclimation time and using custom staining or finishing techniques to blend colors seamlessly.
Controlling indoor humidity helps prevent warping or gaps, ensuring your new and old floors integrate beautifully over time.
Are There Specific Tools Installers Use for Precise Wood Floor Matching?
When it comes to precise wood floor matching, you’ll want to have the right tools in your arsenal.
Installers use rulers or tape measures to nail down exact plank widths, while moisture meters help assess wood condition.
Color-matching devices, like spectrophotometers, capture stain nuances, and thickness gauges make certain new planks sit flush.
Combining these tools with expert eyes lets you hit the nail on the head, achieving seamless, flawless floor integration every time.
From Careful Matching to Stunning Results
Matching wood floors takes careful attention to detail, from identifying your hardwood type to refining color and finish.
Did you know that 85% of homeowners prefer matching new flooring to existing hardwood for a cohesive look?
By measuring species, grade, and plank dimensions accurately, and using expert refinishing techniques, you’ll create a seamless shift that enhances your space’s beauty and value.
With patience and precision, your floors will look effortlessly unified and timeless.