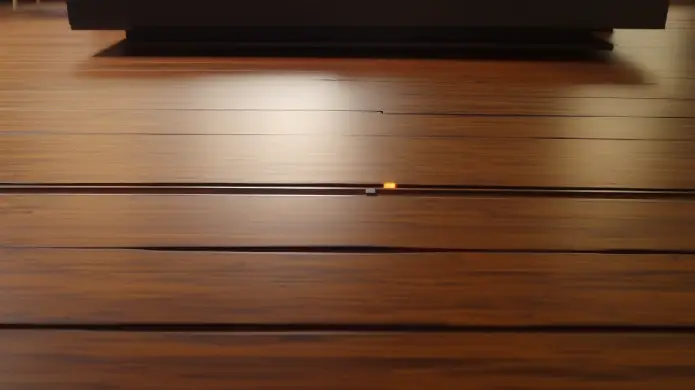
What Is a Sanding Sealer Used for: Flawless Woodwork
You use sanding sealer to prepare raw wood by filling pores and sealing knots, creating a smooth, even surface that improves adhesion for stains, paints, or clear coats.
It minimizes sanding effort by softening raised grain and reducing stain bleed from resinous knots. Sanding sealer dries quickly, allowing easy sanding and faster project progress while ensuring a uniform, long-lasting finish.
If you want to achieve professional-level results, understanding its application and types will help you optimize your woodworking projects.
Key Takeaways
- Sanding sealer smooths and levels wood surfaces by filling pores and microscopic irregularities for easier sanding.
- It seals knots and stabilizes wood grain to prevent stain bleed and uneven finish absorption.
- Provides a strong, porous base layer that enhances adhesion of stains, paints, and clear coats.
- Speeds project progress by drying quickly and reducing sanding effort and sandpaper clogging.
- Ensures a uniform, durable final finish with improved appearance and longevity on raw or pre-finished wood.
What Is Sanding Sealer and How Does It Work?

Sanding sealer typically acts as the essential first coat applied to raw or pre-finished wood surfaces to prepare them for subsequent finishing layers.
It works by penetrating microscopic gullies and leveling the surface, which allows for smoother sanding and better adhesion of topcoats.
When you apply sanding sealer, it fills pores and seals knots, preventing uneven absorption of finishes.
Its composition dries quickly, usually tack-free within 10 to 20 minutes, enabling faster project progression.
You’ll find shellac-based and lacquer-based variants designed for different wood types and finishes.
After applying one or two thin coats and sanding, you enhance the wood’s uniformity, reduce sandpaper clogging, and prevent surface scratches.
This precise sealing optimizes the wood’s readiness, ensuring your subsequent finishes adhere strongly and uniformly.
Proper surface prep ensures durability and enhances the finish’s appearance, making sanding sealer a crucial step in the preparation and surface readiness process.
Why Use Sanding Sealer Before Wood Finishing?
When preparing wood for finishing, applying a sealer first guarantees a uniform surface that minimizes sanding effort and enhances topcoat adhesion.
By penetrating the wood fibers, sanding sealer creates a consistent base that reduces microscopic surface irregularities, allowing your subsequent sanding to be faster and more efficient.
You’ll also notice less sandpaper clogging, thanks to its softer film composition, which prevents scratches and coring.
Additionally, the sealer builds film thickness quickly, providing a robust foundation that promotes stronger bonding for stains, paints, or clear coats.
This step is especially critical on raw or stained wood, where uneven absorption can cause blotches.
Using sanding sealer before finishing makes certain a smoother, more durable final coat with improved visual uniformity and longevity.
It is important to ensure the surface is clean, dry, and free of dust or debris before applying any sealer to promote proper adhesion.
How Sanding Sealer Smooths Raised Wood Grain and Seals Knots?

Frequently, raised wood grain and knots pose challenges during finishing by creating uneven textures and discolorations. When you apply sanding sealer, it penetrates the wood surface, filling microscopic gullies and hardening raised fibers.
This action smooths the grain, enabling faster, more uniform sanding. Additionally, the sealer fills and stabilizes knots, preventing surface defects that could interfere with the finish.
Applying a compatible wood filler beforehand can enhance surface uniformity and improve final stain acceptance.
| Issue | Sanding Sealer Effect |
|---|---|
| Raised grain fibers | Softens and levels for easy sanding |
| Microscopic gullies | Fills gaps, creating uniform surface |
| Knots | Seals and stabilizes for smooth finish |
| Uneven texture | Leveled by sealer film thickness |
How Sanding Sealer Prevents Knot Stain Bleed?
Beyond smoothing raised grain and stabilizing knots, applying a sanding sealer plays a key role in preventing knot stain bleed. Knots contain natural resins and tannins that can leach through finishes, causing discoloration.
When you apply sanding sealer, it forms a uniform barrier that markedly reduces this risk by:
- Sealing porous wood fibers within knots, limiting resin migration.
- Creating a stable film that blocks tannins and dyes from penetrating topcoats.
- Providing strong adhesion for subsequent layers, ensuring the finish remains intact without bleed-through.
Regular sealing practices also contribute to minimizing scratches and maintaining the wood’s appearance over time.
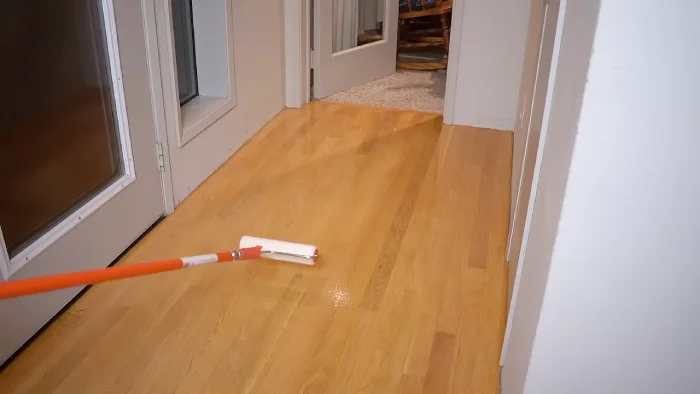
How to Apply Sanding Sealer to Raw Wood?
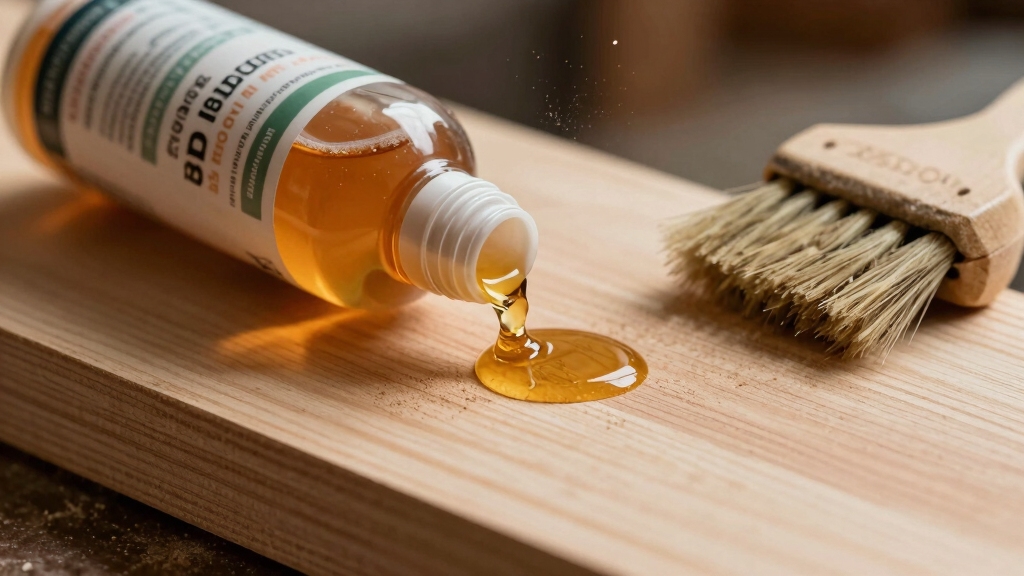
Before you dive into applying sanding sealer to your raw wood, it’s super important to ensure that the surface is nice and clean.
You’ll want it to be dry and free from any dust or debris so that the sealer can really stick and do its job.
Once you’ve got that sorted, you can grab a brush or a spray to start applying the sealer.
Just remember to go for thin, even coats.
It’s all about that smooth finish, right?
After you apply the first coat, give it about 10 to 20 minutes to dry until it’s tack-free.
Now, here’s a little tip: after the first coat dries, take some fine-grit sandpaper and sand it lightly.
This will help smooth out any raised grain, making your wood surface even nicer for the next steps.
Once you’ve done that, you’re all set to apply more sealer or your topcoats!
For best results, consider using water-based finishes which dry quickly and provide a smooth, durable surface.
Surface Preparation Steps
When preparing raw wood for sanding sealer application, you’ll first make sure the surface is clean, dry, and free of dust or oils that could interfere with adhesion.
Proper preparation guarantees the sealer bonds uniformly and enhances sanding efficiency.
Follow these steps:
1. Clean the surface: Use a tack cloth or vacuum to remove all dust and debris.
Avoid water, which can raise the grain.
2. Check moisture content: Confirm the wood is fully dry.
Ideal moisture content is below 12% to prevent adhesion failure.
3. Smooth rough areas: Lightly sand with fine-grit sandpaper (180-220 grit) to level microscopic surface irregularities, improving sealer penetration and film uniformity.
Completing these preparation steps sets a solid foundation for the sanding sealer to perform optimally.
Using an orbital sander can help achieve an even sanding surface for better sealer application.
Application Techniques
Applying sanding sealer properly guarantees best adhesion and a smooth surface for subsequent finishes.
Begin by ensuring the raw wood is clean and dust-free.
Apply one thin, even coat using a brush or spray, allowing the sealer to penetrate deeply and harden the wood structure uniformly.
After drying, typically within 10-20 minutes, lightly sand the surface with fine-grit sandpaper to remove raised grain and fill microscopic gullies.
Remove sanding dust thoroughly before applying a second thin coat if needed.
This process prevents sandpaper clogging and corning, optimizing smoothness.
Once the sealer is dry and sanded, proceed with your chosen topcoat layers, sanding lightly between each.
Following this technique enhances adhesion, reduces stain bleed, and improves final finish clarity and luster.
For optimal results, ensure the sealer is fully cured and properly prepared to promote strong mechanical adhesion with subsequent finishes.
When and How to Use Sanding Sealer on Painted or Stained Wood?
Although painted or stained wood surfaces may appear finished, using a sanding sealer as an initial coat markedly enhances adhesion and surface uniformity before topcoating.
Using a sanding sealer before topcoating improves adhesion and creates a smoother, more uniform surface.
This step is critical to avoid peeling and to achieve a smoother final finish.
You should apply sanding sealer when:
- The surface has minor imperfections or microscopic gullies that need leveling to make sure even sanding.
- You want to improve topcoat adhesion, especially if the existing finish is aged or slightly glossy.
- You’re sealing stained wood to prevent tannin or dye bleed-through during subsequent coats.
Applying sanding sealer in thin, even layers creates a softer, uniform surface that sands easily.
This allows you to build a consistent base for your topcoats.
This approach guarantees a durable, high-quality finish on painted or stained wood surfaces.
For best results, ensure the surface is fully dry before applying sanding sealer to prevent issues related to surface preparation timing.
How to Apply and Sand Sanding Sealer Effectively?
Building on the importance of preparing painted or stained surfaces, you should start by applying sanding sealer in thin, even coats to ensure uniform coverage.
Use a high-quality brush or spray for precise application, avoiding puddles or drips. Allow the sealer to dry thoroughly, typically 10–20 minutes, until tack-free.
After drying, sand the surface lightly with fine-grit sandpaper (220–320 grit) to smooth raised grain and create a uniform base.
Remove sanding dust completely before applying a second coat if necessary. Repeat the drying and sanding process to enhance adhesion and surface smoothness.
Proper sanding sealer application makes for faster sanding, reduces sandpaper clogging, and promotes a flawless finish when topcoats follow.
Always test on a small area before full application to confirm compatibility and results.
For best results, consider applying a water-based polyurethane topcoat after sanding sealer to maintain a clear, durable finish.
Types of Sanding Sealers and How to Choose One?
When selecting a sanding sealer, understanding the different types available is essential to guarantee compatibility with your project’s finish and desired results. You’ll encounter shellac-based, lacquer-based, and water- or oil-based sealers, each suited for specific applications.
- Shellac-based sealers: Offer quick drying and excellent sanding properties.
- Lacquer-based sealers: Provide strong adhesion and faster build-up. They’re best for lacquer topcoats and thinned with nitrocellulose lacquer thinner.
- Water- or oil-based sealers: Compatible with most finishes except some like Endur-o-var. They allow for easier cleanup but have slower drying times.
Choose based on your topcoat type, drying time preferences, and surface compatibility to ensure peak sealing and sanding performance. Additionally, using a compatible sealer is crucial when applying finishes such as gel stain on hardwood floors to protect the surface and enhance durability.
How Sanding Sealer Enhances Topcoat Adhesion and Smoothness?
Hey there! So, when it comes to getting that perfect finish on your woodworking projects, sanding sealer is your best friend. It really helps create a stronger bond between the wood surface and your topcoat. How does it do that? Well, it creates this ideal layer that promotes adhesion.
Plus, here’s the cool part: it fills in those tiny microscopic pores and smooths out any irregularities on the surface. This means you end up with a more uniform surface, which is super important for achieving a consistent finish.
And you know what? When you have that combination—the filled pores and the smoothness—your topcoat goes on so much more evenly. You’ll notice it achieves a finer, more durable luster that just makes your project shine. So, don’t skip the sanding sealer; it really makes a difference!
Promotes Stronger Topcoat Bond
Applying a sanding sealer creates an ideal surface that enhances the adhesion of subsequent topcoats by filling microscopic voids and leveling inconsistencies.
When you apply it, the sealer forms a uniform film that bonds tightly with both the wood substrate and the topcoat. This prevents peeling or flaking caused by poor adhesion.
Additionally, the sealer’s composition promotes chemical and mechanical bonding with various finishes. Here’s how sanding sealer promotes a stronger topcoat bond:
- It fills tiny surface irregularities, creating a continuous base for topcoat application.
- It builds a slightly porous, tacky layer that topcoats can grip effectively.
- It reduces surface dust and contaminants that interfere with adhesion.
Using sanding sealer guarantees your finish lasts longer and performs better.
Creates Uniform Smooth Surface
A sanding sealer creates a uniform smooth surface by filling microscopic gullies and leveling inconsistencies on the wood. This allows you to achieve a flawless finish.
By penetrating and sealing the wood fibers, it prevents raised grain during sanding. This enables you to sand more efficiently without clogging your abrasives.
This results in a smoother substrate that improves topcoat adhesion and reduces the risk of surface imperfections like corning or scratches.
The sealer’s formulation dries quickly and forms a soft yet durable film. This allows you to build thickness rapidly with fewer coats.
Applying 1-2 thin sanding sealer layers and sanding between coats guarantees you create an even base. This enhances the final topcoat’s gloss and luster, delivering professional-quality results with minimal effort.
When Can You Skip Using Sanding Sealer in Your Project?
Knowing when to skip sanding sealer can streamline your woodworking process without compromising the finish quality.
You don’t always need sanding sealer if the project conditions allow it. Here are three scenarios where you can omit it:
- When applying a finish that inherently seals the wood, like polyurethane or varnish, which provides sufficient adhesion and protection without a sealer.
- If the wood surface is already sealed or prefinished, making an additional sanding sealer coat redundant and unnecessary.
- When working with non-porous or heavily lacquered surfaces where sanding sealer won’t improve adhesion or surface smoothness.
Frequently Asked Questions
Can Sanding Sealer Be Used on Non-Wood Surfaces?
Sanding sealer is primarily formulated for wood surfaces, so using it on non-wood materials isn’t recommended. It relies on penetrating wood fibers and bonding with wood’s porous structure, which non-wood surfaces typically lack.
If you apply it on plastics, metals, or composites, adhesion may be weak or ineffective. Instead, choose sealers or primers specifically designed for those materials to guarantee proper adhesion and surface preparation before finishing.
How Long Does Sanding Sealer Typically Last Before Reapplication?
You can expect sanding sealer to last anywhere from several months up to a year before needing reapplication, depending on wear and environmental exposure.
It typically maintains adhesion and protection through multiple sanding and topcoat layers during finishing. However, if you notice surface degradation, sanding resistance, or finish dullness, it’s time to reapply.
Proper sealing extends your wood’s lifespan, ensuring smoother topcoats and preventing issues like tannin bleed or scratches.
Is Sanding Sealer Safe for Outdoor Wood Projects?
Sanding sealer isn’t typically formulated for outdoor wood projects because it lacks strong weather resistance.
You can use it as a preparatory coat under exterior finishes, but you’ll need a durable topcoat like marine varnish or exterior-grade polyurethane to protect wood from moisture, UV rays, and temperature changes.
Always make certain proper sealing since sanding sealer alone won’t prevent outdoor wood deterioration or fading over time.
Can Sanding Sealer Be Tinted or Colored?
You can’t judge a book by its cover, and the same goes for sanding sealer. It can be tinted or colored, but with care.
Most sanding sealers are clear or lightly pigmented, yet you can add compatible dyes or pigments to achieve subtle hues.
Just test first, as heavy tinting might affect drying or adhesion.
What Are the Environmental or Safety Precautions When Using Sanding Sealer?
You should use sanding sealer in a well-ventilated area to avoid inhaling fumes, especially with shellac or lacquer-based types containing solvents.
Wear gloves and eye protection to prevent skin and eye irritation. Avoid open flames, as many sealers are flammable.
Dispose of rags properly to prevent spontaneous combustion.
Always read the manufacturer’s safety data sheet for specific handling, storage, and disposal instructions to guarantee safe use.
From Rough to Refined: Sanding Sealer Makes the Difference
Think sanding sealer is just an optional extra? If you enjoy uneven finishes, stubborn knot stains, and sanding headaches, then… But if you want smooth, flawless woodwork without the drama, sanding sealer is your best friend.
It fills pores, seals knots, and creates the perfect base for topcoats to cling to. Skip it at your own risk unless you like your projects looking like a DIY horror show. Precision demands it.