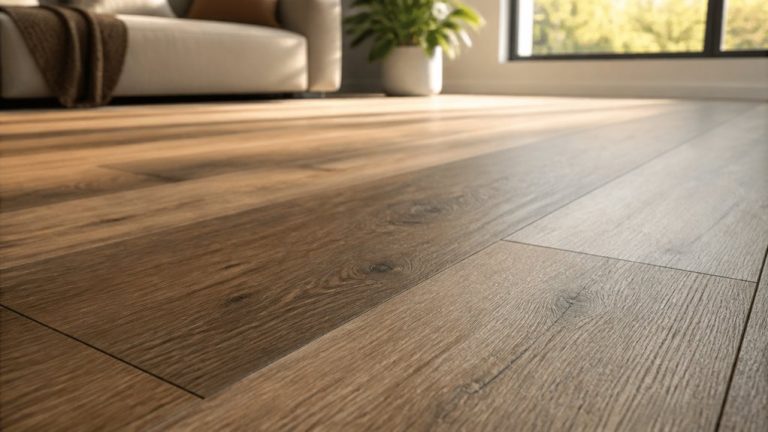
How to Install Hardwood on Concrete: Flawless Finish
To install hardwood on concrete, choose engineered hardwood for its moisture resistance and durability. Thoroughly clean and repair the concrete slab, then test moisture levels to confirm they’re within limits.
Install a vapor barrier with sealed seams to prevent moisture migration. Select the appropriate installation method: glue-down, nail-down over plywood, or floating, and follow manufacturer guidelines.
Maintain proper expansion gaps and flatness. Proper preparation and moisture control guarantee lasting performance; you can explore detailed steps and best practices to master this process.
Key Takeaways
- Choose engineered hardwood for moisture resistance and stability on concrete subfloors.
- Thoroughly clean, repair, and test concrete moisture to ensure it meets manufacturer and industry standards.
- Install a vapor barrier (minimum 10 mil polyethylene) with sealed seams to prevent moisture damage.
- Use appropriate installation methods: glue-down, nail-down over plywood, or floating with proper expansion gaps.
- Maintain indoor humidity between 30%-50% and avoid excess water during cleaning to prevent hardwood warping or cupping.
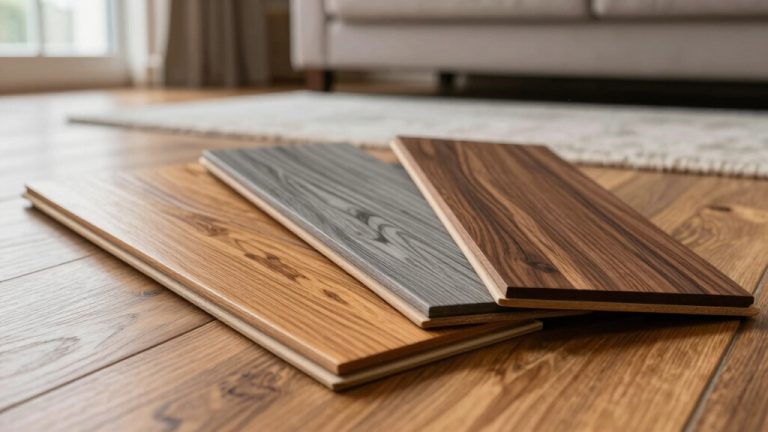
Choosing the Right Type of Hardwood for Concrete
When installing hardwood directly on concrete, you should prioritize engineered hardwood due to its multi-layer construction, which offers superior moisture resistance and dimensional stability compared to solid hardwood.
Engineered hardwood’s design allows for various installation methods on concrete, including glue-down and floating floors, enhancing versatility. It typically requires no acclimation, simplifying preparation. It is also important to maintain floor cleanliness to prevent damage after installation.
Unlike solid hardwood, which demands additional plywood subflooring and moisture barriers, engineered hardwood accommodates concrete’s moisture challenges more efficiently. It also provides better moisture resistance than carpet, which may face moisture resistance issues when installed over concrete.
Selecting species like oak, maple, or hickory with higher hardness ensures durability against temperature and moisture fluctuations inherent to concrete slabs.
Additionally, engineered hardwood’s thicker wear layers and stable grain structures minimize risks of cupping and warping, making it the ultimate choice for concrete subfloor installations.
Preparing the Concrete Subfloor for Installation
Before installing hardwood on concrete, you need to make certain the subfloor is meticulously prepared for ideal adhesion and durability.
Begin by thoroughly cleaning the concrete, removing dust, oils, sealers, and loose material. Inspect for cracks or hollow spots and repair them to ensure a solid base. It is also important to check moisture levels using a moisture meter to prevent future flooring issues. Maintaining proper moisture control during installation is crucial to avoid warping or buckling of the hardwood.
Verify the slab’s flatness. Grind high spots and fill low areas, maintaining tolerances within 1/8 inch over 6 feet. Sweep and mop the surface, then let it dry completely before proceeding.
| Concern | Action Needed | Result |
|---|---|---|
| Dust & Contaminants | Clean thoroughly | Strong adhesive bond |
| Cracks & Hollows | Repair and patch | Solid, stable base |
| Uneven Surface | Grind and level | Even hardwood fit |
| Moisture | Ensure dryness | Prevent floor failure |
| Safety | Follow OSHA silica dust rules | Safe work environment |
Testing and Managing Moisture Levels in Concrete
Ensuring the concrete subfloor is properly prepared sets the foundation for successful hardwood installation. Managing moisture levels within the slab plays an equally important role.
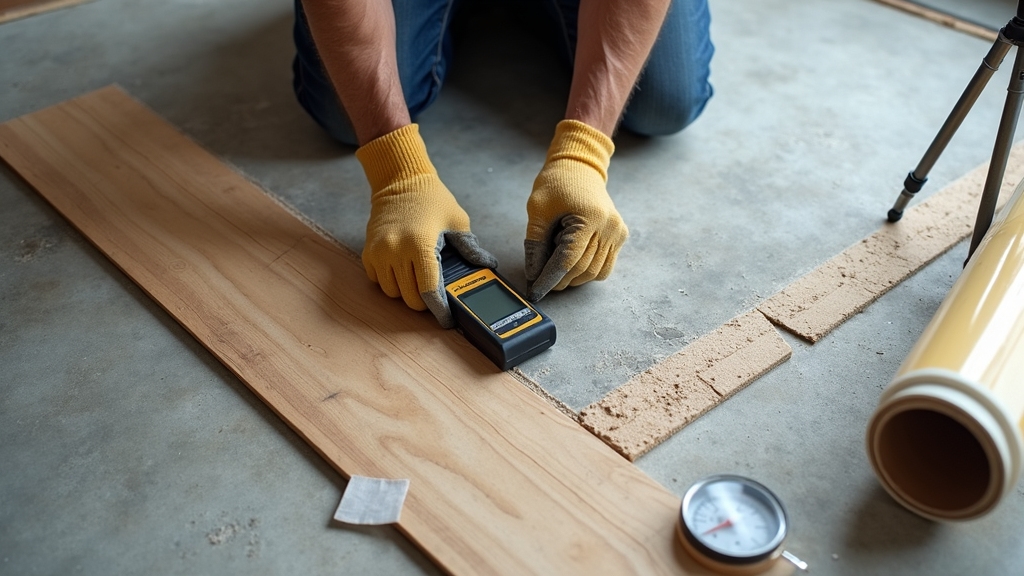
You should test moisture only after the concrete cures, at least 30 days post-placement. Use industry-standard methods like ASTM F2170 for in-situ relative humidity (RH) testing.
Moisture meters are practical tools for residential applications and provide a convenient way to take initial readings. It is also important to verify that the subfloor materials are low-emission to maintain healthy indoor air quality.
Drill probes to 40% depth for one-sided drying. Sensors equilibrate over 24 hours to measure internal moisture accurately. Supplement with ASTM F1869 calcium chloride tests to assess surface vapor emission rates (MVER).
Use qualitative meters for initial surveys but confirm with quantitative tests. Test multiple slab locations, especially near walls and seams, following manufacturer thresholds.
Typically, RH should be below 75–85% and MVER under 3–5 lbs/1,000 sq. ft./24 hrs. Document all results meticulously to guide remediation and ensure warranty compliance. Regular testing helps identify moisture issues before installation, reducing the risk of flooring failure preventing failures.
Installing a Moisture Barrier on Concrete Slabs
Before you dive into installing hardwood on your concrete, let’s talk about the moisture barrier. You’ll want to pick the right one—typically, a polyethylene sheet that meets ASTM E-1745 standards. Aim for a thickness of at least 10 mils; this will give you the effective vapor protection you need.
Now, don’t skip this step: prepare your slab! Make sure to clean it up and fix any defects. This is super important because you don’t want anything damaging your barrier during installation.
Also, remember that proper installation of the vapor barrier eliminates ground moisture contribution to slab RH, which is critical for preventing moisture issues. Installing a moisture barrier correctly also helps to maintain the flooring’s longevity by preventing moisture-related damage.
Once your slab is all set, it’s time to roll out the barrier. Be sure to overlap the edges properly and seal all seams and edges. This way, you’ll have a solid, continuous moisture-resistant layer under your flooring. It’s all about making sure that moisture doesn’t ruin your beautiful hardwood!
Moisture Barrier Types
What kind of moisture barrier should you install on a concrete slab to protect your hardwood flooring? Choose a vapor barrier with a permeance rating below 0.3 perms, per ACI 302.2R-06, to minimize moisture migration.
Proper moisture control is critical because excess moisture in concrete can weaken the slab and compromise the durability of installed flooring.
Common options include polyethylene sheeting (10–20 mils thick) and specialty membranes like W. R. MEADOWS or Stego, which offer permeance as low as 0.01 perms with high puncture resistance. Using a high-quality barrier also helps maintain the hardwood floor’s appearance by preventing moisture-related damage.
Composite and bituminous membranes provide enhanced waterproofing, while liquid-applied membranes ensure seamless coverage.
Confirm the barrier meets ASTM E1745 Class A or B for tensile strength and thickness—preferably 15 mils or more for durability. Proper installation technique, including sealing seams, is essential to ensure the barrier’s effectiveness.
Proper material selection prevents moisture vapor intrusion, protects adhesives, and maintains hardwood integrity over time. Seal seams and edges thoroughly to maintain a continuous, effective moisture barrier.
Installation Best Practices
Selecting the right moisture barrier sets the foundation, but installing it correctly on your concrete slab determines its effectiveness. Start by thoroughly cleaning and repairing the slab to ensure a smooth, dry surface.
Use vapor barriers meeting ASTM E-1745 standards with at least 10 mil thickness. These barriers provide low permeance to significantly reduce moisture vapor transmission and protect the hardwood flooring. Overlap sheets by 2-3 inches and seal seams with pressure-sensitive tape to prevent vapor leaks.
Extend the barrier up walls or enclosure bottoms to isolate moisture sources fully. Proper installation helps prevent structural damage caused by moisture infiltration. Avoid puncturing the barrier during installation; minor perforations are acceptable if coverage remains intact.
Key installation best practices include:
- Cleaning and repairing the slab surface before installation
- Using standardized, thick vapor barrier materials
- Overlapping and sealing seams meticulously
- Extending barrier material onto vertical surfaces to guarantee total moisture isolation
Glue-Down Installation Process for Engineered Hardwood
When installing engineered hardwood on concrete using the glue-down method, you must guarantee meticulous preparation and follow a systematic process to achieve a durable, stable floor.
Start by testing concrete moisture using the polyethylene sheet method for 24-48 hours. Ensure the surface is clean, dry, and level. Measure the relative humidity of the concrete slab at approximately 2 inches depth to confirm proper moisture levels before installation. Applying a fire retardant treatment to the wood before installation can enhance safety in certain environments.
Begin by checking concrete moisture with the polyethylene sheet test for 24-48 hours.
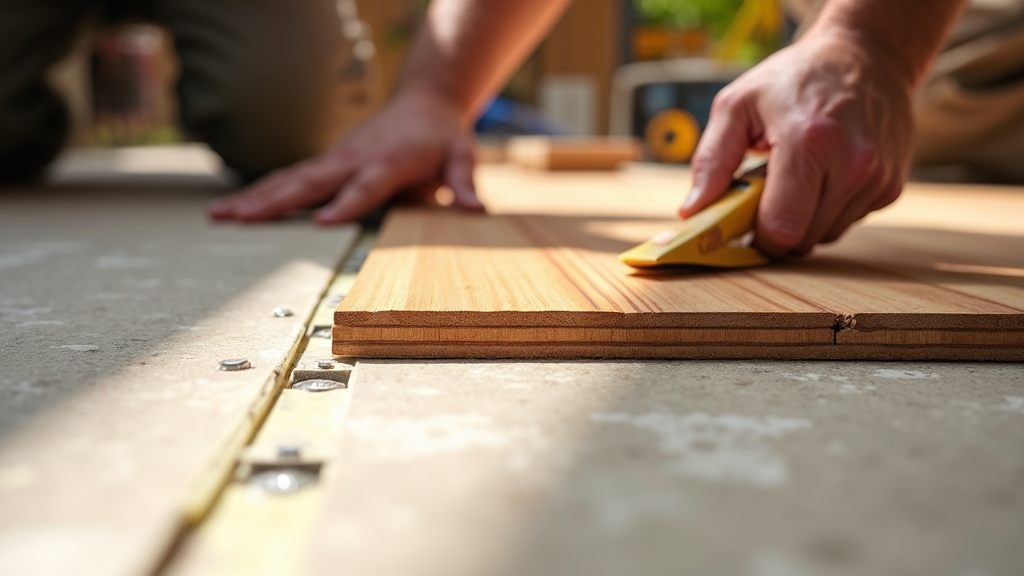
Repair imperfections with high-strength patching compounds and grind to flatten.
Select a one-component adhesive like polyurethane or MS polymer, applying it with a B11 notched trowel for even coverage.
Snap chalk lines for alignment, maintain a 1/2-inch expansion gap, and stagger end joints by 4–5 inches.
Press and tap boards fully into wet adhesive, working in small sections to prevent drying.
Immediately weight the floor, clean excess adhesive, and avoid heavy traffic for 24-48 hours to guarantee excellent bonding and finish quality.
Nail-Down Installation Using a Plywood Subfloor
Before you install hardwood using the nail-down method, make certain the concrete slab is properly prepared by verifying it’s clean, dry, level, and free of cracks or contaminants.
Next, install a vapor retarder over the slab to prevent moisture penetration, extending it up the walls and taping seams securely. Proper preparation ensures a stable, long-lasting hardwood installation.
Then, fasten ¾-inch CDX plywood sheets staggered over the vapor barrier, leaving a 1-inch gap from the slab to reduce moisture transfer.
Secure plywood with power-actuated fasteners spaced 2 inches from edges and every 6–8 inches across panels.
Key steps to remember:
- Test slab moisture; cure new slabs 60+ days
- Repair uneven or cracked concrete
- Overlap and tape vapor barrier seams
- Blind-nail hardwood planks into plywood subfloor every 6–8 inches
Floating Hardwood Floor Installation Over Concrete
When you’re getting ready to install a floating hardwood floor over concrete, it’s a good idea to start with engineered hardwood. It’s not only more moisture resistant, but it also offers better stability. Trust me, you’ll be glad you chose it!
Now, let’s talk about preparing that concrete surface. You’ll want to clean it really well and make sure to do some moisture tests. This step is crucial to ensure that the surface is ready for your new flooring. Testing for moisture and flatness is essential before installation to avoid future problems.
And don’t forget about the underlayment! Installing a proper moisture barrier, like a 6-mil polyethylene vapor barrier, is essential. It’ll protect your beautiful hardwood floor from any moisture coming up from the concrete.
Choosing Engineered Hardwood
Although installing hardwood directly on concrete presents challenges, choosing engineered hardwood with a floating installation method offers a practical and durable solution.
Engineered hardwood’s layered construction provides enhanced moisture resistance, which is essential for concrete subfloors. Floating floors lock planks together without the need for glue or nails, simplifying installation and protecting the subfloor.
Verify and document concrete RH levels per ASTM F2170 standards before installation to prevent moisture issues. Moisture testing ensures the longevity and performance of the flooring.
Additionally, leaving an expansion gap around the perimeter is critical to accommodate natural movement and prevent buckling. When selecting engineered hardwood for your project, consider these key advantages:
- Compatibility with concrete and various subfloor types
- Reduced installation time and subfloor damage
- Effective accommodation of radiant heating systems with proper vapor barriers
- Flexibility to expand and contract in humid or below-grade environments
Preparing Concrete Surface
Since the success of a floating hardwood floor installation depends heavily on the condition of the concrete slab, you must conduct a thorough inspection and prepare the surface appropriately.
Examine the slab for cracks, spalling, uneven spots, and contamination. Guarantee flatness within 3/16″ over 10 feet as per NWFA standards.
Remove loose or deteriorated concrete, and repair defects with suitable patching materials.
Clean the surface by eliminating dust, oils, old adhesives, and curing compounds using mechanical methods like diamond grinding to create a roughened profile.
Confirm the slab is dry and structurally sound, with moisture levels below manufacturer limits. It is important to conduct moisture testing in multiple areas of the slab to ensure suitability for hardwood flooring.
Address any unevenness using self-leveling compounds to prevent wood buckling or gaps.
A properly prepared concrete surface assures stable, long-lasting hardwood floor installation.
Installing Moisture Underlayment
After preparing the concrete surface to meet flatness and moisture requirements, the next step involves installing a moisture underlayment to protect the hardwood floor.
This underlayment acts as a vapor barrier, preventing moisture from seeping through the porous concrete and damaging the wood. It also cushions the floating floor and reduces sound transmission. Moisture barriers are essential in porous concrete to prevent moisture seepage that can cause damage to hardwood flooring. Installing a quality vapor barrier is critical to maintaining the integrity and longevity of the hardwood.
To install it correctly:
- Test concrete moisture with ASTM F2170 in-situ RH method to ensure dryness.
- Lay polyethylene sheeting or foam underlayment flat, overlapping seams and taping securely.
- Extend underlayment slightly up walls and seal edges with polyurethane sealant.
- Follow manufacturer guidelines precisely to maintain warranty and performance.
Proper installation stabilizes moisture levels, prevents warping, and supports the floating hardwood floor’s expansion and contraction.
Tips for Maintaining Hardwood Floors Installed on Concrete
When maintaining hardwood floors installed on concrete, managing moisture effectively is essential to prevent issues like cupping, buckling, or warping.
Always monitor indoor relative humidity, keeping it between 30% and 50%, and maintain stable HVAC operation year-round. Using humidity control devices can help maintain these ideal levels consistently.
Use vapor retarders beneath the flooring and ensure the concrete slab is fully dry before installation. It is important to test moisture levels using ASTM-approved methods to confirm the slab’s dryness.
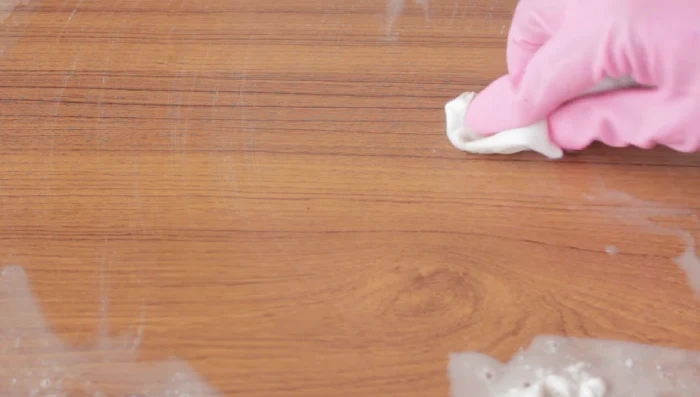
Clean floors regularly with manufacturer-approved products, avoid excess water, and wipe spills promptly to prevent moisture penetration. Regular cleaning also includes removing grit manually and vacuuming beneath furniture to prevent scratches and damage.
Protect floors from dirt by placing mats at entryways and avoid dragging heavy furniture to prevent damage.
Address any gaps or squeaks promptly, as persistent problems often signal moisture issues requiring professional attention.
Seasonal adjustments to humidifiers or dehumidifiers help maintain ideal conditions.
Following these practices ensures the longevity and stability of your hardwood floors over concrete.
Frequently Asked Questions
Can Hardwood Floors Be Installed Over Radiant Heated Concrete Slabs?
Yes, you can install hardwood floors over radiant heated concrete slabs, but you’ll want to choose engineered hardwood for better stability and moisture resistance.
Confirm the slab is fully cured, flat, and dry, using a proper vapor barrier. Avoid wide planks and control heat carefully to prevent damage.
Follow manufacturer guidelines closely and consider professional installation to manage moisture and temperature, securing long-term performance and avoiding warping or gaps.
What Tools Are Essential for Hardwood Installation on Concrete?
You’ll need a floor scraper and concrete grinder to prepare the slab by removing debris and leveling it.
Use a tape measure, chalk line, and saws like a miter or table saw to cut planks precisely.
For installation, an adhesive trowel or pneumatic flooring nailer with an air compressor is essential.
Don’t forget spacers for expansion gaps, a rubber mallet, tapping block, and safety gear like glasses and gloves to protect yourself.
How Long Should Hardwood Acclimate Before Installation on Concrete?
Like a sponge soaking up water, hardwood needs time to adjust to its environment. You should acclimate hardwood flooring for 3 to 7 days before installation on concrete.
Engineered hardwood may require only 48 hours to 3 days.
Make sure the concrete slab is fully dry, usually 30 to 60 days old.
Store the wood in the installation room, keeping temperature between 60°F-80°F and humidity at 30%-50% for accurate acclimation.
Are There Specific Adhesives Recommended for Glue-Down Hardwood?
Yes, you should use urethane-based or silane-modified adhesives like Bostik’s BEST or Bona R850T for glue-down hardwood on concrete.
These adhesives provide strong, flexible bonds and often include moisture vapor barriers to protect against slab moisture.
Moisture-cure urethane adhesives also offer excellent bonding and vapor barrier functions.
Choose adhesives compatible with your hardwood type, ensuring the subfloor is properly prepared for suitable adhesion and durability.
How Do Temperature Fluctuations Affect Hardwood on Concrete Floors?
Temperature fluctuations act like a silent tug-of-war between your hardwood and concrete floor.
As wood expands and contracts with heat and cold, concrete lags behind, causing stress at their interface.
This mismatch leads to gaps, warping, or adhesive failure.
To protect your floor, maintain stable indoor conditions, acclimate the wood properly, and use moisture barriers.
Otherwise, temperature swings can cause premature wear and structural issues in your hardwood flooring.
Maintenance Tips to Keep Your Hardwood Looking New
By carefully preparing your concrete subfloor and choosing the right hardwood and installation method, you can enjoy a durable, beautiful floor. For example, a homeowner in Chicago successfully installed engineered hardwood using a moisture barrier and glue-down method. This prevented warping despite seasonal humidity changes.
Following these precise steps guarantees long-lasting results and minimizes common issues like moisture damage. With proper maintenance, your hardwood floor will remain a valuable, attractive feature of your home for years to come.