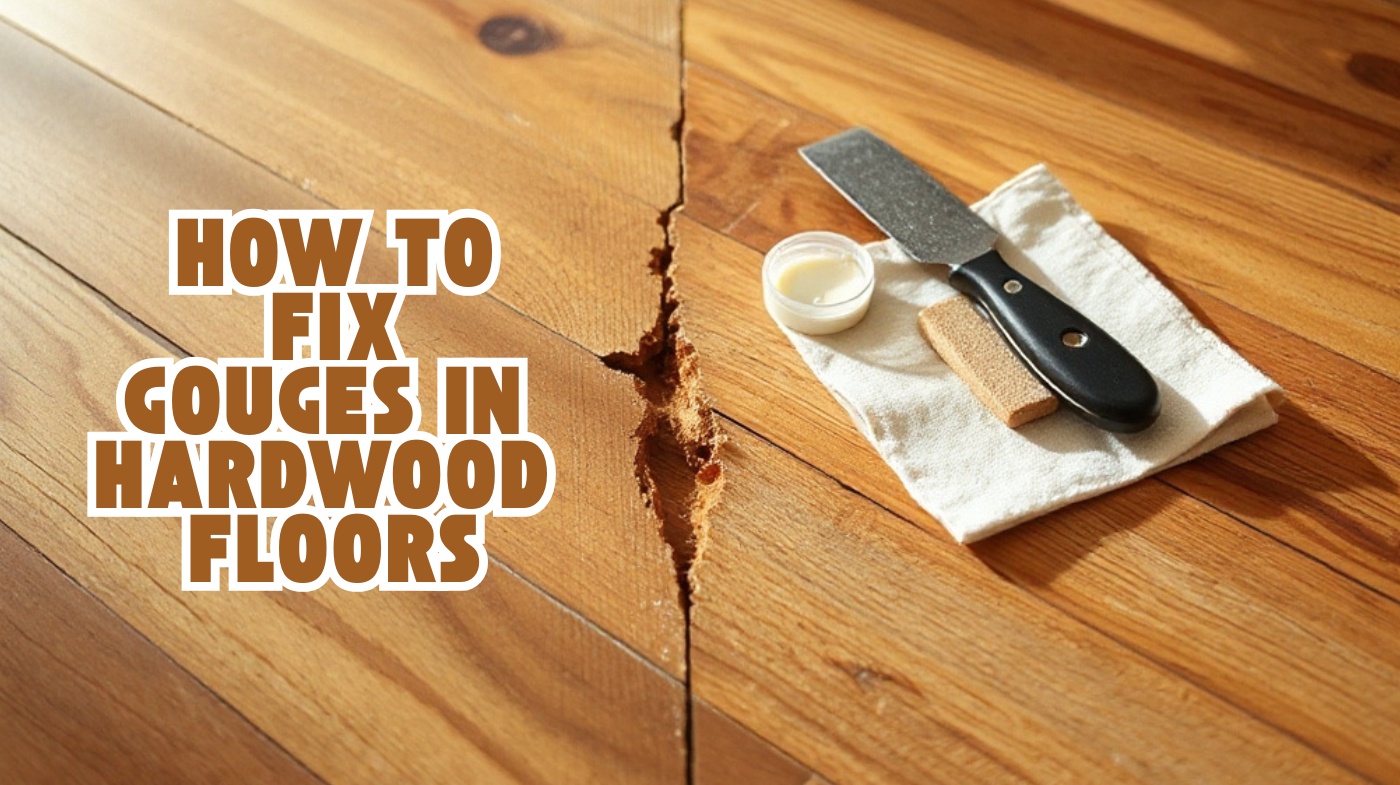
How to Fix Gouges in Hardwood Floors: Long-Lasting Repairs
To fix gouges in your hardwood floor, first assess the damage by checking depth and width. Clean and sand the area lightly to remove debris and rough edges.
Use wax filler sticks for shallow gouges, wood putty for moderate damage, and epoxy for deep gouges, applying slightly beyond the gouge to allow for shrinkage.
After curing, sand smooth along the grain and apply a matching finish. Proper prep and finishing are key for durable repairs, and you can explore advanced techniques to perfect your floor’s appearance.
Key Takeaways
- Assess gouge depth and clean the area by removing debris, trimming edges, and sanding lightly along the grain.
- Choose repair material based on gouge severity: wax filler sticks for shallow, wood putty or epoxy for deeper gouges.
- Apply filler generously, overfilling slightly, then smooth and allow proper curing time before sanding.
- Sand the repair flush using progressively finer grits, maintaining grain direction, then wipe clean before finishing.
- Blend repaired area by buffing and applying matching stain or finish coats for a seamless and durable repair.
Identifying the Severity of Hardwood Floor Gouges
When evaluating hardwood floor gouges, you first need to distinguish them from superficial scratches by examining their depth and width, since gouges remove chunks of wood and penetrate beneath the finish and stain layers.
Use calipers or inspect under strong lighting to measure gouge dimensions accurately. Depth indicates severity: shallow gouges affect only the surface, while deep gouges expose bare wood and risk moisture infiltration.
Assess width, too wider gouges require more filler and precise repair. Visually and by touch, look for splintered edges, removed wood, and texture changes. Categorize gouges as minor, moderate, or severe based on these factors.
Because sweeping hardwood floors regularly helps reduce dirt and debris buildup, it plays a role in minimizing surface damage. This classification guides your repair approach, whether filling, sanding, or professional refinishing, ensuring you address both appearance and structural integrity effectively.
To prevent further damage, implement prevention tips such as using furniture pads and placing rugs in high-traffic areas to reduce the risk of new gouges forming.
Selecting the Right Repair Materials for Gouges
Although selecting the right repair materials depends largely on the gouge’s depth and location, you must prioritize compatibility with your hardwood floor’s species, finish, and existing damage severity.
Choosing repair materials hinges on gouge depth, location, and hardwood species compatibility for effective restoration.
For deep gouges, use wood putty or professional glue gun kits for strong adhesion and layered filling. It is essential to clean and sand the damaged area before applying any filler to ensure proper adhesion and a smooth finish preparation steps.
Using materials that maintain the wood’s fire retardant properties can be important in certain building codes. Shallow gouges respond well to wax filler sticks that quickly fill and match colors. Ensure color matching under different lighting and choose fillers tailored to your wood’s grain, open or tight.
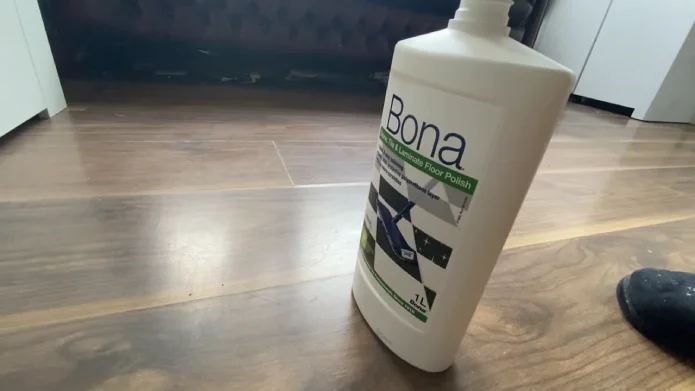
Consider finish type; polyurethane-based fillers suit water-based finishes. Avoid overly soft fillers to prevent cracking under foot traffic. Equip yourself with a plastic putty knife for application and a soft cloth for blending. Select commercial products like Bona Pacific or Knottec kits for reliable results.
Prioritize durable, compatible materials to guarantee a lasting repair.
Preparing the Gouged Area for Repair
Before applying any repair materials, you must thoroughly prepare the gouged area to guarantee maximum adhesion and durability. Begin by removing loose splinters and wood fragments carefully, then use a vacuum or soft brush to clear dust and fine particles.
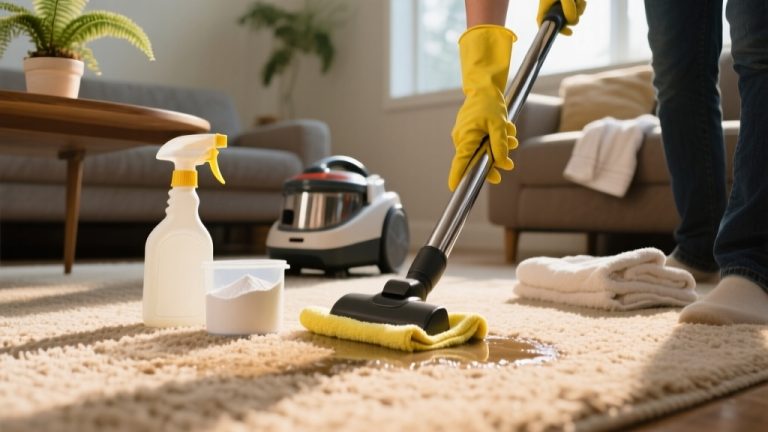
Avoid moisture at this stage to prevent wood swelling. Regular cleaning and vacuuming help prevent dirt buildup that causes scratches and dullness, which can affect the repair quality (Preventative Maintenance).
Using a microfiber cloth during cleaning helps ensure gentle and effective debris removal without damaging the wood surface. Next, trim jagged edges with a fine utility knife or small chisel, and lightly sand along the grain using fine-grit sandpaper to create a uniform surface. Clean sanding dust with a vacuum or tack cloth.
Ensure the area is completely dry; use a fan or dehumidifier if necessary. Finally, apply painter’s tape around the gouge to protect adjacent floor sections and create clean boundaries. Confirm the surface is clean, dry, and ready before proceeding with filler application.
Step-by-Step Guide to Using Wax Filler Sticks
To achieve a durable and visually seamless repair, start by selecting a wax filler stick that closely matches your hardwood floor’s color, opting for a slightly darker shade to guarantee a natural blend. Clean the gouged area thoroughly, removing dust and debris
Make sure the defect is free of splinters and rough edges to ensure proper adhesion of the wax filler stick. Rub the wax stick firmly back and forth across the gouge, applying liberally to fully saturate the defect. Multiple passes may be necessary for complete coverage.
Immediately level excess wax with a plastic scraper, using a slicing motion while the wax is slightly dry but not hardened. Use the plastic scraper to remove surplus material after filling. Buff the area gently with a soft rag to smooth and blend.
Finally, inspect under natural light to confirm the fill is flush and visually integrated with the surrounding wood surface.
Applying Wood Putty for Deeper Gouge Repairs
When repairing deeper gouges, you’ll want to select a wood putty that closely matches your floor’s color to guarantee a seamless finish. First, clean the gouge thoroughly to remove dust. It is important to apply the putty generously in multiple directions to avoid air bubbles and ensure complete coverage.
Mix any wood splinters from the damaged area into the putty for natural tonality. Using a putty knife or spatula, press the putty firmly into the gouge, slightly overfilling to compensate for shrinkage during drying.
Spread the putty evenly with your finger before smoothing the excess at a flat angle. Allow the putty to dry fully per the manufacturer’s instructions. Proper finishing and maintenance after drying will help blend the repair with the existing floor and prolong its durability.
Once dry, sand the repair lightly with fine-grit sandpaper until flush with the floor. Wipe off dust with a damp cloth, then apply compatible stains or finish in thin, even coats to blend the repair with the surrounding hardwood.
Using Epoxy to Fix Very Deep Gouges
Although repairing very deep gouges can be challenging, using industrial-grade epoxy offers a durable and effective solution. Begin by thoroughly cleaning and preparing the gouged area to guarantee strong adhesion.
Mixing epoxy with sanding dust or a universal colorant to match your floor’s hue enhances the repair’s appearance and helps it blend seamlessly. Mix epoxy with sanding dust or a universal colorant to match your floor’s hue.
Use a needle-tip applicator to inject epoxy deeply into the gouge, slightly overfilling to compensate for shrinkage. Smooth the surface immediately with a putty knife, then apply weight to keep it flush.
Cover with plastic wrap to control moisture during curing. This quick application process, aided by repair kits, simplifies fixing dents and gouges effectively. Remember to avoid moisture exposure during the curing period to prevent damage to the epoxy coating.
Allow the epoxy to fully cure, typically 24 hours without disturbance. Once hardened, you’ll proceed with sanding and finishing to seamlessly blend the repair into your hardwood floor’s surface.
Techniques for Sanding and Finishing Repairs
Start sanding repaired areas with progressively finer grits to achieve a smooth, even surface that blends seamlessly with the surrounding wood. Proper sanding is crucial because it allows for the removal of old finish layers and prepares the wood for a new polyurethane finish.
Using edge sanders and hand sanding for corners and tight spots, maintaining consistent pressure to avoid visible transition, is essential since proper sanding removes surface imperfections. Vacuum and wipe the area with a tack cloth after sanding to ensure a clean surface for finishing.
Finish by buffing the floor with a rotary buffer to enhance luster and ensure an even finish across the repair. Allow the finish to dry fully and lightly sand between coats if applying multiple layers for a professional, durable result.
Sanding Techniques for Smoothness
Because achieving a smooth, uniform surface is essential for a professional finish, you must carefully select sanding techniques tailored to each stage of repair.
Start with coarse grit (36-40) to remove old finishes and level deep gouges, progressing to medium grit (60-80) to refine scratches, and finish with fine grit (100-150) for a smooth texture ready for finishing.
Maintain sanding direction with the wood grain, use proper pressure, and feather the drum sander to avoid marks. Proper sanding also removes imperfections, ensuring the surface is even before applying finishes.
Using the correct sanding equipment and technique is critical to avoid over-sanding risks that can damage the wood.
| Stage | Grit Range | Technique |
|---|---|---|
| Coarse | 36-40 | Even passes, parallel then angled |
| Intermediate | 60-80 | Moderate pressure, consistent grain |
| Finish | 100-150 | Light pressure, feather edges |
| Equipment Care | N/A | Continuous movement, pad dressing |
Blending and Buffing Methods
When you repair deep gouges in hardwood floors, blending and buffing are essential to achieve a seamless finish. After filling the gouge with colored wood putty or wax filler sticks, guarantee the material slightly overfills the damaged area to compensate for shrinkage.
Once dry, sand the patch flush with the floor, taking care not to oversand the surrounding wood. Use a soft cloth or buffing pad to gently buff the repair, removing excess filler and evening out the surface.
This step enhances gloss and helps the patch reflect light like the original floor. Proper sanding and buffing also help prevent future shifting or warping of the repair.
Finally, apply thin, even coats of varnish or polyurethane, allowing each coat to dry thoroughly. Multiple applications may be needed for deeper gouges to perfectly blend repairs with the floor’s finish. Just ensure that the finish and color match the existing floor to create a seamless look.
Tips for Maintaining and Protecting Repaired Floors
Keep your repaired hardwood floors in ideal condition by dusting regularly with a microfiber mop and cleaning weekly using pH-neutral, non-toxic cleaners designed for wood finishes. Immediately wipe up spills with a dry or slightly damp cloth to prevent moisture damage and avoid abrasive or acidic products.
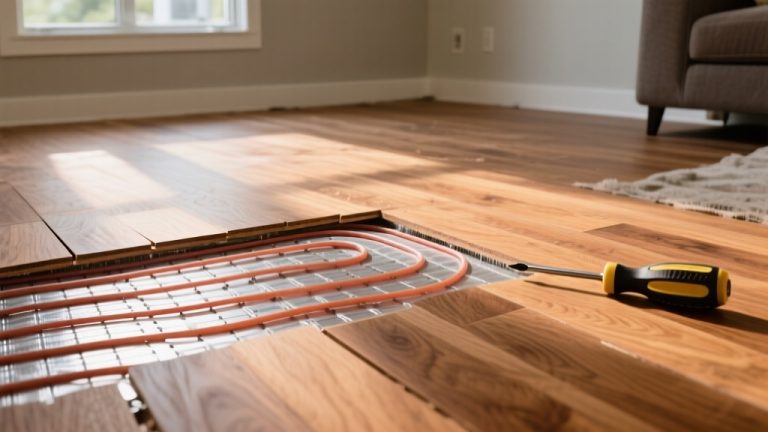
Protect the surface further by using furniture pads, placing rugs in high-traffic areas, and maintaining stable indoor humidity to minimize wear and prevent new gouges. Additionally, using the correct underlayment beneath your hardwood floors can enhance their durability and reduce the risk of damage from subfloor imperfections.
Regular Cleaning Techniques
Although repairing gouges restores your hardwood floor’s surface, regular cleaning plays a crucial role in maintaining and protecting those repairs. Sweep or dust mop daily using microfiber tools to trap dust and prevent scratches.
Microfiber dust mops attract and trap dust, allergens, and dirt via static electricity. Vacuum weekly with a hard-surface-compatible vacuum to remove debris and pet hair, avoiding brooms that merely push dirt around.
Using microfiber mops/dusters is a lightweight and reusable method that efficiently removes dust without damaging the floor finish. Immediately clean spills with a dry or slightly damp cloth to prevent moisture damage.
Mop monthly with hardwood-specific products, avoiding excessive water, wax-based cleaners, or harsh chemicals. Use synthetic cleaners for lacquered floors and mild soap for oiled finishes to maintain integrity.
Regularly remove grit manually to prevent scratching. Control dust by vacuuming beneath furniture and promptly clearing dirt accumulation. These precise cleaning practices will preserve your floor’s repaired surface and extend its lifespan effectively.
Protective Measures Post-Repair
Maintaining the integrity of your repaired hardwood floors requires more than just proper cleaning; it demands targeted protective measures to prevent new damage and preserve repair quality. Install soft furniture pads under legs and walk-off mats at entrances to trap abrasive debris.
Avoid rubber-backed rugs that retain moisture and can degrade finishes. Regular dry-mopping or sweeping helps prevent scratches and keeps floors looking their best, so incorporate this into your routine care.
Control indoor humidity between 35% and 55% using humidifiers or dehumidifiers to minimize wood movement near repairs. Limit direct sunlight exposure with UV-protective coverings to prevent drying and fading.
Adopt gentle usage practices: lift heavy items instead of dragging and avoid high heels on repaired areas. Apply compatible floor polish or wax periodically to protect gouges and maintain appearance.
Regularly inspect repaired spots for wear and schedule professional maintenance as needed to ensure repair longevity. Following specific care guidelines provided with your flooring product can help maintain the finish and extend the life of your flooring.
Frequently Asked Questions
How Long Should I Wait Before Walking on a Repaired Gouge?
You should wait at least 1 to 2 hours before walking on a repaired gouge filled with wood filler or putty to allow proper hardening. If you’ve applied varnish or polyurethane finish afterward, wait 4 to 24 hours for drying, with full curing taking up to 48 hours.
Avoid immediate foot traffic to prevent damage. Always follow the specific product’s drying and curing times for the best, most durable results.
Can I Use Colored Markers to Match Wood Putty Color?
About 70% of wood fillers don’t absorb stain like natural wood, making color matching tricky. You can use colored markers to tint wood putty, but it’s best for small touch-ups, not deep gouges.
Markers often fade and don’t penetrate well, so test on a small area first. For more durable, accurate matches, consider mixing artist oils with filler or using pre-tinted putty designed for your wood stain.
Are There Eco-Friendly Alternatives to Traditional Wood Fillers?
Yes, you can use eco-friendly alternatives like plant-based epoxies (e.g., EcoPoxy), beeswax-infused fillers, or sawdust mixed with natural glues. These options offer durability and low environmental impact.
Water-based fillers such as Timbermate dry quickly and emit low VOCs. Choose fillers with water resistance and non-toxic properties to protect your wood and indoor air quality, especially in homes with children or pets.
How Do I Handle Gouges Near Floor Vents or Irregular Surfaces?
When repairing gouges near floor vents or irregular surfaces, use flexible fillers like wax sticks or colored wood putty to conform to uneven shapes. Clean the area thoroughly, apply filler carefully with small putty knives or fingertips, and avoid excessive sanding to protect the vent fit.
After filler dries, sand lightly and blend stain edges smoothly. Buff gently to make certain a seamless finish without disturbing vent components or creating gaps.
What Safety Gear Is Recommended When Working With Epoxy Fillers?
You absolutely can’t afford to skip safety gear when working with epoxy fillers, it’s like playing with liquid fire and invisible poison! Always wear safety glasses or full-face shields to protect your eyes from splashes and vapors.
Use a respirator with organic vapor cartridges to avoid inhaling toxic fumes, especially in poorly ventilated spaces. Don chemical-resistant gloves like nitrile or butyl rubber to shield your hands, and cover your arms and torso with protective clothing to prevent skin irritation.
Sand and Blend the Repair Seamlessly with Your Floor
So, if you’re aiming for that flawless hardwood floor, remember: ignoring gouges won’t make them disappear, contrary to popular belief, floors don’t fix themselves. By identifying the damage, choosing the right materials, and following precise repair steps, you’ll restore your floor’s integrity efficiently.
Embrace the process, because leaving gouges untreated only guarantees they’ll become the centerpiece of unwanted attention. Now, get to work and save your floors before they save you from walking comfortably.