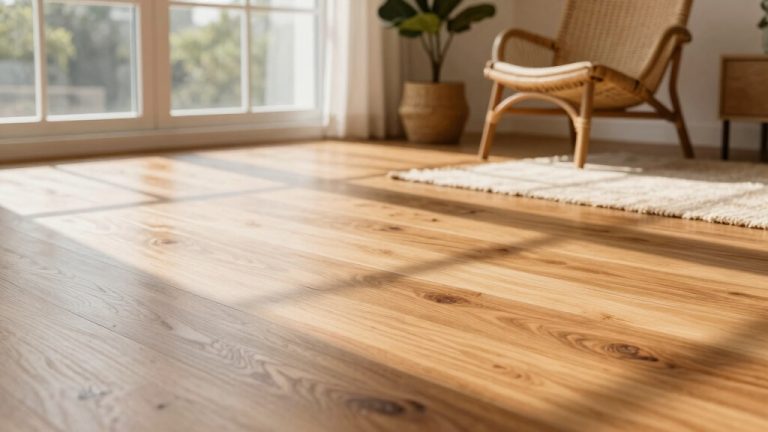
How to Fix Worn Spots on Hardwood Floors: Quick Fixes
To fix worn spots on hardwood floors, first assess the damage type and size, then clear and clean the area thoroughly. For minor scratches, use color-matched stain markers or wood fillers, and for deeper gouges, apply epoxy or wood putty carefully, sanding smooth after curing.
Match the stain and finish precisely, applying multiple coats for durability. Proper preparation and detail guarantee seamless blending. Following these steps sets the foundation for restoring your floor’s appearance and longevity effectively.
Key Takeaways
- Identify worn spots by examining wood species, damage type, and environmental factors affecting color and texture changes.
- Clean and prepare the surface by removing furniture, vacuuming debris, and ensuring the area is dry and dust-free.
- Repair minor scratches with color-matching markers or wax sticks, and fill deeper gouges using wood putty or epoxy resin.
- Lightly sand repair areas, feather edges, and test stain and finish products for color and sheen compatibility.
- Apply stain with a lambswool applicator, wipe excess, and finish with at least two urethane-based topcoats for durability.
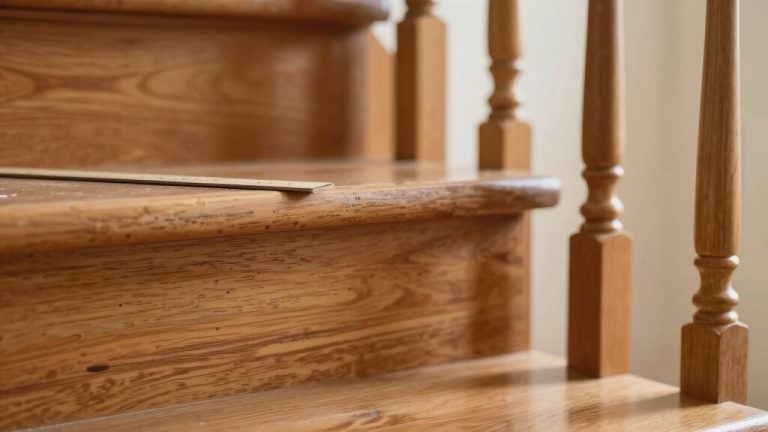
Identifying the Type and Severity of Worn Spots
Before you can repair worn spots on hardwood floors, you need to accurately identify the type of wood and assess the damage’s severity.
Start by examining the wood species: oak features prominent grain lines and rays, maple shows a fine, uniform grain, cherry offers a reddish hue with smooth texture, and walnut appears dark brown with rich grain variation.
Understanding the wood’s composition helps determine its durability and maintenance needs.
Next, observe color and texture changes; faded or discolored areas may indicate wear or moisture damage. Check for surface damage types: minor scratches suggest light wear, deeper dents require fillers, and cracks or warping signal structural problems.
Differentiate between normal wear and tear and damage caused by neglect or accidents to determine the appropriate repair approach.
Assess severity by noting wear patterns and environmental impacts like moisture or sunlight exposure, which influence repair methods. Accurate identification ensures you select appropriate restoration techniques and materials for lasting results.
Assessing the Size and Location of Damage
You need to evaluate the damage severity by accurately measuring worn spots and determining whether spot repairs or full refinishing are necessary.
Understanding the refinishing process helps decide the best restoration method. Assess how the location, such as high-traffic zones or moisture-prone areas affects both the urgency and method of repair.
Because moisture can cause wood floors to swell and deteriorate, consider underlying moisture levels when assessing damage in water-damaged flooring. This targeted assessment guarantees you select the most effective and durable restoration approach.
Damage Severity Evaluation
When evaluating damage severity, measuring the exact size and pinpointing the location of worn spots is crucial for determining the appropriate repair strategy.
You should categorize damage types scratches, gouges, water damage, cracks, or stains, and assess whether they’re superficial or compromise structural integrity. Identifying whether damage is minor, such as surface scratches, or major, like deep gouges or structural issues, helps decide between DIY repair and professional intervention.
Consider the type of flooring, as engineered hardwood may have limitations on sanding and refinishing options. Precisely measure affected areas and map their concentration, especially in high-traffic zones versus hidden spaces.
Examine proximity to walls or transitions, as this influences repair methods. Use moisture testing tools to detect hidden issues and compare readings against baseline unaffected wood. Always use a moisture meter to check moisture content before proceeding with any repairs.
Document damage thoroughly with photographs and measurements for accurate analysis. Finally, evaluate potential safety risks, repair feasibility, and impact on aesthetics and property value to decide if professional intervention is necessary or if DIY repair suffices.
Spot vs Full Repair
Accurately determining whether to pursue spot repair or a full refinishing hinges on analyzing the size and location of the worn areas identified during damage severity evaluation.
If damage is isolated such as deep scratches or small water stains affecting less than 25% of the floor—you can opt for spot repair. This approach is cost-effective, minimally invasive, and faster, provided the finish hasn’t deeply penetrated and can be matched accurately.
Spot repairs preserve most of the existing floor, fixing specific problem areas. For transitions between repaired sections and untouched areas, using transition strips can help maintain a seamless look and protect edges.
However, when wear is extensive, widespread across high-traffic zones, or involves multiple damaged spots, full refinishing becomes necessary to restore uniformity and durability.
Full refinishing incurs higher costs and requires significant preparation, but ensures consistent color and finish, extending the floor’s lifespan. Your decision should weigh damage extent, finish condition, budget, and tolerance for disruption.
A professional assessment can determine if the damage extends beyond the surface and if boards have sufficient wear layer for refinishing, ensuring the most suitable repair option is chosen based on professional assessment.
Location Impact Considerations
Although evaluating worn spots on hardwood floors involves multiple factors, the size and location of the damage play a critical role in determining the appropriate repair method.
Damage in high-traffic zones like hallways demands more frequent refinishing, while worn spots in visible rooms require meticulous color matching. Protecting your floor from physical damage by using pads and rugs can reduce the occurrence of such worn areas.
Identify the type of hardwood floor finish, as this affects the choice of cleaning and repair techniques, especially for stained or damaged spots that require gentle treatment with polyurethane finishes.
Small surface scratches under furniture may be harder to access but typically need only light sanding or restorers. Larger damage centrally located often calls for full plank replacement or extensive refinishing to maintain uniformity.
Environmental factors such as proximity to moisture sources or HVAC vents affect repair urgency and material selection. Assessing these variables helps you choose between spot repairs, partial refinishing, or full replacement, ensuring durability and aesthetic consistency aligned with flooring type and homeowner expectations.
Preparing the Surface for Repair
Before you begin repairing worn spots on hardwood floors, you need to thoroughly prepare the surface to guarantee a durable and seamless finish. Start by removing all furniture and rugs to clear your workspace.
Assess the damage to determine whether minor or extensive repairs are required, noting any unevenness, gaps, or deep scratches. It is important to determine whether damage is localized or widespread to decide between repair or replacement.
Cover vents and doorways with plastic sheeting to contain dust during sanding. Proper dust containment helps maintain air quality and protects other areas during floor preparation. Next, vacuum and sweep the floor to eliminate debris that could affect the repair.
Inspect for old finishes that may need removal. Understanding the finish curing time can guide you on when to safely proceed with refinishing steps. Equip yourself with protective gear, including masks and gloves.
Finally, prepare sanding tools, ensuring they’re functional and appropriate for the task. This precise preparation sets the foundation for effective sanding and refinishing, ensuring ideal adhesion and a smooth final appearance.
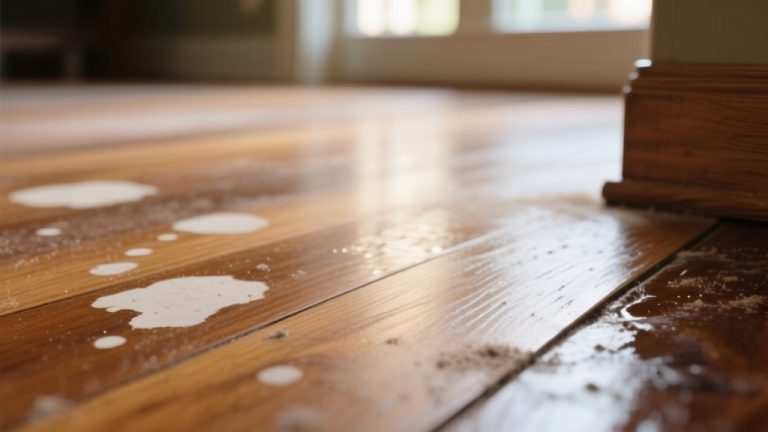
Cleaning Techniques Before Refinishing
Once the surface is properly prepared and free of furniture, cleaning the hardwood floor thoroughly becomes your next priority to guarantee ideal adhesion of stains and finishes.
Begin by vacuuming with a soft brush attachment to eliminate loose debris without scratching. Follow this by wiping with a dry microfiber cloth to capture residual dust that vacuums miss. This initial cleaning is critical as floors are often in dire need of cleaning and buffing before refinishing.
Use a pH-neutral cleaner to avoid damaging the wood or finish during this process. Avoid excessive moisture; use a damp mop or microfiber cloth with a mild cleaner, preferably a mixture of equal parts white vinegar and warm water, to prevent wood damage or uneven texture.
Key cleaning steps before refinishing:
- Vacuum and microfiber wipe to remove dust thoroughly.
- Use gentle, hardwood-specific cleaners without harsh chemicals.
- Mop lightly in wood grain direction, avoiding standing water.
Repairing Minor Scratches and Light Wear
When you notice minor scratches and light wear on your hardwood floors, accurately evaluating their depth is vital to selecting the appropriate repair technique.
Surface scratches affect only the finish and can often be treated with commercial scratch removers or color-matching stain markers and wax sticks. Using products like DAP Wood Blend Sticks, which come in various colors, can help match floor color effectively and fill in scratches for a seamless look.
For slightly deeper scratches that penetrate the finish, apply wood filler, smooth with a putty knife, lightly sand once dry, then seal. It is important to allow the stain or filler to dry completely, considering the type of wood and environmental conditions to ensure proper adhesion.
Natural remedies like raw walnuts or coconut oil offer cost-effective options for light surface damage but require prior cleaning and repeated use. Buffing with fine-grit sandpaper followed by polishing restores shine and reduces minor flaws.
Always thoroughly clean and dry the floor before repair to guarantee adhesion and avoid worsening damage. Consistent maintenance prevents scratch progression and prolongs floor life.
Fixing Deeper Gouges and Larger Damaged Areas
When addressing deeper gouges, you’ll need to use wood putty or epoxy resin to fill the damaged area completely. This ensures a flush surface after curing. Mix epoxy with colorant to match the floor and slightly overfill the gouge to allow for sanding.
For larger damaged sections, sanding and refinishing the entire affected plank may be necessary to achieve a uniform appearance. Proper color matching and finish application are essential to seamlessly blend repairs with the existing floor.
Additionally, sealing or finishing the repaired area helps protect and maintain the floor’s durability over time.
Filling Deep Gouges
Although small surface scratches can often be repaired with simple methods, filling deep gouges requires careful material selection and preparation to restore your hardwood floor’s integrity.
Start by thoroughly cleaning the gouge to remove dust and debris, guaranteeing peak adhesion. Choose an appropriate filler—epoxy resin or wood putty—that matches the color precisely using universal colorants or premixed fillers.
Slightly overfill the gouge to compensate for shrinkage during drying. Use putty knives or plastic scrapers to press the filler in and level the surface. Selecting a filler with good durability & water resistance helps ensure the repair lasts longer, especially in moisture-prone areas.
Key steps include:
- Mixing epoxy with sanding dust or colorant for a custom match
- Allowing full curing per manufacturer instructions before sanding
- Gently sanding with fine-grit paper to blend and prep for finishing
This process ensures durability and seamless integration with your hardwood floor. Knowing the type of damage, such as a deep gouge, is essential for selecting the proper repair method and materials.
Refinishing Large Areas
After filling deep gouges, you’ll need to address larger damaged areas by refinishing the hardwood floor. Start by sanding with a drum sander using coarse grit (40-grit) to remove old finish and scratches, then progress to finer grits.
Use an edge sander for corners. Always sand with the wood grain to avoid damage. Clean thoroughly after sanding and use a tack cloth to remove dust. Apply compatible stains and polyurethane finishes with rollers or brushes, allowing adequate drying between thin coats.
| Step | Key Action |
|---|---|
| Sanding | Coarse to fine grit sanding |
| Surface Prep | Clean, fill gaps, light sand |
| Finishing | Apply stain, polyurethane |
Choosing Suitable Wood Fillers and Stains
Since selecting the right wood filler directly impacts the durability and appearance of your hardwood floor repairs, you should contemplate factors such as filler composition, stain compatibility, and application requirements.
Choosing the right wood filler is essential for durable, seamless hardwood floor repairs.
For small cracks, flexible latex fillers prevent cracking, while medium to large gaps require fillers like Woodwise Full Trowel, compatible with various stains. It is important to choose a wood filler that matches the size of the gap or scratch to ensure a seamless repair.
Color matching is critical; use stainable fillers or mix sanding dust with glue for precision. Key points to consider:
- Choose fillers formulated specifically for hardwood floors to ensure smooth sanding and even stain absorption.
- Verify compatibility with your floor’s existing finish type (oil or water-based) to avoid adverse reactions.
- Test filler color on a hidden area before full application to confirm stain matching and final appearance.
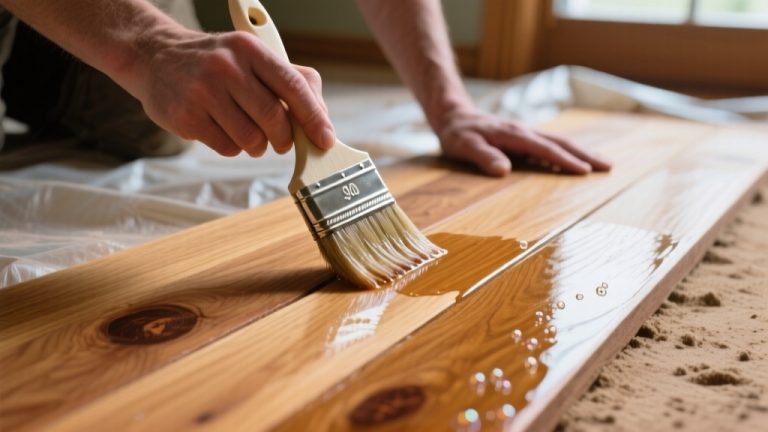
Applying Stain and Protective Finishes
Before you apply any stain or protective finish, prepare the hardwood floor meticulously by sanding it to bare wood, screening to remove scratches, and thoroughly cleaning all dust and debris. It is important to vacuum and wipe down the floor with a microfiber cloth and mineral spirits to eliminate all dust particles before staining.
Next, apply stain with a lambswool applicator, working along the grain in small sections to guarantee even coverage. Allow the stain to penetrate briefly—about one minute—then wipe off excess to prevent blotchiness.
Once dry, apply at least two coats of urethane-based finish for maximum durability, ensuring each coat dries fully—typically 24 hours. Use clean applicators and maintain application direction with the wood grain for smooth, clear results.
Proper curing between stain and finish prevents adhesion issues and uneven appearance, especially when addressing worn spots. This precise approach ensures a durable, professional-quality repair.
Matching Finishes for Seamless Repairs
You need to start by accurately identifying the existing finish type on your hardwood floor to guarantee compatibility. Selecting the right products—whether water-based or oil-based—prevents adhesion issues and color mismatches.
Test the stain and finish on a scrap piece or an inconspicuous area to ensure a precise color match. Apply the finish consistently, using proper tools and techniques, to achieve a seamless repair that blends with the surrounding floor.
Identifying Finish Types
Although identifying the finish type on your hardwood floor can seem challenging, it’s essential for achieving seamless repairs that blend perfectly with the existing surface.
Start by evaluating the sheen and texture: water-based polyurethane appears clear and smooth with satin to semi-gloss shine, oil finishes offer matte or low sheen with natural texture, and wax finishes provide a soft glow with a slightly waxy feel.
Water-based polyurethane is popular because it dries quickly, forming a durable and water-resistant surface once hardened. Key steps include:
- Solvent test: Apply mineral spirits or lacquer thinner on a hidden area to observe finish reaction.
- Water test: Check if water beads (polyurethane/lacquer) or absorbs (oil).
- Visual cues: Note color impact and scratch resistance to differentiate finishes.
Choosing Compatible Products
When selecting products for repairing worn spots on hardwood floors, matching the existing finish type is essential to guarantee seamless integration and long-lasting results. Identify whether your floor has penetrating oil, shellac, oil-based or water-based polyurethane, wax, or acid-cured finishes.
Avoid combining incompatible products; for example, shellac shouldn’t be paired with polyurethane and requires refinishing with shellac or wax.
Consider VOC levels—water-based polyurethane and shellac emit fewer VOCs than oil-based polyurethane. Oil-based finishes typically have a high VOC content and strong odor during application. Match the color and sheen of wood fillers and finishes precisely to the original floor to prevent visible patching.
Also, account for durability needs: oil-based polyurethane offers superior scratch and water resistance, while wax and shellac are less durable. Selecting compatible products guarantees your repair blends flawlessly and maintains the floor’s structural integrity.
Applying Finish Consistently
Since finish consistency directly affects the visual and protective quality of hardwood floor repairs, preparing the surface meticulously is essential. Clean the worn spot thoroughly, sand lightly with fine-grit paper following the grain, and remove all dust.
Feathering edges ensures a seamless blend into the existing finish. Matching the finish type such as matte, semi-gloss, or high-gloss is crucial to maintain visual harmony.
To apply finish uniformly, remember to:
- Use the same finish type and sheen as the original to avoid incompatibility and mismatched gloss.
- Apply thin, even coats along the wood grain, allowing full drying time between layers.
- Lightly sand between coats with ultra-fine sandpaper to eliminate imperfections and promote adhesion.
Tips for Maintaining Hardwood Floors and Preventing Future Damage
To maintain hardwood floors effectively and prevent future damage, you need to establish a consistent cleaning and care routine tailored to the flooring’s specific requirements.
Focus on daily dust removal using soft tools, weekly damp mopping with hardwood-safe cleaners, and seasonal humidity regulation to stabilize wood expansion. Promptly clean spills and inspect for damage regularly.
Avoid water saturation and harsh chemicals to preserve finish integrity.
| Maintenance Aspect | Recommended Practice |
|---|---|
| Daily Cleaning | Sweep with microfiber mop; quick spill cleanup |
| Weekly Routine | Damp mop; vacuum with hardwood-safe device |
| Seasonal Care | Humidity regulation; protective mats |
| Damage Prevention | Prompt repairs; avoid water saturation |
Frequently Asked Questions
Can I Use Household Items to Fix Hardwood Floor Scratches?
Yes, you can use household items to fix minor hardwood floor scratches effectively. Start by cleaning the area thoroughly and drying it completely. Then, apply walnut oil, olive oil with vinegar, or a color-matched crayon or stain marker to fill and camouflage the scratch.
Remember, these methods work best on surface-level scratches and won’t restore protective finishes. Always test products in small, hidden areas to avoid discoloration or damage.
How Long Does It Take for Stain and Finish to Fully Cure?
Imagine your freshly stained wood glowing under soft light—before it’s ready to handle daily life, you need to wait. Water-based stains dry in 3 to 4 hours but take 24 to 48 hours to fully cure.
Oil-based finishes require 6 to 8 hours between coats and up to 7 days to cure completely. Proper curing ensures durability, so let the finish set undisturbed for maximum hardness and longevity.
Is It Safe to Repair Hardwood Floors Myself, or Should I Hire a Professional?
You can safely repair minor hardwood floor damage yourself if you have the right tools, PPE, and knowledge of dust and chemical hazards. However, for extensive wear, deep gouges, or structural issues, hiring a professional is advisable.
They use industrial-grade equipment to minimize health risks and guarantee durable, high-quality results. Assess your skill level, safety precautions, and the damage scope carefully before deciding to DIY or engage a specialist.
What Tools Are Essential for DIY Hardwood Floor Repairs?
Imagine you’re replacing a damaged plank in your living room. You’ll need a circular saw to cut the new wood precisely and a pry bar to remove the old board without harming adjacent pieces.
A drill with a spade bit helps if you need to make holes for fasteners. Sandpaper smooths edges, while wood filler fills gaps. Don’t forget safety goggles and a dust mask to protect yourself during the process.
How Do Humidity and Temperature Affect Hardwood Floor Repairs?
You need to control humidity and temperature tightly during hardwood floor repairs. High humidity causes wood expansion, risking buckling or cupping, while low humidity leads to contraction and gaps.
Temperature swings affect moisture levels, accelerating wood movement and stressing repairs. Stabilize indoor conditions within 35-55% relative humidity before sanding or refinishing.
Use moisture meters to monitor equilibrium, ensuring your repair materials bond properly and the floor remains durable long-term.
Fillers and Finishes: Choosing What Your Floor Deserves
So, if you’re enthusiastic to turn your hardwood floor’s worn spots into a charming “distressed” look, feel free to ignore these steps. But if you actually want flawless, professional results, you’ll identify damage precisely, prep thoroughly, and choose the right fillers and finishes.
Remember, a seamless repair isn’t magic—it’s methodical work. Follow these guidelines, and your floors will thank you by looking pristine, not perpetually “lived-in.”