How to Level a Floor for Hardwood: Smoothing Out Imperfection
To level a floor for hardwood, start by evaluating your subfloor’s condition for moisture, damage, and flatness using a moisture meter and straightedge. Clean and prep the surface thoroughly.
Use appropriate leveling compounds cement-based for concrete, gypsum-based for wood and apply them evenly after priming. Check for uneven spots with laser levels, then smooth as needed.
Leave proper expansion gaps for wood movement. Confirm environmental conditions are stable before installation. Below, you’ll find detailed guidance to nail each step perfectly.
Key Takeaways
- Inspect and prepare the subfloor by cleaning, removing debris, and checking moisture levels between 6%-12% for plywood/OSB.
- Use laser levels or straightedges to identify floor irregularities and mark high and low spots accurately.
- Correct low spots with self-leveling compounds and grind down high spots to achieve a flat surface within 3/16 inch deviation over 10 feet.
- Leave appropriate expansion gaps of 1/4 to 3/4 inch around room edges to accommodate wood movement and ensure proper acclimation.
- Allow leveling compounds to fully cure (4-24 hours) in controlled temperature and humidity before installing hardwood flooring.
Assessing the Condition of the Subfloor
Before installing hardwood flooring, you need to thoroughly assess the condition of your subfloor to guarantee a stable and durable foundation.
Start by measuring moisture levels with a moisture meter. Plywood and OSB subfloors should have 6%-12% moisture content, and hardwood must be within 2%-4% of that.
Measure moisture carefully; plywood and OSB should be 6%-12%, hardwood within 2%-4% of that range.
Check for water damage, mold, or rot, as these issues can compromise both the subfloor and flooring. A compromised subfloor can cause creaking, squeaking, and gaps in your finished floor, so it is crucial to address these problems early to ensure flooring stability.
Use lasers or straightedges to verify flatness, ensuring no more than 3/16 inch deviation over 10 feet. Inspect for sagging, warping, cracks, and gaps that indicate structural problems. Finally, confirm the subfloor material’s thickness and condition to support hardwood properly.
Preparing the Subfloor Surface
Once you’ve confirmed the subfloor’s condition and addressed any structural issues, you can focus on preparing its surface for hardwood installation.
Start by removing all floor coverings, nails, and debris. Sweep and vacuum thoroughly, then scrape off any residues. Inspect for low or raised spots; sand or shim as needed to ensure flatness.
It is important to use a moisture meter to test subfloor moisture levels and follow manufacturer guidelines. Check moisture levels and install vapor barriers properly.
When dealing with uneven surfaces, consider using underlayment to create a smooth base for hardwood. Finally, perform a detailed inspection to confirm readiness.
| Step | Action | Purpose |
|---|---|---|
| Removal | Take out baseboards, carpet, nails | Clear workspace |
| Cleaning | Sweep, vacuum, scrape residues | Remove contaminants |
| Leveling | Sand raised areas, shim low spots | Achieve flat surface |
| Inspection & Moisture | Test moisture, install barriers | Prevent future damage |
Selecting and Applying Leveling Compounds
You’ll want to pick a leveling compound that matches your subfloor type and the floor’s unevenness. Floor leveling compounds are typically cement-based Portland compounds used on concrete subfloor.
Apply it evenly using the right tools, following the manufacturer’s guidance for thickness and technique. Then, permit proper curing and drying time to guarantee a solid, smooth base before installing your hardwood.
Proper drying time is essential to prevent damage during subsequent steps such as floor finishing. The cost of these compounds is generally around five dollars per 50-pound bag, making them an economical choice for achieving flat surfaces.
Choosing Compatible Compounds
Although selecting the right leveling compound can seem overwhelming, choosing one compatible with your subfloor and project requirements guarantees a smooth, durable base for your hardwood installation.
Cement-based compounds work well for concrete and wood subfloors, offering cost-effective durability and good flow. If you’re working with wood, gypsum-based compounds are lighter and easier to apply.
Regular maintenance and gentle cleaning, such as vacuuming hardwood floors with appropriate attachments, help preserve the integrity of the floor after installation.
For high-traffic areas, consider polyurethane-based compounds for their flexibility and wear resistance. Epoxy-based compounds provide exceptional strength but demand precise application and higher costs.
Hybrid formulations let you tailor properties for specific needs across various subfloor. Also, factor in setting times: pre-mixed compounds set faster, while dry-mix options give you more control.
Many older homes benefit from using self-leveling underlayment to fill dips and cracks, creating a flat surface suitable for hardwood installation. self-leveling underlayment
Proper Application Techniques
Before applying any leveling compound, thoroughly prepare your subfloor by inspecting for cracks, cleaning debris, and marking uneven spots. For wood subfloors, apply a Henry primer and allow it to dry for 2-3 hours before leveling to ensure proper adhesion.
CSelect a suitable primer for your substrate to improve bonding; apply it evenly with a stiff brush. Control moisture levels during preparation to prevent damage to the floor finish later. Mix the compound precisely per manufacturer instructions for consistency.
Work in small sections, applying the compound with a trowel or squeegee. Use a spike roller to smooth the surface and eliminate air bubbles. Always wear protective gear.
| Step | Key Tip |
|---|---|
| Subfloor Prep | Clean, inspect, mark spots |
| Primer Application | Even coverage, correct type |
| Mixing Compound | Follow exact mixing ratios |
| Applying Compound | Work in sections, smooth out |
Curing and Drying Times
When selecting and applying leveling compounds, understanding curing and drying times is essential to guarantee a stable, safe base for your hardwood floor.
Drying times vary widely from 4 to 24 hours depending on the product and conditions. Remember, each millimeter of thickness generally adds a full day to drying.
If possible, leave it overnight to ensure the compound is fully set before proceeding. Proper drying also helps prevent issues like gaps and warping once the hardwood is installed.
Environmental factors like humidity and temperature play a significant role; high humidity slows drying, while good air circulation speeds it up.
Always follow the manufacturer’s guidelines for drying and curing times. Never install hardwood until the compound is fully cured and moisture tests confirm readiness.
Keep the area dry, avoid foot traffic, and monitor progress closely to ensure your flooring installation rests on a solid, properly cured foundation. Controlling room humidity levels during this phase can significantly improve the final outcome and prevent future floor problems.
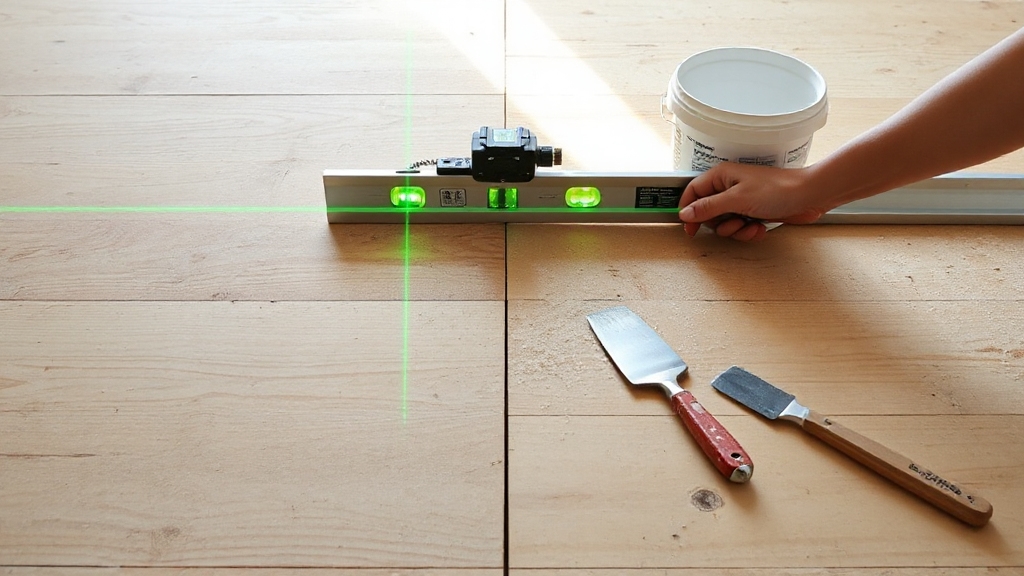
Using Tools to Detect and Correct Uneven Areas
Since uneven floors can cause issues with hardwood installation, you’ll need reliable tools to detect and correct any irregularities accurately.
Start by using a laser level or straightedge to identify high and low spots. A marble test can quickly reveal unevenness, while digital flatness meters provide precise data.
To correct these areas, apply self-leveling compounds for low spots and use grinders to remove high points. Floor jacks and laser-guided systems ensure accuracy during adjustments.
Establish a stable reference point by selecting a wall on a concrete foundation and setting the laser level there to find the point of truth. Proper floor leveling is essential to avoid problems during hardwood floor refinishing.
| Detection Tool | Purpose |
|---|---|
| Laser Level | Projects level reference line |
| Straightedge | Measures surface deviations |
| Digital Flatness Meter | Provides precise flatness data |
| Marble Test | Simple unevenness indicator |
Managing Expansion Gaps for Hardwood Flooring
Although hardwood floors add timeless beauty to your space, you’ll need to manage expansion gaps carefully to guarantee lasting performance. These gaps, usually between 1/4 and 3/4 inch, accommodate seasonal expansion and contraction caused by humidity changes.
Solid hardwood demands larger gaps than engineered wood due to greater movement. Calculate the gap based on room size, board width, and manufacturer guidelines for example, red oak expands about 1/16 inch per foot across the grain.
Leave gaps around fixed objects like baseboards, using spacers to maintain consistency during installation. Cover gaps with quarter rounds or trim, but avoid filling them with materials that restrict movement.
Neglecting proper expansion gaps can cause buckling or crowning, so plan and install them precisely to ensure your floor remains stable and beautiful for years. Additionally, choosing low-emission flooring options can contribute to healthier indoor air quality during and after installation.
Performing Final Checks Before Installation
Before you start installing, double-check moisture levels in both the subfloor and hardwood boards using a reliable meter to prevent future warping.
Regular inspection helps identify moisture-related damage and installation issues, with professional help recommended if problems are found. Proper acclimation duration is essential to ensure the flooring adjusts to the room’s conditions and prevents warping or buckling.
Make sure the room’s temperature and humidity are within the manufacturer’s recommended range to guarantee proper acclimation. Finally, gather all necessary tools and materials so you’re fully prepared to work efficiently and accurately.
Moisture Level Verification
When you’re ready to install your hardwood floor, verifying moisture levels is an essential final step to avoid costly issues later. Use a pinless meter with sensor pads to scan the subfloor and hardwood surface, ensuring you test every 1,000 square feet or at least three spots per room.
Take multiple readings with a pinless moisture meter to ensure accuracy and avoid damaging the wood surface. Input the correct wood species on your meter for accurate readings, and compare moisture levels between the subfloor and hardwood.
If levels exceed manufacturer guidelines, delay installation and address moisture sources. Ideally, moisture content should be within the acceptable range of 6% to 9% for hardwood floorboards to prevent warping or gaps.
Record all readings for quality control. Regularly calibrate your meter and follow its instructions closely. Avoid pin-type meters to prevent surface damage unless depth measurement is necessary.
Proper moisture verification protects your investment, ensuring a stable, durable hardwood floor. Additionally, be cautious to avoid excessive moisture exposure during the installation process to prevent long-term damage to your hardwood flooring.
Temperature and Humidity
After confirming moisture levels, you’ll want to verify that the temperature and humidity at the installation site fall within the ideal ranges for hardwood flooring. Maintain temperatures between 60 and 80 degrees Fahrenheit, aiming for around 68 degrees for best results.
Consistency is key fluctuations can cause wood to expand or contract, leading to gaps or warping. Keep relative humidity between 30% and 50%, ideally near 45%, to prevent cracking or swelling. These ranges align with the optimal environment for solid wood flooring and match human comfort levels.
Use a hygrometer to monitor these levels closely. If needed, adjust conditions with humidifiers, dehumidifiers, or HVAC settings. Proper installation includes accommodating natural movement with expansion gaps, which help prevent future damage caused by environmental changes.
Ensure continuous air circulation by running fans or HVAC systems to avoid stagnant air. Proper environmental control before installation minimizes future floor issues and guarantees your hardwood performs well over time.
Tools and Materials
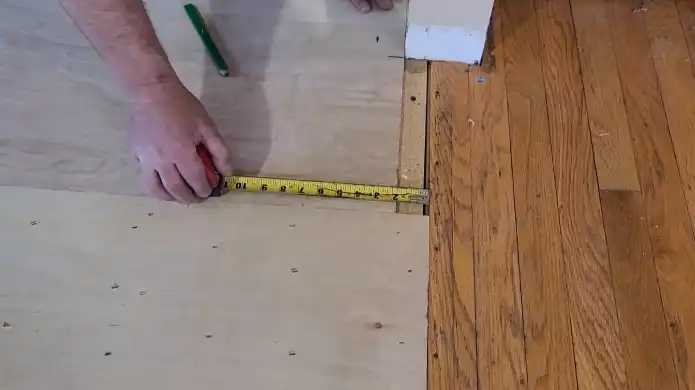
Since accuracy and safety are paramount, gather all necessary tools and materials before starting your hardwood floor installation. You’ll need preparation tools like a measuring tape, chalk line, pry bar, hammer, and level to ensure precise measurements and a perfectly flat surface.
Don’t forget safety gear: goggles, ear protection, knee pads, dust mask, and steel-toed boots to protect yourself throughout the process. It’s also important to use a vacuum cleaner to thoroughly clean the subfloor before installation.
For cutting, have a handsaw, miter saw, or circular saw ready to trim boards accurately. Secure boards with a nail gun or stapler, wood glue, and approved adhesive applied evenly with a trowel.
Before laying flooring, perform final checks using a moisture meter, install underlayment with spacers for expansion gaps, and secure it with tape. A tapping block will help you fit boards tightly without damage.
Frequently Asked Questions
Can I Level a Concrete Subfloor the Same Way as Plywood?
You can level both concrete and plywood subfloors using self-leveling compounds, but the process differs. Concrete needs heavy-duty, moisture-resistant compounds and thorough cleaning for proper bonding.
Plywood requires moisture protection and sometimes additional underlayment layers for stability.
So, while the general approach is similar, you’ll modify materials and prep based on the subfloor type to guarantee durability and smoothness. Always consider moisture and load capacity differences.
How Long Should Hardwood Acclimate Before Installation?
You should acclimate hardwood flooring for at least 3 days to several weeks, depending on your home’s environment. Always stack planks with spacers to allow air circulation on all sides.
Even if moisture levels seem close, don’t skip a minimum 48-hour acclimation. Regularly check moisture content until it matches the subfloor within 2%. This step prevents warping and guarantees a stable, long-lasting installation.
What Safety Precautions Are Needed When Sanding the Subfloor?
Imagine dust swirling like a silent storm when sanding your subfloor, you can’t ignore safety. You’ll want to wear a dust mask or respirator to protect your lungs, goggles to shield your eyes, and gloves to guard your skin.
Ear protection is a must to block loud noise. Plus, steel-toed boots keep your feet safe from heavy tools. Always ventilate the area well by opening windows and using fans to keep air fresh.
Can I Install Hardwood Over Radiant Heating Systems?
Yes, you can install hardwood over radiant heating systems, but you need to choose the right materials and follow proper procedures. Engineered hardwood works best due to its stability and resistance to warping.
Acclimate the wood to your home’s environment beforehand, maintain consistent humidity levels, and keep the heating system at moderate temperatures.
Proper subfloor preparation and professional installation ensure efficient heat transfer and prevent damage, so don’t skip these essential steps.
How Do Seasonal Humidity Changes Affect Floor Leveling?
Seasonal humidity changes cause wood to expand and contract, affecting floor leveling. High humidity can make boards swell, causing buckling or uneven surfaces.
Low humidity leads to contraction and gaps. You’ll want to control indoor humidity between 35-55% and acclimate your hardwood for at least 7-14 days before installation.
Using humidistats or dehumidifiers helps maintain stability, preventing warping or cupping that can compromise your floor’s flatness.
Leave Room to Breathe: Creating Expansion Gaps for Wood Floors
Now that you’ve leveled your floor, you’re setting the stage for hardwood that’ll stand the test of time. Think of this process as laying a solid foundation for a masterpiece; skipping steps only leads to cracks and creaks later.
Stay sharp with your tools, apply compounds evenly, and don’t forget those expansion gaps. With these final checks, your floor will be as smooth as glass and ready to impress.