How to Refinish Hardwood Table? Step-by-Step Guide
To refinish your hardwood table, start by thoroughly cleaning and sanding the surface to remove the existing finish and smooth imperfections.
Repair any cracks or dents with wood filler, then test and apply your chosen stain evenly along the grain.
Once dry, select an appropriate protective finish, either oil or water-based, and apply multiple thin coats, sanding lightly between each.
Proper drying and curing are essential for durability. Following these steps guarantees a flawless restoration, with detailed techniques available to help perfect each stage.
Key Takeaways
- Clean and sand the hardwood table surface progressively from 150 to 220 grit, always sanding with the grain and removing dust between steps.
- Remove any existing finish using chemical strippers, heat guns, or scrapers, then clean residue thoroughly before sanding.
- Repair surface imperfections with appropriate wood filler, sand smooth, and ensure flawless repairs before staining.
- Test and apply wood stain evenly with a lint-free rag or foam brush, wiping off excess and allowing adequate drying time between coats.
- Choose and apply a compatible protective finish only after the stain is completely dry, ensuring dust-free surfaces and proper ventilation.
Preparing the Hardwood Table Surface
Before you begin refinishing your hardwood table, you’ll need to thoroughly prepare the surface to guarantee ideal adhesion and a flawless finish.
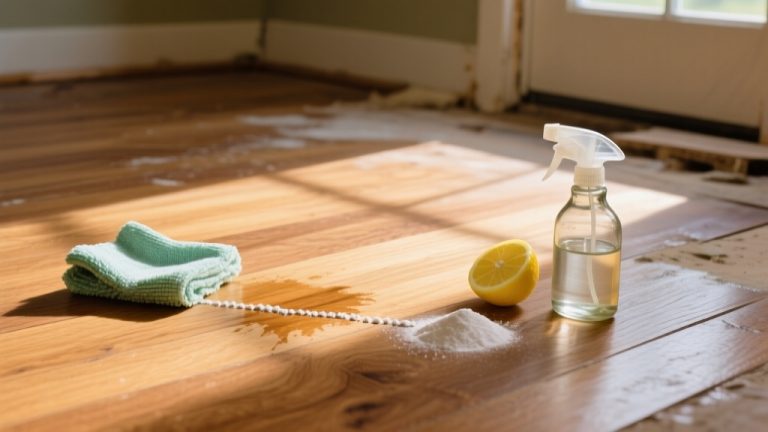
Start by cleaning the surface with a gentle wood-appropriate cleaner, removing dirt, grease, and grime without using harsh chemicals. Clean along the wood grain, then ensure the surface dries completely. It is important to avoid excess moisture during cleaning to prevent damage.
Next, sand with 150-grit sandpaper to smooth uneven areas, progressing to 220-grit for a polished finish, always sanding with the grain. It is important to start sanding with coarse-grit sandpaper to effectively remove the old finish and prepare the wood properly.
Raise the grain intentionally by wiping the wood with a damp cloth; once dry, lightly sand raised fibers using very fine sandpaper or steel wool.
Remove all dust using a vacuum and tack cloth. Finally, inspect for imperfections, fill cracks, and wipe again to ensure a smooth, dust-free surface ready for staining or sealing.
Removing the Existing Finish
When you refinish a hardwood table, removing the existing finish is a crucial step that guarantees proper adhesion of the new coating. Choose the removal method based on finish type and table condition. Consider these options:
- Apply a chemical stripper evenly, work it into grooves with a wire brush, scrape softened finish, then neutralize residue and dry for 24 hours. It is important to wear safety equipment such as nitrile gloves and a respirator during this process to protect yourself from harmful chemicals. Proper ventilation is also essential to minimize exposure to fumes during this step.
- Use a heat gun to soften thick varnish, scraping carefully while avoiding wood scorching or fire hazards. This method requires caution to prevent damage to the hardwood surface and maintain the integrity of the wood grain.
- Employ a flat scraper for thick, peeling polyurethane finishes on solid wood, using steady pressure to prevent gouges. Using the right tools and technique helps preserve the hardwood beneath while effectively removing the finish.
- Opt for soda-blasting to remove finish efficiently, especially in detailed areas, but ensure proper technique to avoid surface damage. Soda-blasting can be combined with vacuuming hardwood floors methods to efficiently manage dust and debris during cleanup.
Thoroughly clean all residue to prepare for sanding and refinishing.
Sanding Techniques for Hardwood Tables
Although removing the existing finish prepares your hardwood table for refinishing, sanding is essential to create a smooth, even surface that guarantees proper adhesion of stains and sealants.
Removing old finish is just the first step; sanding ensures a smooth surface for lasting stain and sealant adhesion.
Start with coarse grit (80) sandpaper, sanding diagonally to eliminate old finish and surface irregularities. Progress to medium grit (120-150) to remove scratches, then finish with fine grit (220+) along the grain for smoothness. It is important to work outside when possible, as this is the best location to minimize dust accumulation.
Use an orbital sander for flat areas, switching to hand sanding or detail sanders for edges and curves. Apply steady, even pressure, letting the abrasive do the work. Using soft cleaning tools after sanding helps preserve the wood’s integrity before finishing.
Frequently wipe dust with a tack cloth to monitor progress and prevent contamination. Sand evenly to avoid blotches and avoid over-sanding veneer tops to maintain integrity.
Always wear protective gear and ensure proper dust removal before finishing.
Repairing Surface Imperfections
When it comes to repairing surface imperfections on your hardwood table, the first step is to really take a good look at the damage. You want to identify exactly what you’re dealing with—are there scratches, dents, or even cracks? Properly assessing gouge depth will help you determine the best repair approach. Once you have a clear picture, you can choose the right wood filler for the job.
If you have deeper gouges or splits, make sure to apply the filler a bit above the surface. This way, when you sand it down later, everything will be nice and even.
After the filler has cured, grab some medium to fine-grit sandpaper. You’ll want to smooth out those repairs to ensure a flawless finish. This step is crucial before you go ahead and refinish your table. Using products like Restore-A-Finish can help rejuvenate the wood surface without the need for extensive sanding, preserving the table’s original character and charm with minimal effort restore wood finish.
Trust me, taking your time here will really pay off in the end!
Identifying Surface Damage
Since successful refinishing depends on accurately identifying surface damage, you need to conduct a thorough inspection focusing on visible and tactile indicators.
Begin by visually scanning for cracks, holes, discoloration, and mold. Then, run your hand over the surface to detect roughness, swelling, or loose joints. Use additional tools if needed, such as UV light to reveal hidden damage or a moisture meter to assess dampness.
- Identify cracks, holes, and faded finishes indicating pest damage or UV exposure.
- Detect swelling, warping, or mold growth caused by moisture fluctuations.
- Examine scratches, dents, and surface roughness from mechanical impacts.
- Check joints and fixtures for looseness or structural weakness.
This methodical approach ensures you pinpoint all imperfections before proceeding. Additionally, maintaining optimal indoor conditions such as humidity levels can help prevent further moisture-related damage during the refinishing process.
Using Wood Filler
When repairing surface imperfections on hardwood tables, choosing the right wood filler is essential to guarantee a durable and aesthetically consistent result.
Start by cleaning the damaged area thoroughly, removing dust and loose fibers to assure strong adhesion. Testing color matching on scrap or inconspicuous areas beforehand helps achieve a seamless blend with the existing wood.
Select a filler type based on the repair: use Minwax for small, non-structural defects, epoxy for load-bearing or extensive damage, and sawdust mixed with wood glue for color-matched repairs. Epoxy fillers are especially recommended for structural repairs and areas affected by rot due to their durability and water resistance.
Apply filler firmly with a putty knife, pressing into cracks or holes, and remove excess for a smooth finish.
Allow the filler to dry completely, noting that drying times vary by product and repair size. Using a fast-drying wood filler can speed up the repair process and reduce downtime.
After drying, inspect for shrinkage or cracks, applying additional filler as needed to prepare the surface for sanding and finishing.
Smoothing and Sanding Repairs
After filling surface imperfections, you’ll need to smooth and sand the repaired areas to guarantee an even, flawless foundation for finishing.
Begin sanding with 80-grit sandpaper to remove excess filler and any remaining finish. Progress methodically through 120–180 grit to blend edges smoothly, then finish with 220–320 grit to polish the surface without causing scratches. Using an orbital sander can make this process faster and more consistent, especially for larger surfaces. It is also important to ensure the wood is clean and dry before sanding to achieve the best results.
Always sand along the wood grain, using long, even strokes with light pressure to prevent gouges and swirl marks. Vacuum or wipe dust between grits for a clean surface.
Follow these steps:
- Start coarse (80 grit) for major leveling.
- Move to medium grit (120–180) for blending.
- Finish with fine grit (220–320) for polishing.
- Clean dust thoroughly before refinishing.
Selecting and Testing Wood Stain
Although selecting the right wood stain can seem straightforward, it requires careful consideration of factors like wood species, stain base, and desired finish.
Different woods absorb stain uniquely, altering final color and grain visibility. Test stains on a hidden area or scrap to preview true tone under varied lighting.
Choose a stain base: oil-based for deep penetration, water-based for quick drying, or gel for vertical control, aligned with your hardwood and usage needs. It is important to consider natural undertones of the wood to ensure the stain complements its inherent hues.
Consider transparency to balance grain visibility versus coverage.
| Wood Species | Stain Base Options | Transparency Levels |
|---|---|---|
| Oak | Oil, Water, Gel | Transparent, Semi-solid |
| Pine | Oil, Water | Semi-transparent, Solid |
| Maple | Oil, Water, Hybrid | Transparent, Semi-solid |
| Walnut | Oil, Gel | Semi-solid, Solid |
| Teak | Oil, Varnish | Semi-solid, Solid |
Applying Wood Stain Effectively
When you’re getting ready to apply wood stain, the first step is to choose a stain type that works well with both your wood and the specific conditions of your project. It’s super important to make sure everything is compatible to get the best finish possible.
Once you’ve got your stain selected, it’s all about applying it methodically. Using the right tools will help you achieve even coverage and steer clear of any blotching. Nobody wants that! Applying stain along the wood grain and maintaining a wet edge during application helps prevent streaks and ensures a smooth finish.
And don’t forget about the drying conditions! Keeping an eye on them is key to getting that uniform color you’re after.
Plus, it sets you up nicely for sealing the surface afterward. Happy staining!
Choosing the Right Stain
When selecting the right stain for your hardwood table, consider both the type of wood and the environment in which the table will be used.
Different stains offer varying penetration, drying times, and durability. Follow these steps to choose effectively:
- Identify wood type and grain pattern; use pre-stain conditioner for blotch-prone woods like pine.
- Select stain base: oil-based for deep penetration and durability, water-based for quick drying and easier cleanup, gel for vertical surfaces, or hybrid for balanced properties.
- Decide on color intensity: semi-transparent to highlight grain, solid for opaque coverage. Test samples on scrap wood to verify appearance.
- Account for environment: oil-based suits high-traffic areas but requires ventilation; water-based is eco-friendlier for indoor use.
This methodical approach ensures a stain choice that matches wood characteristics and usage conditions.
Stain Application Techniques
After selecting the appropriate stain for your hardwood table, the next step focuses on applying it effectively to achieve an even, professional finish.
Begin by sanding with 150-grit sandpaper along the grain to open pores and smooth imperfections. Sanding to at least 180 grit or finer is recommended to create a smooth surface that improves stain absorption for best results. Using wood that has been properly treated can enhance the durability and safety of your finished piece, especially regarding fire resistance, which is a crucial consideration in some environments.
Then remove dust thoroughly. Stir the stain gently to maintain uniform color.
Use a clean, lint-free rag or foam brush, applying stain in long, horizontal strokes following the grain.
Start at one end and move systematically to maintain a wet edge.
For edges and tight spots, use a small foam applicator.
Avoid heavy coats; apply evenly and wipe off excess with a clean rag along the grain after 5–10 minutes to control saturation.
Work in a well-ventilated area, wearing protective gear to guarantee safety and ideal results, especially since some stains may contain chemicals related to fire retardant treatments.
Managing Stain Drying
Although applying stain correctly is essential, managing its drying time guarantees a durable and professional finish on your hardwood table.
Hardwood stains typically dry to the touch in 4–8 hours and fully cure within 24–48 hours. Environmental factors like humidity and temperature can extend these times, so always adjust accordingly. Good air circulation can help reduce drying time and improve the finish quality. Using insulation materials or ensuring proper ventilation can further optimize drying conditions.
To manage stain drying effectively:
- Apply thin, even coats and wipe off excess promptly to prevent uneven drying or tackiness.
- Wait at least 4 hours between coats, ensuring the first is dry to the touch before reapplying.
- Allow the stain to dry completely overnight before applying a topcoat to avoid adhesion issues.
- Test dryness by lightly touching an inconspicuous area; no color transfer means it’s ready.
Following these steps ensures a consistent, long-lasting finish.
Choosing the Right Protective Finish
Since the protective finish determines your hardwood table’s durability and appearance, choosing the right type is essential.
Oil-based finishes penetrate deeply, enhancing grain with moderate water resistance but emit higher VOCs and dry slowly. They often require careful disposal of oily rags to prevent fire hazards. For surfaces requiring frequent cleaning, consider finishes compatible with low-VOC cleaners to maintain finish integrity.
Water-based polyurethanes dry quickly, emit low VOCs, and provide clear, non-yellowing protection. However, they’re slightly less durable and require multiple coats with sanding between.
Varnishes offer hard, durable coats but dry slowly and are more toxic.
Conversion varnish delivers professional-level hardness and chemical bonding but demands complex application.
Natural oils and waxes enhance grain and offer eco-friendly options but need frequent reapplication and provide limited wear resistance.
Match your finish choice to usage: high-traffic tables benefit from polyurethane or conversion varnish, while decorative pieces can use wax or oils for aesthetic appeal with lighter protection.
Applying Clear Coats and Finishes
Before you apply any clear coat, make sure the stained surface is completely dry. Waiting at least 24 hours helps prevent streaks or smudging.
Stir the clear coat gently; shaking creates bubbles that mar the finish. Remove all sanding dust with a tack cloth before you start.
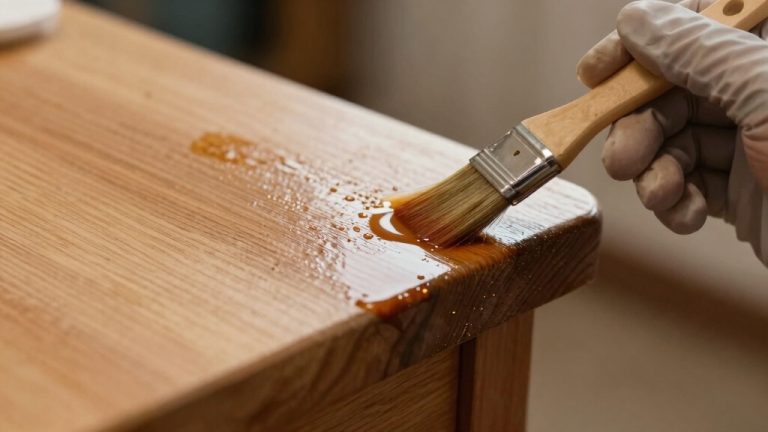
Apply thin, even coats using a high-quality brush or foam applicator, following the wood grain to avoid streaks or bubbles. Here’s a methodical approach:
- Apply the first thin coat evenly, maintaining a wet edge.
- Let it dry fully—20 minutes for water-based, up to 24 hours for oil-based.
- Lightly sand with 220-320 grit sandpaper to smooth and promote adhesion.
- Repeat for at least two to three coats, adjusting for table use. Choosing the right clear coat options like polyurethane or lacquer depends on your project’s needs.
Work in a dust-free, ventilated area at about 70°F for best results.
Final Curing and Maintenance Tips
Once you’ve applied and sanded the final clear coat, the refinished table still requires proper curing time to develop full hardness and durability. Utilizing a penetrating finish like Restora Finish before applying the clear coat can enhance the wood’s color and sheen without extensive sanding.
Depending on your finish, oil-based or water-based, full cure can range from days to up to 30 days. Maintain ideal conditions: 70°F temperature, 50% humidity, and good ventilation.
Full curing time varies by finish type, requiring up to 30 days under optimal conditions of 70°F, 50% humidity, and ventilation.
Avoid placing objects on the surface to prevent damage during curing. Test cure by pressing a fingernail lightly; no indentation means readiness.
Check water repellency to confirm. For daily care, use coasters and clean spills immediately with a soft, damp cloth.
Regular maintenance includes dusting with microfiber cloths and waxing every 6–12 months. Address scratches via light sanding and recoating.
Consistent humidity control avoids finish cracking, ensuring your table remains durable and visually pristine.
Frequently Asked Questions
Can I Refinish a Hardwood Table Without Stripping the Old Finish?
Yes, you can refinish a hardwood table without stripping the old finish. Start by cleaning the surface thoroughly and repairing minor damages.
Use Howard’s Restore-A-Finish with fine steel wool to blend scratches and restore color. Alternatively, apply a gel stain directly over the existing finish for color enhancement.
Afterward, protect the surface with a clear coat sealer like polyurethane. Make certain proper drying and ventilation throughout the process for ideal results.
What Safety Gear Is Recommended During Refinishing?
You need a chemical-rated respirator mask to block harmful fumes. Standard dust masks won’t suffice.
Wear nitrile gloves to protect your skin from solvents, along with splash-proof goggles to shield your eyes from splashes and debris.
Work in a well-ventilated area to disperse vapors.
Using protective clothing and a drop cloth helps contain spills.
Proper fit and maintenance of gear guarantee effective protection throughout refinishing.
How Do Humidity and Temperature Affect the Refinishing Process?
Humidity and temperature critically influence your refinishing results. Too high humidity causes wood swelling and prolongs drying, risking runs and clouding. Too low humidity speeds drying, leading to poor adhesion and cracking.
Temperature outside 60°F to 80°F impairs cure times. Heat dries too fast, causing brush marks; cold slows drying, inviting dust imperfections.
Maintain stable 35 to 55% humidity and 60°F to 80°F temperature to guarantee even finish curing, adhesion, and durability.
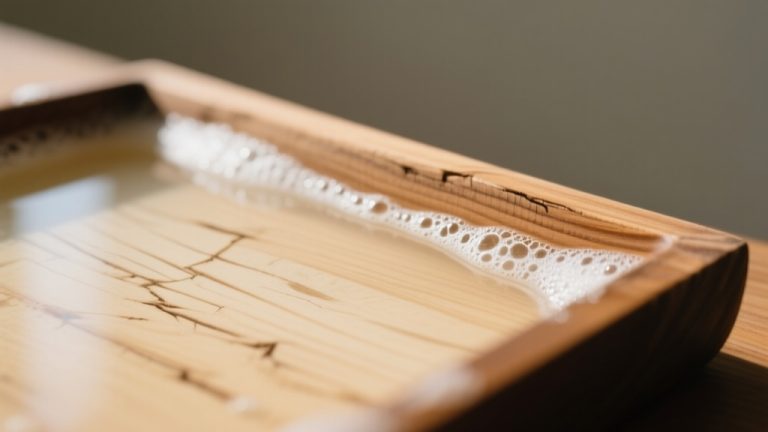
Can I Refinish a Table With Water Damage or Stains?
Yes, you can refinish a table with water damage or stains, but you must first verify it’s completely dry and free of mold.
Use fans or dehumidifiers to speed drying.
Sand the surface thoroughly to remove stains and damaged finish, filling cracks as needed.
Address loose joints by regluing.
Finally, apply protective finishes in thin coats, allowing full drying between layers to restore and safeguard the wood effectively.
What Tools Are Essential for a Beginner Refinisher?
You’ll need an orbital sander for even sanding. Sandpaper in grits 80-220 to strip and smooth. A sanding block is useful for edges.
Use a tack cloth to clear dust afterward.
Chemical stripper and putty knife help remove old finishes and fill imperfections.
For finishing, foam brushes and clean rags apply stain and polyurethane smoothly.
Don’t forget protective eyewear, gloves, and a well-ventilated area for safety throughout the process.
Extend Your Hardwood Table’s Life with Proper Refinishing
Refinishing your hardwood table not only restores its beauty but can also increase its lifespan by up to 20 years when done correctly. By carefully preparing, sanding, staining, and sealing the surface, you guarantee durability and a professional finish.
Remember, attention to detail during each step prevents costly mistakes. Follow proper curing times and maintenance to keep your table looking pristine. Your precision now pays off with lasting quality and enhanced wood protection.