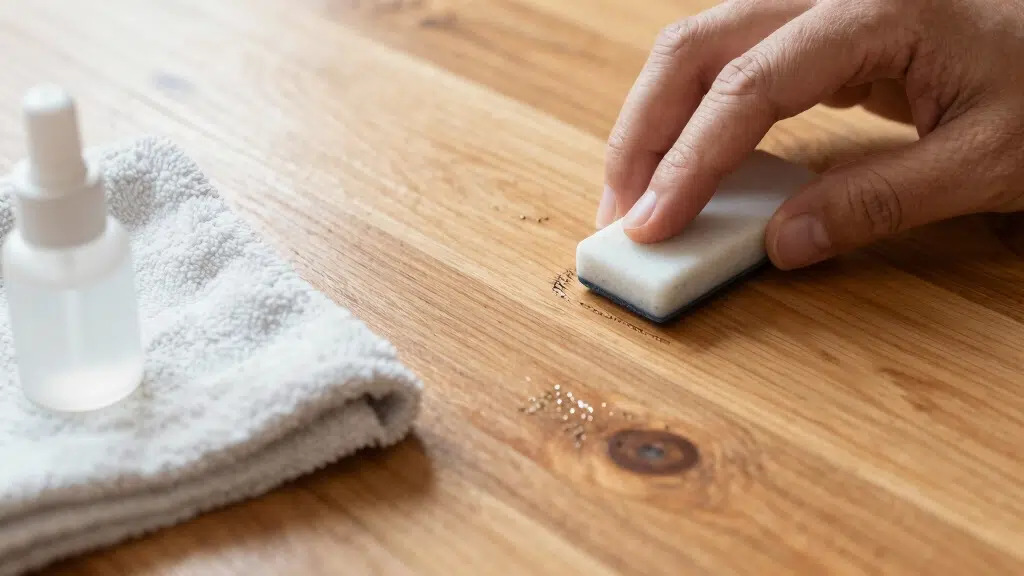
How to Get Scuffs off Wood Floors: Story Beneath Your Feet
To get scuffs off wood floors, start by gently wiping fresh marks with a damp sponge to avoid damage. For tougher scuffs, apply a baking soda paste with a soft cloth, then wipe clean and dry.
Natural solutions like a vinegar and olive oil mix or walnut oil can help conceal scratches without harsh chemicals. Use commercial cleaners like Goo Gone carefully on stubborn spots, testing first.
Protect your floors from future scuffs and learn when professional refinishing might be best for lasting results.
Key Takeaways
- Gently wipe fresh scuffs with a damp sponge in circular motions to lift marks without damaging the wood finish.
- Apply a baking soda paste with a soft cloth, gently scrubbing scuffs before wiping clean and drying thoroughly.
- Use a vinegar and olive oil mix to naturally conceal drag marks by darkening the wood surface, avoiding aggressive rubbing.
- For stubborn scuffs, carefully apply Goo Gone, then clean and dry the area to protect the floor finish.
- Prevent scuffs by using area rugs, felt pads on furniture, removing shoes indoors, and regularly cleaning floors gently.
Removing Fresh Scuff Marks With Water and a Sponge

Usually, the simplest way to remove fresh scuff marks from hardwood floors is by using just water and a sponge.
The easiest method to erase fresh scuff marks on hardwood floors involves only water and a sponge.
You’ll start by dipping a clean sponge into warm water, wringing out the excess so it’s damp, not soaked.
Then, gently wipe the scuffed area in a circular motion, observing as the mark begins to lift.
This method works best on fresh scuffs because the water softens the residue, making it easier to remove without damaging the floor’s finish.
Avoid scrubbing hard or using too much water, as this can harm the wood.
If the mark persists after a few gentle wipes, it’s best to try other treatments.
This approach requires minimal effort and no additional products, making it your first go-to solution.
For ongoing maintenance, regularly using microfiber mops can help keep the floor free of dust and prevent buildup that might contribute to scuffing.
Using Baking Soda Paste for Tougher Hardwood Floor Scuffs
Alright, let’s tackle those tough scuff marks on your hardwood floors! First things first, grab about two tablespoons of baking soda and mix it with some warm water until you have a nice, smooth paste.
Once you’ve got that, take a soft cloth and apply the paste right onto the scuff marks. Just gently scrub away; you’ll see those marks start to fade!
When you’re done, don’t forget to wipe the area clean with a damp cloth. It’s super important to dry it thoroughly afterward to keep that beautiful finish on your hardwood floors. Happy cleaning! To maintain the floor’s integrity, it’s also beneficial to use gentle cleaning methods regularly.
Preparing Baking Soda Paste
Mixing a baking soda paste is a straightforward yet powerful step for tackling tougher scuff marks on hardwood floors.
You’ll need just two simple ingredients to prepare the paste:
- Measure about 2 tablespoons of baking soda into a small bowl.
- Gradually add warm water, a teaspoon at a time, mixing until you get a smooth, spreadable paste.
- Avoid making it too runny; the consistency should be thick enough to stay on the cloth without dripping.
- Prepare a soft cloth or sponge for applying the paste once ready.
This paste is effective in loosening stubborn marks without damaging the wood’s finish.
Having it ready guarantees you can move on quickly to the application phase with confidence.
For best results, use a soft cloth to apply the paste to avoid scratching the floor during cleaning.
Application Techniques
Applying the baking soda paste correctly guarantees maximum effectiveness in removing tough scuff marks from your hardwood floors.
First, use a soft cloth to apply the paste gently in a circular motion directly onto the scuffed area.
Avoid scrubbing too hard to prevent damaging the wood’s finish. Focus on the marks, working the paste evenly to break down the residue.
Once you’ve treated the scuffs, wipe away the baking soda with a clean, damp cloth, ensuring no residue remains.
Finally, dry the area thoroughly with a dry towel to prevent moisture from seeping into the wood. Immediate drying helps preserve the floor integrity and prevents damage caused by excess moisture.
Post-Cleaning Care
Regularly maintaining your hardwood floors after using baking soda paste guarantees the treated area stays clean and damage-free.
After scrubbing tough scuffs with the paste, follow these steps to protect your floor’s finish and extend its lifespan:
- Wipe the area thoroughly with a clean, damp cloth to remove all baking soda residue.
- Dry the floor completely using a soft, dry towel to prevent moisture damage.
- Avoid walking on the treated spot until it’s fully dry to maintain the floor’s integrity.
- Apply a recommended hardwood floor polish periodically to restore shine and add a protective layer.
- Consistent maintenance and proper cleaning routines help prevent residue buildup and prolong the life of your hardwood floors.
How Vinegar and Olive Oil Can Hide Drag Marks?
You’ll want to mix equal parts vinegar and olive oil to whip up a natural solution for those pesky drag marks. Seriously, it’s super easy!
Just grab a bowl, combine the two, and you’re good to go.
Next, apply the mixture directly to the scuffed area. Let it sit for a few minutes—this gives it time to work its magic.
After that, just wipe it off with a clean cloth. You’ll notice that this treatment not only darkens the wood beneath the scratches but also effectively disguises the marks.
And the best part? It does all this without altering the floor’s surface. How cool is that?
For best results, be sure to test on a small area first to ensure compatibility with your hardwood floor.
Vinegar And Oil Mix
A simple mixture of vinegar and olive oil can effectively conceal drag marks on wood floors by darkening the wood beneath the scratches. This natural remedy doesn’t remove the scuffs but masks them, making the damage far less noticeable.
To use this method effectively:
- Mix equal parts vinegar and olive oil to balance the acidity and moisturizing effect.
- Apply the mixture directly to the drag marks, allowing it to soak in for several minutes.
- The vinegar gently cleans while the olive oil nourishes and darkens the wood.
- Wipe off any excess with a clean, soft cloth to avoid a greasy residue.
This technique preserves your floor’s finish without harsh chemicals, offering a quick, natural way to improve appearance. For long-lasting results, maintaining stable indoor conditions and controlling humidity is essential to prevent further damage to hardwood floors due to temperature fluctuations.
Application Process Steps
After preparing the vinegar and olive oil mixture, start by applying it directly onto the drag marks using a soft cloth or sponge.
Spread the solution evenly over the affected area, ensuring full coverage. Let it sit for several minutes to allow the vinegar to penetrate and the olive oil to condition the wood.
This process darkens the wood beneath the scuff, effectively disguising the marks. After the waiting period, gently wipe off the excess mixture with a clean, dry cloth, buffing the surface to restore its natural shine.
Be careful not to oversaturate the floor, as too much liquid can damage the wood. Repeat as necessary for stubborn drag marks, but avoid rubbing aggressively to protect your floor’s finish. For best results, use a microfiber cloth to apply the mixture gently and prevent scratches.
Visual Effects On Wood
When you apply the vinegar and olive oil mixture, it works by soaking into the wood’s surface and altering its appearance to mask drag marks. This solution doesn’t remove scratches but darkens the wood beneath, effectively disguising imperfections.
To use it properly:
- Mix equal parts vinegar and olive oil.
- Apply directly onto the drag marks.
- Let the mixture sit for several minutes to penetrate the wood.
- Wipe off excess with a clean cloth.
This natural remedy enhances the wood’s color contrast, blending the marks with the surrounding floor. It’s a quick, chemical-free way to improve your floor’s look without sanding or refinishing.
Use it regularly to maintain a smooth, polished appearance. Be sure to avoid harsh chemicals and abrasive tools to preserve the matte finish hardwood floors.
Quickly Hide Scratches by Rubbing Walnut Oil
Rub walnut directly over the scratched surface to quickly conceal marks with its natural oils. You’ll find this method works on all types of hardwood flooring and wooden furniture.
Simply take a walnut and rub it along the scuffed area, allowing the oils to absorb into the wood grain. This instantly darkens and blends scratches, making them far less visible.
Unlike chemical products or stains, walnut oil preserves your floor’s existing finish without causing damage or buildup. It’s a fast, minimal-effort solution that doesn’t require any additional tools or cleaners.
Use this natural remedy whenever you want to maintain your floor’s integrity while effectively hiding minor scratches and scuffs in seconds. For best results, ensure the surface is clean and dry before application to avoid trapping moisture, which can affect the hardwood finish.
Using Goo Gone for Stubborn Hardwood Floor Scuff Marks
If you’ve tried natural remedies and still can’t get rid of tough scuff marks, Goo Gone offers a powerful solution designed specifically for stubborn hardwood floor stains.
Before using, test Goo Gone on a hidden spot to make certain it won’t damage your floor’s finish. To apply it effectively:
- Shake the bottle well and apply a small amount directly onto the scuff mark.
- Let it sit for a minute to break down the residue.
- Gently wipe the area with a soft cloth, applying light pressure.
- Clean the treated spot with a damp cloth and dry thoroughly.
Goo Gone works on multiple surfaces, making it ideal when other methods fail. Use it sparingly to protect your floor’s finish while removing aggressive marks.
When to Choose Professional Refinishing or Recoating for Scuffs?
After trying products like Goo Gone for stubborn scuff marks, you may find some damage requires more than surface cleaning.
Sometimes, stubborn scuff marks need more than just surface cleaning to fully repair.
When scuffs penetrate deep or cover a large area, professional refinishing or recoating becomes necessary.
Refinishing involves sanding the floor to bare wood, erasing scratches entirely. It’s best left to experts due to its complexity and dust generation.
Alternatively, advanced recoating processes like ReCoat Revolution offer a quicker, less invasive solution. This method cleans and gently abrades the surface to minimize drag marks.
It usually completes in a single day and costs markedly less than traditional refinishing.
Choose professional services when scuffs resist all DIY methods or when you want to restore your floor’s appearance without compromising its finish or durability.
Tips for Protecting Hardwood Floors From Future Scuff Marks
To prevent scuff marks from marring your hardwood floors, you’ll want to adopt a few key habits and protective measures.
These practices will maintain your floor’s finish and reduce damage over time.
- Use area rugs or mats in high-traffic zones to shield floors from dirt and grit that cause scratches.
- Attach felt pads to chair and furniture legs to prevent dragging marks when moving them.
- Encourage family and guests to remove shoes indoors, limiting abrasive particles that scratch wood.
- Regularly sweep or vacuum with a soft brush attachment to remove debris before it wears down the finish.
How to Test Scuff Removal Methods Safely on Hardwood Floors?
Testing scuff removal methods safely on hardwood floors involves taking careful steps to protect your wood’s finish while evaluating effectiveness.
Start by selecting a small, inconspicuous area to apply your chosen method. Observe the reaction for any discoloration or damage over 24 hours before proceeding. Use gentle pressure to avoid worsening scratches.
| Step | Action |
|---|---|
| Choose Test Spot | Select hidden floor corner |
| Apply Treatment | Use recommended method lightly |
| Wait and Observe | Check for finish changes 24 hrs |
| Assess Results | Decide if safe to continue |
This approach safeguards your floor’s aesthetics, ensuring you remove scuffs without damaging the wood or finish.
Common Mistakes to Avoid When Removing Scuff Marks From Wood
Although removing scuff marks from wood floors might seem straightforward, you can easily make mistakes that damage the finish or worsen the appearance.
To make sure you protect your floor and achieve the best results, avoid these common errors:
- Using harsh chemicals or abrasive tools that strip the floor’s finish or create scratches.
- Applying excessive water or soaking the floor, which can warp or stain wood.
- Skipping patch tests before trying new cleaning solutions, risking discoloration or damage.
- Rubbing too aggressively, which may deepen scratches instead of removing marks.
Frequently Asked Questions
Can Scuff Marks on Wood Floors Cause Permanent Damage?
Yes, scuff marks on wood floors can cause permanent damage if they penetrate the finish or scratch the wood itself.
You’ll want to address scuffs promptly because fresh marks are easier to remove without harming the floor.
If scuffs go untreated, they might deepen, requiring professional refinishing to restore your floor’s appearance.
Taking quick action preserves your floor’s finish and prevents costly repairs down the line.
Are There Any Homemade Alternatives to Commercial Scuff Removers?
Sure, simple solutions like a baking soda paste or a natural mix of vinegar and olive oil offer effective, eco-friendly alternatives to commercial scuff removers.
You can swiftly scrub stubborn scuffs with a baking soda and warm water paste, then wipe clean.
Alternatively, apply the vinegar-olive oil combo to camouflage marks while conditioning wood.
Both methods save money, avoid harsh chemicals, and preserve your floor’s finish with careful, consistent care.
How Long Should I Wait After Cleaning Before Walking on the Floor?
You should wait at least 15 to 30 minutes after cleaning before walking on the floor.
This allows the wood to dry completely and prevents new scuff marks or water damage.
If you used a paste or oil treatment, give it even longer, up to an hour, to fully absorb and set.
Always make sure the floor feels dry and not tacky to protect your wood’s finish and keep it looking pristine.
Will Removing Scuff Marks Affect the Floor’s Warranty?
When it comes to your floor’s warranty, you shouldn’t bite off more than you can chew.
Generally, gentle cleaning methods like water, baking soda paste, or natural oils won’t void it.
However, aggressive sanding or harsh chemicals might.
Always check your warranty terms carefully before trying professional refinishing or specialized products.
If you stick to manufacturer-approved methods, you’ll protect both your floor’s finish and your warranty coverage.
Can Scuff Removal Methods Be Used on Laminate or Vinyl Flooring?
You can use some scuff removal methods on laminate or vinyl flooring, but you need to be cautious.
Gentle approaches like a damp sponge or baking soda paste usually work well without damaging the surface.
Avoid harsh abrasives or oils like walnut oil, as they might harm the finish.
Always test any cleaner in a small, hidden area first to verify it won’t discolor or damage your flooring.
Maintaining the Story and Beauty of Your Wood Floors
Think of your wood floor as a storybook. Each scuff is a character’s mark. By gently removing or disguising these marks, you’re preserving its tale and keeping the wood’s natural beauty alive.
Use the right methods wisely, like a skilled storyteller, and protect your floors to keep new chapters pristine. When in doubt, professional care can help rewrite any stubborn scars.
With care and attention, your floor will continue shining, reflecting the heart of your home.