How to Fix a Hole in Hardwood Floor: Measuring the Damage
To fix a hole in your hardwood floor, first measure its size and clean the area thoroughly. Choose a filler or wood plug matching your floor’s color and species.
For small holes, apply wood filler with a putty knife, then sand smooth. Larger holes may need reshaping and custom plugs glued and clamped in place.
Afterward, sand and apply a matching finish coat for seamless blending. Following precise repair steps guarantees lasting results and flawless appearance, with more detailed techniques available.
Key Takeaways
- Assess the hole size and cause to determine the appropriate repair method and materials.
- Clean and prepare the damaged area by removing debris and sanding edges for better filler adhesion.
- Select and apply a matching wood filler or patch, layering for deep holes and ensuring color match.
- Sand the repaired area smoothly and apply stain and finish to blend with the surrounding floor.
- Protect the repair with multiple thin coats of appropriate finish and maintain humidity to prevent future damage.
Assessing the Size and Type of the Hole
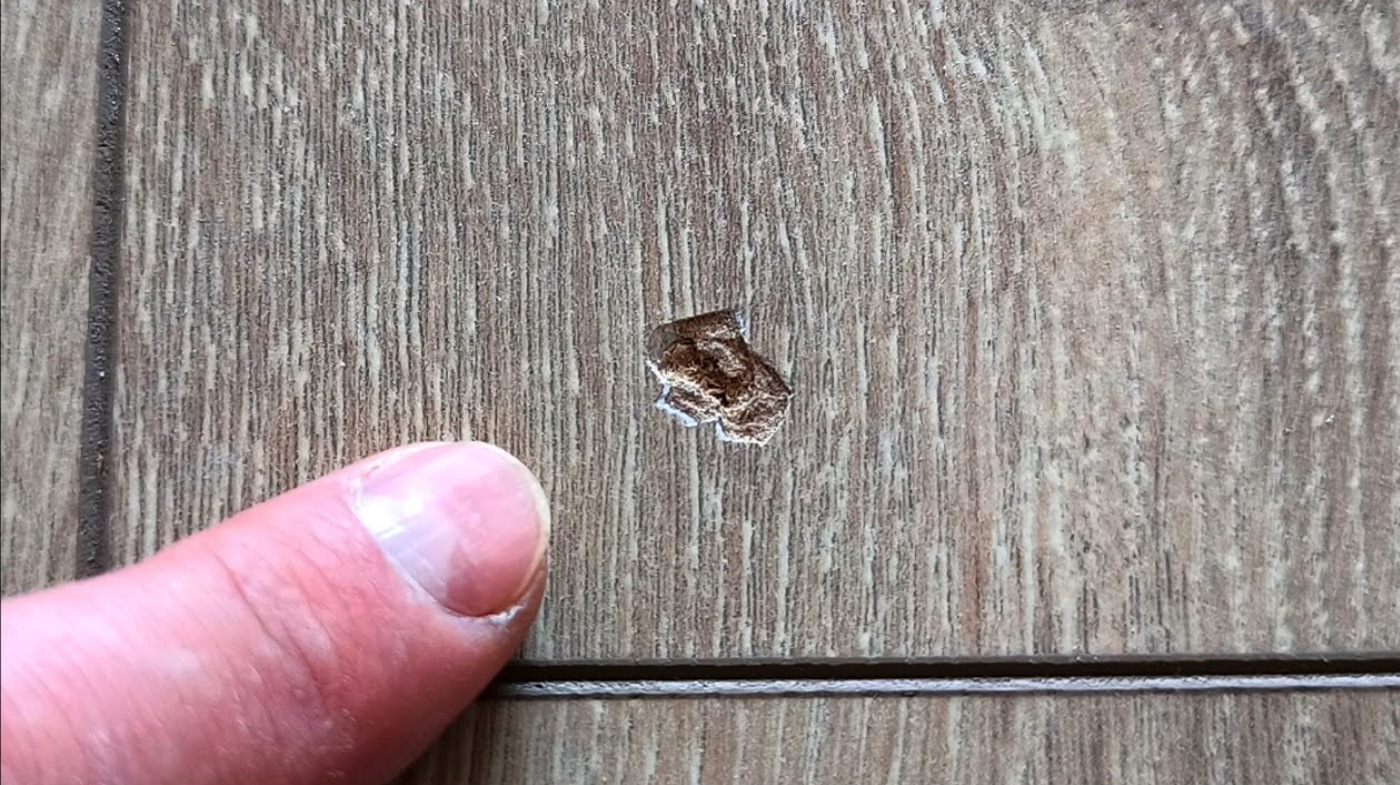
Before you start repairing, you need to accurately assess the size and type of the hole in your hardwood floor. Use a measuring tape or digital calipers to determine diameter: Pin holes are barely visible, small holes measure a few millimeters, medium holes extend up to 1 inch, and large holes exceed 1 inch.
Identify the cause—removed fasteners, impact damage, knots fallen out, or insect activity—by inspecting shape and surrounding wood condition with a flashlight or inspection mirror. Note gaps or cracks separately, as they require different approaches.
Proper floor preparation, including refinishing, can help prevent further damage and facilitate easier repairs. Document hole location and size with photos and sketches. Assess structural impact, especially for holes over 1 inch or clustered openings near joists.
Accurate evaluation guarantees proper repair planning and preserves floor integrity. Large holes may indicate underlying structural issues affecting the floor’s stability and should be addressed promptly. Ensuring the floor is fully dried before repairs is crucial to achieve a durable and visually cohesive fix.
Selecting the Right Repair Materials
Choose repair materials based on the hole’s size and location, selecting from latex fillers, solvent-based options, or wood putties. Make sure your filler matches the floor’s color precisely to maintain a seamless appearance.
Proper material selection and accurate color matching are critical for durable, visually consistent repairs. For larger or deep repairs, it is often best to apply filler in layers to ensure complete filling and durability, especially when working with products like Glitsa Wood Flour Cement that require mixing in layers.
Additionally, addressing underlying causes such as water damage or subfloor issues before repair helps prevent future problems.
Material Types Overview
Selecting the right repair materials is crucial for effectively fixing holes in hardwood floors. Choose wood fillers like Bona Pacific Filler for gouges or Woodwise Full Trowel for larger gaps. Epoxy-based adhesives provide strong, durable bonds, ideal for cracks and substantial holes.
When choosing a finish after repair, consider that oil-based finishes tend to be darker and more amber, which can affect the final appearance. Polymer-modified two-component silicate resin suits hollow spots beneath flooring, injected via specialized repair kits.
Latex-based fillers offer flexibility for minor gaps, while acrylic fillers balance durability and elasticity. Prepare the surface with coarse grit sandpaper to remove old finishes, then smooth with fine grit before applying fillers.
Use scrapers to clear stubborn residues. For best results, ensure the surface is free of dust and debris by sweeping or vacuuming hardwood floors before beginning repairs. Each material serves specific purposes; pick accordingly based on hole size, location, and floor condition to ensure a lasting, professional repair.
Color Matching Tips
A successful hardwood floor repair hinges on accurate color matching to guarantee the fix blends seamlessly with the surrounding wood. First, identify the wood species and original stain. Use color fans or digital tools to compare hues precisely.
Test stains on hidden areas before application. Use proper safety gear during sanding and finishing to protect yourself. Considering the wood species and grain patterns ensures a visual harmony between the repaired area and the existing floor.
If needed, mix custom stains to replicate the original color, considering wood aging and sunlight exposure. Match the existing finish type, polyurethane, oil-based, or water-based, to ensure compatibility and durability.
Apply stain and finish in thin, layered coats, allowing each to dry fully. Clean and hand-sand the area for smooth progressions. For best results, verify that sealers and topcoats don’t reactivate dyes. Finally, assess the repair under varied lighting to confirm a flawless match.
Preparing the Damaged Area
Evaluate the size and depth of the hole to determine the appropriate repair method. Next, thoroughly clean the surrounding area to guarantee proper adhesion and a smooth finish. Please avoid excess moisture during cleaning to prevent damage to the hardwood floor.
Finally, gather all necessary repair materials, including matching wood, filler, and tools, before beginning the repair process. For larger holes, consider using a circle cutter tool to create custom patches that fit precisely.
Assess Hole Size
Before proceeding with repairs, you’ll need to measure the hole’s diameter and depth accurately using a ruler or caliper. This assessment helps determine the right materials and repair method. Next, identify the hole’s shape—circular, oblong, or irregular—as this affects patch cutting.
Check if the hole goes completely through the floorboard and inspect edges for splintering or crumbling, which may require additional stabilization. Avoid excessive moisture during repair to prevent moisture penetration that can damage the wood.
- Measure diameter and depth precisely.
- Record the hole’s shape and edge condition.
- Confirm if the hole penetrates through the board.
- Assess stability of edges under slight pressure.
- Note any adjacent board or subfloor damage.
Additionally, understanding that holes can vary greatly in size and shape will guide you in selecting the most effective repair technique.
Clean Surrounding Area
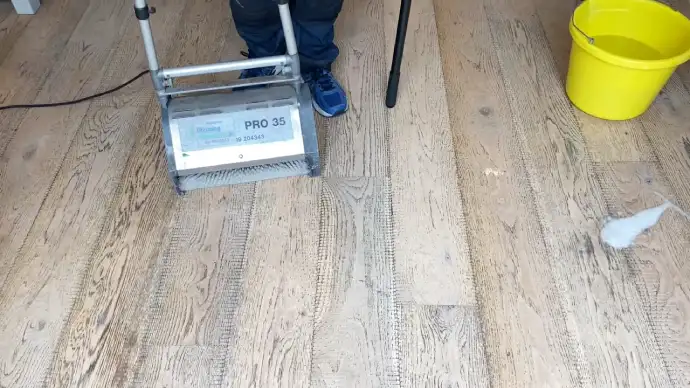
While preparing the damaged area, you’ll want to remove all dust and debris from the hole using a vacuum or a soft brush to guarantee a clean surface.
Next, remove the finish surrounding the hole to ensure proper filler adhesion. Smooth edges with folded sandpaper, then tape off the area with painter’s tape to protect the floor. Confirm the wood is dry and inspect for additional damage before proceeding.
Proper preparation is crucial because removing old flooring beneath other materials can add to repair costs and affect refinishing quality.
| Step | Tool/Material | Purpose |
|---|---|---|
| Dust Removal | Vacuum/Soft Brush | Clear dust and debris |
| Finish Removal | Sandpaper | Promote filler bonding |
| Edge Smoothing | Folded Sandpaper | Smooth hole edges |
| Area Taping | Painter’s Tape | Protect surrounding floor |
Gather Repair Materials
With the damaged area clean and prepped, gather all necessary tools and materials to guarantee a smooth repair process. Collect items that enable precise removal, fitting, and finishing of the hardwood floor patch.
Ensure you have replacement boards matching the original wood species and color to maintain uniformity. Prepare adhesives and fillers to secure and perfect the repair. Protect the surrounding areas and yourself with appropriate safety gear.
Regular maintenance and careful handling of tools help prevent further damage during the repair process and preserve the hardwood floor finish. Essential items include:
- Utility knife and chisel for precise cutting and removal
- Hammer and drill/driver to assist with board installation
- Carpenter’s glue to bond new boards securely
- Wood filler and knot fillers to seal gaps
- Random-orbit sander for smoothing the repaired surface
Selecting a red oak tongue and groove strip flooring board for the repair ensures the patch blends seamlessly with the existing floor. Having these ready streamlines the repair and guarantees a durable, professional finish.
Repair Techniques for Small Holes
Although small holes in hardwood floors may seem minor, addressing them promptly prevents further damage and preserves the floor’s integrity. Start by cleaning the area thoroughly with a stiff-bristle brush and vacuum to remove dirt and debris.
Promptly fixing small hardwood floor holes protects your floor’s durability and prevents further damage.
Identify the hole type, pinhole or finish issue, to select the right repair product. For small holes, apply a wood filler matching the floor’s color and grain using a putty knife; smooth excess and let it dry completely.
Before filling, prepare the hole by sanding around it to smooth high spots and ensure proper adhesion. Sand the area to blend with the surrounding surface. Use stain markers like Mohawk Ultra Mark to match color and wood grain, testing first on a hidden spot.
Finish with a protective coat matching the original floor finish. Allow it to dry fully before use, inspecting for any imperfections to touch up as needed.
Repair Solutions for Large Holes
When you encounter large holes in hardwood floors, you’ll need specialized repair techniques that go beyond simple fillers. Start by reshaping the hole into a circular form for wood plug insertion.
Before installing the plug, support the repair area underneath with straight wooden boards to ensure stability and a level surface. Proper gap management helps prevent further damage around the repair site.
Select plugs that match your floor’s grain and color for seamless integration. You might also create custom plugs with precise drilling and wood glue application. For added stability, reinforce the repair area with wooden supports or epoxy beneath the plug.
Always finish by sanding the repair flush and applying matching stain or polyurethane to protect and blend the area.
- Drill hole to a clean circular shape for plug fitting
- Use tapered or custom wood plugs matching floor grain
- Apply wood glue on plug edges for secure installation
- Reinforce large holes with supports or epoxy underneath
- Sand and finish repair to match surrounding floor perfectly
Performing a Dutchman Repair
Large hole repairs often require inserting wood plugs, but for a cleaner, more integrated finish, performing a Dutchman repair offers a precise alternative. Start by evaluating the damage and selecting matching wood stock.
The Dutchman technique is especially effective for structural damage and aging issues in hardwood floors. It is important to remove loose dust and debris from the area before beginning the repair to ensure proper adhesion.
Clear a beveled cavity slightly larger than the hole using a chisel and hammer; ensure all debris is removed and the subfloor is stable. Next, cut a plug from the selected wood, bevel its edges, and sand it smooth, aligning the grain with the surrounding boards.
Apply wood glue evenly inside the cavity, then insert the plug carefully. Secure it with clamps or tape, removing excess glue immediately. Allow the glue to dry thoroughly before moving on to the sanding and finishing steps.
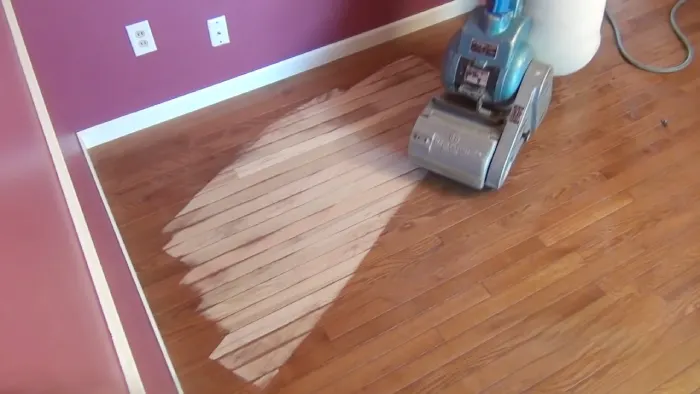
Sanding and Finishing the Repaired Area
Before applying any finish, you’ll need to sand the repaired area meticulously to guarantee a smooth, even surface. Start with a 40-grit drum sander, moving steadily along the wood grain to remove old finish and imperfections. Progress through 60-grit to 100-grit for a fine, uniform finish.
Use an edge sander for corners and hand-sand tight spots to blend seamlessly. Always use feather sanding motions to avoid visible marks.
- Sand along the wood grain, never across it, except at a 45° angle if correcting damage
- Maintain steady sander movement; avoid lingering in one spot
- Clean thoroughly before and after sanding to remove dust
- Lightly sand between finish coats to ensure adhesion
- Use multiple thin coats of finish applied evenly along the grain for best results
Applying Protective Coatings
Although sanding creates a smooth surface, applying the right protective coating is essential to safeguard your hardwood floor from wear and moisture.
Proper protective coatings not only prevent damage from moisture and humidity but also enhance the longevity and appearance of hardwood surfaces, ensuring your floor remains beautiful over time.
Start by thoroughly cleaning and lightly sanding the repaired area to ensure adhesion. Choose a coating based on durability needs: water-based polyurethane dries fast, emits less odor, and preserves natural color; oil-based offers superior durability and deepens grain but requires longer drying and ventilation.
Apply a bonding agent like TyKote® if available to improve finish adhesion. Use a brush, roller, or sprayer per product instructions, applying multiple thin coats with adequate drying time between.
Select a finish sheen: matte, satin, semi-gloss, or gloss, based on aesthetics and maintenance preferences. Properly applied coatings extend floor life, resist scratches, and simplify cleaning, making them a vital part of floor protection.
Tips for Preventing Future Damage
To keep your hardwood floor looking its best, you need to proactively prevent damage by managing dirt entry, protecting furniture, controlling humidity, maintaining cleanliness, and minimizing moisture exposure. Implement these essential steps:
Proactively protect your hardwood floor by managing dirt, furniture, humidity, cleanliness, and moisture exposure.
- Place doormats inside and outside entrances to trap dirt and enforce a no-shoes policy to reduce debris.
- Attach felt pads to furniture legs and use coasters under heavy items to prevent scratches and dents.
- Maintain indoor humidity between 35% and 55% using a hygrometer, humidifier, or dehumidifier as needed. Using a humidifier can also help mitigate seasonal gaps caused by wood contraction and expansion.
- Sweep or vacuum frequently with hardwood-appropriate settings and clean spills promptly to avoid staining.
- Avoid wet mopping and apply water-resistant rugs near moisture-prone areas, inspecting regularly for leaks.
Frequently Asked Questions
Can I Fix Hardwood Floor Holes Myself or Should I Hire a Professional?
You can fix small hardwood floor holes yourself using wood filler, putty, and basic tools like a utility knife and hammer. DIY is cost-effective but requires patience and correct stain matching.
For large or complex holes, hiring a professional ensures proper plank replacement, stain matching, and a quality finish. Assess the hole size and your skill level before determining between DIY and professional repair.
How Long Does It Take for Wood Glue or Epoxy to Fully Cure?
Think of curing time as the silent architect shaping strength beneath the surface. Wood glue typically sets within 30 minutes to 24 hours, with fast-curing types like Gorilla Wood Glue needing about 20-30 minutes of clamping and full cure at 24 hours.
Epoxy demands more patience initially, workable for 12-24 hours but requires up to 7 days to fully cure, depending on temperature and thickness. Always wait full cure for maximum durability and finish quality.
Are There Eco-Friendly or Non-Toxic Wood Filler Options Available?
Yes, you can choose eco-friendly and non-toxic wood fillers that avoid harsh solvents and VOCs. These fillers, like Rubio Monocoat Wood Filler and Woodwise Full Trowel Filler, offer safe indoor use with minimal environmental impact.
They dry quickly and work well with water or solvent-based stains. Always prepare the surface clean and dry before applying with a putty knife or trowel, then sand and finish for a smooth repair.
Will Repaired Spots Show up Under Different Lighting Conditions?
Yes, repaired spots often become visible under varying lighting conditions. Natural and artificial light can highlight color, texture, and finish differences between the patch and original floor. Direct sunlight accelerates fading, making mismatched repairs more apparent.
To minimize visibility, use custom-blended fillers, sand and refinish larger areas, and apply UV-resistant finishes. Consistent lighting and periodic refinishing also help maintain a uniform appearance across the floor.
Can Seasonal Humidity Changes Affect the Repaired Hardwood Floor?
Think of your repaired hardwood floor as a ship steering through changing tides. Seasonal humidity shifts cause wood to swell or shrink, stressing repairs. You need to control indoor humidity between 35%-55% using humidifiers or AC to stabilize your floor.
Choose fillers and adhesives compatible with wood’s natural movement, and inspect regularly for gaps. Proper acclimation and maintenance ensure your floor weathers these fluctuations without compromising repair integrity.
Achieve Professional Results with Effective Repair Tips
Fixing a hole in your hardwood floor might seem intimidating, but with the right materials and techniques, it becomes manageable. While small holes call for quick patching, large ones demand careful Dutchman repairs, both requiring precise sanding and finishing.
By applying protective coatings afterward, you not only restore beauty but also prevent future damage. Remember, a well-executed repair transforms a flaw into a seamless part of your floor’s character.