How to Fix Bubbles in Hardwood Floor Finish: 10 DIY Steps [Must Follow]
Beautiful hardwood floors can add warmth and elegance to any space, but tiny air pockets in a delicate souffle, bubbles in hardwood floor finish can be a frustrating eyesore. These unsightly blemishes can detract from the overall appeal of your flooring, however, there are effective solutions.
To eliminate bubbles in the hardwood floor finish, tape off the affected area to protect the surrounding floor. Then gently scrape the bubbles to pop them and hand sand the area with 220 grit sandpaper. After wiping the surface, apply a wood finish to restore the natural color of the wood.
In this step-by-step guide, we will discuss the causes of these pesky bubbles, explore their potential impact on your hardwood floors. We also share expert steps to effectively banish them from your wood flooring. So keep reading for detailed information.
How to Fix Bubbles in Hardwood Floor Finish: Step-by-Step Guide
If you’re dealing with bubbles in your hardwood floor finish, here’s a step-by-step guide to help you fix the issue:
- STEP 1. Tape off the affected area
- STEP 2. Scrape gently to pop bubbles
- STEP 3. Hand sand with 220 grit
- STEP 4. Pop remaining bubbles
- STEP 5. Loosen remaining small bubbles with goof off
- STEP 6. Wipe the surface with a wet rug
- STEP 7. Re-sand with 220 grit sandpaper
- STEP 8. Again wipe the surface with a wet rug
- STEP 9. Stain over the area to give back the color
- STEP 10. Apply a fresh coat of wood finish
Let’s discuss these steps in detail:
STEP 1. Tape Off the Affected Area
To fix bubbles in the hardwood floor finish, examine it carefully to see where the bubbles are. Tape off the affected area to contain the repair process and prevent any further damage. Also, remove any dirt, dust, or debris from the affected area using a soft cloth or vacuum cleaner. This will ensure a clean surface for the repair.
STEP 2. Scrape Gently to Pop Bubbles:
Carefully use the sharp scraper to gently remove the tops of the isolated bubbles without causing damage to the surrounding area. Start by positioning the sharp edge of the scraper at the edge of the bubble, and with a controlled and steady motion, apply slight pressure to cut off the top of the bubble.
Make sure to keep the scraper at a shallow angle to prevent gouging or scratching the floor. Also, pay close attention to the pressure applied and be cautious not to dig too deep into the finish. Work your way through each bubble individually, taking your time and being meticulous in your approach.
STEP 3. Hand Sand with 220 Grit
After scraping the surface, use 220 grit to hand sand the affected areas for deeper bubbles, ensuring a smooth and clean surface. This grit is fine enough to remove any deep bubbles and imperfections left after scraping.
Begin by gently sanding the bubbles in a circular motion, applying light pressure. Make sure to sand the surrounding area to blend the finish seamlessly.
As you sand, periodically check the surface to ensure you achieve the desired smoothness. Remember to sand in the direction of the wood grain to avoid any potential damage.
STEP 4. Pop Remaining Bubbles
Inspect the affected areas and use the scraper to pop any remaining deep bubbles carefully. This is crucial when fixing bubbles in a hardwood floor finish to achieve a smooth and flawless result.
Take your time to thoroughly examine the floor, paying close attention to any areas where bubbles may persist. With the scraper in hand, gently press down on each bubble, applying enough pressure to pop them without causing any damage to the surrounding finish.
Be meticulous and methodical, ensuring that you address every single bubble. By doing so, you will eliminate any imperfections and create a seamless surface.
STEP 5. Loosen Remaining Small Bubbles with Goof Off
To effectively address any lingering small bubbles, use Goof Off to loosen them. Goof Off is a powerful solvent that can help break down the hardened finish and release trapped air bubbles.
Start by applying a small amount of Goof Off to a clean cloth. Gently rub the cloth over the area with small bubbles, using circular motions. This will help to soften the finish and allow the trapped air to escape. Be careful not to apply too much pressure, which could damage the surrounding finish.
STEP 6. Wipe Surface With a Rug
After using Goof Off to address any remaining small bubbles, gently wipe the surface with a soft rug to remove scraped debris. This is crucial to ensure a smooth and flawless finish on your hardwood floor.
STEP 7. Re-Sand with 220 Grit Sandpaper
To achieve a smooth surface, gently re-sand it using 220 grit sandpaper. After wiping the surface with a wet rug, this step is crucial in fixing bubbles in your hardwood floor finish.
Begin by carefully sanding the affected area, applying even pressure, and covering the entire surface. Using small circular motions, focus on the areas where the bubbles are most prominent. Take your time and be thorough to ensure a seamless result.
The 220-grit sandpaper is specifically chosen for its fine texture, allowing it to smooth out imperfections without causing further damage. Keep a close eye on the progress, periodically checking the surface to ensure the bubbles are being eliminated.
STEP 8. Again Wipe the Surface With a Wet Rug
After completing the re-sanding process, thoroughly clean the surface before moving on to the next step. You must wipe the surface again, but this time with a wet rug. This step is essential to eliminate any remaining debris and ensure a smooth finish for your hardwood floor.
STEP 9. Stain Over Area to Give Back the Color
You can apply a stain over the surface of your wood floor to achieve the desired natural color. Start by choosing a stain that matches the original color of your floor. Before applying the stain, make sure the surface is clean and dry.
Use a brush or a rag to apply the stain evenly, following the direction of the wood grain. Allow the stain to penetrate the wood for the recommended time, usually 10-15 minutes.
Then, wipe off any excess stains with a clean rag. It’s important to work in small sections to ensure an even application. Once the stain is dry, you can proceed to the next step in restoring the beauty of your hardwood floor.
STEP 10. Apply a Fresh Coat of Wood Finish
Now, you can apply a new coat of wood finish to complete the restoration process. Before you begin, make sure you have put on a face mask and opened the windows for proper ventilation. This will ensure your safety and prevent any fumes from building up in the room.
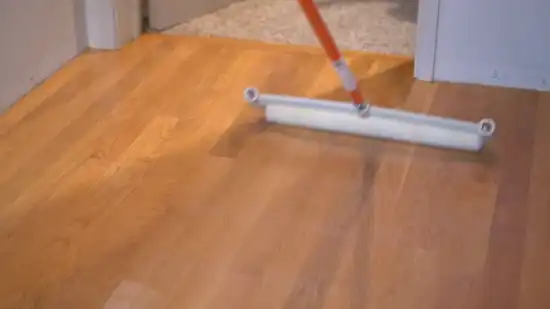
Stir the polyurethane finish thoroughly to ensure it is well-mixed. Apply the finish to the hardwood floor using a paintbrush in even strokes. Start from the farthest corner and work towards the wood boards, covering the entire floor evenly. Take your time and be meticulous in your application.
Once the finish is applied, allow it to dry overnight. This will give it enough time to fully cure and provide a durable protective layer for your hardwood floor.
What causes bubbles on hardwood floors?
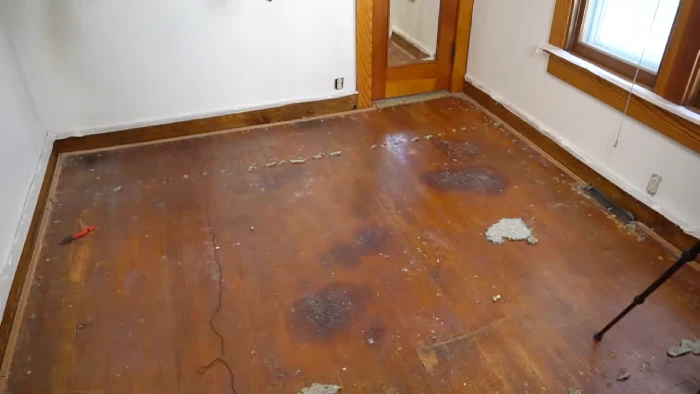
If you notice bubbles on your hardwood floors, it’s likely due to excess moisture or heat in the room. When water or excess heat forms in a room, it can cause the wood to warp, leading to blistering and bubbling in the floor finish. This can give your floors an unsightly waxy appearance.
To fix the bubbles in your hardwood floor finish, you will need to address the root cause of the issue. Ensure that the room is properly ventilated and maintains a consistent humidity level.
If there are any water leaks or spills, clean them up promptly to prevent moisture from seeping into the wood. Also, avoid exposing the floors to excessive heat sources.
Will bubbles ruin hardwood floors?
Excess moisture or heat in a room can cause bubbles on hardwood floors, potentially ruining their appearance. When a finish is drying, it is susceptible to forming bubbles. If these bubbles are not addressed and fixed, they can ruin the sheen of the hardwood floor.
Bubbles can distort the smoothness and shine of the finish, making the floor look uneven and unattractive. It is crucial to have a professional refinisher take care of these bubbles before considering the job complete. They have the knowledge and experience to address this issue and restore the floor’s flawless appearance.
How can I get bubbles out of polyurethane finish wood flooring?
To remove bubbles from a polyurethane finish on wood flooring, lightly sanding the surface with fine-grit sandpaper can help achieve a smooth application. Start by identifying the areas with bubbles and gently sand them using a back-and-forth motion.
Be sure to follow the grain of the wood to avoid causing any additional damage. After sanding, wipe away any dust or debris with a clean, damp cloth. Next, apply a thin coat of polyurethane using a high-quality brush or roller. Work in small sections, going with the grain of wood.
Avoid over-applying polyurethane, as this can lead to more bubbles. Allow the polyurethane to dry completely before applying additional coats. If necessary, repeat this process until the desired finish is achieved.
Restore the Elegance of Your Hardwood Floors by Eliminating Them
Bubbles in a hardwood floor finish can be frustrating, but fixing them is a simple process that can be done with a few steps.
By assessing the extent of the problem and following the appropriate steps for either surface or deep-seated bubbles, you can restore the beauty of your hardwood floor and enjoy a flawless finish.Prevention is key, so be mindful of your application techniques and keep humidity low to minimize the risk of future bubble formation. If you encounter persistent issues, feel free to seek guidance from a flooring professional or the manufacturer’s representative.