Does Engineered Hardwood Need Underlayment: 10 Steps Solution
If you’re planning to install engineered hardwood floors, you might be wondering if you need to use underlayment. This depends on several factors, including the type of subfloor you have, the type of engineered hardwood you’re using, and the environment where you’re installing the floors.
Underlayment is a layer of material that goes between the subfloor and the hardwood planks. Its purpose is to provide cushioning, absorb sound, and reduce moisture transfer. When installed correctly, underlayment can help prolong the life of your hardwood floors and improve their performance.
As part of this article, we’ll discuss the reasons why you might need underlayment for engineered hardwood, the types of underlayment available, and the steps to install it properly.
Steps on How Do You Use Underlayment for Engineered Hardwood Floors?
When installing engineered hardwood floors, it’s important to use underlayment to provide a barrier between the subfloor and the hardwood. Here are the steps to do this properly:
- Step 01: Prepare the Subfloor
- Step 02: Choose the Right Underlayment
- Step 03: Measure and Cut the Underlayment
- Step 04: Lay the Underlayment
- Step 05: Continue Installing
- Step 06: Attach the Underlayment
- Step 07: Check for Smoothness and Stability
- Step 08: Acclimate the Engineered Hardwood
- Step 09: Install the Engineered Hardwood
- Step 10: Finishing Touches
Step 01: Prepare the Subfloor
Before you lay down the foundation of your engineered hardwood floor, make sure that the subfloor is as smooth as a calm sea, free of any debris or unevenness. This is crucial in ensuring that your flooring lasts for years without any issues. To prepare the subfloor, follow these steps:
| Step | Action |
| 1 | Clean the subfloor thoroughly. Remove any debris, dust, or uneven areas. |
| 2 | Dry the subfloor completely. Moisture can cause your flooring to warp or buckle over time. |
| 3 | Level the subfloor. Repair any significant imperfections or damage in the subfloor before proceeding. |
Step 02: Choose the Right Underlayment
To ensure a long-lasting and comfortable flooring experience, you’ll want to select the right type of underlayment for your specific needs when installing engineered hardwood.
Here are four considerations to keep in mind when choosing the appropriate underlayment:
- Moisture resistance
If you’re installing hardwood in a room with high moisture levels, like a bathroom or laundry room, you’ll need an underlayment that can resist moisture. This will prevent damage to your floor and ensure it lasts longer.
- Sound absorption
If you’re installing hardwood in a multi-story home, you’ll want an underlayment that can absorb sound. This will prevent noise from traveling between floors and disrupting your daily activities.
- Stability
If your subfloor is uneven or has cracks, you’ll need an underlayment that can provide stability and prevent your hardwood from shifting or creaking.
- Additional requirements
Depending on your unique situation, you may have additional requirements for your underlayment, such as insulation or vapor barriers. Discuss these needs with a professional to ensure you choose the right underlayment for your specific situation.
Step 03: Measure and Cut the Underlayment
Make sure to measure the dimensions of the room accurately before cutting the underlayment sheets. You don’t want to end up with an underlayment that’s either too short or too long for the room. Use a tape measure and a straightedge to ensure precise measurements.
Once you have the measurements, cut the underlayment sheets accordingly using a utility knife or a pair of scissors. Remember to leave a small gap along the edges of the room to allow for the expansion of the engineered hardwood flooring. This gap should be about 1/8 inch to 1/4 inch wide.
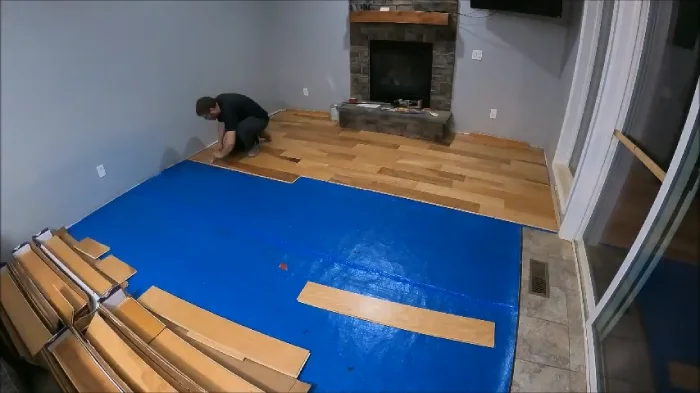
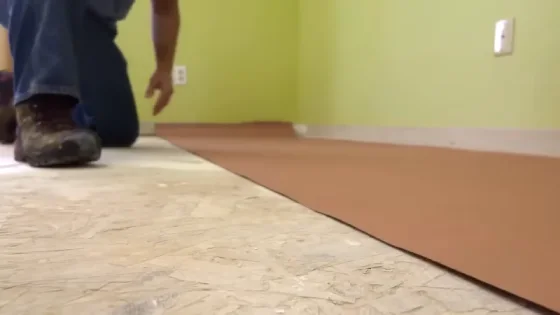
Step 04: Lay the Underlayment
Position yourself in the corner of the room and lay the first sheet of underlayment smoothly without any overlapping to ensure a sturdy base for your new floor.
Make sure that the smooth side is facing up and that the edges are tightly butted together. If required, use tape or adhesive recommended by the manufacturer to secure the seams.
Step 05: Continue Installing
Now that you’ve laid and secured the underlayment, it’s time to continue installing your stunning new floor. Follow these steps to ensure that your engineered hardwood is installed correctly:
- Begin by laying the first row of hardwood planks against the longest wall in the room, leaving a 1/2-inch gap between the planks and the wall to allow for expansion. If the planks are not tightly locked together, use a tapping block and hammer.
- Continue laying the planks row by row, ensuring that each plank is tightly locked to the previous one. Remember to stagger the planks for a natural look and to avoid visible seams.
- Use a saw to cut planks as necessary to fit around obstacles like door frames or vents. Be sure to leave a 1/2-inch gap around these objects as well.
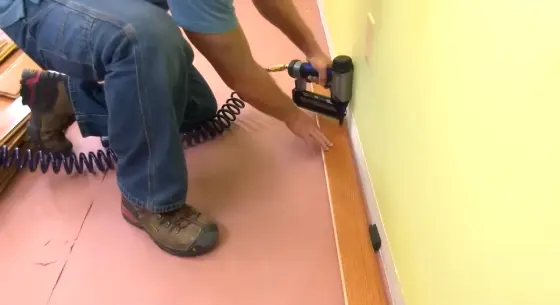
- Once the installation is complete, use a flooring nailer to secure the final row of planks in place.
Step 06: Attach the Underlayment
As you begin the installation process, attaching the proper underlayment according to the manufacturer’s instructions is important, ensuring the longevity and stability of your beautiful new floor.
Before attaching the underlayment, be sure to consult the manufacturer’s instructions for both the underlayment and the engineered hardwood boards you are using. Depending on the type of underlayment and flooring, there may be specific requirements or recommendations for installation.
Step 07: Check for Smoothness and Stability
To ensure a stable and consistent base for your flooring, take the time to smooth out any bumps or ridges and ensure that the surface is as even as possible. Here are three steps you can take to check for smoothness and stability before proceeding with your engineered hardwood installation:
- Run a level over the surface to check for any high or low spots. If you find any, use a sander or other tool to gently remove any bumps or ridges and create a level surface.
- Inspect the surface for any cracks or gaps. These can be filled with a wood filler or other product to create a smooth, even surface.
- Ensure that the underlayment is installed correctly and provides a stable base for the flooring. If you notice any issues with the underlayment, take the time to address them before proceeding with the installation.
Step 08: Acclimate the Engineered Hardwood
Acclimation is a process where the flooring adapts to the room’s temperature and humidity levels. This step is critical because it helps prevent the flooring from expanding or contracting due to changes in temperature and humidity, which can cause damage to the flooring and affect its durability.
During acclimation, ensure that the flooring is stored in the room where it will be installed for at least 48-72 hours. Keep the room’s temperature and humidity levels consistent with the manufacturer’s recommendations.
This process allows the wood to adjust to its new environment and ensures that the flooring is in its optimal condition before installation.
Step 09: Install the Engineered Hardwood
Now that you’ve properly acclimated your new flooring, it’s time to lay it down like a jigsaw puzzle, ensuring each piece fits snugly together. Begin by laying down the underlayment, following the manufacturer’s instructions.
Here are some tips to keep in mind: leave a gap of at least 1/2 inch around room edges to expand and contract the flooring. Use a tapping block and mallet to gently tap each plank into place, ensuring a tight fit. Stagger the joints between planks to create a more natural look.
Use a jigsaw or circular saw to cut planks to fit around obstacles such as door frames or vents. Once the flooring is installed, remove any excess glue or adhesive from the surface using a damp cloth. Allow the floor to dry completely before walking on it.
Step 10: Finishing Touches
Once all the planks are snugly in place, you can polish your new hardwood floor to make it shine like a diamond.
The first step in finishing your engineered hardwood floor is to apply a protective coating. This can help prevent scratches, scuffs, and other types of damage over time.
Various finishes are available, including oil-based, water-based, and polyurethane. Your choice will depend on your personal preferences, as well as the type of flooring you have installed.
After applying the protective coating, you may need to install trim around the room’s edges to cover any gaps or spaces between the flooring and the walls. This can help to give your new floor a more finished look and prevent debris or moisture from getting underneath the planks.
Finally, allowing the floor to set and acclimate before use is important. This can help to ensure that the planks settle into place and that any remaining moisture is fully absorbed. With the right finishing touches, your new engineered hardwood floor will look beautiful and last for years to come.
How does underlayment help floating hardwood floors?
The underlayment provides a cushioning layer between the subfloor and the hardwood flooring, making it softer to walk on and reducing the impact of footsteps. This is especially important for those who spend much time standing or walking on their floors, as it can help prevent foot fatigue and joint pain.
In addition to providing cushioning, underlayment evens out the subfloor, ensuring the surface floor is level and free of bumps or dips. This is important because a level subfloor is necessary for a successful installation and will prevent the hardwood flooring from becoming crooked or uneven.
Underlayment also reduces sound, absorbing the noise of footsteps and other sounds that can be distracting or disruptive. This makes it an ideal choice for homes with multiple levels or those wanting to minimize noise in their living spaces.
What type of underlayment is best for engineered hardwood?
For the optimal installation of engineered hardwood flooring, it’s cork or foam underlayment that takes the cake. However, cork is the better option due to its sturdiness and less flexible nature.
This means the underlayment won’t flex underneath the planks, providing a stable foundation for your floors. Cork underlayment is ideal for engineered hardwood flooring as it absorbs sound, provides insulation, and resists mold and mildew.
Invest in a High-Quality Underlayment for Long-Lasting Engineered Hardwood Floors
Underlayment is absolutely crucial for a successful installation of engineered hardwood floors. Not only does it provide a flat subfloor to work with, but it also serves as a protective cushion against cracks and shifting.
In addition, underlayment adds sound insulation and moisture resistance to your floors, further increasing their stability and longevity.
Choosing the proper type of underlayment for your specific flooring needs is important. When selecting, consider factors such as location, subfloor material, and noise level. Pay attention to quality here, as a high-quality underlayment can save you from costly repairs.
Remember that a well-installed underlayment will keep your floors looking beautiful for years. Trust in this essential step of the installation process to ensure the longevity and stability of your engineered hardwood floors.