Do You Remove Baseboards When Refinishing Hardwood Floors: Detailed Explanation
When refinishing hardwood floors, you may wonder if you need to remove baseboards. Some homeowners like removing the baseboards for a more thorough refinishing, but others like a less invasive approach.
Generally, leave your baseboards on when having your hardwood floors refinished, especially if they’re painted. But, if the hardwood floor has been refinished a lot and the wood has built up underneath, or if the floor is too uneven, you might want to replace the baseboards too.
In the following sections, we’ll discuss removing baseboards (if necessary). We will also discuss the considerations of hardwood floor refinishing without removing baseboards. For more details, keep reading.
Do You Remove Baseboards When Refinishing Hardwood Floors: In-Depth Discussion
When refinishing hardwood floors, it’s usually best to leave the baseboards on for a smooth and seamless finish that looks like a professional did. You might be tempted to remove them, but removing them can cause damage to the wall or molding, and it can be difficult to reinstall them properly.
Although it may be more difficult to reach the edges of the floor with refinishing equipment and finishing products, leaving the base and shoe on is recommended, especially if painted.
Exceptions for removing base and shoe moldings include if the floors have been refinished multiple times and wood has built up underneath them or if the floor is uneven and needs leveling. In these cases, it may be necessary to remove them to ensure a level surface.
However, removing the baseboards can be time-consuming and may require additional work to reinstall them. Also, if the baseboards are in good condition, it’s best to leave them on to avoid unnecessary damage.
How to Remove Baseboards when Refinishing Hardwood Floors (if necessary)?
When removing baseboards during hardwood floor refinishing, prepare the work area by removing furniture and protecting the floors. Next, score the baseboards and quarter-round molding to prevent damage when prying them off.
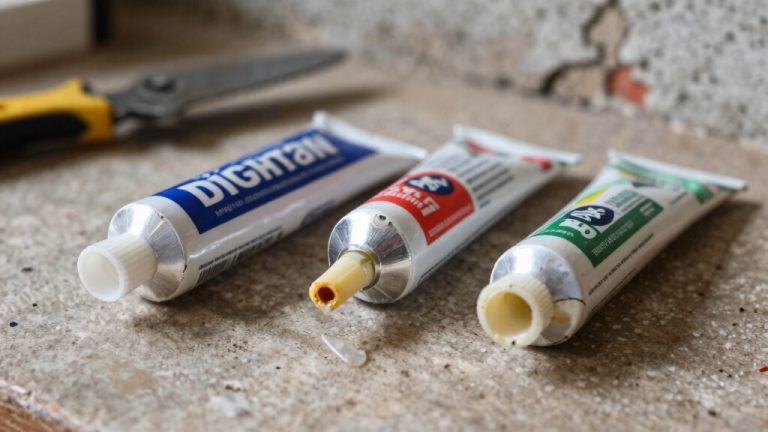
Tools and Materials Needed:
- Scoring tool or utility knife
- Pry bar
- Thin putty knife
- Hammer
- Block of wood
- Safety goggles
- Gloves
- Dust mask (if necessary)
- Drop cloth or plastic sheeting (optional)
Here are the steps to follow once you have gathered all these tools and materials:
- Step 1: Prepare the Work Area
- Step 2: Score the Baseboards and Quarter Round Molding
- Step 3: Start at an Outside Corner
- Step 4: Use a Pry Bar to Loosen the Baseboards
- Step 5: Deal with Inside Corners
- Step 6: Lift the Baseboards
- Step 7: Remove Nails and Clean Up
Step 1: Prepare the Work Area
To start, you must prepare the work area before removing the baseboards to refinish hardwood floors. Clear the room of any furniture or obstacles that may hinder your access to the baseboards. This will allow you to work more efficiently and safely.
Also, if you’re concerned about dust or debris, cover the floor with a drop cloth or plastic sheeting. This will help protect your floors from damage during the refinishing process.
To make the preparation process even easier, here are some tips to follow:
- Move all furniture out of the room or to the center, away from the baseboards.
- Take down any curtains or blinds that may get in the way.
- When removing the baseboards, use painter’s tape to protect the walls from damage.
- Wear protective gear such as gloves, goggles, and a dust mask to protect yourself from hazards.
- Have all necessary tools for removing the baseboards, such as a pry bar, hammer, and pliers, ready and easily accessible.
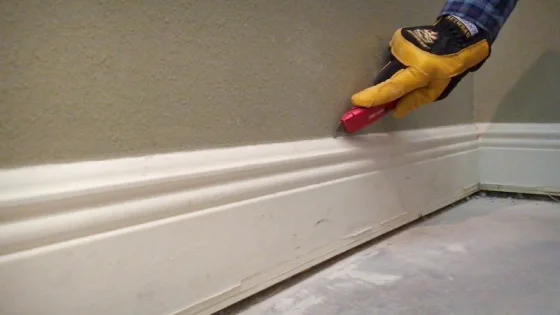
Step 2: Score the Baseboards and Quarter-Round Molding
Before starting, scoring the baseboards’ top edge and quarter-round molding with a scoring tool or utility knife is crucial. This step is critical because it helps release them more easily and prevents damage to adjacent surfaces.
You create a separation point between the baseboards and the wall by scoring the top edge. This makes it easier to remove them without causing any damage to the surrounding areas.
To score the baseboards and quarter-round molding, use a scoring tool or utility knife and carefully cut the top edge. Take extra caution not to cut too deep into the wood or damage the wall or floor.
After scoring, gently pry the baseboards and quarter-round molding from the wall using a pry bar. If the baseboards are nailed to the wall, use a hammer to remove the nails and gently pry them out.
Step 3: Start at an Outside Corner
With a thin putty knife, gently tap behind the molding with a hammer at an outside corner, making sure not to damage the wall or the molding. This will make it easier to open the joint between the baseboards, so you can keep going.
Once you have created the gap, insert a pry bar or flathead screwdriver into the gap and carefully pry off the baseboard from the wall. If there’s any resistance, gently tap the pry bar with a hammer to loosen the baseboard.
Follow these steps to remove the baseboards safely:
- Use a stud finder to locate any studs behind the baseboard. This will help you avoid damaging the studs when removing the baseboard.
- Label each baseboard as you remove it. This will make it easier to reinstall them later on.
Step 4: Use a Pry Bar to Loosen the Baseboards
Using a pry bar to loosen the baseboards is the next step in safely removing them, and you’ll be glad to know that 90% of DIY enthusiasts find this step relatively easy. However, approach cautiously to avoid damage to the wall or baseboard.
First, position the pry bar behind the baseboard with a fulcrum against the wall. Apply gentle pressure to loosen the baseboard from the wall, and slowly work along the length as you go.
Avoid excessive force, which can cause the baseboard to crack or split. Instead, use a steady, controlled motion to loosen the baseboard from the wall gradually.
Step 5: Deal with Inside Corners
Now, as you encounter inside corners, you’ll need to gently tap a putty knife into the joint and pry it apart to avoid damaging the wall or the molding. Inside corners can sometimes lock the pieces tightly, making it difficult to separate the baseboards.
But with patience and a steady hand, you can loosen the grip and continue with your refinishing project. Here are some tips to help you deal with inside corners while removing baseboards:
- Use a putty knife: A putty knife is a great tool for tight corners. It’s thin, flexible, and easily slides into the wall and baseboard joint. Once you’ve inserted the putty knife, gently pry the baseboard away from the wall.
- Be patient: Inside corners can be tricky, so it’s important to take your time and be patient. You may damage the molding or the wall if you rush the job. Work the putty knife into the joint and slowly pry the baseboard away from the wall. If you encounter resistance, stop and reposition the putty knife.
- Work slowly: When dealing with inside corners, work slowly and carefully. Rushing the job can lead to mistakes and damage to the wall or molding. Take your time and work in small sections, gently prying the baseboard away from the wall.
Step 6: Lift the Baseboards
As you gently lift the baseboards, feel the satisfaction of progress in your DIY home renovation journey. You may encounter some difficulty if the floors were installed before the baseboards. In this case, use a pry bar to pry the baseboards up slightly, freeing them from the floor.
However, take care not to damage the flooring surface as you do so. This step may require patience and finesse, but it is an important aspect of refinishing hardwood floors.
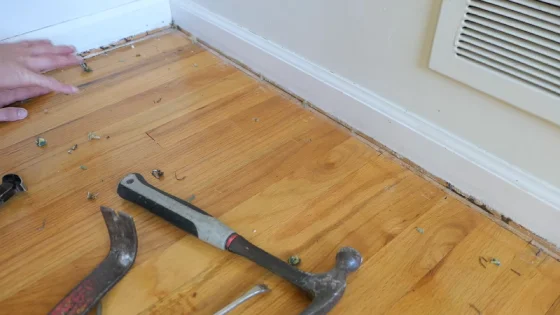
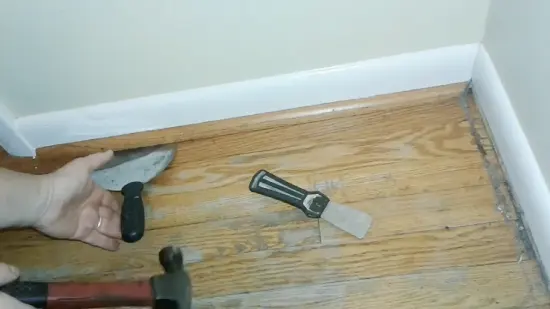
Step 7: Remove Nails and Clean Up
After successfully lifting the baseboards, it’s important to carefully inspect them for any remaining nails and clean up any debris left behind.
Take a closer look at each piece of baseboard to ensure no nails are left behind. If you find any, use a pair of pliers or a hammer to remove them. Leaving nails in the baseboards can cause damage to your newly refinished floors, so it’s crucial to make sure all nails are removed.
Once you’ve confirmed that no nails are left in the baseboards, it’s time to clean up any debris left behind. Use a broom or vacuum to remove dust, dirt, and small pieces of wood from the area. This will ensure that your floors are clean and ready for the next step in the refinishing process.
What to Consider When Refinishing Hardwood Floors Without Removing Baseboards?
When refinishing hardwood floors without removing baseboards, there are several key points you need to consider.
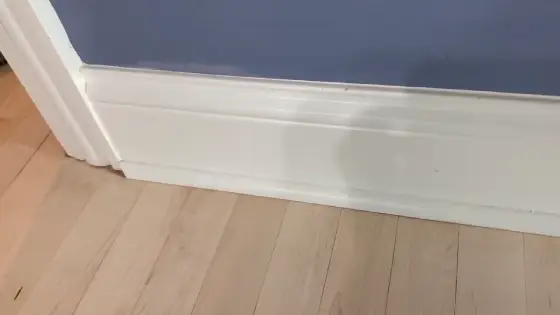
Protection
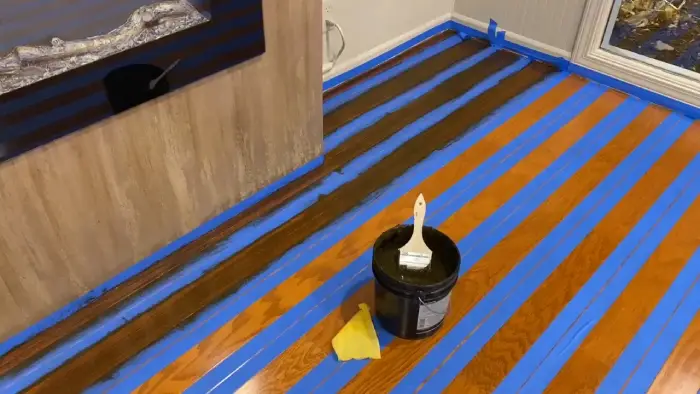
To protect your baseboards from damage during refinishing, you should use painter’s tape to cover the edges, as 90% of baseboard damage during refinishing can be avoided with this simple step.
The tape should be applied along the entire length of the baseboard, making sure that it is flush with the floor. This will prevent any sanding or finishing products from getting onto the baseboards and causing damage to the surface.
Another important protection measure is to use a drop cloth to cover the floor around the room’s perimeter. This will prevent dust or debris from getting onto the baseboards and causing damage.
Also, ensure that any furniture or other items in the room are covered or removed to prevent accidental damage during the refinishing process. By taking these protection measures, you can ensure that your baseboards will remain in excellent condition throughout the refinishing process.
| Pros | Cons |
| Provide excellent protection | Can be time-consuming to apply |
| Inexpensive | May leave a residue if left on too long |
| Easy to remove | May not adhere well to certain surfaces |
Sanding
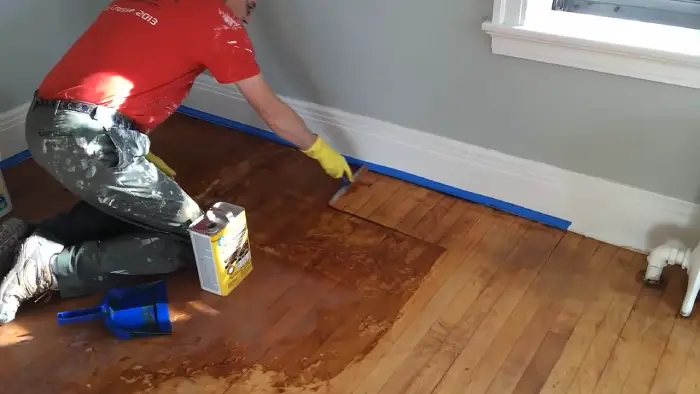
Achieving a smooth and even surface on your flooring is crucial for a successful refinishing project. Using a floor sander with fine-grit sandpaper can help you achieve this without damaging your baseboards.
When sanding your hardwood floors, be cautious near the edges to prevent accidental contact with the baseboards. To ensure a successful sanding process, follow these tips:
1. Begin sanding in the middle of the room and work your way toward the edges.
2. Use a gentle touch when sanding the edges to avoid hitting the baseboards.
3. Keep the sander moving at all times to avoid creating uneven spots.
4. Use a vacuum or broom to clean up any dust and debris before moving on to the next sanding step.
Remember, sanding your hardwood floors is a crucial step in refinishing; taking the necessary precautions can help you achieve the best results. By using fine-grit sandpaper and being mindful of the baseboards, you can achieve a smooth and even surface on your flooring.
Edge Sanding
If you want those hard-to-reach areas near your baseboards to look as smooth as a baby’s bottom, try using a hand-held edge sander or an oscillating tool with a sanding attachment.
These tools are designed to reach tight spaces and help you achieve a professional-looking finish. However, note that edge sanding requires a bit of finesse and patience. Here are some tips to keep in mind:
- First, make sure your sandpaper is securely attached to the sanding tool. Loose sandpaper can cause scratches and uneven sanding.
- Second, use a light touch when sanding near the baseboards. Pressing too hard can damage the wood or create visible sanding marks.
- Finally, take your time and work in small sections. Rushing the process can lead to mistakes and a subpar finish.
To give you a better idea of what to expect, here’s a table comparing the pros and cons of using a hand-held edge sander versus an oscillating tool with a sanding attachment:
| Tool | Pros | Cons |
| Hand-held edge sander | Precise control, powerful motor, can handle heavy sanding | Heavy and bulky, requires more effort, difficult to use on uneven surfaces |
| An oscillating tool with the sanding attachment | Lightweight and portable, versatile, can reach tight spaces | Less powerful, slower sanding, may not be suitable for heavy-duty tasks |
Finishing Products
When it comes to giving your baseboards a professional-looking finish, choosing the right products that are compatible and easy to control is important.
One of the best finishing products for baseboards is water-based polyurethane. This type of finish is easy to apply and control near the edges, preventing drips or pooling. It’s also a great option if you’re looking for a low-odor and quick-drying finish.
When applying finish near the baseboards, it’s important to avoid applying excessive amounts. This can cause drips and pooling, ruining the look of your freshly finished floors.
Instead, apply a thin and even coat of finish and allow it to dry completely before applying additional coats. This will ensure a smooth and professional finish that will last for years.
Application Techniques
To get a smooth and even finish on your baseboards, use careful application techniques that minimize the risk of getting finished where you don’t want it. Here are some tips to help you achieve a professional-looking finish:
- Use a brush or a foam applicator pad to apply the finish near the edges. This will help you control the amount of finish you apply and minimize the risk of getting it on the baseboards.
- Take time and work slowly to ensure an even and controlled application. Rushing can lead to uneven finishes, drips, and runs, which can be difficult to fix.
- Use a light touch when applying the finish. Applying too much pressure can cause the finish to pool and create an uneven, blotchy appearance. Instead, let the finish flow naturally and spread it evenly over the surface using gentle strokes.
Cleanliness
Keeping a clean work environment is crucial for achieving a professional-looking finish on your baseboards during the refinishing process. Regularly clean up any dust or debris to prevent it from accumulating near the baseboards. This will help avoid any unwanted particles from interfering with the finish.
To ensure that your work environment remains clean and tidy, it is recommended that you use a two-column table to keep track of your cleaning schedule.
On one side of the table, you can list the tasks that need to be completed, such as sweeping or wiping down surfaces. Alternatively, you can list the frequency at which these tasks should be done, such as daily, weekly, or monthly.
Patience and Precision
Achieving a flawless finish on your baseboards during refinishing requires a steady hand and meticulous attention to detail. Begin by using painter’s tape to protect your baseboards’ edges from accidental scratches or dings.
Take the time to carefully sand the edges of your hardwood floors, careful not to damage your baseboards. A sanding block or an orbital sander can make the job easier, but you’ll still need fine-grit sandpaper to achieve a smooth finish.
Next, apply a thin layer of stain or finish to your floors, being careful not to let it drip onto your baseboards. Use a small brush to apply the stain around the edges of your floors and baseboards, and then use a larger brush or roller to cover the rest of the floor.
Be patient and take time during this step, ensuring you apply the stain evenly and consistently. Once the stain has dried, apply a second coat of finish to your floors to protect them from wear and tear.
Should I remove the quarter round before refinishing the floors?
If you’re considering refinishing your wood floors, you may want to evaluate whether removing the quarter-round trim is necessary for achieving a polished finish. While it’s possible to refinish floors without removing the quarter round, it’s highly recommended that you do so for the best results.
Here are a few reasons why:
- Removing the quarter round allows you to sand or strip off the old finish all the way to the edges. This ensures that the entire floor is refinished evenly, with no visible lines or gaps between the floor and trim.
- Refinishing the floors without removing the quarter round can cause damage to the trim. As you sand or strip the floor, you may accidentally scratch or dent the quarter round, which can be difficult to repair or replace without removing it.
- Removing the quarter round allows you to inspect it for damage or wear. If the trim is in poor condition, it may be time to replace it.
- By removing the quarter round, you can also clean and paint or stain it separately from the floor, ensuring it looks as good as new when reinstalled.
- Finally, removing the quarter round allows you to install new flooring underneath it, which can be helpful if you plan to change the type or color of your flooring.
How do I protect my baseboards when sanding floors?
Simply cover your baseboards with foam and masking tape to protect them during sanding and buffing. This will prevent any accidental scuffing from the sanding machine.
When sanding your hardwood floors, it’s important to be cautious and avoid damaging any adjacent surfaces. By taking a few extra steps to protect your baseboards, you can ensure that your refinishing job will be successful and leave your home looking beautiful.
Transform Your Space with Stunning Hardwood Floors and Baseboards
Refinishing hardwood floors and baseboards can be daunting, but with the right skills and knowledge, you can transform your space into a beautiful masterpiece. Your hardwood floors and baseboards can create a stunning dance of style that captivates anyone who enters your house.
Removing and protecting your baseboards during refinishing can be quickly done with the right tools and techniques. But specialized equipment and extra precautions must ensure a seamless finish for those who leave them in place.
By following these steps you can master the art of refinishing your hardwood floors and baseboards, leaving your space with a flawless finish. So take the first step towards your dream home and let your beautiful, newly refinished floors shine.