Can You Refinish Hardwood Floors in Sections: Nine DIY Steps
If you’re considering refinishing your hardwood floors, you might wonder if it’s possible to do it in a manageable way that won’t disrupt your home too much.
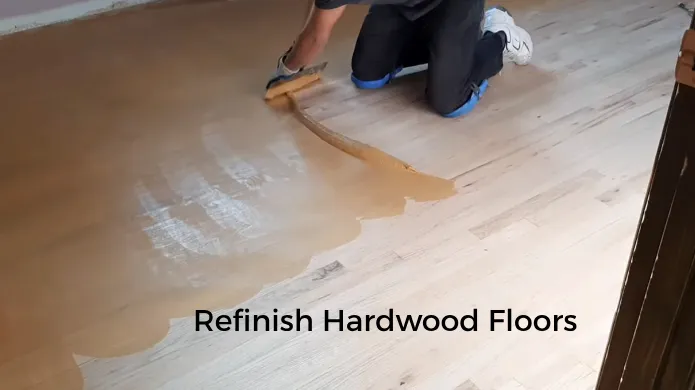
Well, the answer is yes, refinishing hardwood floors in sections is a great way to get the job done without having to clear out your entire space or disrupt your daily routine.
When you refinish just a few boards, you should understand that they may appear shinier or have a slightly different color compared to the surrounding boards. This is because the new finish may only blend in perfectly once it gets scuffed up enough over time.
Today, we’ll explore the step-by-step process of refinishing hardwood floors in sections and provide you with everything you need to know to tackle this project successfully. So, get ready to transform your hardwood floors and bring new life to your home.
How to Refinish Hardwood Floors in Sections: Step-by-Step Procedures
When refinishing hardwood floors in sections, there are a few essential steps to follow.
- STEP 1. Plan and mark the hardwood floor sections
- STEP 2. Prepare the section
- STEP 3. Sand the floor with fine grits sander
- STEP 4. Inspect, repair, and replace (if needed)
- STEP 5. Staining the selected area (optional)
- STEP 6. Apply the finish
- STEP 7. Sanding between coats of finish
- STEP 8. Apply the second coat
- STEP 9. Repeat for other sections
Let’s discuss these steps in detail:
STEP 1. Plan and Mark the Hardwood Floor Sections
First, to plan and mark the hardwood floor sections, analyze the layout and furniture placement in your home. This will help you determine the logical division of the area that makes the most sense for your situation.
You can divide the sections by room, hallway, or any other factors that are relevant to your space. Once you have identified the sections, you can mark them if you want to refinish specific areas. This will ensure that you focus your efforts and resources on the areas needing attention most.
To give you an idea, here is a sample table that you can use to plan and mark your hardwood floor sections:
| Section | Room | Furniture Placement |
| Section 1 | Living Room | Couch, Coffee Table, TV |
| Section 2 | Dining Room | Dining Table, Chairs |
| Section 3 | Bedroom | Bed, Dresser, Nightstands |
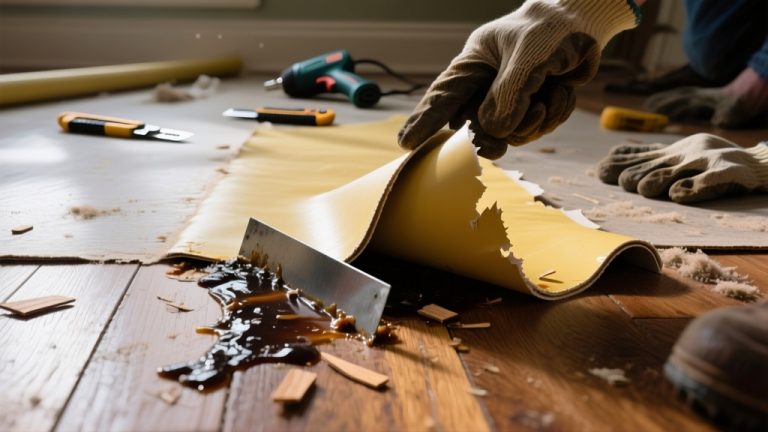
STEP 2. Prepare and Clean the Section
After clearing the section of furniture and rugs, clean the area to remove any dust or debris thoroughly. This ensures a smooth and flawless refinishing process for your hardwood floors.
Here’s what you need to do:
- Sweep the area with a broom or use a vacuum cleaner to remove loose dirt and dust.
- Use a damp cloth or mop to wipe the floor and remove any remaining particles.
- You can use a mild cleaner specifically designed for hardwood floors for stubborn stains or sticky residue.
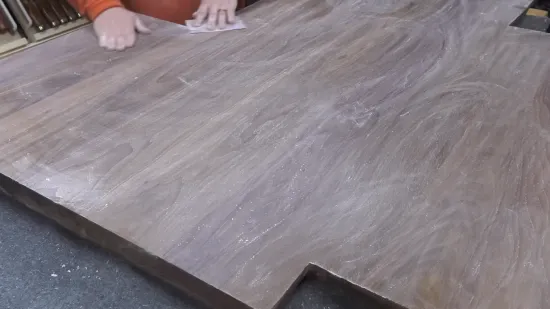
STEP 3. Sand the Floor with Fine Grits Sander
Now sand the floor using a floor sander with fine grits to achieve a smooth surface. This is crucial in preparing the hardwood floors for refinishing. You can remove any remaining imperfections and create a flawless surface using finer grits. The fine grits help smooth the wood and remove small scratches or blemishes.
Move the sander in a consistent, even motion to avoid uneven sanding. Take your time with this step to ensure you achieve the desired smoothness. Once you’re done sanding, you’ll have a clean and perfectly prepared surface ready for the next steps in the refinishing process.
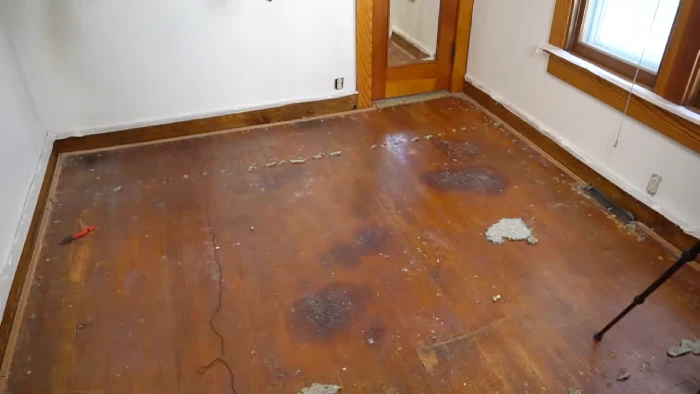
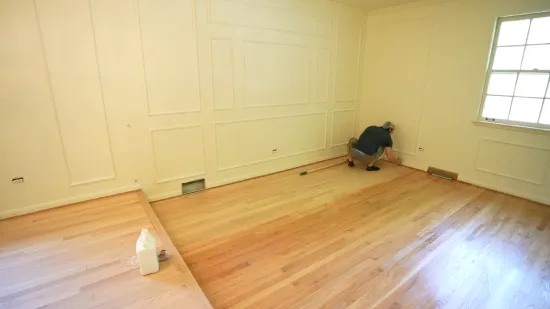
STEP 4. Inspect, Repair, and Replace (if needed)
Inspect the wood for any damage, such as cracks, gaps, or loose boards, and make necessary repairs or replacements. It is crucial to thoroughly examine the entire surface of the hardwood floors to ensure their structural integrity.
Look for any signs of wear and tear, including splits in the wood, gaps between the boards, or any boards that are loose or unstable. These issues can lead to further problems if addressed. Once identified, promptly repair or replace the damaged areas to prevent further deterioration.
STEP 5. Staining the Selected Area (optional)
Now that you have inspected, repaired, and replaced any damaged areas, it’s time to stain the selected area. This optional step allows you to change the color of your hardwood floors to your desired shade. Applying a wood stain can enhance the natural beauty of the wood and create a new look for your space.
Following the manufacturer’s instructions for application and drying times is important to ensure the best results. Before applying the stain, ensure the surface is clean and free of dust or debris.
Use a brush or cloth to apply an even coat of stain, working toward the wood grain. Allow the stain to dry completely before proceeding to the next step.
STEP 6. Apply the Finish
To protect and enhance the appearance of your wood, it’s time to apply a new coat of finish, such as polyurethane or a water-based sealer. Here’s how you can do it:
- Use a brush or roller to apply the finish evenly onto the wood.
- If using a brush, apply in long, even strokes, following the grain of the wood.
- If using a roller, start from one corner and work across the surface, applying the finish in a thin, even layer.
STEP 7. Sanding Between Coat of Finish
After applying a finish coat, lightly sand the surface with fine-grit sandpaper before applying the next coat. This process is essential for a smooth and professional finish when refinishing hardwood floors.
By sanding between coats of finish, you can remove any imperfections that may have occurred during the application process, such as dust particles or brush strokes. It also helps to promote better adhesion between the layers of finish, ensuring a more durable and long-lasting result.
When sanding, use fine-grit sandpaper to help smooth the surface without removing too much of the finish. Take your time and sand in the direction of the wood grain for the best results.
STEP 8. Apply the Second Coat
For an even and smooth finish, apply a second coat following the same process of applying, drying, and sanding between each coat. After allowing the first coat to dry completely, it is essential to apply another layer to enhance the durability and beauty of your hardwood floors.
Begin by carefully applying the second coat using a high-quality brush or roller, ensuring even coverage across the entire surface. Once applied, allow the second coat to dry fully before proceeding further. This additional layer will further protect your floors from daily wear and tear and add a stunning shine to the wood.
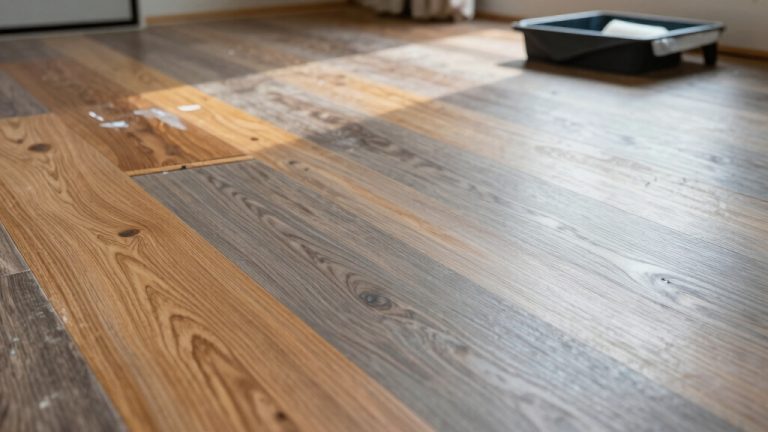
STEP 9. Repeat for Other Sections
Once the second coat is dry and cured, move on to refinish the remaining areas of the floor. This step is crucial to ensure a consistent and uniform finish throughout the space.
What not to do when refinishing hardwood floors?
When refinishing hardwood floors, there are several mistakes that you should avoid.
1. Skipping or Insufficient Preparation:
To achieve even results, thoroughly clean the floor and address any protruding nails or staples before refinishing. Skipping or insufficient preparation can lead to subpar outcomes and damage the hardwood floors.
Take the time to properly clean the surface, removing any dirt, dust, or debris that may interfere with refinishing. Also, inspect the floor for any nails or staples sticking out. These can cause problems during refinishing and should be carefully addressed before proceeding.
2. Insufficient Sanding of the Floor:
There needs to be more sanding to result in a better bond between the new finish and the floor surface, leading to a subpar and short-lived refinishing job. When you don’t sand the floor properly, you risk several negative outcomes that can leave you feeling frustrated and disappointed:
- Uneven finish: The new finish may only adhere evenly across the entire floor surface with adequate sanding. This can result in an unsightly appearance, with patches of the old finish or imperfections still visible.
- Premature wear and tear: Insufficiently sanded floors are more prone to premature wear and tear. The lack of proper adhesion can cause the new finish to peel or chip off easily, leaving your hardwood floors vulnerable to damage.
- Wasted time and effort: You must take the time to sand the floor properly to save your time and effort on a refinishing job that will last. You may find yourself having to redo the entire process sooner than expected.
3. Using the Wrong Grit of Sandpaper:
Using the wrong grit can lead to damage or an uneven finish on the wood. When refinishing hardwood floors, choosing the appropriate grit of sandpaper for each stage of the process is crucial.
Starting with a coarser grit is necessary to remove any old finish and imperfections from the surface. This initial sanding will create a smooth foundation for the subsequent steps.
As you progress, it is vital to transition to finer grits to achieve a polished and flawless result. Each grit serves a specific purpose, and using the wrong one can cause unnecessary damage or leave behind an inconsistent appearance.
4. Over-sanding the Floor:
When refinishing hardwood floors, be cautious and avoid over-sanding the floor. Over-sanding occurs when you spend too much time sanding one particular spot, making the wood too thin. This can weaken the floorboards and lead to a shorter lifespan for your hardwood floors.
It’s especially crucial to avoid over-sanding on older or thinner floors, as they are more susceptible to damage. To prevent over-sanding, evenly distribute your sanding efforts across the entire floor. Take your time and use a light touch, allowing the sandpaper to do the work without excessive pressure.
5. Not Allowing Adequate Drying Time:
Ensure to follow the manufacturer’s recommendations for drying time between coats of finish to avoid a tacky or uneven finish. Not allowing adequate drying time can hurt the final result of your hardwood floor refinishing project.
Rushing the process may seem tempting, but it can lead to various problems, such as a sticky surface or an uneven appearance. Proper drying time is crucial for the finish to cure and harden properly, ensuring a durable and beautiful finish.
6. Applying Finish Too Thickly:

Applying the finish too thickly can result in drips, bubbles, and an uneven appearance. When refinishing hardwood floors, applying the finish in thin, even coats is crucial. This ensures a smooth and flawless finish.
If you apply the finish too thickly, it will not dry evenly, leading to unsightly drips and bubbles. These imperfections can ruin the overall appearance of your hardwood floors. To avoid this, take your time and apply each coat thinly and evenly, allowing sufficient drying time between coats.
7. Not Buffing Between Coats:
Skipping the step of buffing the floor between coats can result in a less professional finish and decrease the adhesion of subsequent coats.
When refinishing hardwood floors, take the time to properly buff the floor before applying each coat of finish. Here are four reasons why buffing between coats is important:
- Smoother surface: Buffing helps remove any imperfections or rough spots on the floor, resulting in a smoother surface for the next coat of finish.
- Better adhesion: Buffing creates a slightly roughened surface, allowing the subsequent coat of finish to adhere better and prevent peeling or flaking.
- Enhanced durability: By buffing between coats, you ensure that each layer of finish is properly bonded to the wood, increasing the overall durability and longevity of the floor.
- Professional finish: Buffing between coats helps achieve a more professional-looking finish by eliminating unevenness or visible brush strokes.
What is the best time of year to refinish hardwood floors?
The ideal time to refinish your hardwood floors is during the summer when the weather is warm and humidity levels are lower. This is because the ideal conditions for refinishing hardwood floors require a stable environment, and summer provides just that.
The finish dries faster when the weather is warm, allowing for a quicker turnaround time. Also, lower humidity levels prevent the wood from absorbing excess moisture, which can lead to warping or buckling.
Refinishing your hardwood floors during the summer ensures the finish will cure properly and provide long-lasting results. So, if you’re planning to have your hardwood floors refinished, enjoy the summer months and enjoy a beautiful, refreshed floor when you return from your vacation.
Are hardwood floor refinishing fumes harmful?
Now that you know the best time of year to refinish your hardwood floors, let’s address an important concern: the potential harm of hardwood floor refinishing fumes. It’s crucial to understand the risks involved before undertaking any project.
The fumes emitted during the refinishing process can harm your health. Here are three reasons why you should take caution:
- Respiratory Issues: The uncured polyurethane used in refinishing can worsen allergies, asthma, and bronchial conditions, making it difficult to breathe properly.
- Vision and Throat Problems: Exposure to these fumes may lead to vision difficulties and throat irritation, causing discomfort and potential long-term effects.
- General Health Concerns: Symptoms such as nausea, uncontrolled coughing, vomiting, and headaches can arise from inhaling these harmful fumes, impacting your overall well-being.
To ensure your safety, taking proper precautions or considering professional assistance when refinishing your hardwood floors is essential.
How long should you stay out of the house after refinishing the floors?

After applying polyurethane or oil-based finish to your floors, it is recommended that you stay out of your house for at least 72 hours to allow the fumes to dissipate. This time frame applies specifically to oil-based polyurethane finishes, which take longer to dry and for the fumes to disperse completely.
Conversely, water-based polyurethane finishes require a shorter waiting period of at least 8 hours. It is crucial to follow these guidelines to ensure your safety and to prevent any potential health risks associated with inhaling the fumes.
Refinish Your Hardwood Floors Like a Pro with Our Step-by-Step Guide
Refinishing hardwood floors can be daunting, but breaking it down into manageable sections makes it much more manageable. Following our step-by-step guide, you can refinish your hardwood floors like a pro.
Remember to prepare the sections correctly, inspect and repair any damage, sand the floors, apply the finish, and repeat the same process for each section until you’ve completed the entire area.
With these tips, you’ll be well on your way to beautiful, newly-refinished hardwood floors that will last for years. So step into your beautifully refinished space and let the warmth of your floors embrace you like a comforting hug.