Can You Put Carpet Over Hardwood Floors: 7 Steps to Follow
Carpets on the floor offer warmth, comfort, and a touch of luxury to any living space. But can you place it over your beloved hardwood floors without causing damage or compromising their beauty?
You can install carpet over hardwood floors, and it’s a popular choice among homeowners.
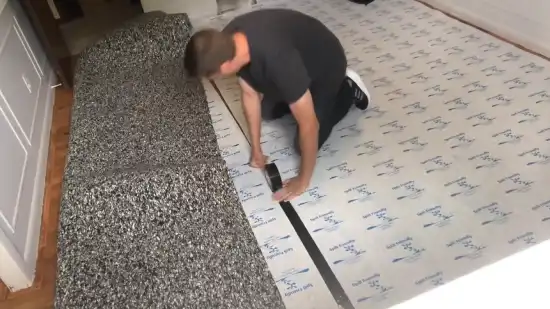
The carpeting process continues with the placement of tackless strips along the room’s perimeter. After that, you need to lay down carpet padding.
Once the strips are in position, the next step involves laying down carpet padding. With the padding in place, accurately measuring and aligning the carpet comes next.
We will discuss all the steps in detail so that you can easily install carpet over your hardwood floors.
Can You Put Carpet Over Hardwood Floors: Make It Possible With These Steps
When you decide to put carpet over hardwood floors, you need to follow some steps. The following are among them:
- Step 1: Thoroughly prepare the floor
- Step 2: Install tackless strips
- Step 3: Lay carpet padding
- Step 4: Position and hook the carpet
- Step 5: Power stretching the carpet
- Step 6: Secure edges and transitions and cut the excess carpet
Let’s examine each step in detail so that you can easily install carpet over hardwood floors.
Step 1: Thoroughly Prepare the Floor
To begin preparing the floor, you need to vacuum and sweep the hardwood surface to ensure it is free of dirt and debris.
First, remove any furniture or obstacles from the floor so you have a clear path to work with. Then, grab your trusty vacuum cleaner with a soft bristle brush attachment and gently glide it over the floor. Feel the satisfaction as it sucks up all the loose dirt, dust, and debris, leaving your hardwood surface pristine.
Once the vacuuming is done, grab a broom or a dry mop and sweep away any remaining particles. This extra step ensures that your floor is truly clean and ready for the next phase of its transformation.
Step 2: Install Tackless Strips
Now you have to install tackless strips. Start by measuring and cutting the tackless strips to fit the room’s perimeter.
Use a tape measure to determine the length of each wall and add them together to calculate the total perimeter.
Cut the tackless strips using a saw or shears to match each wall’s measured length. Place the strips parallel to the wall, ensuring they are about 2/3rd the thickness of the carpet away from the baseboard.
Then, use masonry nails to firmly attach the tackless strips to the floor, pointing them towards the wall for stability.
Step 3: Lay Carpet Padding
Once you’ve cut the carpet padding to the correct dimensions, you need to lay the carpet padding.
Use a measuring tape to determine the dimensions of the room’s perimeter. Measure each wall and add the measurements together to find the total length needed.
Roll out the carpet padding and use a marker or chalk to mark the dimensions you measured. Make sure the marks are straight and accurate.
Now, use a sharp utility knife to cut along the marked lines. Press down firmly and use a straightedge to guide your cut, ensuring clean and precise edges.
Lay the cut padding sections along the room’s perimeter, leaving about 6 inches of space between each piece. Butt the edges together and secure any seams with duct tape. Trim excess padding using the utility knife for a proper fit.
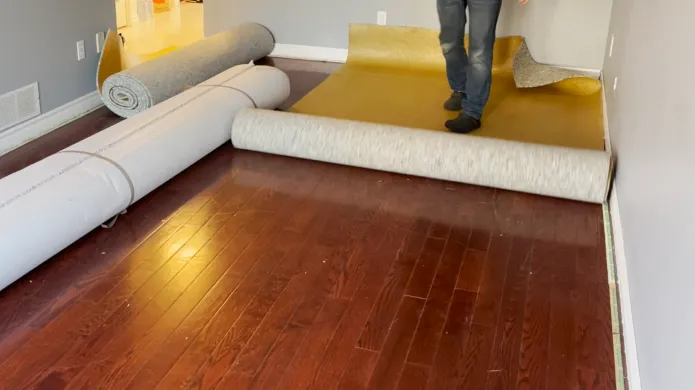
Step 4: Position and Hook the Carpet
Now that you have laid the carpet padding, it’s time to position and hook the carpet onto the tackless strips.
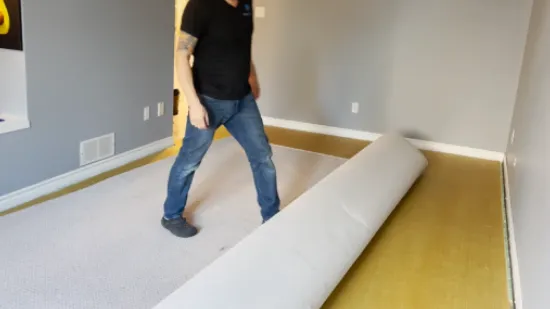
Unroll the carpet over the padding, and make sure it covers the entire area you intend to carpet. Ensure that there’s some extra carpet on all sides to accommodate trimming and adjustments.
Start by aligning one edge of the carpet with a wall, leaving a small amount of excess carpet along the baseboard. This allows for adjustments during the installation process.
If your room has thresholds and doorways, let the carpet overlap them slightly. This overlap will be trimmed later for a clean finish.
Now, position a knee kicker about 3 inches away from the wall where you initially aligned the carpet. Hold the kicker’s handle with one hand and place your knee on the padded end.
Push down on the padded end with your knee to stretch the carpet towards the wall. This stretching action helps the carpet hook onto the pins of the tackless strips, ensuring a secure fit.
Step 5: Power Stretching the Carpet
To achieve a snug fit, use a power stretcher to stretch the carpet across the wooden surface tightly. Make sure to reposition the stretcher as needed to cover all sides and areas over the tackless strips.
It ensures that the carpet is properly secured and free from wrinkles or loose spots. This tool extends the carpet to its maximum tension, fastening it securely to the tackless strips along the room’s perimeter.
Step 6: Secure Edges and Transitions and Cut the Excess Carpet

After you’ve successfully stretched and positioned the carpet using the knee kicker and power stretcher, it’s time to secure the edges and transitions while ensuring a clean and polished appearance.
Start by carefully trimming the excess carpet at the threshold of doorways using a utility knife and a straightedge for a neat finish. After trimming, you can push the carpet under the baseboards using a stair tool, ensuring a polished look and securing the edges.
If there is any excess carpet along the walls, use a carpet trimmer to cut it away, creating a clean and uniform appearance. Remember to be cautious when trimming around obstacles, such as columns or built-in features, to maintain a seamless look.
Once the carpet is in place, align and secure any seams using adhesive tape or glue designed for carpet seams.
Step 7: Finishing Touches and Transition Strips
With the carpet properly secured and trimmed, the final steps involve adding finishing touches to ensure a polished and professional installation.
Walk across the entire carpeted area to ensure that it’s properly stretched and secured. Make any necessary adjustments if you notice any areas that need additional attention.
Carefully inspect the entire installation to ensure that the carpet is even, properly stretched, and free from wrinkles or bumps. Trim any remaining loose threads for a clean finish.
Mistakes to Avoid When Placing Carpet Over Hardwood
When it comes to placing carpet over hardwood floors, there are a few mistakes that you should avoid at all costs. The following are:
- Not Waiting for the Wood to Dry
Ensure that the hardwood floor is completely dry before installing the carpet, as moisture can lead to mold, rot, or mildew in the wood.
Waiting for the wood to dry is crucial for a successful carpet installation. When moisture is trapped between the wood and carpet, it creates a breeding ground for harmful organisms that can cause serious damage to the floor.
To avoid this, it is essential to properly ventilate the area and allow ample time for the wood to dry completely. This may require using fans or dehumidifiers to expedite the process.
Additionally, checking for any signs of moisture before proceeding with the carpet installation is important. Simply running your hand across the wood surface can help detect any residual moisture.
Taking the time to ensure the wood is dry will not only protect the integrity of the floor but also prolong the life of your carpet.
- Installing Incorrect Padding
Select the correct padding material when installing your carpet to avoid damaging your hardwood floors. The type of padding you choose can make a big difference in the long-term protection of your floors. Here are four types of rug padding materials to consider:
- Polyvinyl-based pad: This type of padding is great for added cushioning and durability. It supports your carpet firmly, preventing it from sinking into the hardwood.
- Natural rubber pad: This is a great choice if you’re looking for eco-friendly options. It offers excellent grip and prevents your carpet from sliding on the hardwood.
- Synthetic-latex pad: This padding material is known for its resilience and durability. It can withstand heavy foot traffic and helps extend your carpet’s life.
- Felt pad: This type of padding is ideal for thinner rugs. It adds a layer of cushioning without raising the height of the carpet too much.
- Inadequately Stretching the Carpet
Remember to properly stretch the carpet to avoid any issues with it later on.
Restricting the carpet can lead to a multitude of problems down the road. When the carpet is not stretched tightly enough, it can become loose, creating unsightly wrinkles and bumps.
Not only does this affect the appearance of your floor, but it also poses a tripping hazard.
Additionally, a loosely stretched carpet can lead to premature wear and tear, as it is more prone to shifting and moving.
To ensure a properly stretched carpet, it is essential to use a power stretcher. This tool allows you to apply the necessary tension to keep the carpet securely in place.
What kind of carpet can you put on hardwood floors?
When selecting a carpet to place over hardwood floors, it’s advisable to opt for gentle and protective materials. Polypropylene rugs with jute backing are a great choice as they offer both durability and safeguarding qualities.
Avoid polypropylene rugs with plastic backings, as they can potentially scratch the hardwood surface. For a more natural option, consider carpets made from materials like cotton or wool, known for their softness and durability, making them well-suited for hardwood floors.
How long do you need to wait to put rugs on new hardwood floors?
After refinishing or finishing your hardwood floors, it’s advisable to wait for about 3 weeks before placing area rugs on them.
This waiting period allows the finish to fully cure and harden, ensuring that the rugs won’t adhere to the surface or potentially cause any damage.
Similarly, after the hardwood has been refinished or finished, it’s recommended to wait for 48 to 72 hours before putting the furniture back in its place. This gives the finish ample time to set without the risk of leaving marks or imprints.
Successfully Install Carpet Over Hardwood Floors
You can now confidently enhance your living space by placing carpet over your beloved hardwood floors but avoid carpeting underlay under hardwood floors. You’ll achieve a seamless and polished installation by following the carefully laid out steps.
Avoid common pitfalls like moisture buildup, incorrect padding choices, and inadequate stretching.
Remember, thorough preparation, proper padding selection, and precise stretching are key to protecting your new hardwood and carpet from humidity effects.
Your hardwood floors and carpet will coexist harmoniously, providing comfort and luxury to your home for years to come. Enjoy the beauty and warmth of your revamped living space.