Can You Install Engineered Hardwood Over Tile: Easy Steps for Installation
Are you looking to update your home’s flooring but want to avoid the hassle and expense of removing your existing tile? You may be wondering if installing engineered hardwood over the tile is possible.
You can install engineered hardwood over the tile if the tiles are in good condition and not loose or cracked. Remember that loose or cracked tiles can cause your installation to fail. You should also consider installing hardwood flooring over tile will raise your floor height.
Today we’ll discuss installing engineered hardwood over tile, including what to look for in your tile and subfloor. So, if you’re ready to give your home a fresh look, read on to learn how to install engineered hardwood over existing tile flooring.
How to Install Engineered Hardwood Over Existing Tile Flooring: Steps to Follow
Before installing engineered hardwood over existing tile flooring, you need to evaluate the condition of your tiles. Following these steps, you can easily install engineered hardwood over your existing tile flooring:
- Step 1: Evaluate Existing Tile Flooring Condition
- Step 2: Measure the Height and Moisture Levels
- Step 3: Gather the Necessary Tools and Materials
- Step 4: Acclimate the Engineered Hardwood
- Step 5: Prepare the Tile Flooring
- Step 6: Install the Underlayment (if necessary)
- Step 7: Begin the Installation
- Step 8: Cut and Stagger the Planks
- Step 9: Continue the Installation
- Step 10: Complete the Installation
Step 1: Evaluate Existing Tile Flooring Condition
To begin with, take a close look at the tile flooring and ensure there aren’t any glaring issues like tiles popping up or cracks deep enough to swallow a small animal. It’s crucial to have a stable and level surface before installing engineered hardwood over the tile.
Carefully inspect the existing tile flooring for cracks, loose tiles, or uneven areas. These imperfections can cause problems down the line and compromise the overall integrity of the flooring. If you notice any issues, it’s best to address them before moving forward with the installation process.
Step 2: Measure the Height and Moisture Levels
Next up, you’ll want to whip out your measuring tape and get the height of your tile flooring to ensure it’s compatible with doors and appliances. Remember to check for any excess moisture levels that could cause issues with the installation process.
It’s essential to have enough clearance space for the added height of the engineered hardwood. To make it easier, use a table to keep track of the measurements. The first column should indicate the area you’re measuring, such as the hallway or kitchen.
The second column should list the height of the tile flooring. The third column should show the clearance height of doors and appliances. Finally, the fourth column should indicate if the height is compatible or not.
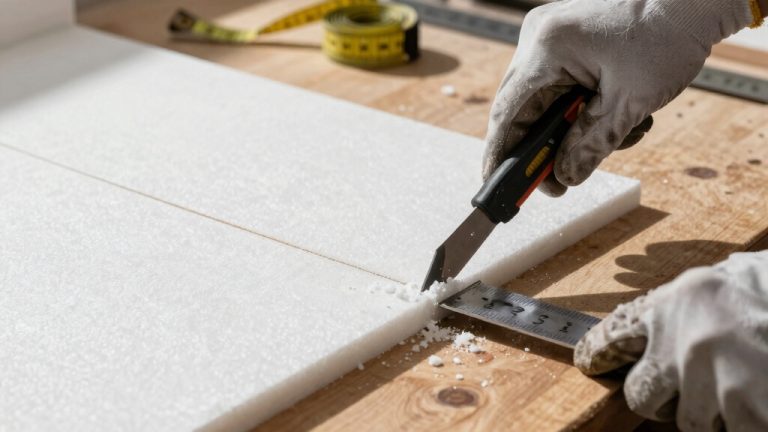
Step 3: Gather the Necessary Tools and Materials
To ensure a successful flooring project, make sure you have all the necessary tools and materials at hand. These tools include spacers, a saw (such as a circular or miter saw), a tapping block, a pry bar, and a rubber mallet. They will help you measure and cut the engineered hardwood flooring and install it properly.
Also, if required, you may need underlayment and a tape measure to ensure accurate measurements. Having these tools and materials ready will make the installation smoother and more efficient. This will give you a high-quality finish for your engineered hardwood over-tile project.
Step 4: Acclimate the Engineered Hardwood
Before slapping down those planks, let them chill out in the room for at least three days to get nice and cozy with the humidity and temperature. Don’t be impatient, or you might end up with a warped mess.
Acclimating the engineered hardwood is crucial to ensure it adjusts to the room’s environment before installation. This step is especially important if you’re installing over tile, as the tile may have a different temperature and moisture level than the hardwood.
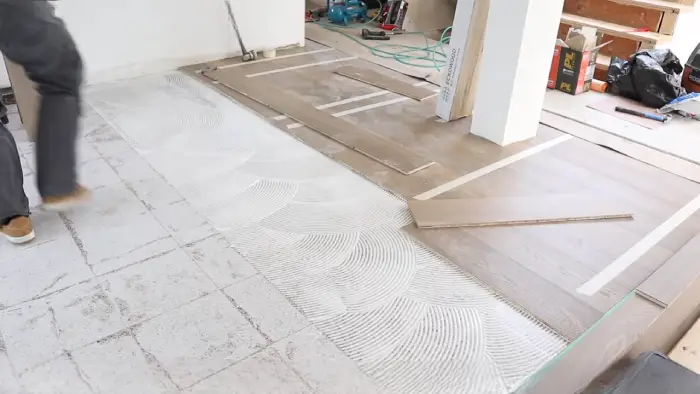
Step 5: Prepare the Tile Flooring
Now it’s time to get that tile flooring ready for the installation of your new hardwood. Before you begin, make sure the surface is clean and free from any dirt, debris, or wax. If there are any protrusions, ensure they’re removed to create a smooth surface.
To further prepare the tile flooring, consider filling the grout lines with a suitable leveling compound to create an even surface. This will ensure that the engineered hardwood will be properly installed and will look great in your space.
Step 6: Install the Underlayment (if necessary)
Get ready for smoother, more moisture-resistant flooring by adding underlayment as necessary, following the manufacturer’s guidelines. Underlayment can provide additional moisture protection and cushioning, making it an important step in the installation process.
Here are some tips to keep in mind when installing underlayment for your engineered hardwood over tile:
- Make sure the underlayment is compatible with both the tile and the hardwood
- Use a moisture barrier if necessary
- Secure the underlayment according to the manufacturer’s guidelines
- Allow the underlayment to acclimate to the room for at least 24 hours before installation
- Trim any excess underlayment after installation to ensure a proper fit.
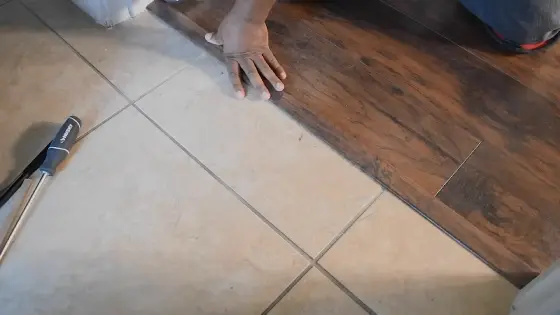
Step 7: Begin the Installation
Before starting, make sure you have left a 3/8-inch gap between the planks and the walls, using spacers to maintain the gap. Now, it’s time to begin the installation process by utilizing the tongue-and-groove system, interlocking the planks securely.
It is possible if you are wondering whether you can install engineered hardwood over tile, but it’s important to ensure that the tile is clean, level, and free of cracks.
Remember to repeat these steps for each plank in the first row, ensuring they are all level and securely locked in place. With precision, care, and the right tools, you can achieve a stunning finish for your flooring.
Step 8: Cut and Stagger the Planks
It’s like putting together a puzzle as you measure and use a saw to precisely cut and stagger the planks for the remaining rows to achieve a flawless finish. Remember to measure and cut the last plank to fit and use a saw to make precise cuts.
Stagger the end joints of the planks in each row to create a natural and visually appealing look. Take your time and ensure that each cut is accurate to avoid any mistakes.
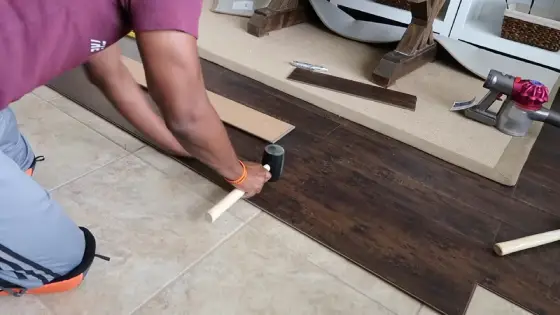
Step 9: Continue the Installation
Now that the planks are cut and staggered, it’s time to continue the installation. Use a tapping block and rubber mallet to ensure a tight fit between each row. Remember to check periodically with a level to maintain a level surface.
Here are some tips to ensure a successful installation:
- Use a tapping block and rubber mallet to ensure a tight fit.
- Be sure to stagger the seams between rows.
- Check periodically with a level to maintain a level surface.
- Take your time and work carefully to avoid damaging the planks.
Step 10: Complete the Installation and Trim the Last Row
Once the last row of engineered hardwood is fitted tightly against the previous row, it’s time to remove the spacers and ensure that the flooring is securely in place. To do this, use a pry bar or pull bar to fit the last row tightly against the previous row.
Once the planks are in place, measure and cut them to fit the remaining space. After completing this step, clean the surface to remove debris before enjoying your newly installed engineered hardwood over the existing tile flooring.
What to Consider When Installing Engineered Hardwood Over Tile?

When installing engineered hardwood over tile, several key points must be considered.
1. Tile Condition:
To ensure the stability and evenness of your new flooring, you’ll want to ensure that your existing tile is in good shape, without any loose or damaged pieces. Otherwise, it could negatively affect the installation of your engineered hardwood.
Damaged or uneven tiles can cause the new flooring to be unstable, leading to cracking, warping, and other issues. Also, if the tiles are level, properly installing the new flooring can be easier, which can lead to unevenness and instability.
2. Tile Stability:
Ensure your tile is firmly adhered to the subfloor and has no flex or movement to prevent any stability issues during installation. If the tile isn’t stable, it can cause the engineered hardwood to shift or buckle over time.
Address any issues with the stability of the tile before proceeding with the installation to ensure a successful and long-lasting result. This may involve repairing or replacing loose or damaged tiles or reinforcing the subfloor to provide additional support.
3. Height Considerations:
Remember the potential increase in floor height when installing engineered hardwood over tile. This can impact the flow of your space and make it feel cramped or disjointed.
Measuring the existing floor height and making necessary adjustments for doors, appliances, and transitions to other rooms is important. You may need to remove some existing tile to accommodate the new flooring or use transition strips to create a seamless transition between rooms.
4. Expansion Space:
Remember, just like a balloon needs room to expand, so does your newly engineered hardwood flooring. Use spacers during installation to maintain a gap around the room’s perimeter, allowing the wood to expand and contract without causing any damage.
This expansion space is crucial for the longevity of your flooring. Without it, the wood could warp, buckle or even break apart. So, plan and leave a ½-inch gap around the room’s perimeter, even if you’re installing engineered hardwood over tile.
5. Tile Acclimation:
Before starting the installation process, it’s important to give your tile enough time to acclimate to the temperature and humidity of the room. This is necessary because tiles can expand or contract depending on their environment. To properly acclimate your tile, you should consider the following steps:
- Store your tile in the room where it’ll be installed for at least 48 hours before installation.
- Keep the room’s temperature between 60-80°F and the humidity between 30-50% during the acclimation process.
- Remove any packaging from the tile to allow air to circulate them.
6. Installation Method:
To ensure your flooring stays secure, you’ll want to snap your click-locking system into place using the hammer and block method. As the saying goes, ‘Measure twice, cut once.’
When installing engineered hardwood over tile, follow the manufacturer’s instructions for the chosen installation method. Click-locking system is often preferred when installing over tile, but ensure the subfloor is level and clean before installation.
7. Underlayment:
Ensure the stability of your tile flooring and address any issues before proceeding with the installation, as generally, underlayment is unnecessary over tile. However, if the tile is not stable or has uneven areas, an underlayment may be necessary to create a smooth surface for the engineered hardwood to be installed on.
In this case, select an underlayment appropriate for use with hardwood flooring and follow the manufacturer’s instructions for installation. Keep in mind that adding an underlayment may also increase the height of the floor, which could impact transitions to other rooms or the installation of baseboards.
Can you put hardwood over ceramic tiles?
You can lay engineered hardwood over ceramic tile with ease, giving your flooring a fresh look without breaking the bank. It’s a great way to update your space without removing the existing tile.
However, take some precautions before installation. Firstly, make sure the tile is in good condition and level. If there are any cracks or uneven spots, it’s recommended to fix them before laying the new flooring.
Secondly, use a suitable underlayment to provide a smooth surface for the new flooring. This will also help prevent moisture from seeping through and damaging the new hardwood.
What wooden flooring can be laid over tiles?
There are several options, including sheet vinyl, vinyl plank, engineered timber & bamboo, laminate, and hybrid flooring.
Engineered timber & bamboo, laminate, and hybrid flooring. These options provide the beauty of real wood with added durability and stability. They’re perfect for areas with high foot traffic and can be installed over tiles with ease.
Upgrade Your Home: Install Engineered Hardwood Over Existing Tile
Installing engineered hardwood over tile can be a rewarding and worthwhile home improvement project with the right approach. Imagine the satisfaction of walking on beautiful, warm wood flooring instead of cold, hard tile.
With the right tools, supplies, and techniques, it’s possible to transform your tile flooring into beautiful, durable, engineered hardwood. However, before you dive into this project, there are a few things to consider.
Make sure your tile flooring is in good condition and level. Any cracks or unevenness could cause problems during installation. Also, choose the right type of engineered hardwood for your tile, as not all products are compatible.
So, if you’re up for the challenge, grab your tools and get ready to transform your space and increase your home value. Your new engineered hardwood flooring awaits.