Can Prefinished Hardwood Floors Be Sanded and Restained: A Comprehensive Guide
Sanding and restaining hardwood floors can give them a new look and extend their lifespan. But you may wonder if prefinished hardwood floors can be sanded and restained.
You’ll be pleased to know that prefinished hardwood floors can indeed be sanded and restained. This provides the perfect opportunity to refresh and revamp your home’s interior design. Compared to unfinished hardwood floors, prefinished floors are coated with a layer of finish at the factory.
Today, we will guide you through the process of sanding and restaining your prefinished hardwood floors step by step. Also, we’ll answer some common questions you may have about this process.
How to Sand and Restain Prefinished Hardwood Floors: Step-by-Step Guide
Before you start sanding and restaining your prefinished hardwood floors, it’s important to prepare your work area. Then, you’ll want to sand the floors using a drum sander, edger, and buffer to remove the old finish.
To sand prefinished hardwood floors, follow these steps:
- Step 1: Prepare the Work Area
- Step 2: Sanding the Prefinished Hardwood Floors
- Step 3: Cleaning and Inspecting the Hardwood Floors
- Step 4: Water-Popping the Hardwood Floors (Optional)
- Step 5: Applying the Stain to the Floors
- Step 6: Applying the Protective Finish
Step 1: Prepare the Work Area
While preparing the hardwood floors for sanding and restaining, open the windows or grab some fans to let fresh air circulate while you clear the room and seal off adjacent areas. This is an important step to ensure a safe and comfortable working environment.
The dust and fumes created during sanding and staining can be harmful if not properly ventilated, so take the necessary precautions. Next, take a look at the floor and remove any staples, nails, or other debris that may be present. Use a floor scraper or putty knife to remove any stubborn materials.
Once the floor is clean, use a vacuum cleaner or tack cloth to remove any dust or dirt that may have accumulated. This will ensure a smooth surface for sanding and staining.
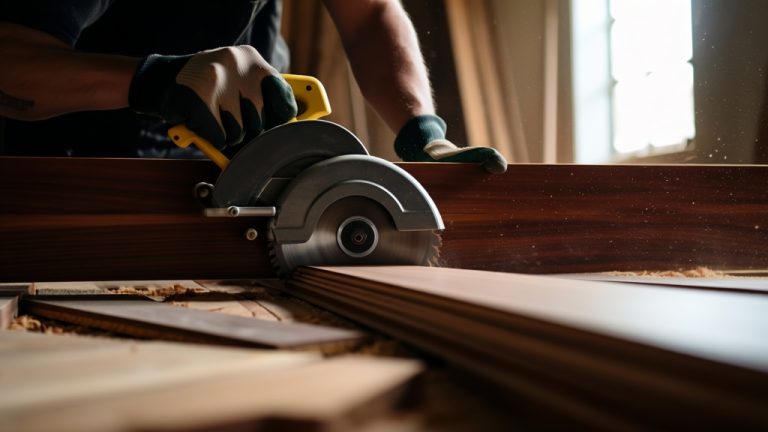
Step 2: Sanding the Prefinished Hardwood Floors
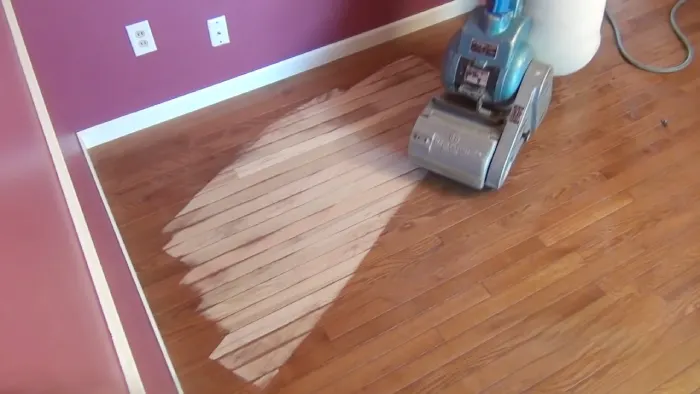
Transform your dull and worn-out floors into a stunning masterpiece using a heavy-duty drum or orbital sander to eliminate imperfections and create a smooth surface for the upcoming staining process. Start with coarse-grit sandpaper to remove the existing finish and any deep scratches or dents.
Running the sander in the direction of the wood grain will help to achieve a uniform finish. When sanding prefinished hardwood floors, paying extra attention to high-traffic areas such as doorways and hallways is important.
Gradually switch to medium-grit sandpaper and fine-grit sandpaper to achieve a smooth surface. Make sure you always keep the sander moving to prevent creating any uneven spots.
And don’t forget to use a shop vacuum or dust collection system to clean up the dust and debris as you go along.
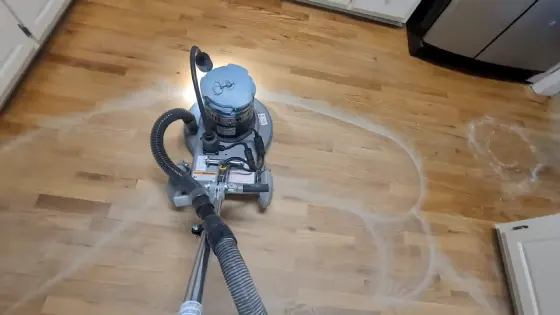
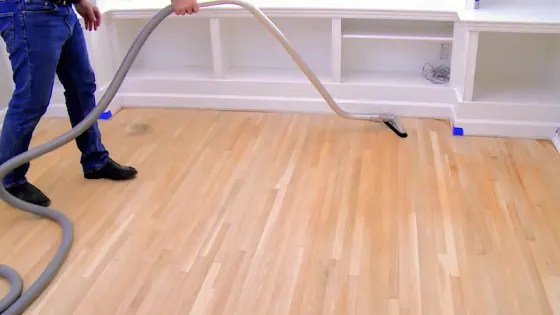
Step 3: Cleaning and Inspecting the Hardwood Floors
To ensure a flawless finish after sanding the surface, thoroughly inspect and clean the floor to remove any debris or imperfections that could affect the staining process. Start by using a tack cloth to clean the surface of the prefinished hardwood floors.
This will remove any dust, dirt, or other small particles that could interfere with the staining process.
After cleaning, take a closer look at the surface of the hardwood floors. Inspect it for any scratches, dents, or other imperfections that must be addressed before beginning the staining process.
Step 4: Water-Popping the Hardwood Floors (Optional)
If you want to take your stain game to the next level, you can try water-popping your floors to enhance the penetration and reveal any missed spots.
This optional step involves moistening a clean rag with water and rubbing it over the sanded floor. The water will raise the grain of the wood, allowing the stain to penetrate deeper and more evenly.
Also, water-popping can help identify any missed areas during the sanding process, as they will appear lighter than the rest of the floor. It’s important to allow the water to dry completely before staining.
This can take anywhere from a few hours to overnight, depending on the humidity and temperature of the room. Once the floor is completely dry, you can proceed with staining as usual.
Step 5: Applying the Stain to the Floors
Once you’ve chosen a wood stain that complements your desired color, it’s time to apply it to your prefinished hardwood floors. You can use a brush or cloth to apply the stain, working in small sections at a time to ensure even coverage.
Allow the stain to penetrate the wood, giving you a more even and long-lasting finish. As you apply the stain, wipe off any excess to avoid a blotchy finish. This can be done with a clean cloth or rag, and it’s important to do it before the stain can dry.
If you need more clarification about the amount of stain you need to apply, it’s always better to start with a small amount and add more as needed. With the right technique and patience, you can achieve a beautiful, customized look for your prefinished hardwood floors.
Step 6: Applying the Protective Finish
After staining your floors, seal and protect them with a polyurethane finish. Polyurethane provides a durable, long-lasting protective layer to keep your floors looking beautiful for years.
To apply the finish, stir the polyurethane thoroughly to ensure it’s well-mixed. Once it’s stirred, you can begin applying it to the floors. It’s important to apply thin, even coats to avoid drips or bubbles that can ruin the finish.
Apply the first coat and allow it to dry completely before applying subsequent coats. The number of coats will depend on the type of polyurethane finish you’ve chosen and the level of protection you desire.
What do sanding and refinishing do on prefinished hardwood floors?

Sanding and refinishing prefinished hardwood flooring create a smooth and flawless finish while removing cosmetic imperfections. This process involves sanding down the top layer of the prefinished hardwood floor to expose the bare wood underneath.
The benefits of sanding and refinishing prefinished hardwood flooring go beyond cosmetic improvements. It also allows you to repair any damage that may have occurred over time, such as scratches, dents, and scuffs.
Furthermore, sanding and refinishing prefinished hardwood flooring can extend the life of your floors by providing a fresh new surface and sealing it from future damage.
How many times can solid prefinished hardwood floors be refinished?
Solid prefinished hardwood floors can be refinished four to seven times, depending on various factors such as the top layer’s thickness, the subfloor’s condition, and the extent of the damage.
The number of refinishes possible is determined by the thickness of the top layer, which ranges from 0.6mm to 6mm. The thicker the top layer, the more the floor can be refinished. However, if the top layer is too thin, sanding and refinishing can cause irreparable damage to the floor.
The condition of the subfloor is another factor that determines the number of refinishes possible. If the subfloor is uneven or damaged, it can affect the stability of the hardwood floor and limit the number of times it can be refinished.
Also, the extent of the damage to the hardwood floor, such as deep scratches and gouges, can also limit the number of refinishes.
Can prefinished engineered hardwood floors be refinished?
Refinishing engineered wood floors can be tricky due to the thickness of the top layer. Unlike solid hardwood floors, which can be sanded and refinished multiple times, engineered wood floors have a much thinner top layer, making it difficult to sand down without damaging the underlying layers.
Most manufacturers don’t recommend refinishing engineered wood floors, as it can void the warranty and potentially ruin the floor. If you’re considering refinishing your prefinished engineered hardwood floors, it’s important to consult with the manufacturer for specific instructions.
They may have recommendations for certain types of sanding equipment or finishing products that are safe to use on their flooring. Additionally, they may be able to guide how much of the top layer can be sanded down without causing damage.
How do you change the color of prefinished hardwood floors?
To transform the look of your prefinished hardwood floors, you can sand and refinish them with a new color, allowing you to create the perfect atmosphere for your home.
However, refinishing prefinished hardwood floors requires a delicate touch to avoid damaging the wood. Note that prefinished hardwood floors have a thin finish layer, making sanding through to the actual wood easier.
To change the color of prefinished hardwood floors, you must first sand the existing finish off the surface of the wood. Once the finish is removed, you can apply a new stain to the wood to achieve the desired color.
It’s important to take your time when sanding to avoid damaging the wood and to ensure a smooth and even surface. After staining, applying a protective finish will help protect the wood and keep it looking beautiful for years.
Upgrade Your Home’s Flooring: Restain Prefinished Hardwood Floors
Sanding and restaining prefinished hardwood floors can be a rewarding and cost-effective way to update your home’s flooring. Without replacing your entire flooring, you can achieve the desired look by following our step-by-step guide and consulting a professional if necessary.
Solid hardwood floors can typically be sanded and refinished multiple times, while engineered hardwood floors may only be refinished once or twice. That means that investing in solid hardwood floors can provide you with years of durable, beautiful flooring that can withstand the test of time.
Sanding and refinishing your prefinished hardwood floors is a great option, whether changing their color or giving them a new lease on life.