Best Way Cut Metal Roofing: Accuracy, Safety, and Longevity
To cut metal roofing effectively, start by securely clamping panels and marking precise lines with a fine-tip marker.
Use aviation snips for thin steel or electric metal shears for longer straight cuts. Nibblers are ideal for ribbed profiles to avoid distortion.
When power tools like grinders or jigsaws are needed, wear full protective gear and control heat to protect coatings.
Immediately coat raw edges post-cut to prevent rust. Mastering these steps guarantees clean, accurate cuts.
Explore further techniques to refine your approach.
Key Takeaways
- Use aviation snips for thin gauge steel and electric metal shears for long, straight cuts to ensure clean, precise edges.
- Secure panels firmly before marking and cutting to prevent shifting and maintain accurate measurements.
- Mark cut lines on the finished side with a fine-tip marker and use a straight edge or square for accuracy.
- For curves or intricate cuts, drill starter holes and use a jigsaw with a fine-tooth metal blade to preserve panel shape.
- Immediately coat raw edges after cutting with corrosion-resistant primer or paint to prevent rust and protect the metal.
Pick the Best Tools for Cutting Metal Roofing

Choosing the right tool for cutting metal roofing directly impacts the quality and efficiency of your work.
For 24-26 gauge steel, aviation snips are your go-to, with color-coded options: red for left curves, green for right, and yellow for straight cuts.
If you need long, clean cuts, electric metal shears reduce effort and vibration.
When dealing with corrugated or ribbed panels, nibblers excel by following contours without distortion.
For heavy-duty or multiple sheets, a circular saw fitted with a metal blade offers speed.
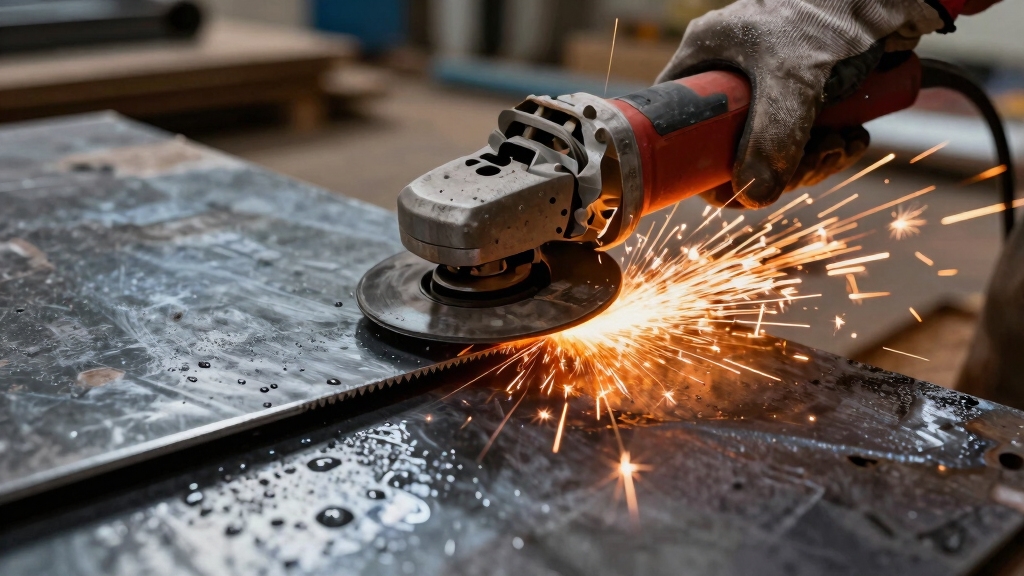
Angle grinders and jigsaws handle intricate or curved cuts but require careful control to manage sparks and heat.
Always match your tool choice to the panel’s thickness and shape, ensuring precise, clean edges essential for durable roofing installation.
For tasks requiring precision holes in metal roofing, using a variable speed drill press with appropriate chuck size ensures clean, accurate drilling without damaging the material.
Prepare and Mark Metal Roofing Panels Accurately
Before cutting, you should secure the metal roofing panels firmly to prevent shifting during marking and cutting.
Secure metal roofing panels firmly before cutting to ensure precise, safe, and clean cuts every time.
Use clamps or a stable workbench to hold the panels steady, guaranteeing accuracy.
Next, measure carefully with a tape measure or ruler, accounting for panel overlaps and drainage.
Mark cut lines clearly using a fine-tip permanent marker or a scratch awl on the finished side to hide imperfections later.
For straight cuts, use a carpenter’s square or straight edge as a guide.
When marking curves or cutouts, outline the shape precisely to match the panel profile.
Double-check your measurements and markings before proceeding.
Accurate preparation minimizes material waste and guarantees clean, professional cuts that fit properly during installation.
To achieve the best results, use proper measurement tools and consider applying painter’s tape along cut lines to reduce splintering and ensure precision.
Cut Straight and Curved Lines With Confidence
When cutting straight or curved lines in metal roofing panels, maintaining control and precision is essential to guarantee a clean edge and proper fit.
Use aviation snips: yellow for straight, green for right curves, red for left to navigate 24-26 gauge steel efficiently. Angle your snips so the waste curls away, preventing jagged edges.
For longer straight cuts, electric metal shears deliver smooth, even results with steady pressure. When tackling ribs or intricate curves, nibblers conform to corrugated contours without distortion.
Always cut from the finished side to hide imperfections and reduce burrs. For curves or cutouts, drill a starter hole before switching to a jigsaw with a fine-tooth metal blade.
Secure panels firmly and cut slowly to minimize vibration, ensuring your lines stay true and edges sharp. Consider using a cordless reciprocating saw with a variable-speed trigger and tool-free blade change for added precision and ease during complex cuts.
Use Power Tools Safely When Cutting Metal Roofing
Operate power tools with full attention and proper precautions to guarantee safety while cutting metal roofing. Always wear full PPE: safety glasses, heavy gloves, ear protection, and long sleeves.
Secure the panel firmly to prevent movement. Use tools suited for the job; angle grinders for curves, jigsaws for intricate cuts, and reciprocating saws for heavy gauge steel.
Control sparks from grinders to avoid fire hazards. Maintain steady pressure and move slowly to minimize vibration and heat, preserving the metal’s protective coating.
A tool with adjustable depth control can help ensure precise cutting depth and reduce damage to the metal surface.
| Power Tool | Best Use | Safety Tip |
|---|---|---|
| Angle Grinder | Curved/detailed cuts | Manage sparks, wear goggles |
| Jigsaw | Intricate shapes | Use fine-tooth metal blade |
| Reciprocating Saw | Heavy gauge, rough cuts | Secure workpiece firmly |
| Electric Shears | Long, straight cuts | Maintain steady pressure |
| Nibbler | Tight curves | Attach securely, control feed |
Prevent Rust and Damage After Cutting Metal Roofing
Although cutting metal roofing is essential, you must immediately treat exposed edges to prevent rust and damage.
After cutting, apply a corrosion-resistant primer or paint on all raw edges to restore protection lost during cutting.
If you used a circular saw or grinder, file down any burrs to eliminate sites where rust can initiate.
Avoid excessive heat buildup during cutting to preserve the Galvalume coating’s integrity.
Make sure cuts are clean and oriented correctly to maintain water drainage and panel overlap, reducing moisture intrusion risk.
Use a fine brush or spray to apply coating evenly.
Prompt post-cut care extends your roof’s lifespan and maintains structural integrity, so don’t skip this vital step after every cut.
Additionally, choosing a moisture-resistant adhesive for any bonding or sealing work after cutting can further protect metal roofing from environmental damage.
Frequently Asked Questions
Can I Cut Metal Roofing Panels in Cold Weather Without Damage?
Yes, you can cut metal roofing panels in cold weather, but you need to be cautious.
Cold temperatures make metal more brittle, increasing the risk of cracking or chipping.
Use sharp, appropriate tools like aviation snips or electric shears, and cut slowly to reduce stress.
Avoid using angle grinders unless necessary, as heat buildup worsens damage.
Always wear full safety gear and store panels indoors before cutting to minimize cold exposure and prevent damage.
How Do I Dispose of Metal Roofing Scraps Safely and Responsibly?
You should recycle metal roofing scraps since over 90% of metal roofing materials are recyclable, reducing landfill waste and conserving resources.
Collect scraps in a designated container, remove any non-metal attachments, and transport them to a local scrap metal recycling center.
Avoid mixing metals to prevent contamination.
If scrap size is large, cut them into manageable pieces using snips or shears.
Always wear gloves and safety gear to handle sharp edges safely during disposal.
What Is the Best Way to Store Leftover Metal Roofing Panels?
You should store leftover metal roofing panels flat on a dry, level surface, elevated off the ground using pallets or blocks to prevent moisture contact and corrosion.
Cover them with a breathable tarp to protect against rain while avoiding trapped condensation.
Stack panels carefully to avoid bending or warping, keeping them organized by size and type.
Make sure good ventilation around the stack to reduce rust risk and maintain their condition for future use.
Are There Specific Blade Types for Cutting Different Metal Roofing Materials?
Imagine slicing through metal like a hot knife through butter. That’s what the right blade does.
You’ll want fine-tooth blades for jigsaws when tackling thin, delicate panels.
Circular saws need metal-specific blades for thicker sheets.
For heavy gauge or complex cuts, choose reciprocating saw blades designed for metal.
Always match blade type to material thickness and profile to ensure clean, precise cuts without damaging the roofing panels.
How Long Does It Typically Take to Cut an Average-Sized Metal Roof?
Cutting an average-sized metal roof typically takes 3 to 5 hours, depending on your tools and experience.
Hand snips work slower, especially on curves, while electric shears or circular saws speed up straight cuts markedly.
Using nibblers for corrugated panels also saves time but requires careful control.
Preparing properly, marking lines clearly, and securing panels minimize rework.
Always factor in post-cut finishing like filing burrs and applying primer to guarantee durability.
From Accurate Marking to Rust Prevention: Perfecting Metal Roof Cuts
Choosing the right tools, marking panels precisely, cutting with control, using power tools safely, and preventing rust are all essential steps when cutting metal roofing.
By focusing on accuracy, safety, and maintenance, you make certain clean cuts, protect the material, and extend the roof’s lifespan.
Master these techniques, follow best practices, and approach each cut with confidence to achieve professional, durable results every time you work with metal roofing.