Best Way to Deep Clean Vinyl Floors: Shine Smart
To deep clean your vinyl floors effectively, start by removing dirt with a soft-bristle broom or vacuum on hard-floor mode without a beater bar.
Use a pH-neutral, low-residue cleaner designed for vinyl, applied with a damp microfiber mop to avoid over-wetting. Work in sections, blotting stains gently and rinsing thoroughly.
Dry each area with a microfiber mop to prevent moisture damage and streaks. Following these steps will keep your floors durable and spotless while preserving their finish.
Learn how to master this process for lasting results.
Key Takeaways
- Use a pH-neutral, vinyl-specific cleaner diluted per instructions and apply with a microfiber mop following the floor grain.
- Avoid over-wetting by using a damp mop and immediately dry each section with a soft towel or dry microfiber mop.
- Employ soft-bristle brooms or vacuums on hard-floor mode without rotating beater bars to remove loose dirt before deep cleaning.
- Treat stubborn stains sparingly with professional-grade cleaners or isopropyl alcohol, then rinse thoroughly and blot dry.
- Finish with a dry microfiber mop pass to prevent streaks and ensure thorough drying, protecting seams and edges from moisture damage.
How to Prepare Your Vinyl Floor for Deep Cleaning?

Before you begin deep cleaning your vinyl floor, you need to prepare the area properly to guarantee effective results and avoid damage.
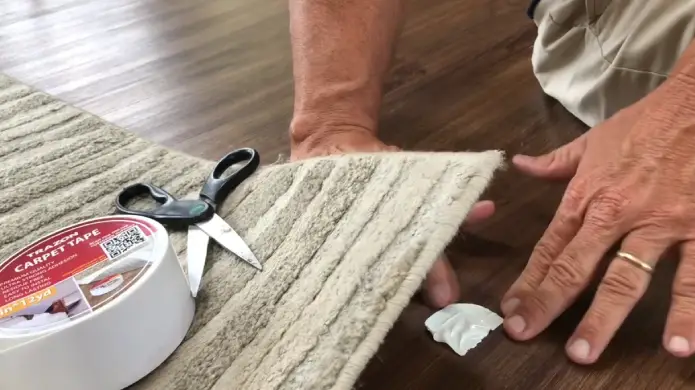
Start by placing wet floor signs at all entry points to keep the area safe. Remove outdoor footwear to prevent dirt tracking.
Place wet floor signs and remove outdoor shoes to maintain safety and cleanliness during floor preparation.
Next, vacuum or dust mop thoroughly using a soft-bristle broom or a vacuum set to hard-floor mode without a beater bar. This will eliminate all debris and dust particles that could scratch the floor during cleaning.
Carefully inspect your vinyl floor’s type and condition to tailor your cleaning approach. Following these steps ensures the surface is clean and ready for deep cleaning while protecting your floor from unnecessary wear or harm during the process.
Using a soft-bristled attachment on your vacuum can help prevent damage while effectively removing dirt and dust.
Choosing the Right Cleaner for Vinyl Floors
When it comes to cleaning vinyl floors, you really want to pick a cleaner that’s pH-neutral and specifically made for vinyl. This way, you’re not just protecting the surface, but also keeping that beautiful finish intact.
It’s super important to steer clear of harsh chemicals like ammonia, bleach, or anything acidic. Trust me, these can really do a number on your floors, causing damage and discoloration that you definitely don’t want.
Using pH-balanced, low-residue cleaners helps effectively lift dirt and grime without leaving streaks or dull films, preserving the floor’s appearance over time.
pH-Neutral Cleaner Benefits
Frequently, choosing a pH-neutral cleaner is the most effective way to maintain vinyl floors without causing damage. These cleaners balance cleaning power with gentle ingredients that protect your floor’s surface and prolong its life.
You’ll avoid harsh chemicals that can dull or degrade vinyl, keeping floors vibrant and smooth.
Here’s a quick comparison to help you understand why pH-neutral cleaners work best:
| Feature | pH-Neutral Cleaner |
|---|---|
| Floor Protection | Prevents surface damage |
| Cleaning Efficiency | Removes dirt without residue |
| Safety | Non-toxic, safe for homes |
Using a pH-neutral cleaner guarantees thorough cleaning while preserving vinyl’s finish. This makes it your best choice for deep cleaning. Choosing products with plant-based ingredients ensures a safer and eco-friendly cleaning process.
Cleaners To Avoid
Although it might seem tempting to use strong household cleaners for vinyl floors, certain products can cause irreversible damage.
Avoid ammonia, bleach, acidic, alkaline, detergent, wax, and citrus-based cleaners, as they can dull or degrade the floor’s surface.
Steer clear of steam cleaners and steam mops, which can warp seams and edges.
Don’t use abrasive cleaners or rotating beater bars on vacuums, since they leave scratches or residue.
Wax, sealants, and floor polishes are also off-limits, as they clog the vinyl’s finish and complicate future cleaning.
Instead, choose pH-neutral cleaners designed for vinyl, and dilute them properly.
For effective cleaning without damage, consider using multi-surface cleaners that are safe for vinyl and other delicate floor types.
Essential Tools and Techniques for Deep Cleaning Vinyl Floors
When preparing to deep clean vinyl floors, selecting the right tools and techniques guarantees effective grime removal without causing damage.
Start with a soft-bristle broom or vacuum set to hard-floor mode without a beater bar to clear debris.
Begin by removing debris using a soft-bristle broom or a vacuum on hard-floor mode without a beater bar.
Use pH-neutral cleaners specifically designed for vinyl floors, diluted according to instructions.
For deep cleaning, employ an automatic scrubber fitted with red or white pads, or a microfiber flat mop for manual scrubbing.
Work in sections, applying cleaner liberally, then mop with the floor grain.
Recover used solution when possible to lift dirt efficiently.
Avoid over-wetting to protect seams and edges.
Finish by air drying and using a dry microfiber mop along the grain to prevent streaks.
These tools and methods ensure a thorough, safe clean every time.
For optimal results, consider using a Bona Multi-Surface Floor Cleaner that is pH-neutral and designed specifically for vinyl and laminate floors.
Common Mistakes to Avoid When Cleaning Vinyl Floors
When you’re cleaning your vinyl floors, it’s super important to steer clear of harsh chemicals. They can really damage the surface and leave you with more problems than you started with.
And hey, try not to over-wet your floors! Too much moisture can lead to seams lifting or edges warping, which is definitely not what you want.
Oh, and let’s not forget about those abrasive tools. They might seem handy, but they can scratch or dull the finish of your beautiful floors. So, stick to gentle cleaning methods for the best results!
Additionally, maintaining proper ventilation helps control indoor humidity, preventing moisture-related damage to vinyl floors.
Using Harsh Chemicals
Since vinyl floors require gentle care, using harsh chemicals can cause irreversible damage. Avoid cleaners with ammonia, bleach, acids, alkalines, wax, or citrus ingredients.
These substances can degrade the floor’s protective wear layer, leading to discoloration, weakening, and premature aging. Instead, choose pH-neutral cleaners specifically designed for vinyl or LVP.
Dilute professional-grade products per label instructions to maintain floor integrity. Harsh chemicals may also leave dull residues or cause surface etching, which dulls your floor’s appearance.
Stick to proven, gentle solutions like Hillyard Heavy Duty Floor Cleaner or Hil-Sheen LV for tough grime. By steering clear of aggressive agents, you preserve your floor’s finish and extend its lifespan.
This ensures a clean, resilient surface without risking costly repairs or replacements. For routine cleaning, using warm water mixed with mild detergent is a safe and effective approach to maintain vinyl floors.
Over-Wetting Floors
Although thorough cleaning is essential, over-wetting vinyl floors can cause serious damage to seams and edges. When you apply too much water, it seeps beneath the surface, weakening adhesive bonds and causing warping or lifting.
To avoid this, always use a damp mop rather than soaking the floor. Employ professional-grade cleaners diluted according to instructions and apply sparingly with microfiber mops or automatic scrubbers that recover excess liquid.
Work in small sections and dry each immediately with a soft towel or dry microfiber mop, following the grain. Never flood the floor or let standing water sit.
Proper moisture control preserves the floor’s integrity and extends its lifespan. This prevents costly repairs and maintains a flawless appearance.
For outdoor spaces, using furniture or workstations with water-resistant finishes can further help reduce moisture-related damage around vinyl flooring areas.
Employing Abrasive Tools
Controlling moisture is only part of protecting your vinyl floors.
Using abrasive tools can cause lasting damage that water alone won’t fix.
Avoid harsh scrubbing pads, steel wool, or stiff-bristle brushes that scratch and dull your floor’s finish.
Instead, opt for soft microfiber mops and non-abrasive pads designed for vinyl.
Abrasive cleaners or tools wear down the protective layer, leading to premature aging and discoloration.
When vacuuming, steer clear of rotating beater bars that can gouge the surface.
If you need to remove tough grime, use a professional-grade cleaner with gentle agitation rather than forceful scrubbing.
By carefully selecting your tools and scrubbing methods, you preserve your vinyl’s appearance and extend its lifespan.
This helps prevent costly repairs or replacement.
Additionally, avoiding harsh chemical cleaners protects the floor’s finish from irreversible damage.
How to Remove Spots and Stains From Vinyl Floors?
When spots or stains pop up on your vinyl floor, act quickly to blot them with a damp cloth to prevent setting. Avoid rubbing, as this can spread the stain or damage the surface.
Quickly blot vinyl floor stains with a damp cloth to stop setting; avoid rubbing to prevent damage.
For dried or stubborn spots, gently agitate the area with a damp white cloth or paper towel. Use a professional-grade cleaner like Encore or isopropyl alcohol to treat persistent stains.
Apply the cleaner sparingly, then rinse thoroughly with clean water and blot dry to avoid residue. Never use vinegar or acidic solutions, as they can harm the vinyl.
Always test any cleaning solution in an inconspicuous spot first to make certain it won’t discolor or damage your floor. This method keeps your vinyl looking clean without compromising its finish.
To prevent future damage, consider using non-slip furniture pads under furniture to protect your vinyl floors from scratches and wear.
Drying and Maintaining Your Vinyl Floor After Cleaning
After removing spots and stains, make sure your vinyl floor dries thoroughly before allowing foot traffic. Proper drying prevents moisture damage and streaks, preserving the floor’s appearance and longevity.
To speed up drying and maintain your floor effectively, use a dry microfiber mop, moving with the wood grain to absorb excess moisture quickly. Follow mopping with a soft towel to wipe any remaining dampness and avoid streaks.
Schedule professional deep cleaning twice a year for high-traffic areas to maintain cleanliness and durability.
Daily care also matters. Sweep or dry mop regularly using microfiber tools to prevent dirt buildup and scratches. By integrating these steps, you’ll keep your vinyl floors spotless, resilient, and looking their best over time.
Frequently Asked Questions
Can Vinyl Floors Be Deep Cleaned With Household Steam Cleaners?
You shouldn’t use household steam cleaners to deep clean vinyl floors. The high heat and moisture can damage seams, edges, and the vinyl surface itself.
Instead, opt for pH-neutral cleaners and professional-grade solutions applied with a microfiber mop or an automatic scrubber. This method preserves your floor’s integrity while effectively removing grime without risking warping or dullness caused by excessive heat or water from steam cleaning.
How Often Should Professional Deep Cleaning Be Scheduled for Vinyl Floors?
You shouldn’t wait until your vinyl floors scream for help. Schedule professional deep cleaning at least twice a year, especially in high-traffic areas.
This routine keeps grime from embedding deeply and prevents premature wear. Regular expert care restores that fresh, polished look and extends your floor’s life.
Between deep cleans, sweep or dry mop daily with microfiber to maintain cleanliness and protect your investment. Consistency is key to flawless, long-lasting vinyl floors.
Are There Specific Floor Pads Recommended for Automatic Scrubbers on Vinyl?
You should use red or white floor pads on automatic scrubbers for vinyl floors.
These pads provide effective deep cleaning without damaging the surface.
Avoid abrasive or aggressive pads, which can cause dulling or scratches.
When scrubbing, work in sections and recover the cleaning solution to lift grime properly.
Stick with these recommended pads to maintain your vinyl floor’s finish and longevity during deep cleaning.
What Are the Risks of Using Acidic Cleaners on Vinyl Flooring?
Using acidic cleaners on vinyl flooring can cause serious damage. You’ll risk dulling the finish, discoloration, and weakening the wear layer, which shortens your floor’s lifespan.
Acidic products may also degrade seams and edges, leading to peeling or warping. To protect your vinyl, always choose pH-neutral cleaners specifically designed for vinyl floors.
Avoid vinegar or bleach, as these harsh chemicals break down the material and compromise its durability.
Can Vinyl Flooring Be Refinished or Resurfaced After Damage?
Think of vinyl flooring like a painted canvas. Once scratched or worn, you can’t simply repaint it without ruining the texture.
You can’t refinish or resurface vinyl like hardwood. Instead, you’ll need to replace damaged planks or tiles to restore its look.
Address minor damage promptly with spot cleaning or patching. For extensive wear, plan on replacement.
This approach preserves your floor’s integrity and appearance effectively.
Clean Floors Without the Meltdown
So, unless you want your vinyl floor looking like a crime scene or a toddler’s art project, follow these steps. Prep it, pick the right cleaner (no, bleach isn’t your friend), use proper tools, and don’t go scrubbing like it owes you money.
Spot-treat stains like a pro, then dry it thoroughly. Stick to this method, and your floors will thank you. No hazmat suit required.
![How to Clean Scratched Hardwood Floors: 7 DIY Steps [Effective]](https://anyshelter.com/wp-content/uploads/2023/06/How-to-Clean-Scratched-Hardwood-Floors.webp)