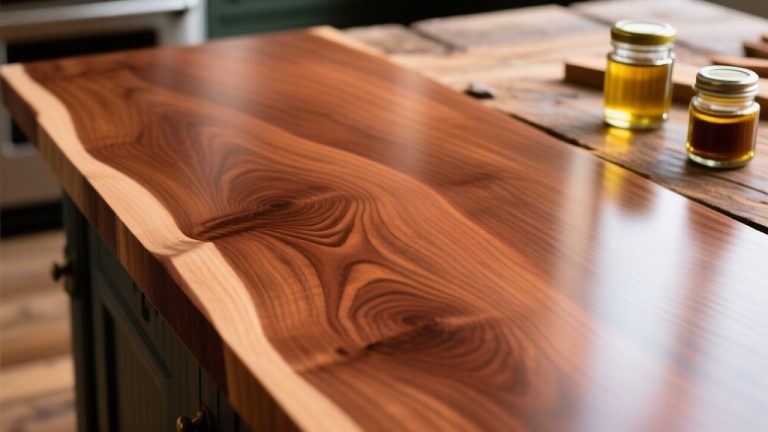
Best Grit for Sanding Wood: Expert Tips for a Smooth Finish
For the smoothest wood finish, start with a coarse grit like 60–100 to remove rough spots, then move up gradually to finer grits, aiming for 180 to 220 grit to polish and smooth.
Your wood type matters: hardwoods handle coarser starts, while softwoods need gentler grits to avoid damage. Use flexible sanding sponges like BokWin’s 220 grit blocks for even, scratch-free results, especially when wet sanding.
Mastering grit progression and tool choice ensures a flawless surface and you can explore additional tips to refine your technique.
| Image | Name | Editor's Rating | Price |
|---|---|---|---|

|
BokWin 16Pcs Sanding Sponge, 220 Grit Washable Sponge Sand B...
|
|
Key Takeaways
- Start with coarse grits (60–100) for hardwoods and medium grits (80–120) for softwoods to avoid surface damage.
- Progress through grits gradually, moving up one or two grades at a time for a smooth finish.
- Use superfine 220 grit sandpaper or sponges for the final smoothing and polishing step.
- Wet sanding with 220+ grit reduces clogging and swirl marks, ideal for final finishes except shellac.
- Always sand with the grain using light pressure to prevent gouges, burns, or visible scratches.
BokWin 16-Piece Washable Sanding Sponge Set for Wet & Dry Use on Wood and Metal
- 【Wet and Dry Available】: The grit sanding sponge is washable and reusable, can be applied to...
- 【Sanding Sponges】: The sanding blocks are made of Brown alumina and blue sponge. Grade...
- 【Widely Usage】: The sanding blocks are good choices for polishing, suitable for wood, metal...
These sanding sponges blend the durability of brown alumina abrasive with a flexible blue sponge base, offering effective surface refinement. The superfine grade of these blocks, around 220 grit, is excellent for smoothing wood, metal, and plastic surfaces with precision. Their size of approximately 4.7 by 3.9 inches provides ample coverage while maintaining control.
BokWin’s design allows both wet and dry applications, enhancing dust control and extending the lifespan of each sponge. The washable, reusable feature means you can maintain consistent sanding performance through multiple uses by simply rinsing them clean. This makes them environmentally thoughtful and cost-effective over time.
Flexible yet sturdy support helps you work smoothly on furniture or painted surfaces. This combination reduces the risk of uneven finishes and adapts well to curved or flat surfaces. The superfine abrasiveness is perfect for finishing touches or prepping surfaces for painting or staining.
Whether you need precise hand sanding or gentle polishing, these blocks cater to delicate tasks without aggressive material removal. The foam’s softness complements the abrasive layer, minimizing the chance of scratches or damage to sensitive projects.
Best for: Home improvement enthusiasts and craftsmen aiming to achieve a smooth, professional-grade finish on woodwork, plastic, or metal surfaces.
Pros:
- Supports both wet and dry sanding applications
- Reusable and washable to maintain performance
- Superfine abrasive grade ideal for detailed finishing
- Flexible sponge backing perfect for contours and flat areas
- Large size for improved handling and coverage
Cons:
- May cake with heavy use but washes clean to restore effectiveness
Essential Tips for Picking Wood Sanding Grits
When you’re picking out grit for sanding wood, it’s important to think about:
Wood Type Influence
Choosing the right sanding grit depends heavily on the type of wood you’re working with. For hardwoods like oak or walnut, start with coarser grits (60–100) to remove mill marks, then move to 120–150 before finishing.
Softwoods such as pine need gentler grits (80–120) to prevent gouging and tear-out—avoid very coarse sandpapers here. Open-grain woods like ash require coarser grits initially to level pores, progressing to 120–180, sometimes even 220 grit, for smoother surfaces.
Closed-grain woods such as maple benefit from finer sequences, starting around 100–120 and finishing at 180–220 grit. If you work with brittle or resinous woods like ebony, use finer grits and clean your abrasives often to avoid heat buildup and uneven sanding.
Desired Finish Quality
Beyond selecting grit based on wood type, you also need to take into account the finish quality you want to achieve. If you aim for a smooth, polished surface, use higher grit sandpapers like 220 to 320 to remove fine scratches and prepare for finishing.
For painted or stained wood, starting with 120–150 grit helps smooth defects without damaging the profile, then step up to 180–220 grit for final prep. Keep in mind, very fine grits above 320 are great for ultra-smooth finishes between coats or delicate woods but can reduce finish adhesion if used too early.
Also, the final sheen matters: higher grits produce glossier results, while stopping at lower fine grits maintains a more matte texture. Choose grit accordingly to match your desired finish.
Initial Surface Condition
Since the condition of your wood’s surface varies, you need to assess factors like the amount of material to remove, existing defects, and previous coatings before selecting the right sanding grit.
If you’re tackling deep scratches, paint, or warped edges, start with coarse grits between 40 and 80 to remove material efficiently. For minor blemishes or raised grain, finer grits from 120 to 150 work best.
Softwoods and thin boards can get damaged by coarse grits, so beginning with 100 to 120 grit helps avoid divots. When removing multiple paint or varnish layers, 60 to 80 grit speeds things up before switching to finer grits for smoothing.
Finally, match your starting grit to your finish goal—finer grits reduce sanding steps and prevent swirl marks if you want a smooth surface.
Sanding Tool Compatibility
When you pick the right sanding grit, it’s important to take into account the tool you’re using because each type handles abrasives differently. For power sanders like belt or disc models, coarser grits (40–80) remove material fast, but switch to finer grits before using finish sanders to avoid deep scratches.
Random orbital sanders work best with medium grits (80–150) for shaping and finer grits (180–320) for smoothing without directional marks. Palm and detail sanders suit medium to fine grits (120–220) for precise work on edges and flat surfaces.
When sanding by hand, opt for fine to superfine grits (180–400+) for delicate touch-ups and finishing. For contoured surfaces with flexible pads or abrasive sponges, choose slightly finer grits to prevent gouging and uneven sanding.
Grit Progression Strategy
To achieve a smooth, flawless wood surface, you’ll want to follow a careful grit progression strategy that starts with coarse abrasives and moves gradually to finer ones. Begin with a coarse grit (40–80) to remove major material or old finishes, then step up to 80, 120, 150–180, and finally 220 grit for interior woodworking.
Move to finer grits (320–400+) only for very smooth finishes or between coats. Change grit once the previous grit no longer removes scratches, increasing by no more than one or two grades to avoid persistent marks.
Keep a sanding log or mark test spots to guarantee defects are gone before progressing. This method prevents deep scratches and swirl marks, giving you a flawless, ready-to-finish surface.
Wet vs Dry Use
Although dry sanding is more common, wet sanding offers distinct advantages that can improve your wood finishing results. Wet sanding reduces clogging and produces a finer, swirl-free finish, letting you use coarser grits like 220–400 to achieve smoothness that dry sanding requires finer grits for.
Water or lubricants soften wood fibers and carry away dust, so abrasives cut more consistently, meaning fewer passes are needed while maintaining your grit progression. Reserve wet sanding for final finishes like sealers, lacquers, and shellac-free coatings, since moisture can damage shellac.
Dry sanding, by contrast, generates heat and dust, clogging finer grits quickly and reducing efficiency. Remember to dry the surface between wet-sanding steps to check progress and avoid moisture issues affecting grain or finish adhesion.
Avoiding Surface Damage
Choosing the right sanding grit plays a crucial role in preventing surface damage on wood. You should use finer grits, like 220 to 400, for finish sanding to remove minor scratches without scouring the surface.
Coarser grits can leave deep scratches that show through stain and finish. Always progress gradually through grit steps—say from 80 to 120, then 180, and finally 220—to avoid gouges and guarantee each coarser scratch gets removed.
Match grit coarseness to the wood’s hardness: softwoods are more vulnerable to damage from coarse grits, while hardwoods can handle more aggressive sanding but still need fine final grits.
Avoid excessive pressure or sanding one spot too long to prevent burns or dips. Finally, sand with the grain using the finest grit for your final finish to avoid visible scratches.
Frequently Asked Questions
Can Sanding Wood Remove Paint or Varnish Completely?
Yes, sanding wood can remove paint or varnish completely if you use the right grit and technique. Start with a coarse grit to strip away the finish quickly, then gradually move to finer grits to smooth the surface.
Be patient and consistent, and you’ll see the old paint or varnish come off. Just remember to wear a mask and work in a well-ventilated area to avoid inhaling dust or fumes.
How Often Should Sanding Belts Be Replaced for Best Results?
You wouldn’t keep using a dull knife to slice bread, right? Similarly, you should replace sanding belts as soon as they start clogging or losing grit.
For best results, swap them out every few hours of heavy use or when you notice decreased efficiency. Waiting too long leads to uneven sanding and wasted effort. Keep your belts sharp and fresh to achieve that smooth, flawless finish every time.
Is Sanding Wood by Hand Better Than Using a Power Sander?
Hand sanding gives you more control and a finer finish, especially on delicate or detailed areas, but it’s slower and more tiring.
Power sanders speed up the job and work well on larger surfaces, though they can be harder to control and might remove too much material if you’re not careful.
You’ll want to pick the method based on your project’s size, precision needs, and how much effort you’re willing to put in.
What Safety Gear Is Necessary During Wood Sanding?
You need to wear safety goggles to protect your eyes from dust and debris. A dust mask or respirator is essential to avoid inhaling fine particles.
Don’t forget hearing protection if you’re using power sanders. Gloves help protect your hands from splinters and abrasions.
Also, wear long sleeves and work in a well-ventilated area to reduce dust exposure. Staying safe guarantees you can keep sanding without health risks.
Can Sanding Affect the Wood Grain Pattern or Texture?
Yes, sanding can affect the wood grain pattern and texture. When you sand, you remove the surface layer, which can highlight or blur the grain depending on the grit you use.
Coarse grits may leave scratches, altering the texture, while finer grits smooth the surface and enhance the grain’s natural beauty. To keep the grain looking sharp, you’ll want to sand progressively with finer grits and always sand with the grain’s direction.
Choose the Best Wood Sanding Grit for Professional Results
Choosing the right grit for sanding wood might seem simple, but it’s anything but. While coarse grits quickly strip rough surfaces, they can leave scratches that finer grits must patiently erase.
On the other hand, starting too fine can waste time and effort. By balancing grit progression with your wood type and desired finish, you’ll avoid damage and achieve that smooth, flawless surface you’re aiming for, proving that patience and precision truly go hand in hand.
Last update on 2026-04-26 / Affiliate links / Images from Amazon Product Advertising API