How to Fix Cracks in Hardwood Floor: Choose the Right Filler
To fix cracks in hardwood floors, start by thoroughly cleaning and drying the cracks using a vacuum and wood-safe cleaner. Choose a suitable filler like stainable wood filler for small gaps or epoxy for structural cracks, and apply it carefully with a putty knife, filling deeply if needed.
After curing, sand the area smoothly with the grain before refinishing to blend repairs. Proper preparation and material choice are vital for lasting results, and understanding advanced techniques can help address complex damage effectively.
Key Takeaways
- Clean cracks thoroughly using a vacuum, soft brush, and wood-safe cleaner to remove debris and ensure dry surfaces before repair.
- Select appropriate filler like stainable wood filler for small cracks or epoxy for larger, structural gaps requiring strength.
- Apply filler in layers if needed, fully packing cracks, then allow proper curing time avoiding foot traffic for at least 24 hours.
- Sand repaired areas with progressively finer grits, always with the grain, to achieve a smooth surface ready for finishing.
- Finish repairs by applying compatible wood finish coats, lightly scuff sanding between layers for adhesion and a uniform appearance.
Identifying Different Types of Hardwood Floor Cracks
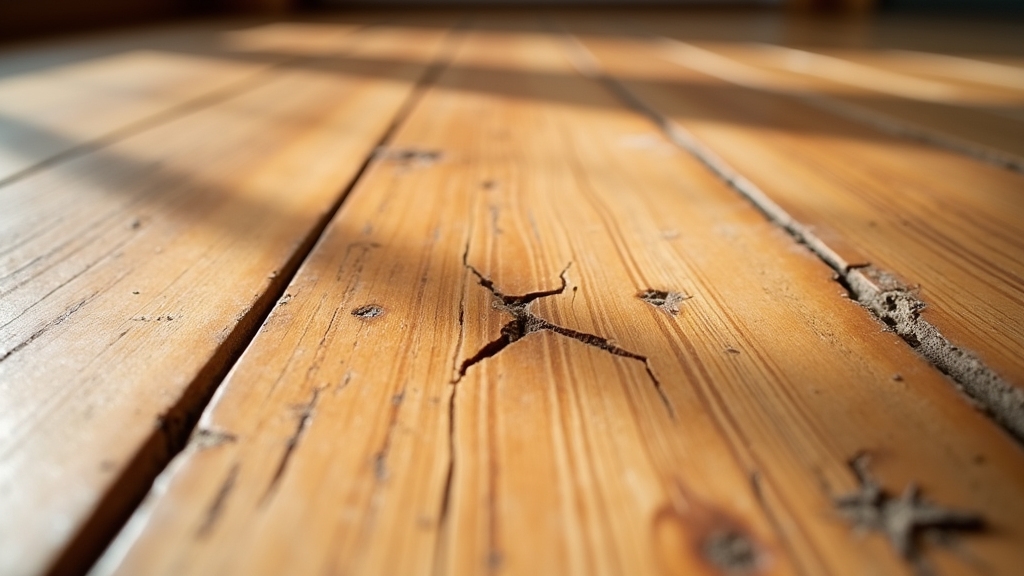
When you inspect hardwood floors for cracks, you need to recognize that different types stem from distinct causes and exhibit unique characteristics. Splits and cracks often run at various angles to growth rings and may result from mechanical damage or moisture loss.
Splits are characterized as tearing or rupturing of wood fibers and may be visible on the surface or just below the finish. Different hardwood floor cracks arise from distinct causes and show unique patterns related to growth rings and damage.
Water damage cracks arise from swelling and shrinking, showing signs like cupping, crowning, or buckling. These cracks are often accompanied by black staining or mold. Proper identification of moisture-related issues is crucial for selecting appropriate refinishing and staining repairs.
Wood distortion cracks, such as crook, twist, and warping, develop due to anisotropic shrinkage and inadequate expansion gaps. Ensuring correct installation practices and sufficient expansion joints helps prevent these distortions.
Surface finish cracks, or telegraphing, reveal underlying wood damage or finish aging. Matching the surface finish type is important when repairing to maintain a cohesive look.
Installation-related cracks frequently result from overdriven fasteners, insufficient expansion joints, or subfloor issues. Using transition strips can sometimes alleviate stresses that cause such cracks.
Choosing the Right Materials for Crack Repair
Although selecting the right material depends on the crack’s size and location, you should prioritize fillers that balance structural integrity, color matching, and ease of application. Regular maintenance practices such as vacuuming hardwood floors help prevent further damage and keep the floor in optimal condition.
For small cracks or nail holes, stainable wood fillers like Minwax offer ease and color refinement post-application. Medium to large gaps require structural fillers such as Woodwise Full Trowel or Glitsa Wood Flour Cement, which combine resin with sanding dust for durability and perfect color matching.
Epoxy fillers provide superior strength but demand precise pre-color mixing since they can’t be stained afterward. Wood’s natural susceptibility to temperature and humidity changes means that crack repair materials must accommodate seasonal expansion and contraction.
Avoid flexible wood putty for structural repairs. It suits only small, finished surface imperfections. Always consider drying times, sanding capability, and stain compatibility to guarantee seamless integration and longevity in your hardwood floor repairs.
Preparing the Hardwood Floor for Repair
Selecting the right filler is only part of the repair process; properly preparing the hardwood floor sets the foundation for a lasting fix. Begin by evaluating the damage type—distinguish between minor cracks, seasonal gaps, or structural issues, and check for moisture, rot, or pest damage that may require board replacement.
Understanding how seasonal changes cause expansion and contraction can help anticipate and manage future gaps effectively. Proper floor prep is key—assess damage type, moisture, and decay before choosing your filler.
Clear the area of furniture and protect edges with painter’s tape and drop cloths. It is important to consider local labor costs when deciding whether to hire a professional for extensive repairs. Gather all tools, safety gear, and materials, ensuring they’re in proper working order and suited to the repair.
Thoroughly vacuum, scrape, and wipe the cracks with mineral spirits, then allow the area to dry completely. Conduct a final inspection to confirm the cracks are clean, dry, and that your repair plan, tools, and safety measures are fully in place before proceeding.
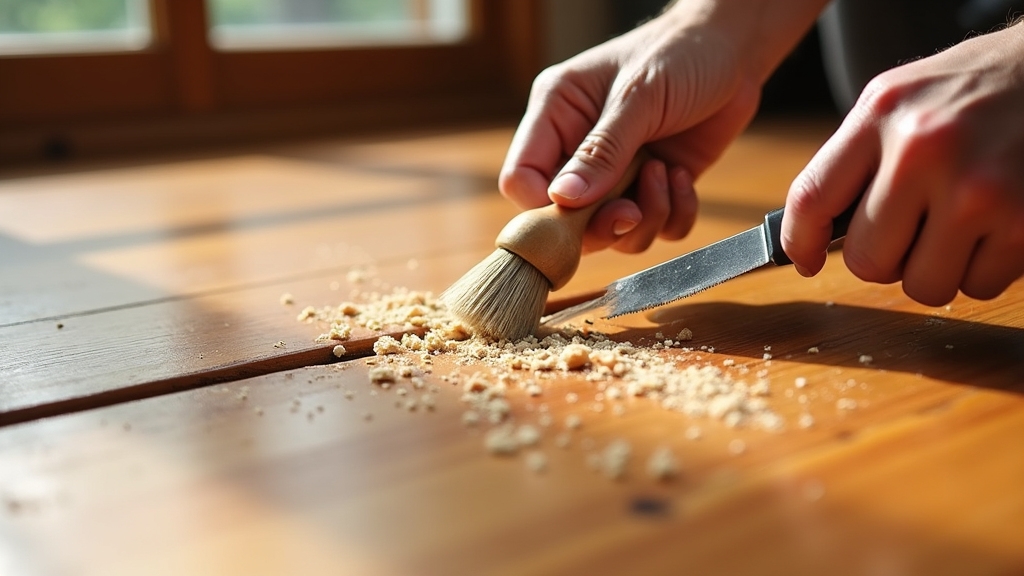
Cleaning and Clearing the Cracks Effectively
Start by removing all dust and debris from the cracks using a vacuum with a narrow attachment to reach deep into the gaps. Set the vacuum to low power to prevent any damage to the wood surface during cleaning.
Use appropriate cleaning tools like a soft-bristle brush and a lightly moistened cloth with a wood-safe cleaner to dislodge and wipe away remaining dirt. Avoid using harsh chemical cleaners or excessive moisture at this stage to prevent finish damage.
Finally, guarantee the cracks are thoroughly dry before proceeding to prevent moisture damage during repairs. Drying the area with a dry cloth is essential to avoid any moisture damage.
Remove Dust and Debris
Effective removal of dust and debris from hardwood floor cracks is essential to maintain both the floor’s appearance and structural integrity. Start by vacuuming the cracks using a narrow crevice attachment at low power to avoid surface damage. Focus on high-traffic areas and empty the vacuum regularly to sustain suction efficiency.
Next, use a soft-bristle brush to loosen embedded particles gently. Never apply excessive pressure or use wire brushes to prevent scratches. Follow brushing with vacuuming or wiping to clear dislodged debris. Regularly vacuum, dust mop, or sweep to remove loose dirt and maintain the floor’s finish.
Occasionally, wipe cracks with a slightly damp cloth moistened with a wood-safe cleaner. Immediately dry the area to prevent moisture damage. It is important to consult manufacturer guidelines to confirm the appropriate cleaning methods and products for your specific hardwood floor type.
Consistent removal of dirt minimizes buildup and helps prevent moisture-related issues like swelling, preserving your hardwood floor’s durability and finish. Avoid wet mopping or excess water exposure, as moisture control is critical to preventing warping and damage.
Use Proper Cleaning Tools
After removing dust and debris from hardwood floor cracks, you need the right tools to clean and clear them thoroughly without causing damage. Use vacuum cleaners with narrow attachments on low power to extract loose particles safely.
Follow with soft bristle brushes to dislodge finer dust without scratching. Damp cloths moistened with wood-safe cleaners remove deeper grime, but avoid excess moisture. Finish by drying with microfiber cloths to absorb residual dampness.
Always dry thoroughly after cleaning to prevent water spots or damage. Avoid harsh chemicals and high-moisture methods that damage wood. For best results, use a microfiber mop with gentle strokes to maintain the wood’s finish and avoid streaking.
Ensure Dry Crack Surface
Although cleaning hardwood floor cracks requires care, guaranteeing the surface is completely dry before filling is essential to prevent moisture damage. Start by vacuuming cracks with a narrow attachment at low power to remove loose debris.
Next, gently scrub with a soft-bristle brush to dislodge stuck particles. Use a damp cloth with a hardwood-safe cleaner to wipe the cracks, avoiding excess moisture that can seep into the wood. Never overwet wood floors to avoid swelling or damage during cleaning.
Immediately dry the area with a clean, dry cloth to eliminate residual dampness and promote proper drying which is essential for maintaining hardwood integrity. Inspect cracks for any moisture accumulation before proceeding.
Proper cleaning and drying ensure the filler bonds effectively and prevent future wood damage. Maintain regular cleaning with vacuuming and sweeping to reduce debris buildup and protect the wood finish over time.
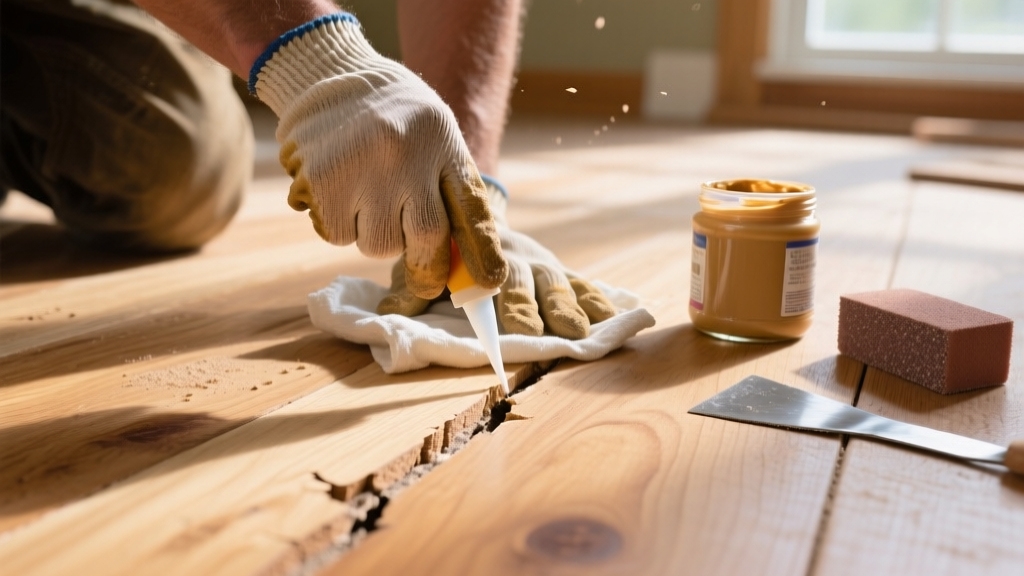
Applying Epoxy or Caulking Compound to Cracks
Start by ensuring the crack is clean and free of dust or loose fibers for ideal adhesion. Mix your epoxy thoroughly to a uniform consistency or load caulk into a gun for direct application.
After filling, allow the material to cure fully before sanding epoxy repairs smooth or leaving caulk flexible to maintain its seal. For best results, use a pH-neutral cleaner to prepare the area without damaging the wood’s finish.
Preparing Crack Surface
Before applying epoxy or caulking compound, you need to thoroughly clean and prepare the crack surface to guarantee strong adhesion and effective repair.
Begin by removing all dirt, dust, and debris using a vacuum or compressed air, especially from deep cracks. The original floor had extensive wood filler in cracks, which deteriorated after about a year, so replacing it with a more durable material is advisable.
Verify the crack is dry; moisture impedes curing. Remove any loose or crumbling filler with a utility knife or scraper. If needed, slightly widen the crack to improve filler penetration. Avoid excess moisture during preparation to prevent damage, as recommended in drying procedures.
Select a sealer compatible with hardwood floors—resin-based patchers or epoxy mixed with matching sawdust work well. The System Three wood flour is a commonly used light-colored thickening agent that can be mixed with epoxy to improve color matching and consistency.
Avoid fillers intended only for small chips, as they can fail in larger cracks. Proper surface preparation sets the foundation for a durable, flush repair, making certain the epoxy or caulk bonds firmly without trapping air or moisture.
Mixing and Applying Filler
Once the crack surface is clean, dry, and properly prepped, you can move on to selecting and mixing the appropriate filler. Choose a slow-cure, flowable epoxy for strong adhesion and penetration, especially on larger cracks.
This type of epoxy is designed to create a strong bond with the wood, matching the expansion and contraction of the floor to maintain durability. It is important to ensure the surface is free from any sticky residues or contaminants to promote proper adhesion.
Accurately mix resin and hardener according to manufacturer instructions, noting you have about 20 minutes of working time. Use painter’s tape to isolate the area, then apply the epoxy with a putty or sculpting knife, packing it fully to eliminate air pockets.
For best results, clean the floor beforehand using a non-abrasive sponge and mild detergent to avoid damaging the finish. For deep cracks, apply epoxy in thin layers no more than 1/4 inch thick, allowing partial curing between layers to prevent overheating. Level the surface by scraping excess along the grain.
For caulking, ensure compatibility with hardwood and apply evenly without gaps or bubbles for a durable, clean fill. Proper drying and curing are essential to avoid sticky surfaces and maintain the floor’s integrity.
Curing and Sanding Process
Although applying the epoxy or caulking compound completes the initial repair step, you must carefully manage the curing process to guarantee durability and adhesion.
First, ensure the cracks are clean, dry, and free of loose material before application. Mask adjacent areas to protect the finish. Proper crack repair enhances both the aesthetic appeal and the structural integrity of the floor.
Maintain stable room temperature and humidity within manufacturer guidelines. Avoid foot traffic for at least 24 hours or until fully cured. Check for shrinkage and apply additional layers if necessary.
Once cured, begin sanding with 60–80 grit sandpaper to level the repair, progressing through 100–120 and finishing with 150–220 grit. Always sand with the grain using orbital or hand sanders to prevent scratches.
Vacuum and wipe with a tack cloth before final finishing to ensure a clean, smooth repair surface. This preparation step is crucial to prevent future damage and promote a smooth, even surface for epoxy application.
Techniques for Filling Large or Deep Cracks
When tackling large or deep cracks in your hardwood floor, you need to prepare the area meticulously to guarantee a durable repair. Begin by cleaning the crack thoroughly, removing dust and debris, and protecting the surrounding floor with masking tape.
Select an appropriate filler, such as epoxy or a solvent-based option, for strength and durability. Mix the filler according to the instructions, then apply it with a putty knife at a 45-degree angle, pressing firmly to fill the crack completely.
For deep cracks, apply multiple thin coats, allowing each to cure fully. It is important to avoid reusing dried filler because it loses its bonding properties and can lead to poor repair results. Use a vacuum and masking tape to clean and protect the area before filling.
Use a putty knife or trowel to apply the filler evenly. To build depth and prevent shrinkage, apply several coats with proper curing time.
Sanding and Finishing the Repaired Areas
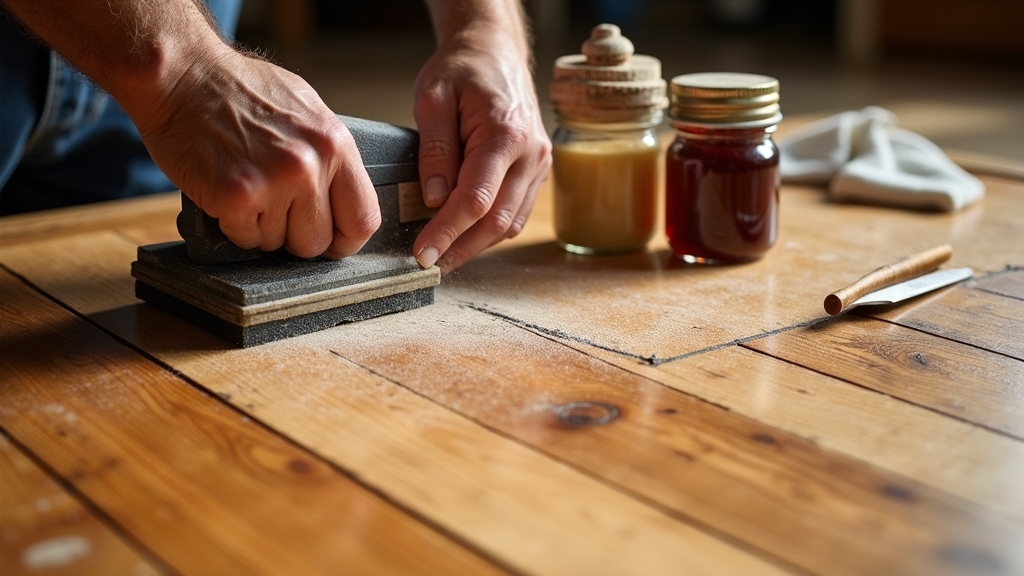
Before applying any finish, you need to sand the repaired areas carefully to guarantee a smooth, level surface that blends seamlessly with the surrounding floor. Start with coarse grit (36-60) to remove old finish and level seams, then progress to medium grit (80-100) to smooth sanding marks without over-sanding.
Finish with fine grit (120-150) for uniformity. Use a drum sander for main surfaces and an edge sander for corners, making light, overlapping passes following the wood grain. This approach prevents flaking and ensures a long-lasting finish.
After sanding, vacuum thoroughly and use a damp mop or tack cloth to remove dust. When applying finish, stir gently, cut in edges with a brush, and apply 2-3 coats with a pad, maintaining a wet edge. Lightly scuff sand between coats with 220-grit to ensure adhesion and smoothness.
Using Wood Strips and Dutchman Patches for Complex Damage
If you encounter complex hardwood floor damage like splits, splintering, or rot, using wood strips or Dutchman patches offers a precise repair method.
Begin by cutting out a geometric mortise around the damaged area, slightly larger than the defect to ease patch fitting. It is important to examine the area carefully before beginning the repair to determine the best approach.
Prepare a custom wood strip from matching species and grain, beveling edges for smooth insertion. Fit the patch tightly into the mortise, never adjusting the mortise to the patch, to ensure structural integrity. Secure it with wood glue, then level the surface flush using a block plane or chisel.
Fill minor gaps with wood filler, sand smooth, and apply stain prioritizing grain match over exact color. Finish with polyurethane to protect the patch, sealing end grain and joints to prevent moisture damage and preserve the floor’s strength.
Maintaining Hardwood Floors to Prevent Future Cracks
To prevent future cracks, you need to maintain indoor humidity between 35% and 55% using humidifiers or dehumidifiers as needed. Regularly inspect your hardwood floors for early signs of damage or moisture issues to catch problems before they worsen.
Consistent monitoring with a hygrometer and prompt adjustments will stabilize wood movement and extend floor life. Installing a whole-home humidification system can help ensure consistent moisture control throughout the year.
Control Indoor Humidity
Since wood constantly absorbs and releases moisture in response to indoor humidity, controlling that humidity is essential for preventing cracks in your hardwood floors. Keep relative humidity (RH) between 30% and 50% to minimize wood expansion or contraction.
Maintaining RH within this range helps keep wood stable and minimizes damage risk, making it the ideal humidity range. Use digital hygrometers placed near the floor to monitor RH accurately.
In dry seasons, operate humidifiers to prevent shrinkage and cracking; in humid seasons, deploy dehumidifiers or air conditioning to reduce swelling and warping. Guarantee proper ventilation, especially in moisture-prone rooms, to avoid localized humidity spikes.
Maintain consistent indoor temperature since fluctuations amplify wood movement.
Regular Floor Inspections
Although hardwood floors are durable, they require regular inspections to catch early signs of damage that could lead to cracks. You should perform monthly visual checks, focusing on scratches, dents, finish wear, and dirt buildup that accelerate deterioration.
Water intrusion causes cupping, crowning, warping, and buckling, which can lead to further damage if not detected early. Verify that furniture pads are intact and walk-off mats are properly placed to prevent surface damage.
Use non-invasive moisture meters to detect hidden water intrusion, monitor subfloor moisture, and inspect seams for swelling or gaps indicating moisture imbalance. Schedule annual professional inspections for deep cleaning, condition assessments, and documentation supporting warranty claims.
Early detection enables timely maintenance like recoating or refinishing, preventing minor issues from evolving into cracks. Consistent, precise inspection and intervention extend your hardwood floor’s lifespan and maintain its structural integrity.
When to Seek Professional Hardwood Floor Repair Services?
When you notice deep scratches, significant water damage, or structural issues like uneven floors and loose boards, it’s time to call in a professional hardwood floor repair service.
These experts use specialized tools and adhere to industry standards to restore your floor correctly. Their expertise ensures proper assessment of hardwood floor condition before work begins, preventing future problems.
Deep scratches, water damage, or uneven floors signal the need for professional hardwood floor repair services.
If you detect warping, buckling, or persistent squeaking, professionals can assess underlying subfloor damage often missed in DIY repairs. Water damage that has penetrated beneath the surface or large cracks requiring board replacement also mandate professional intervention.
Attempting repairs yourself risks worsening the damage, uneven refinishing, or undetected pest infestations. Professionals provide durable, aesthetically consistent results, extending your floor’s lifespan and preserving home value.
When DIY attempts fail or issues persist, seek a certified, insured contractor to ensure precise diagnosis and effective restoration. This approach guarantees compliance with safety standards and building codes, offering peace of mind alongside quality workmanship.
Frequently Asked Questions
Can I Repair Cracks in Hardwood Floors Myself Without Prior Experience?
Yes, you can repair minor cracks in hardwood floors yourself without prior experience by using epoxy fillers or wood putty. You’ll need to prepare the area, mix and apply the filler promptly, and sand it smooth after curing.
However, be cautious—color matching is essential since epoxy can’t be stained afterward. For larger cracks or plank replacements, you’ll require advanced carpentry skills and tools, so consider professional help in those cases.
How Long Does It Take for Epoxy Filler to Fully Cure?
Epoxy filler typically takes 24 to 72 hours to fully cure, depending on the type and thickness applied. Quick-set formulas cure in 5 to 20 minutes but aren’t common for flooring.
To guarantee proper curing, apply in layers for deep cracks, allowing each to gel before adding more. Maintain ambient temperature between 70-80°F to speed curing. Avoid sanding or sealing until the epoxy is completely hardened for maximum durability.
Will Repaired Cracks Be Visible After Staining and Finishing?
Yes, repaired cracks can be visible after staining and finishing because stain pigments settle into depressions, highlighting imperfections. To minimize visibility, you should test stain colors on scrap wood, use water-popping for even absorption, and feather sanding beyond repairs.
Matching the finish sheen and applying tinted toning coats also help blend patches. Proper sanding, dust removal, and patience between coats guarantee a more seamless repair that reduces the chance of noticeable cracks.
Can Temperature Fluctuations Cause New Cracks Even After Repair?
Absolutely, temperature fluctuations can cause new cracks even after repair—they’re like tiny earthquakes for your hardwood. When temperatures drop or spike rapidly, wood contracts or expands, stressing fibers and causing fresh splits.
To minimize this, control indoor humidity between 35%-55% using humidifiers or dehumidifiers. Avoid sudden temperature changes and schedule repairs during moderate seasons. Proper environment management is key to preventing those frustrating re-cracks.
Are There Eco-Friendly Materials for Hardwood Floor Crack Repairs?
Yes, you can use eco-friendly materials like water-based fillers and latex fillers that have low or zero VOCs and dry quickly. Rubio Monocoat Wood Filler Putty is non-toxic and odorless, perfect for safe indoor use.
Wood flour mixed with resin recycles sanding dust, ensuring a color match with minimal waste. Always test small areas first, and pair these fillers with plant-based stains and finishes for a sustainable, durable repair.
Advanced Techniques for Tackling Complex Floor Damage
Did you know that over 60% of hardwood floor damage results from untreated cracks? By promptly identifying and repairing these cracks using the right materials and techniques like epoxy application or Dutchman patches, you’ll extend your floor’s lifespan and maintain its appearance.
Regular maintenance also plays a vital role in preventing future damage. If cracks worsen or cover large areas, don’t hesitate to seek professional help to guarantee a durable, flawless finish.